lock HONDA ELEMENT 2010 1.G User Guide
[x] Cancel search | Manufacturer: HONDA, Model Year: 2010, Model line: ELEMENT, Model: HONDA ELEMENT 2010 1.GPages: 342, PDF Size: 5.76 MB
Page 21 of 342
This section gives you important
information about how to protect
yourself and your passengers. It shows
you how to use seat belts. It explains
how your airbags work. And it tells you
how to properly restrain infants and
children in your vehicle.
Important Safety Precautions.............6
Your Vehicle's Safety Features ..........7
Seat Belts ..................................... 8
Airbags ........................................ 9
Protecting Adults and Teens ...........11
1. Close and Lock the Doors ........11
2. Adjust the Front Seats .............11
3. Adjust the Seat-Backs ..............12
4. Adjust the Head Restraints ......13
5. Fasten and Position the Seat Belts .................................. 14
6. Maintain a Proper Sitting Position .............................. 15
Advice for Pregnant Women ........16
Additional Safety Precautions ......16
Additional Information About Your Seat Belts ............................... 18
Seat Belt System Components .....18 Lap/Shoulder Belt
......................19
Automatic Seat Belt Tensioners ............................. 20
Seat Belt Maintenance ................20
Additional Information About Your Airbags .................................. 22
Airbag System Components ........22
How Your Front Airbags Work ....25
How Your Side Airbags Work ......28
How Your Side Curtain Airbags Work ..................................... 30
How the SRS Indicator Works .....31
How the Side Airbag Off Indicator Works .....................32
How the Passenger Airbag Off Indicator Works .....................32
Airbag Service ............................ 33
Additional Safety Precautions ......34
Protecting Children -General
Guidelines .............................. 35
All Children Must Be
Restrained .............................. 35
All Children Should Sit in a Back Seat ....................................... 36
The Passenger's Front Airbag
Can Pose Serious Risks ...........36If You Must Drive with Several
Children ................................ 38
If a Child Requires Close Attention ................................ 38
Additional Safety Precautions ......39
Protecting Infants and Small Children ................................. 40
Protecting Infants .......................40
Protecting Small Children ...........41
Selecting a Child Seat .....................42
Installing a Child Seat .....................43
Installing a Child Seat with
LATCH .................................. 44
Installing a Child Seat with a Lap/Shoulder Belt ..................46
Installing a Child Seat with a
Tether ................................... 48
Protecting Larger Children .............49
Checking Seat Belt Fit ................49
Using a Booster Seat ...................50
When Can a Larger Child Sit in
Front ..................................... 50
Additional Safety Precautions ......51
Carbon Monoxide Hazard ...............52
Safety Labels .................................. 53
Driver and Passenger Safety
5
Driver and Passenger Safety
Page 23 of 342
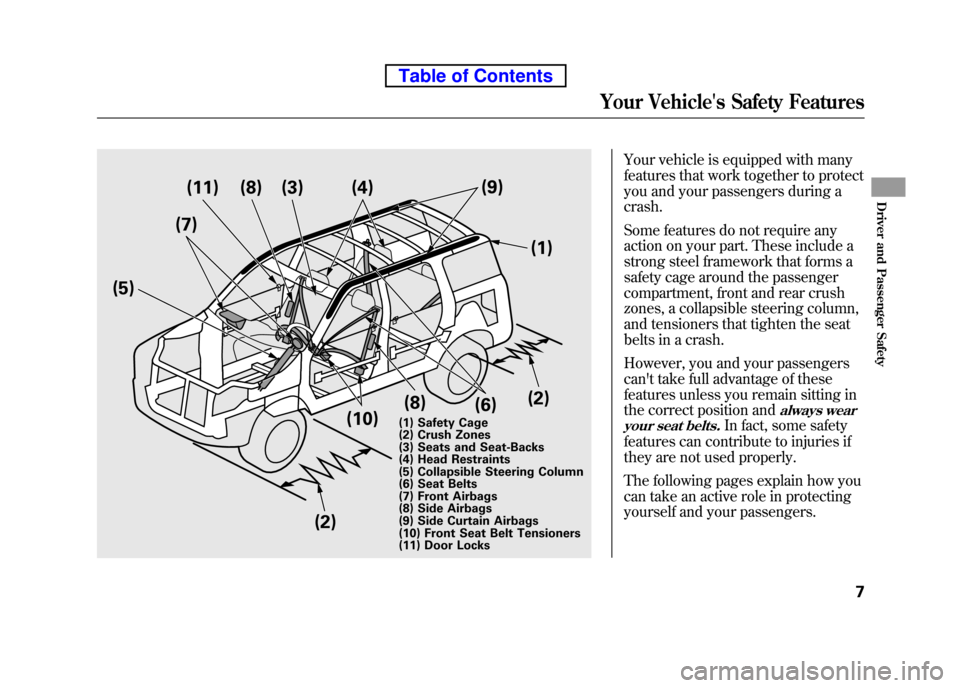
Your vehicle is equipped with many
features that work together to protect
you and your passengers during acrash.
Some features do not require any
action on your part. These include a
strong steel framework that forms a
safety cage around the passenger
compartment, front and rear crush
zones, a collapsible steering column,
and tensioners that tighten the seat
belts in a crash.
However, you and your passengers
can't take full advantage of these
features unless you remain sitting in
the correct position and
always wear
your seat belts.
In fact, some safety
features can contribute to injuries if
they are not used properly.
The following pages explain how you
can take an active role in protecting
yourself and your passengers.
(5) (7)
(11) (8) (3) (4)
(9)
(1)
(2) (8)
(10) (2)
(1) Safety Cage
(2) Crush Zones
(3) Seats and Seat-Backs
(4) Head Restraints
(5) Collapsible Steering Column
(6) Seat Belts
(7) Front Airbags
(8) Side Airbags
(9) Side Curtain Airbags
(10) Front Seat Belt Tensioners
(11) Door Locks (6)
Your Vehicle's Safety Features
7
Driver and Passenger Safety
Table of Contents
Page 27 of 342
Introduction
The following pages provide
instructions on how to properly
protect the driver, adult passengers,
and teenage children who are large
enough and mature enough to drive
or ride in the front.
See pages 35-51 for important
guidelines on how to properly protect
infants, small children, and larger
children who ride in your vehicle. 1. Close and Lock the Doors
After everyone has entered the
vehicle, be sure the doors, the hatch,
and the tailgate are closed and locked.
Your vehicle has a door and
tailgate open indicator on
the instrument panel to indicate
when a specific door, the tailgate or
the hatch is not tightly closed.
Locking the doors, the hatch, and the
tailgate reduces the chance of
someone being thrown out of the
vehicle during a crash, and it helps
prevent passengers from accidentally
opening a door, the hatch, or the
tailgate and falling out.
Locking the doors, the hatch, or the
tailgate also helps prevent an
outsider from unexpectedly opening
a door when you come to a stop.
See page 80 for how to lock the
doors, and page 61 for how the door
and tailgate indicator system works. 2. Adjust the Front Seats
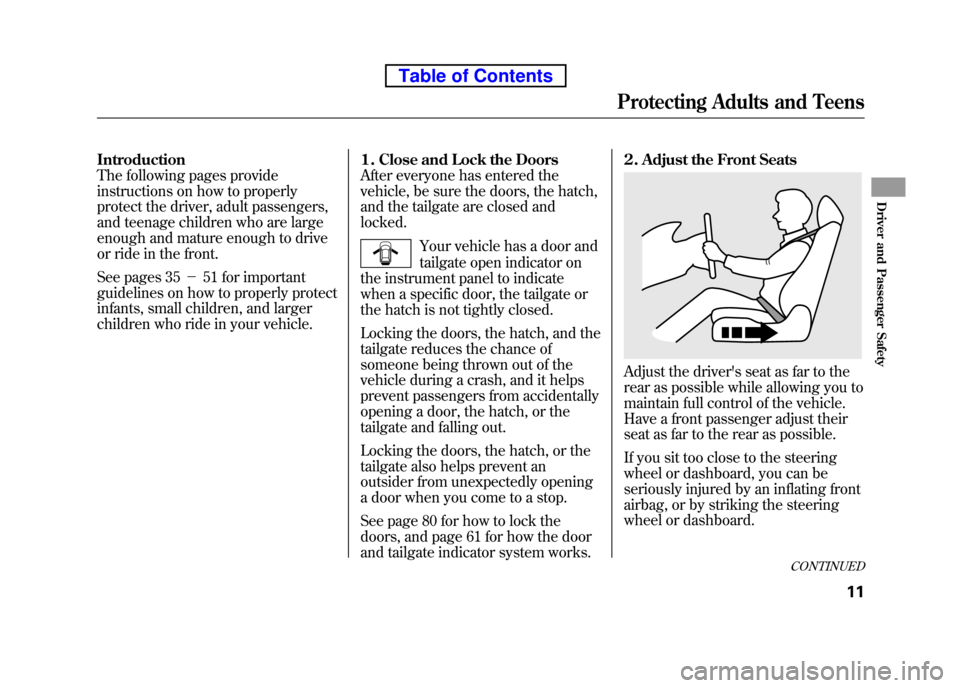
Adjust the driver's seat as far to the
rear as possible while allowing you to
maintain full control of the vehicle.
Have a front passenger adjust their
seat as far to the rear as possible.
If you sit too close to the steering
wheel or dashboard, you can be
seriously injured by an inflating front
airbag, or by striking the steering
wheel or dashboard.
CONTINUED
Protecting Adults and Teens
11
Driver and Passenger Safety
Table of Contents
Page 28 of 342
The National Highway Traffic Safety
Administration and Transport
Canada recommend that drivers
allow at least 10 inches (25 cm)
between the center of the steering
wheel and the chest. In addition to
adjusting the seat, you can adjust the
steering wheel up and down (see
page 74).
If you cannot get far enough away
from the steering wheel and still
reach the controls, we recommend
that you investigate whether some
type of adaptive equipment may help.
Sitting too close to a front
airbag can result in serious
injury or death if the front
airbags inflate.
Always sit as far back from the
front airbags as possible.Once a seat is adjusted correctly,
rock it back and forth to make sure it
is locked in position.
See page 83 for how to adjust the
front seats.
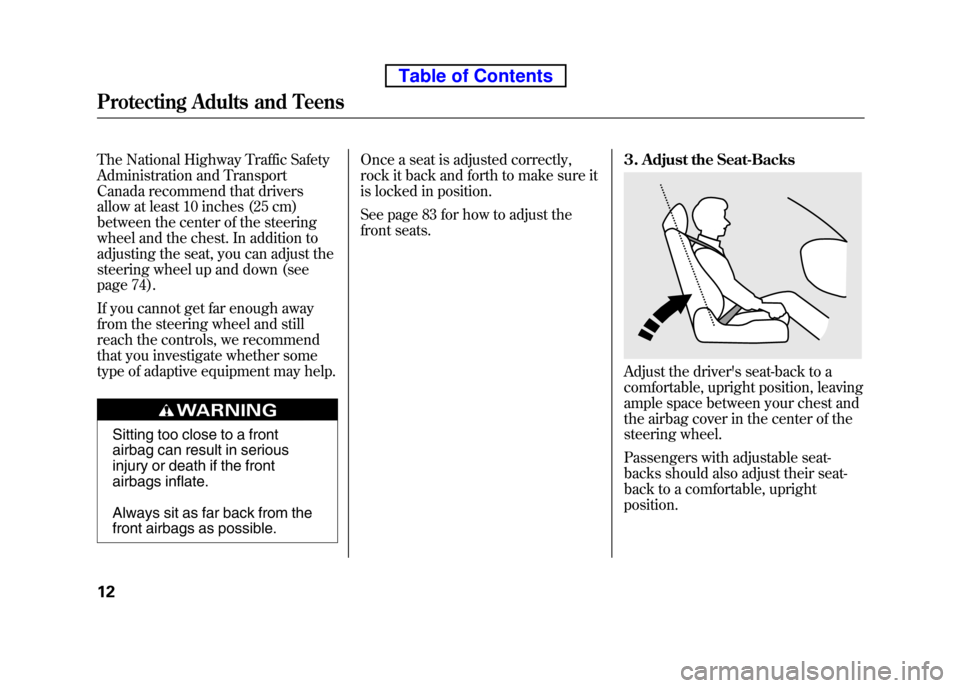
3. Adjust the Seat-Backs
Adjust the driver's seat-back to a
comfortable, upright position, leaving
ample space between your chest and
the airbag cover in the center of the
steering wheel.
Passengers with adjustable seat-
backs should also adjust their seat-
back to a comfortable, uprightposition.
Protecting Adults and Teens
12
Table of Contents
Page 35 of 342
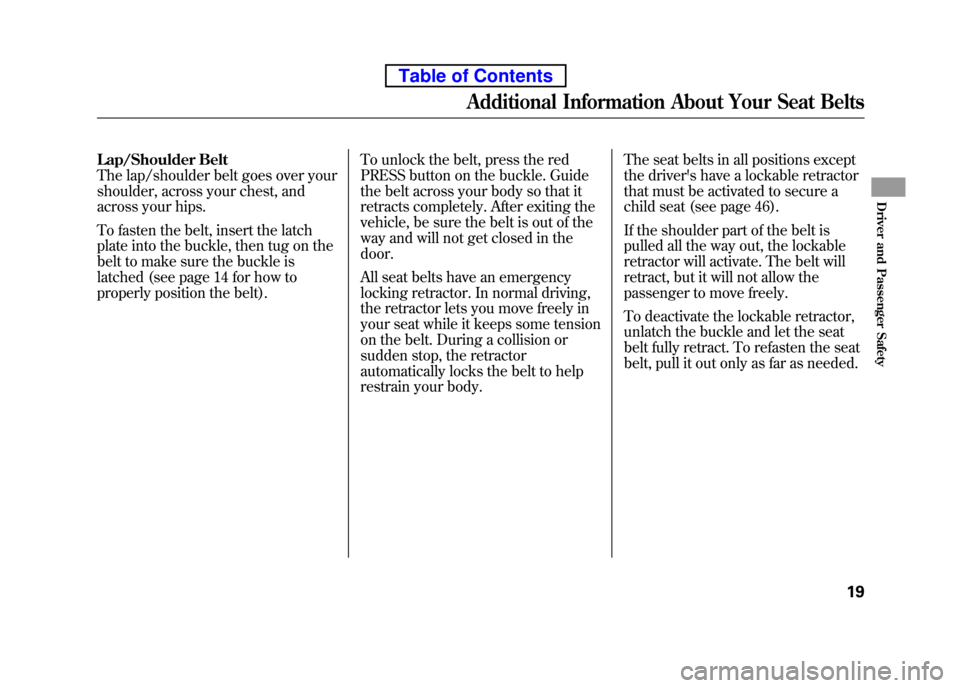
Lap/Shoulder Belt
The lap/shoulder belt goes over your
shoulder, across your chest, and
across your hips.
To fasten the belt, insert the latch
plate into the buckle, then tug on the
belt to make sure the buckle is
latched (see page 14 for how to
properly position the belt).To unlock the belt, press the red
PRESS button on the buckle. Guide
the belt across your body so that it
retracts completely. After exiting the
vehicle, be sure the belt is out of the
way and will not get closed in thedoor.
All seat belts have an emergency
locking retractor. In normal driving,
the retractor lets you move freely in
your seat while it keeps some tension
on the belt. During a collision or
sudden stop, the retractor
automatically locks the belt to help
restrain your body.The seat belts in all positions except
the driver's have a lockable retractor
that must be activated to secure a
child seat (see page 46).
If the shoulder part of the belt is
pulled all the way out, the lockable
retractor will activate. The belt will
retract, but it will not allow the
passenger to move freely.
To deactivate the lockable retractor,
unlatch the buckle and let the seat
belt fully retract. To refasten the seat
belt, pull it out only as far as needed.
Additional Information About Your Seat Belts
19
Driver and Passenger Safety
Table of Contents
Page 55 of 342
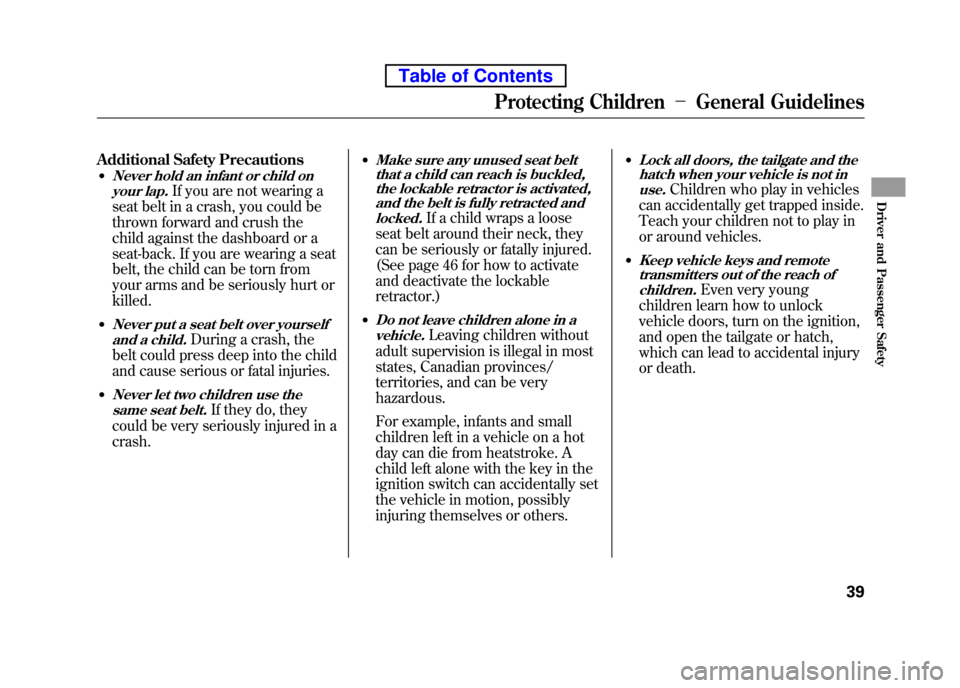
Additional Safety Precautions●
Never hold an infant or child on
your lap.
If you are not wearing a
seat belt in a crash, you could be
thrown forward and crush the
child against the dashboard or a
seat-back. If you are wearing a seat
belt, the child can be torn from
your arms and be seriously hurt or killed.
●
Never put a seat belt over yourself and a child.During a crash, the
belt could press deep into the child
and cause serious or fatal injuries.
●
Never let two children use the same seat belt.If they do, they
could be very seriously injured in acrash. ●
Make sure any unused seat belt
that a child can reach is buckled,the lockable retractor is activated,
and the belt is fully retracted and
locked.
If a child wraps a loose
seat belt around their neck, they
can be seriously or fatally injured.
(See page 46 for how to activate
and deactivate the lockableretractor.)
●
Do not leave children alone in a vehicle.
Leaving children without
adult supervision is illegal in most
states, Canadian provinces/
territories, and can be veryhazardous.
For example, infants and small
children left in a vehicle on a hot
day can die from heatstroke. A
child left alone with the key in the
ignition switch can accidentally set
the vehicle in motion, possibly
injuring themselves or others. ●
Lock all doors, the tailgate and the
hatch when your vehicle is not in
use.
Children who play in vehicles
can accidentally get trapped inside.
Teach your children not to play in
or around vehicles.
●
Keep vehicle keys and remote transmitters out of the reach of
children.
Even very young
children learn how to unlock
vehicle doors, turn on the ignition,
and open the tailgate or hatch,
which can lead to accidental injury
or death.
Protecting Children -General Guidelines
39
Driver and Passenger Safety
Table of Contents
Page 56 of 342
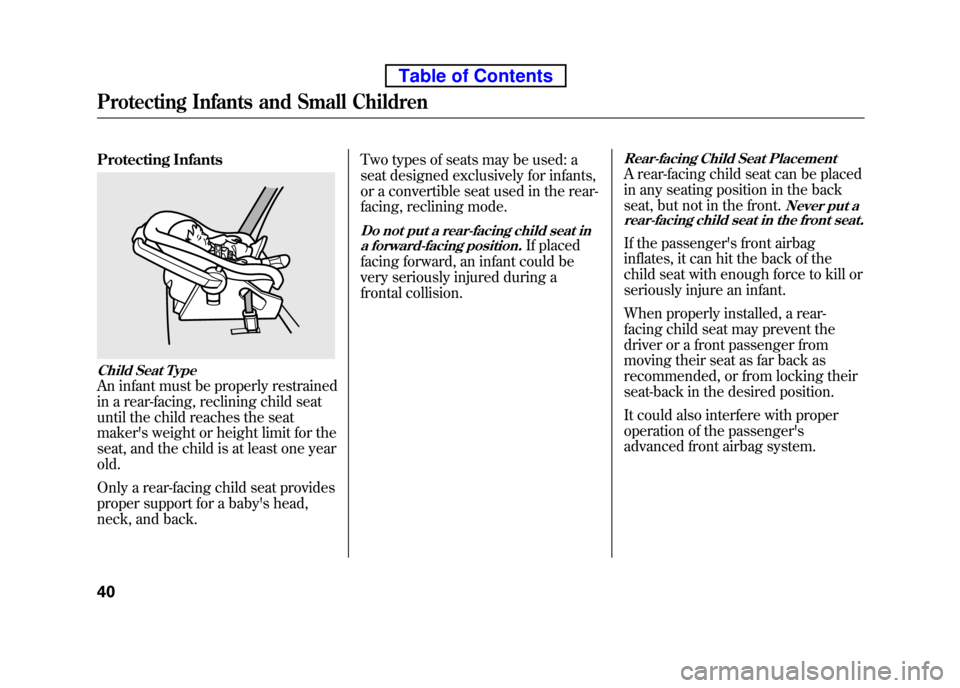
Protecting Infants
Child Seat Type
An infant must be properly restrained
in a rear-facing, reclining child seat
until the child reaches the seat
maker's weight or height limit for the
seat, and the child is at least one year old.
Only a rear-facing child seat provides
proper support for a baby's head,
neck, and back.Two types of seats may be used: a
seat designed exclusively for infants,
or a convertible seat used in the rear-
facing, reclining mode.
Do not put a rear-facing child seat in
a forward-facing position.If placed
facing forward, an infant could be
very seriously injured during a
frontal collision.
Rear-facing Child Seat Placement
A rear-facing child seat can be placed
in any seating position in the back
seat, but not in the front.
Never put a
rear-facing child seat in the front seat.
If the passenger's front airbag
inflates, it can hit the back of the
child seat with enough force to kill or
seriously injure an infant.
When properly installed, a rear-
facing child seat may prevent the
driver or a front passenger from
moving their seat as far back as
recommended, or from locking their
seat-back in the desired position.
It could also interfere with proper
operation of the passenger's
advanced front airbag system.
Protecting Infants and Small Children
40
Table of Contents
Page 62 of 342
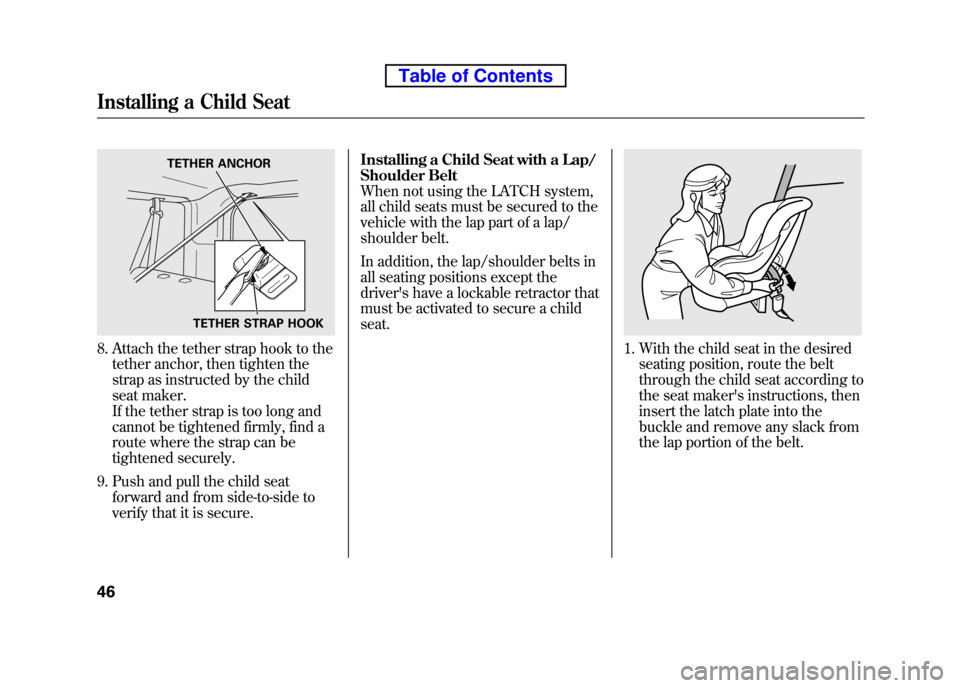
8. Attach the tether strap hook to thetether anchor, then tighten the
strap as instructed by the child
seat maker.
If the tether strap is too long and
cannot be tightened firmly, find a
route where the strap can be
tightened securely.
9. Push and pull the child seat forward and from side-to-side to
verify that it is secure. Installing a Child Seat with a Lap/
Shoulder Belt
When not using the LATCH system,
all child seats must be secured to the
vehicle with the lap part of a lap/
shoulder belt.
In addition, the lap/shoulder belts in
all seating positions except the
driver's have a lockable retractor that
must be activated to secure a childseat.1. With the child seat in the desired
seating position, route the belt
through the child seat according to
the seat maker's instructions, then
insert the latch plate into the
buckle and remove any slack from
the lap portion of the belt.
TETHER STRAP HOOK
TETHER ANCHOR
Installing a Child Seat
46
Table of Contents
Page 63 of 342
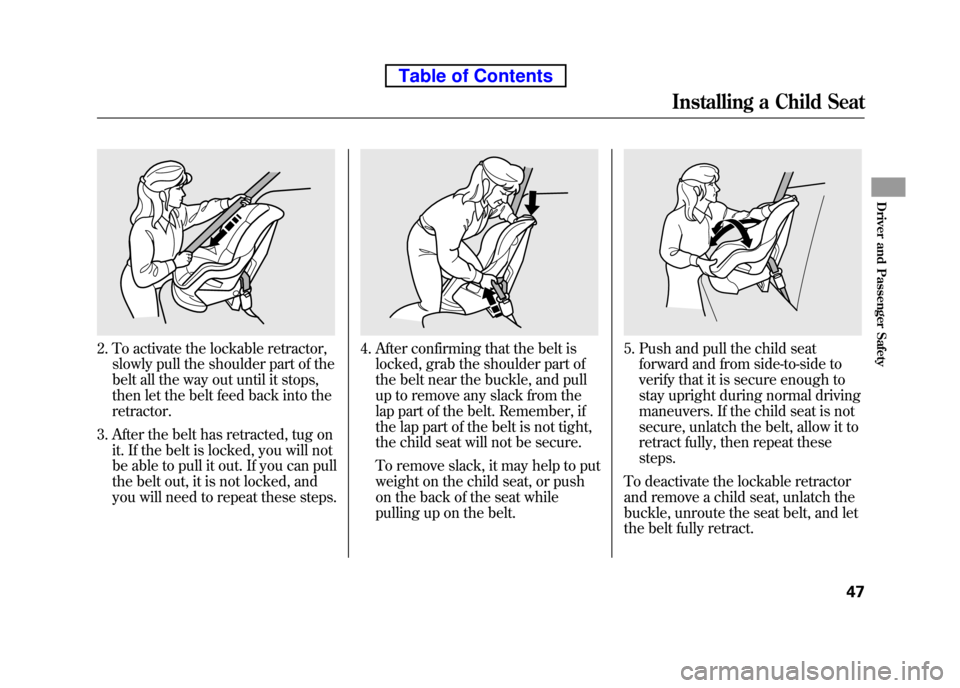
2. To activate the lockable retractor,slowly pull the shoulder part of the
belt all the way out until it stops,
then let the belt feed back into theretractor.
3. After the belt has retracted, tug on it. If the belt is locked, you will not
be able to pull it out. If you can pull
the belt out, it is not locked, and
you will need to repeat these steps.4. After confirming that the belt islocked, grab the shoulder part of
the belt near the buckle, and pull
up to remove any slack from the
lap part of the belt. Remember, if
the lap part of the belt is not tight,
the child seat will not be secure.
To remove slack, it may help to put
weight on the child seat, or push
on the back of the seat while
pulling up on the belt.5. Push and pull the child seatforward and from side-to-side to
verify that it is secure enough to
stay upright during normal driving
maneuvers. If the child seat is not
secure, unlatch the belt, allow it to
retract fully, then repeat thesesteps.
To deactivate the lockable retractor
and remove a child seat, unlatch the
buckle, unroute the seat belt, and let
the belt fully retract.
Installing a Child Seat
47
Driver and Passenger Safety
Table of Contents
Page 71 of 342
This section gives information about
the controls and displays that
contribute to the daily operation of
your vehicle. All the essential
controls are within easy reach.
Control Locations..........................56
Instrument Panel ..........................
57
Instrument Panel Indicators ..........58
Gauges ..........................................
64
Information Display ..................65
Odometer ..................................
65
Trip Meter ................................ 66
Fuel Gauge ............................... 66
Check Fuel Cap Message .........
66
Temperature Gauge ..................67
Maintenance Minder ................
67
Outside Temperature Indicator ............................... 68Controls Near the Steering
Wheel ....................................... 69
Windshield Wipers and Washers .................................... 70
Turn Signals and Headlights .........71
Instrument Panel Brightness ........
72
Hazard Warning Button ................73
Rear Window Defogger .................74
Steering Wheel Adjustment ..........
74
Keys and Locks ............................. 75
Immobilizer System ......................
76
Remote Transmitter ......................77
Ignition Switch ..............................
79
Door Locks ................................... 80
Power Door Locks ....................
80
Rear Doors ................................ 81
Hatch ........................................ 81
Tailgate .....................................
82
Seats ............................................. 83
Seat Adjustments ......................
83
Driver's Seat Height Adjustment ........................... 84
Front Seat Armrests ..................85
Head Restraints ......................... 85Reclining the Front Seats
..........
87
Folding the Rear Seats ..............
88
Removing the Rear Seats ..........90
Power Windows ............................
92
Mirrors ......................................... 93
Adjusting the Power Mirrors .....
93
Rear Windows ............................... 94
Parking Brake ............................... 94
Interior Lights ...............................
95
Light Control Switch .................95
Individual Map Lights ...............
95
Courtesy Light .......................... 96
Ceiling Light .............................
96
Cargo Area Light .......................96
Ignition Switch Light .................
96
Interior Convenience Items ...........97
Cooler Box ................................ 98
Beverage Holders .....................
99
Accessory Power Sockets .......100
Glove Box ...............................
100
Sun Visor ................................ 100
Vanity Mirror ..........................
101
Overhead Console ..................101
Instruments and Controls
55
Instruments and Controls