service indicator HONDA ELEMENT 2010 1.G User Guide
[x] Cancel search | Manufacturer: HONDA, Model Year: 2010, Model line: ELEMENT, Model: HONDA ELEMENT 2010 1.GPages: 342, PDF Size: 5.76 MB
Page 215 of 342
If you notice any undesirable
operating symptoms, try another
service station or switch to another
brand of gasoline.
For further important fuel-related
information for your vehicle, or
information on gasoline that does not
contain MMT, visit Owner Link at
owners.honda.com. In Canada, visit
www.honda.cafor additional
information on gasoline. Refueling
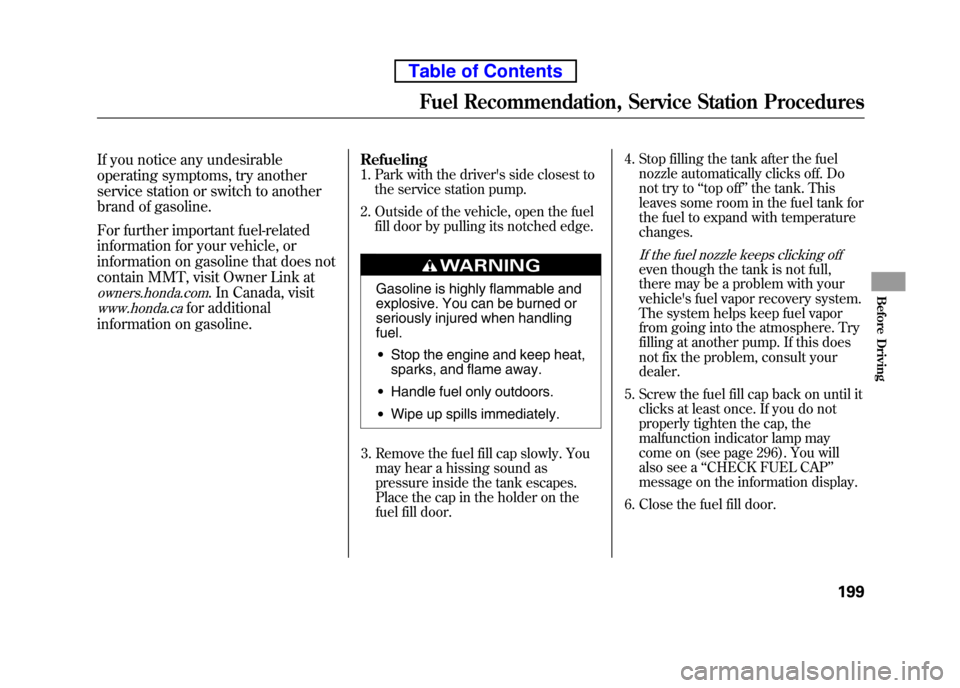
1. Park with the driver's side closest to
the service station pump.
2. Outside of the vehicle, open the fuel fill door by pulling its notched edge.
Gasoline is highly flammable and
explosive. You can be burned or
seriously injured when handling fuel.
● Stop the engine and keep heat,
sparks, and flame away.
● Handle fuel only outdoors.
● Wipe up spills immediately.
3. Remove the fuel fill cap slowly. You may hear a hissing sound as
pressure inside the tank escapes.
Place the cap in the holder on the
fuel fill door. 4. Stop filling the tank after the fuel
nozzle automatically clicks off. Do
not try to ‘‘top off ’’the tank. This
leaves some room in the fuel tank for
the fuel to expand with temperature changes.
If the fuel nozzle keeps clicking offeven though the tank is not full,
there may be a problem with your
vehicle's fuel vapor recovery system.
The system helps keep fuel vapor
from going into the atmosphere. Try
filling at another pump. If this does
not fix the problem, consult your dealer.
5. Screw the fuel fill cap back on until it clicks at least once. If you do not
properly tighten the cap, the
malfunction indicator lamp may
come on (see page 296). You will
also see a ‘‘CHECK FUEL CAP ’’
message on the information display.
6. Close the fuel fill door.
Fuel Recommendation, Service Station Procedures
199
Before Driving
Table of Contents
Page 243 of 342

Your vehicle is equipped with a tire
pressure monitoring system (TPMS)
that turns on every time you start the
engine and monitors the pressure in
your tires while driving.
Each tire has its own pressure sensor
(not including the spare tire). If the
air pressure of a tire becomes
significantly low, the sensor in that
tire immediately sends a signal that
causes the low tire pressure indicator
to come on.Low Tire Pressure Indicator
When the low tire pressure indicator
is on, one or more of your tires is
significantly underinflated. You
should stop and check your tires as
soon as possible, and inflate them to
the proper pressure as indicated on
the vehicle's tire information placard.
If you think you can safely drive a
short distance to a service station,
proceed slowly, and inflate the tire to
the recommended pressure shown
on the driver's doorjamb.
If the tire is flat, or if the tire pressure
is too low to continue driving, replace
the tire with the compact spare tire
(see page 282). If you cannot make the low tire
pressure indicator go out after
inflating the tires to the specified
values, have your dealer check the
system as soon as possible.
Driving on a significantly
underinflated tire causes the tire to
overheat and can lead to tire failure.
Underinflation also reduces fuel
efficiency and tire tread life, and may
affect the vehicle's handling and
stopping ability.
Because tire pressure varies by
temperature and other conditions,
the low tire pressure indicator may
come on unexpectedly.
CONTINUED
Tire Pressure Monitoring System (TPMS)
227
Driving
Table of Contents
Page 244 of 342

For example, if you check and fill
your tires in a warm area, then drive
in extremely cold weather, the tire
pressure will be lower than
measured and could be underinflated
and cause the low tire pressure
indicator to come on. Or, if you
check and adjust your tire pressure
in cooler conditions, and drive into
extremely hot conditions, the tire
may become overinflated. However,
the low tire pressure indicator will
not come on if the tires are overinflated.
Refer to page 271 for tire inflationguidelines.
Although your tire pressure is
monitored, you must manually check
the tire pressures monthly.
Each tire, including the spare, should
be checked monthly when cold and
set to the recommended inflation
pressure as specified in the vehicle
placard and this owner's manual (see
page 310).Tire Pressure Monitoring
System (TPMS) Indicator
This indicator comes on and stays on
if there is a problem with the tire
pressure monitoring system.
If this happens, the system will shut
off and no longer monitor tire
pressures. Have the system checked
by your dealer as soon as possible.
When you restart the vehicle with
the compact spare tire, the TPMS
indicator may also come on and stay
on after driving several miles (kilometers). Changing a Tire with TPMS
If you have a flat tire, the low tire
pressure indicator will come on.
Replace the flat tire with the compact
spare tire (see page 282).
Each wheel (except the compact
spare tire wheel) is equipped with a
tire pressure sensor mounted inside
the tire behind the valve stem. You
must use TPMS specific wheels. It is
recommended that you always have
your tires serviced by your dealer or
qualified technician.
After you replace the flat tire with the
compact spare tire, the low tire
pressure indicator stays on. This is
normal; the system is not monitoring
the spare tire pressure. Manually
check the spare tire pressure to be
sure it is correct. After several miles
(kilometers) driving with the
compact spare tire, the TPMS
indicator comes on and the low tire
pressure indicator goes off.
Tire Pressure Monitoring System (TPMS)
228
Table of Contents
Page 259 of 342
Your vehicle displays engine oil life
and maintenance service items on
the information display to show you
when you should have your dealer
do engine oil replacement and
indicated maintenance service.
Based on the engine operating
conditions and accumulated engine
revolutions, the onboard computer in
your vehicle calculates the remaining
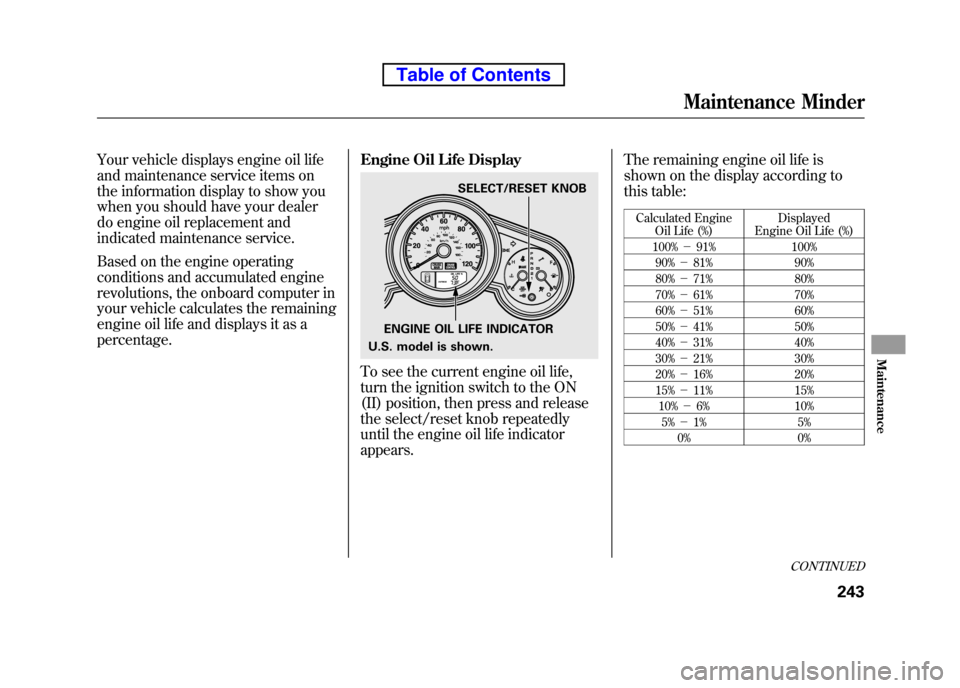
engine oil life and displays it as apercentage.Engine Oil Life Display
To see the current engine oil life,
turn the ignition switch to the ON
(II) position, then press and release
the select/reset knob repeatedly
until the engine oil life indicatorappears.The remaining engine oil life is
shown on the display according to
this table:
Calculated Engine Oil Life (%) Displayed
Engine Oil Life (%)
100% -91% 100%
90% -81% 90%
80% -71% 80%
70% -61% 70%
60% -51% 60%
50% -41% 50%
40% -31% 40%
30% -21% 30%
20% -16% 20%
15% -11% 15%
10% -6% 10%
5% -1% 5%
0% 0%
ENGINE OIL LIFE INDICATOR SELECT/RESET KNOB
U.S. model is shown.
CONTINUED
Maintenance Minder
243
Maintenance
Table of Contents
Page 260 of 342
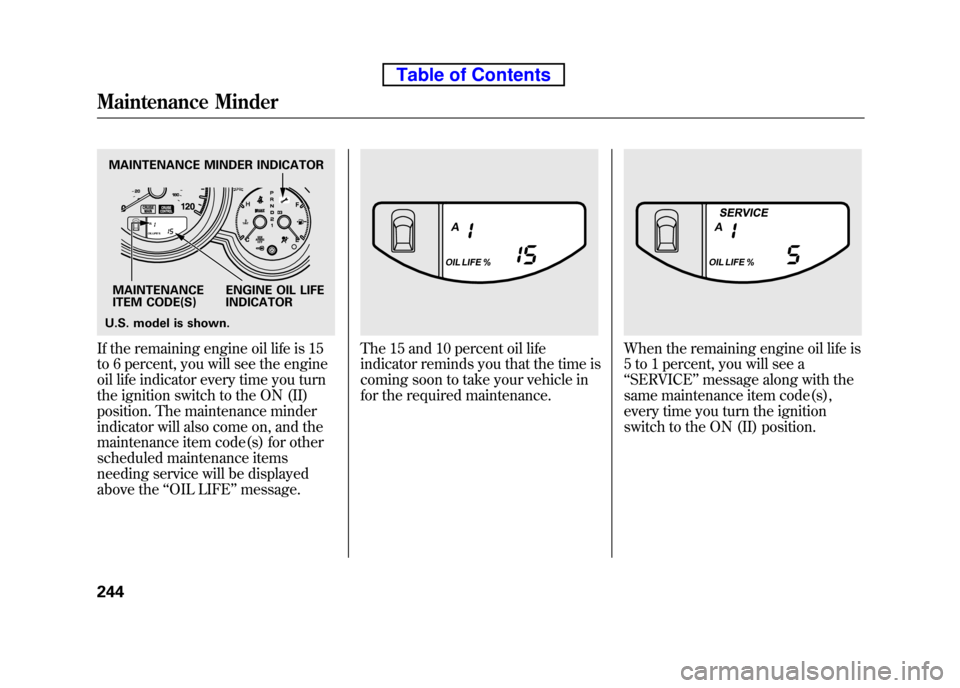
If the remaining engine oil life is 15
to 6 percent, you will see the engine
oil life indicator every time you turn
the ignition switch to the ON (II)
position. The maintenance minder
indicator will also come on, and the
maintenance item code(s) for other
scheduled maintenance items
needing service will be displayed
above the‘‘OIL LIFE ’’message.The 15 and 10 percent oil life
indicator reminds you that the time is
coming soon to take your vehicle in
for the required maintenance.When the remaining engine oil life is
5 to 1 percent, you will see a‘‘SERVICE ’’message along with the
same maintenance item code(s),
every time you turn the ignition
switch to the ON (II) position.
MAINTENANCE MINDER INDICATOR
MAINTENANCE
ITEM CODE(S) ENGINE OIL LIFE
INDICATOR
U.S. model is shown.
Maintenance Minder
244
Table of Contents
Page 262 of 342
To change the information display
from the engine oil life display to the
odometer or the trip meter, press and
release the select/reset knob.
When the engine oil life is 0 percent
or negative distance traveled, the
maintenance minder indicator (
)
remains on even if you change the
information display.
Immediately have the service
performed, and make sure to reset
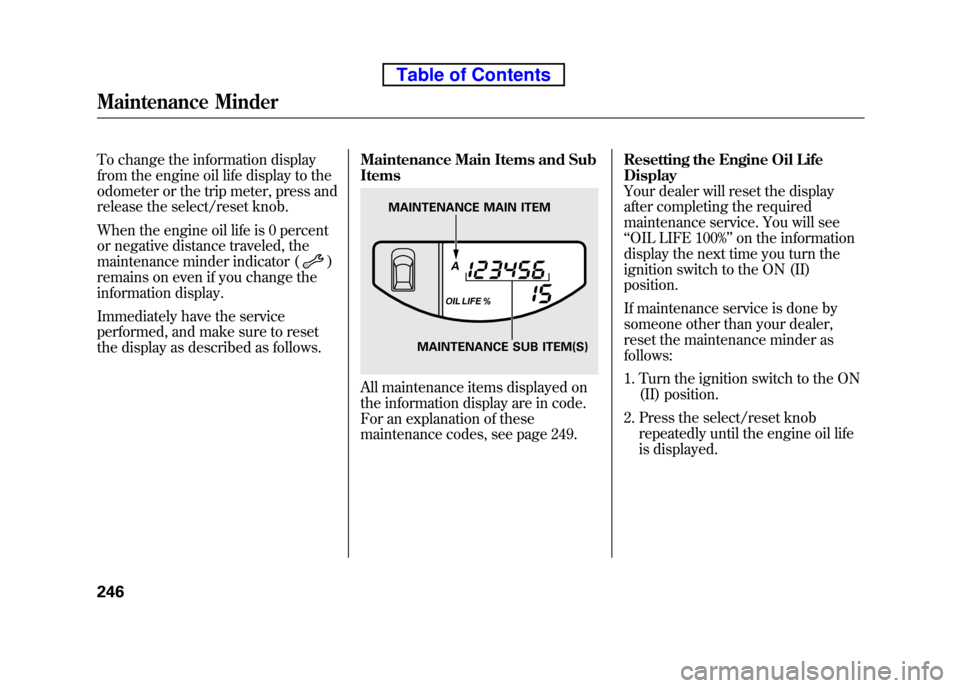
the display as described as follows. Maintenance Main Items and Sub Items
All maintenance items displayed on
the information display are in code.
For an explanation of these
maintenance codes, see page 249.Resetting the Engine Oil LifeDisplay
Your dealer will reset the display
after completing the required
maintenance service. You will see ‘‘
OIL LIFE 100% ’’on the information
display the next time you turn the
ignition switch to the ON (II)position.
If maintenance service is done by
someone other than your dealer,
reset the maintenance minder as follows:
1. Turn the ignition switch to the ON (II) position.
2. Press the select/reset knob repeatedly until the engine oil life
is displayed.
MAINTENANCE MAIN ITEM
MAINTENANCE SUB ITEM(S)
Maintenance Minder
246
Table of Contents
Page 289 of 342
The compact spare tire pressure is:
60 psi (420 kPa, 4.2 kgf/cm2)
For convenience, the recommended
tire sizes and cold tire pressures are
on a label on the driver's doorjamb.
For additional technical information
about your tires, see page 311.
Tire Inspection
Every time you check inflation, you
should also examine the tires for
damage, foreign objects, and wear.
You should look for: ● Bumps or bulges in the tread or
side of the tire. Replace the tire if
you find either of these conditions.
● Cuts, splits, or cracks in the side of
the tire. Replace the tire if you can
see fabric or cord.
● Excessive tread wear.
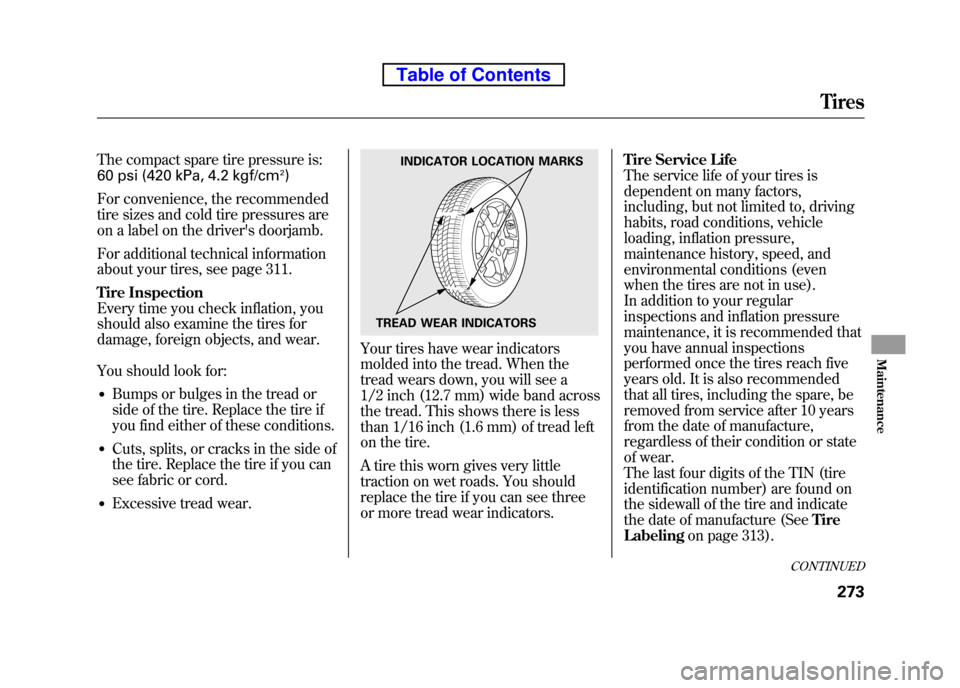
Your tires have wear indicators
molded into the tread. When the
tread wears down, you will see a
1/2 inch (12.7 mm) wide band across
the tread. This shows there is less
than 1/16 inch (1.6 mm) of tread left
on the tire.
A tire this worn gives very little
traction on wet roads. You should
replace the tire if you can see three
or more tread wear indicators. Tire Service Life
The service life of your tires is
dependent on many factors,
including, but not limited to, driving
habits, road conditions, vehicle
loading, inflation pressure,
maintenance history, speed, and
environmental conditions (even
when the tires are not in use).
In addition to your regular
inspections and inflation pressure
maintenance, it is recommended that
you have annual inspections
performed once the tires reach five
years old. It is also recommended
that all tires, including the spare, be
removed from service after 10 years
from the date of manufacture,
regardless of their condition or state
of wear.
The last four digits of the TIN (tire
identification number) are found on
the sidewall of the tire and indicate
the date of manufacture (See
Tire
Labeling on page 313).
INDICATOR LOCATION MARKS
TREAD WEAR INDICATORS
CONTINUED
Tires
273
Maintenance
Table of Contents
Page 311 of 342
Low Oil Pressure Indicator
This indicator should never
come on when the engine is
running. If it starts flashing or stays
on, the oil pressure has dropped very
low or lost pressure. Serious engine
damage is possible, and you should
take immediate action.
Running the engine with low oil
pressure can cause serious mechanical
damage almost immediately. Turn off
the engine as soon as you can safely get
the vehicle stopped. 1. Safely pull off the road, and shut
off the engine. Turn on the hazard
warning lights.
2. Let the vehicle sit for a minute. Open the hood, and check the oil
level (see page 201). An engine
very low on oil can lose pressure
during cornering and other drivingmaneuvers.
3. If necessary, add oil to bring the level back to the full mark on the
dipstick (see page 251).
4. Start the engine, and watch the oil pressure indicator. If it does not go
out within 10 seconds, turn off the
engine. There is a mechanical
problem that needs to be repaired
before you can continue driving(see Emergency Towing on page
303). Charging System Indicator
If the charging system
indicator comes on brightly
when the engine is running, the
battery is not being charged.
Immediately turn off all electrical
accessories. Try not to use other
electrically operated controls such as
the power windows. Keep the engine
running; starting the engine will
discharge the battery rapidly.
Go to a service station or garage
where you can get technicalassistance.
Low Oil Pressure Indicator, Charging System Indicator
295
Taking Care of the Unexpected
Table of Contents
Page 313 of 342

Brake System Indicator (Red)U.S. Canada
The brake system indicator (red)
normally comes on when you turn
the ignition switch to the ON (II)
position, and as a reminder to check
the parking brake. It will stay on if
you do not fully release the parkingbrake.
If the brake system indicator (red)
comes on while driving, the brake
fluid level is probably low. Press
lightly on the brake pedal to see if it
feels normal. If it does, check the
brake fluid level the next time you
stop at a service station (see page258).
If the fluid level is low, take your
vehicle to a dealer, and have the
brake system inspected for leaks or
worn brake pads. However, if the brake pedal does not
feel normal, you should take
immediate action. A problem in one
part of the system's dual circuit
design will still give you braking at
two wheels. You will feel the brake
pedal go down much farther before
the vehicle begins to slow down, and
you will have to press harder on thepedal.
Slow down by shifting to a lower
gear, and pull to the side of the road
when it is safe. Because of the long
distance needed to stop, it is
hazardous to drive the vehicle. You
should have it towed and repaired as
soon as possible (see
Emergency
Towing on page 303).
If you must drive the vehicle a short
distance in this condition, drive
slowly and carefully. If the ABS indicator and the VSA
system indicator come on with the
brake system indicator, have your
vehicle inspected by your dealer immediately.
Brake System Indicator
297
Taking Care of the Unexpected
Table of Contents