reset HONDA FIT 2009 2.G Owner's Manual
[x] Cancel search | Manufacturer: HONDA, Model Year: 2009, Model line: FIT, Model: HONDA FIT 2009 2.GPages: 352, PDF Size: 17.67 MB
Page 177 of 352
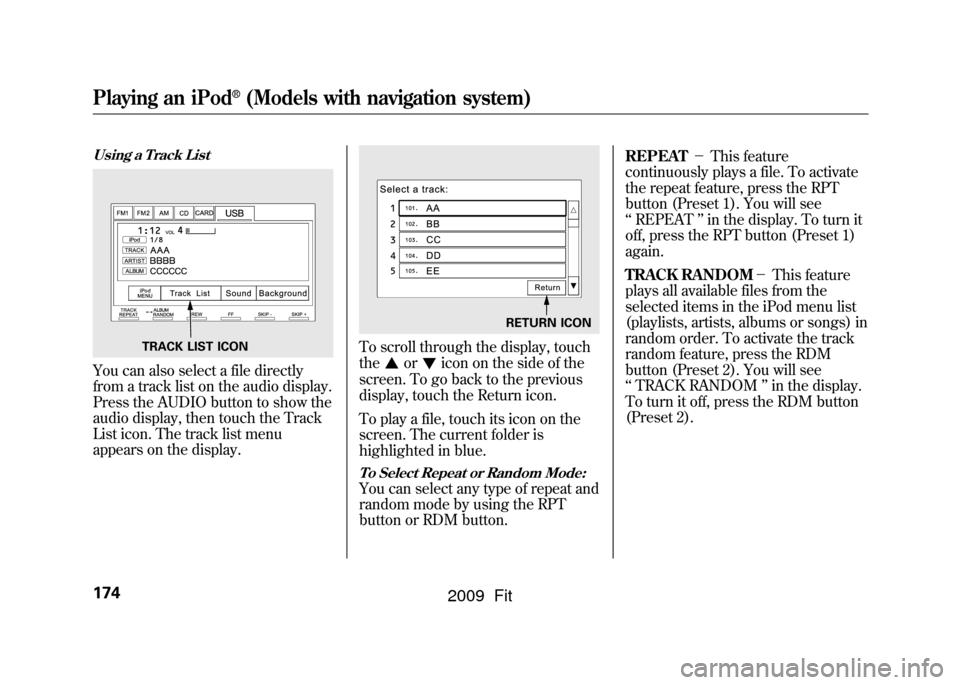
Using a Track ListYou can also select a file directly
from a track list on the audio display.
Press the AUDIO button to show the
audio display, then touch the Track
List icon. The track list menu
appears on the display.
To scroll through the display, touch
the
or
icon on the side of the
screen. To go back to the previous
display, touch the Return icon.
To play a file, touch its icon on the
screen. The current folder is
highlighted in blue.
To Select Repeat or Random Mode:You can select any type of repeat and
random mode by using the RPT
button or RDM button. REPEAT
-This feature
continuously plays a file. To activate
the repeat feature, press the RPT
button (Preset 1). You will see
‘‘ REPEAT ’’in the display. To turn it
off, press the RPT button (Preset 1)
again.
TRACK RANDOM -This feature
plays all available files from the
selected items in the iPod menu list
(playlists, artists, albums or songs) in
random order. To activate the track
random feature, press the RDM
button (Preset 2). You will see
‘‘ TRACK RANDOM ’’in the display.
To turn it off, press the RDM button
(Preset 2).
TRACK LIST ICON
RETURN ICON
Playing an iPod
®
(Models with navigation system)
174
2009 Fit
Page 178 of 352

ALBUM RANDOM-This feature
plays all available albums from the
selected items in the iPod menu list
(playlists, artists, albums or songs) in
random order. The files in each
album are played in the recored
order. To activate the album random
feature, press and hold the RDM
button (Preset 2). You will see
‘‘ ALBUM RANDOM ’’in the display.
To turn it off, press and hold the
RDM button (Preset 2).
You can also select another list from
the iPod menu while keeping the
random function.
NOTE:
Available operating function varies
on models or versions. Some
functions may not be available on the
vehicle ’s audio system. To Stop Playing Your iPod
To play the radio when an iPod is
playing, press the FM/AM button or
touch the FM1, FM2, or AM icon. If
a disc is in the audio unit, press the
CD/AUX button or touch the CD
icon to play the disc. If a PC card is in
the audio unit, Press the CD/AUX
button or touch the CARD icon to
play a PC card.
Press the CD/AUX button again or
touch the AUX icon to switch back to
the iPod.
Disconnecting an iPodYou can disconnect the iPod at any
time when you see
‘‘OK to
Disconnect ’’message
ꭧin the iPod
display. Always make sure you see
‘‘ OK to Disconnect ’’message in the
iPod display before you disconnect it.
Make sure to follow the iPod ’s
instructions on how to disconnect the
dock connector from the USB
adapter cable. ꭧ
: The displayed message may vary
on models or versions. On some
models, there is no message to
disconnect.
When you disconnect the iPod while
it is playing, the navigation screen
shows ‘‘NO DATA. ’’
If you reconnect the same iPod, the
system may begin playing where it
left off, depending on what mode the
iPod is in when it is reconnected.
iPod Error Messages
If you see an error message on the
screen, see page 176.
Playing an iPod
®
(Models with navigation system)
175
Features
2009 Fit
Page 183 of 352
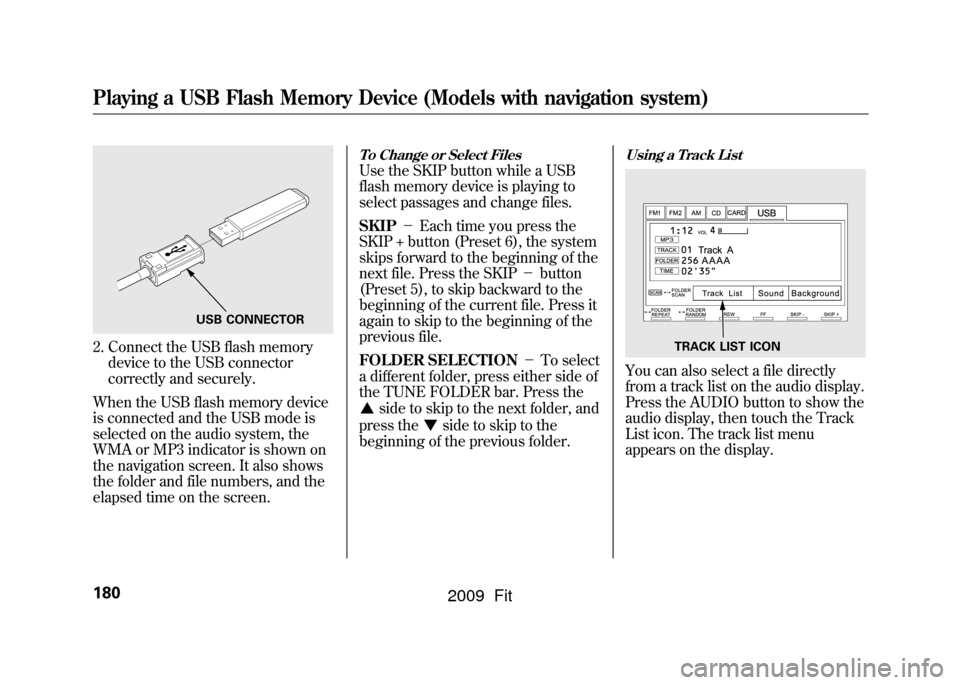
2. Connect the USB flash memorydevice to the USB connector
correctly and securely.
When the USB flash memory device
is connected and the USB mode is
selected on the audio system, the
WMA or MP3 indicator is shown on
the navigation screen. It also shows
the folder and file numbers, and the
elapsed time on the screen.
To Change or Select FilesUse the SKIP button while a USB
flash memory device is playing to
select passages and change files.
SKIP -Each time you press the
SKIP + button (Preset 6), the system
skips forward to the beginning of the
next file. Press the SKIP -button
(Preset 5), to skip backward to the
beginning of the current file. Press it
again to skip to the beginning of the
previous file.
FOLDER SELECTION -To select
a different folder, press either side of
the TUNE FOLDER bar. Press the
side to skip to the next folder, and
press the
side to skip to the
beginning of the previous folder.
Using a Track ListYou can also select a file directly
from a track list on the audio display.
Press the AUDIO button to show the
audio display, then touch the Track
List icon. The track list menu
appears on the display.
USB CONNECTOR
TRACK LIST ICON
Playing a USB Flash Memory Device (Models with navigation system)180
2009 Fit
Page 184 of 352
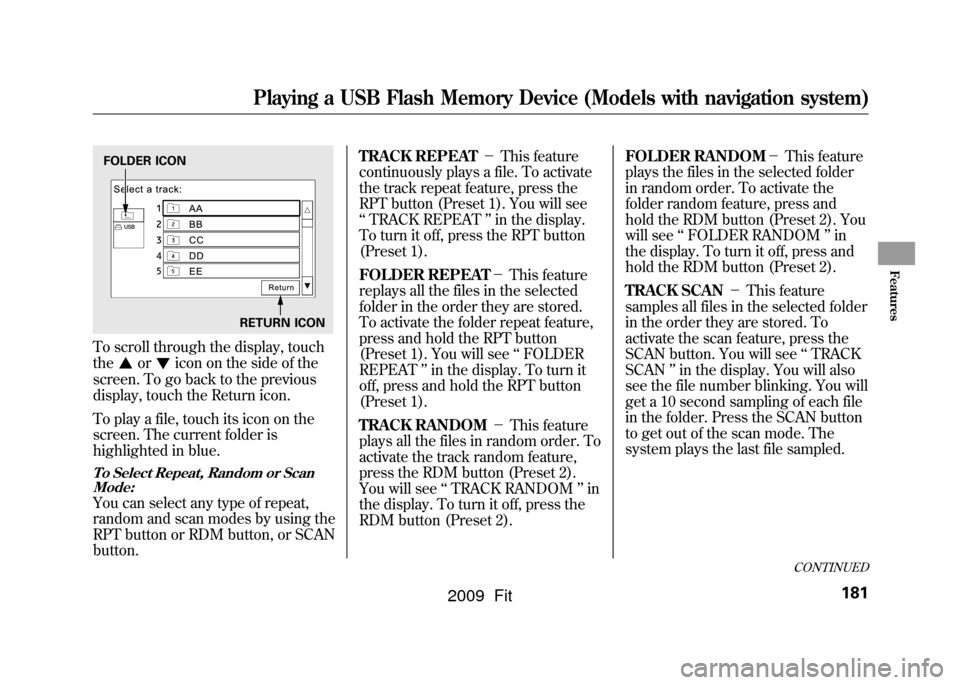
To scroll through the display, touch
the
or
icon on the side of the
screen. To go back to the previous
display, touch the Return icon.
To play a file, touch its icon on the
screen. The current folder is
highlighted in blue.
To Select Repeat, Random or Scan Mode:You can select any type of repeat,
random and scan modes by using the
RPT button or RDM button, or SCAN
button. TRACK REPEAT
-This feature
continuously plays a file. To activate
the track repeat feature, press the
RPT button (Preset 1). You will see
‘‘ TRACK REPEAT ’’in the display.
To turn it off, press the RPT button
(Preset 1).
FOLDER REPEAT -This feature
replays all the files in the selected
folder in the order they are stored.
To activate the folder repeat feature,
press and hold the RPT button
(Preset 1). You will see ‘‘FOLDER
REPEAT ’’in the display. To turn it
off, press and hold the RPT button
(Preset 1).
TRACK RANDOM -This feature
plays all the files in random order. To
activate the track random feature,
press the RDM button (Preset 2).
You will see ‘‘TRACK RANDOM ’’in
the display. To turn it off, press the
RDM button (Preset 2). FOLDER RANDOM
-This feature
plays the files in the selected folder
in random order. To activate the
folder random feature, press and
hold the RDM button (Preset 2). You
will see ‘‘FOLDER RANDOM ’’in
the display. To turn it off, press and
hold the RDM button (Preset 2).
TRACK SCAN -This feature
samples all files in the selected folder
in the order they are stored. To
activate the scan feature, press the
SCAN button. You will see ‘‘TRACK
SCAN ’’in the display. You will also
see the file number blinking. You will
get a 10 second sampling of each file
in the folder. Press the SCAN button
to get out of the scan mode. The
system plays the last file sampled.FOLDER ICON
RETURN ICON
CONTINUED
Playing a USB Flash Memory Device (Models with navigation system)
181
Features
2009 Fit
Page 192 of 352
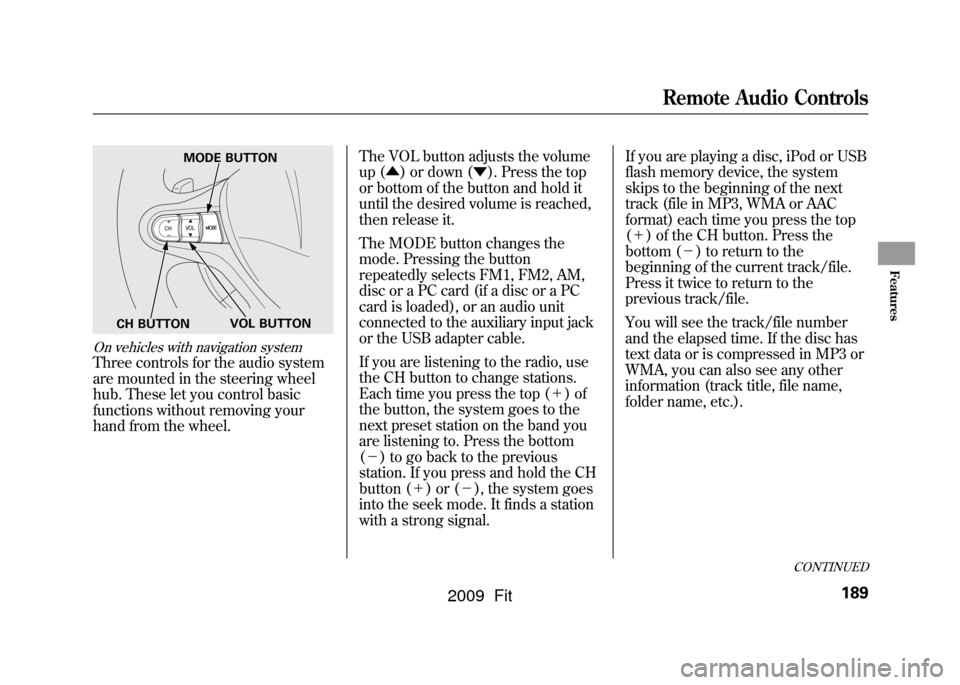
On vehicles with navigation systemThree controls for the audio system
are mounted in the steering wheel
hub. These let you control basic
functions without removing your
hand from the wheel.The VOL button adjusts the volume
up (
▲) or down ( ▼). Press the top
or bottom of the button and hold it
until the desired volume is reached,
then release it.
The MODE button changes the
mode. Pressing the button
repeatedly selects FM1, FM2, AM,
disc or a PC card (if a disc or a PC
card is loaded), or an audio unit
connected to the auxiliary input jack
or the USB adapter cable.
If you are listening to the radio, use
the CH button to change stations.
Each time you press the top ( +)of
the button, the system goes to the
next preset station on the band you
are listening to. Press the bottom
( - ) to go back to the previous
station. If you press and hold the CH
button ( +)or( -), the system goes
into the seek mode. It finds a station
with a strong signal. If you are playing a disc, iPod or USB
flash memory device, the system
skips to the beginning of the next
track (file in MP3, WMA or AAC
format) each time you press the top
(
+ ) of the CH button. Press the
bottom ( -) to return to the
beginning of the current track/file.
Press it twice to return to the
previous track/file.
You will see the track/file number
and the elapsed time. If the disc has
text data or is compressed in MP3 or
WMA, you can also see any other
information (track title, file name,
folder name, etc.).
MODE BUTTON
VOL BUTTON
CH BUTTON
CONTINUED
Remote Audio Controls
189
Features
2009 Fit
Page 194 of 352

Your vehicle's audio system will
disable itself if it is disconnected
from electrical power for any reason.
To make it work again, you must
enter a specific digit code using the
preset buttons. Because there are
hundreds of number combinations
possible from specific digits, making
the system work without knowing
the exact code is nearly impossible.
You should have received a card that
lists your audio system's code and
serial numbers. It is best to store this
card in a safe place at home. In
addition, you should write the audio
system's serial number in this
owner's manual.
If you lose the card, you must obtain
the code number from a dealer. To
do this, you will need the system's
serial number.If your vehicle's battery is
disconnected or goes dead, or the
radio fuse is removed, the audio
system will disable itself. If this
happens, you will see
‘‘ENTER
CODE ’’in the frequency display the
next time you turn on the system.
Use the preset buttons to enter the
code. On vehicles with navigation
system, touch the Done icon to set
the code. The code is on the radio
code card included in your owner's
manual kit. When it is entered
correctly, the radio will start playing.
If you make a mistake entering the
code, do not start over; complete the
sequence, then enter the correct
code. You have 10 tries to enter the
correct code. If you are unsuccessful
in 10 attempts, you must then leave
the system on for 1 hour before
trying again.
Radio Theft Protection
191
Features
2009 Fit
Page 195 of 352
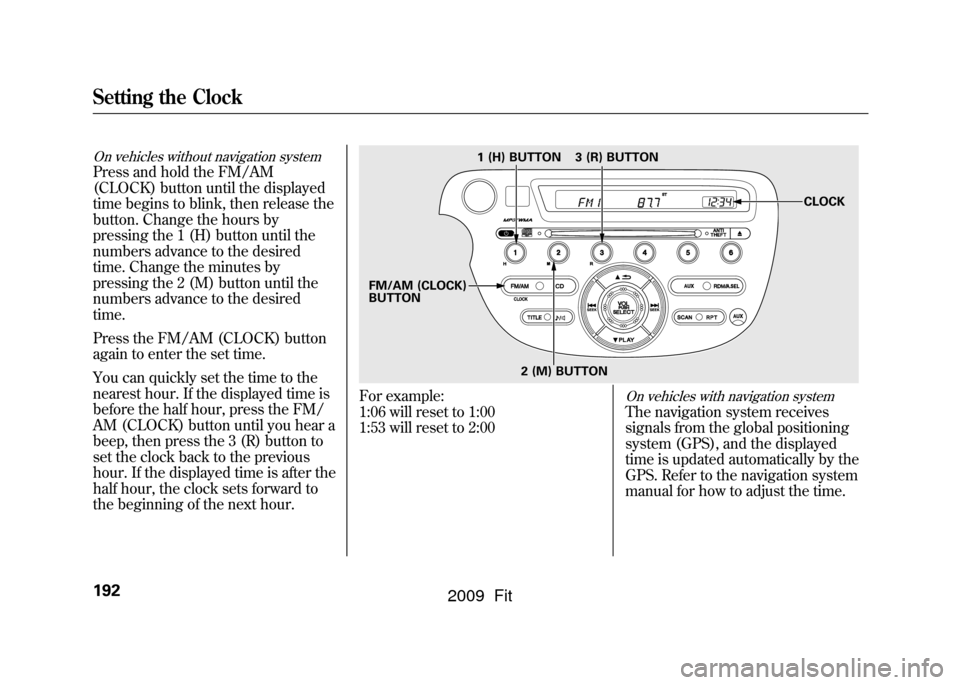
On vehicles without navigation systemPress and hold the FM/AM
(CLOCK) button until the displayed
time begins to blink, then release the
button. Change the hours by
pressing the 1 (H) button until the
numbers advance to the desired
time. Change the minutes by
pressing the 2 (M) button until the
numbers advance to the desired
time.
Press the FM/AM (CLOCK) button
again to enter the set time.
You can quickly set the time to the
nearest hour. If the displayed time is
before the half hour, press the FM/
AM (CLOCK) button until you hear a
beep, then press the 3 (R) button to
set the clock back to the previous
hour. If the displayed time is after the
half hour, the clock sets forward to
the beginning of the next hour.
For example:
1:06 will reset to 1:00
1:53 will reset to 2:00
On vehicles with navigation systemThe navigation system receives
signals from the global positioning
system (GPS), and the displayed
time is updated automatically by the
GPS. Refer to the navigation system
manual for how to adjust the time.
1 (H) BUTTON
FM/AM (CLOCK)
BUTTON 3 (R) BUTTON
CLOCK
2 (M) BUTTON
Setting the Clock192
2009 Fit
Page 196 of 352
On Sport modelThe security system helps to protect
your vehicle and valuables from
theft. The horn sounds and a
combination of headlights, parking/
side marker lights and taillights
flashes if someone attempts to break
into your vehicle or remove the audio
unit. This alarm continues for 2
minutes, then the system resets. To
reset an activated system before the
2 minutes have elapsed, unlock the
driver's door with the key or the
remote transmitter.
The security system automatically
sets 15 seconds after you lock the
doors, hood, and the tailgate. For the
system to activate, you must lock the
doors and the tailgate from the
outside with the key, driver's lock
tab, door lock master switch, or
remote transmitter. The security
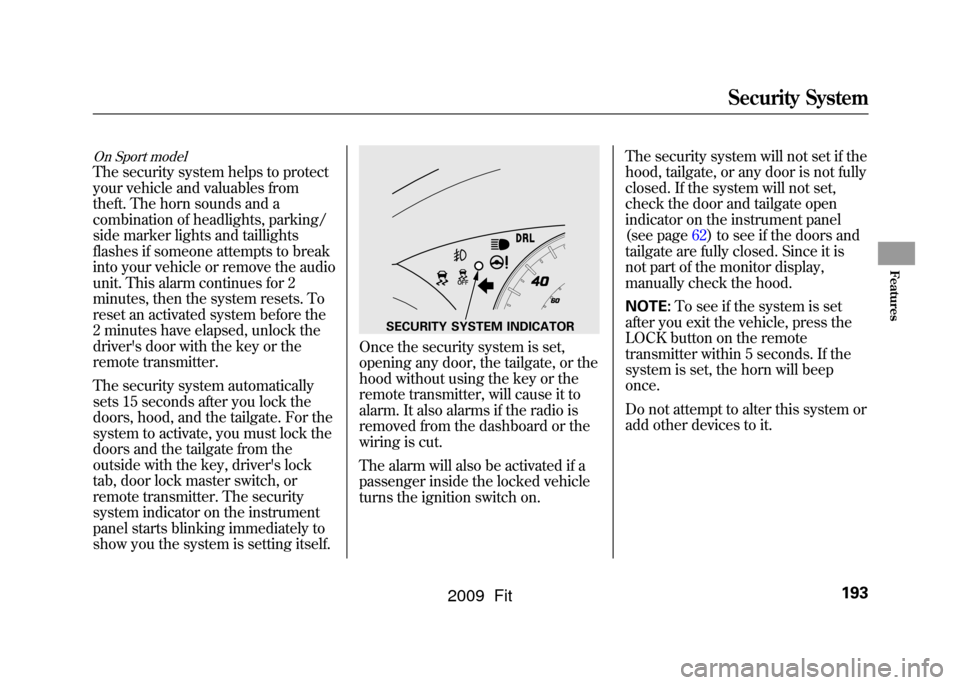
system indicator on the instrument
panel starts blinking immediately to
show you the system is setting itself.
Once the security system is set,
opening any door, the tailgate, or the
hood without using the key or the
remote transmitter, will cause it to
alarm. It also alarms if the radio is
removed from the dashboard or the
wiring is cut.
The alarm will also be activated if a
passenger inside the locked vehicle
turns the ignition switch on.The security system will not set if the
hood, tailgate, or any door is not fully
closed. If the system will not set,
check the door and tailgate open
indicator on the instrument panel
(see page
62)to see if the doors and
tailgate are fully closed. Since it is
not part of the monitor display,
manually check the hood.
NOTE: To see if the system is set
after you exit the vehicle, press the
LOCK button on the remote
transmitter within 5 seconds. If the
system is set, the horn will beep
once.
Do not attempt to alter this system or
add other devices to it.
SECURITY SYSTEM INDICATOR
Security System
193
Features
2009 Fit
Page 208 of 352
●Avoid excessive idling-Idling
results in 0 miles per gallon.●Minimize the use of the air
conditioning system -The A/C
puts an extra load on the engine
which makes it use more fuel. Use
the fresh-air ventilation when
possible.●Plan and combine trips -
Combine several short trips into
one. A warmed-up engine is more
fuel efficient than a cold one.
Calculating Fuel Economy
Measuring TechniquesDirect calculation is the
recommended source of information
about your actual fuel economy.
Using frequency of fill-ups or taking
fuel gauge readings are NOT
accurate measures of fuel economy.
Fuel economy may improve over the
first several thousand miles.
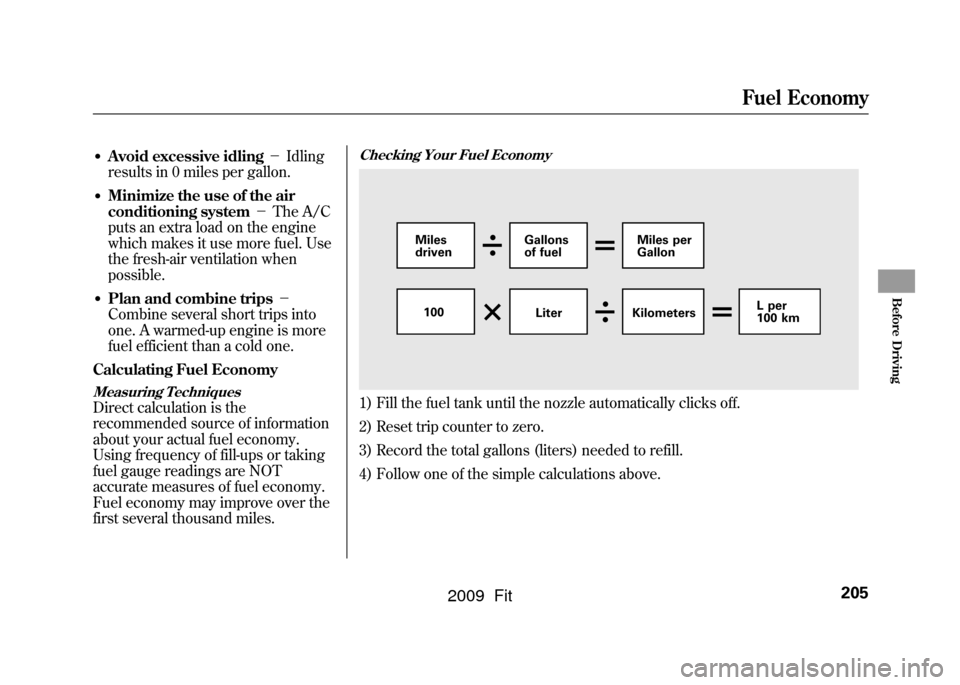
Checking Your Fuel Economy1) Fill the fuel tank until the nozzle automatically clicks off.
2) Reset trip counter to zero.
3) Record the total gallons (liters) needed to refill.
4) Follow one of the simple calculations above.
Miles
driven Gallons
of fuel Miles per
Gallon
100 LiterKilometers L per
100 km
Fuel Economy
205
Before Driving
2009 Fit
Page 236 of 352
If equippedThe vehicle stability assist (VSA)
system helps to stabilize the vehicle
during cornering if the vehicle turns
more or less than desired. It also
assists you in maintaining traction
while accelerating on loose or
slippery road surfaces. It does this by
regulating the engine's output and by
selectively applying the brakes.
When VSA activates, you may notice
that the engine does not respond to
the accelerator in the same way it
does at other times. There may also
be some noise from the VSA
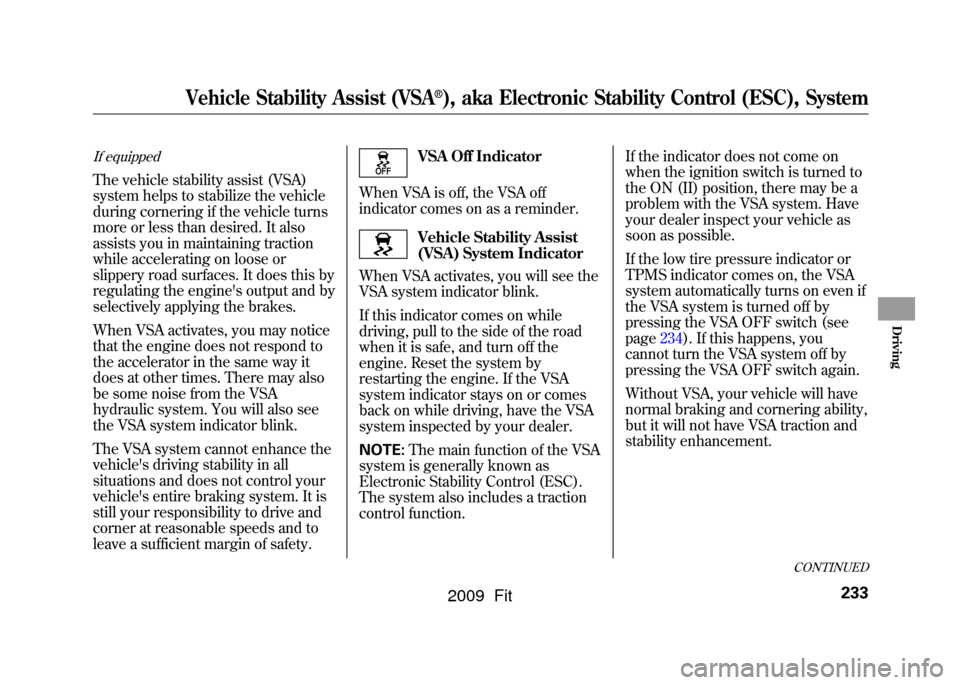
hydraulic system. You will also see
the VSA system indicator blink.
The VSA system cannot enhance the
vehicle's driving stability in all
situations and does not control your
vehicle's entire braking system. It is
still your responsibility to drive and
corner at reasonable speeds and to
leave a sufficient margin of safety.
VSA Off Indicator
When VSA is off, the VSA off
indicator comes on as a reminder.Vehicle Stability Assist
(VSA) System Indicator
When VSA activates, you will see the
VSA system indicator blink.
If this indicator comes on while
driving, pull to the side of the road
when it is safe, and turn off the
engine. Reset the system by
restarting the engine. If the VSA
system indicator stays on or comes
back on while driving, have the VSA
system inspected by your dealer.
NOTE: The main function of the VSA
system is generally known as
Electronic Stability Control (ESC).
The system also includes a traction
control function. If the indicator does not come on
when the ignition switch is turned to
the ON (II) position, there may be a
problem with the VSA system. Have
your dealer inspect your vehicle as
soon as possible.
If the low tire pressure indicator or
TPMS indicator comes on, the VSA
system automatically turns on even if
the VSA system is turned off by
pressing the VSA OFF switch (see
page234).If this happens, you
cannot turn the VSA system off by
pressing the VSA OFF switch again.
Without VSA, your vehicle will have
normal braking and cornering ability,
but it will not have VSA traction and
stability enhancement.
CONTINUED
Vehicle Stability Assist (VSA
®), aka Electronic Stability Control (ESC), System
233
Driving
2009 Fit