brake HONDA FIT 2010 2.G Owner's Guide
[x] Cancel search | Manufacturer: HONDA, Model Year: 2010, Model line: FIT, Model: HONDA FIT 2010 2.GPages: 351, PDF Size: 5.67 MB
Page 232 of 351
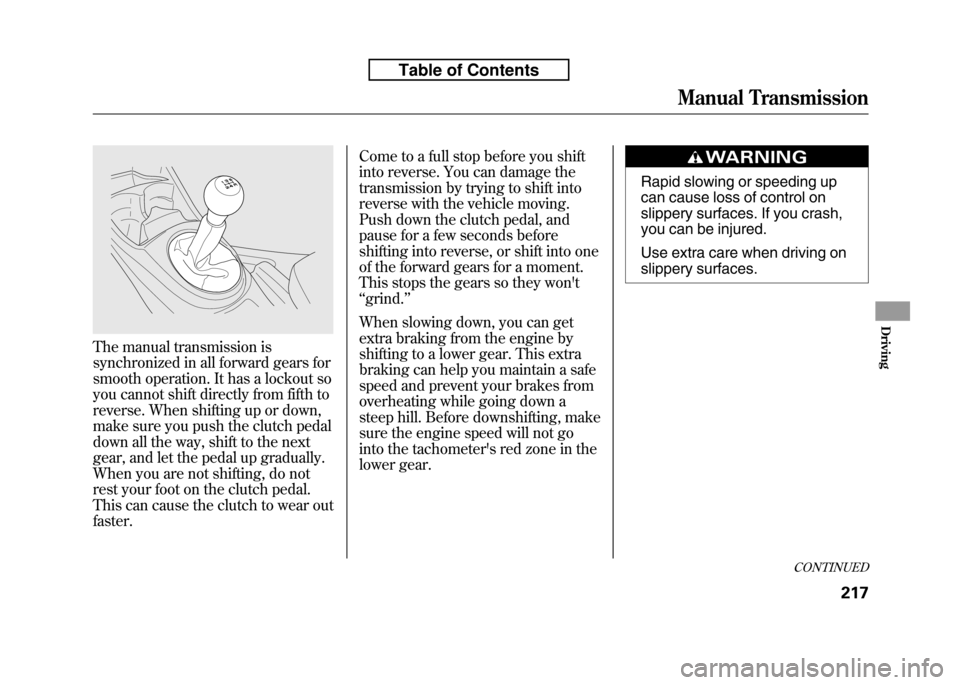
The manual transmission is
synchronized in all forward gears for
smooth operation. It has a lockout so
you cannot shift directly from fifth to
reverse. When shifting up or down,
make sure you push the clutch pedal
down all the way, shift to the next
gear, and let the pedal up gradually.
When you are not shifting, do not
rest your foot on the clutch pedal.
This can cause the clutch to wear outfaster.Come to a full stop before you shift
into reverse. You can damage the
transmission by trying to shift into
reverse with the vehicle moving.
Push down the clutch pedal, and
pause for a few seconds before
shifting into reverse, or shift into one
of the forward gears for a moment.
This stops the gears so they won't‘‘
grind. ’’
When slowing down, you can get
extra braking from the engine by
shifting to a lower gear. This extra
braking can help you maintain a safe
speed and prevent your brakes from
overheating while going down a
steep hill. Before downshifting, make
sure the engine speed will not go
into the tachometer's red zone in the
lower gear.
Rapid slowing or speeding up
can cause loss of control on
slippery surfaces. If you crash,
you can be injured.
Use extra care when driving on
slippery surfaces.
CONTINUED
Manual Transmission
217
Driving
Table of Contents
Page 234 of 351
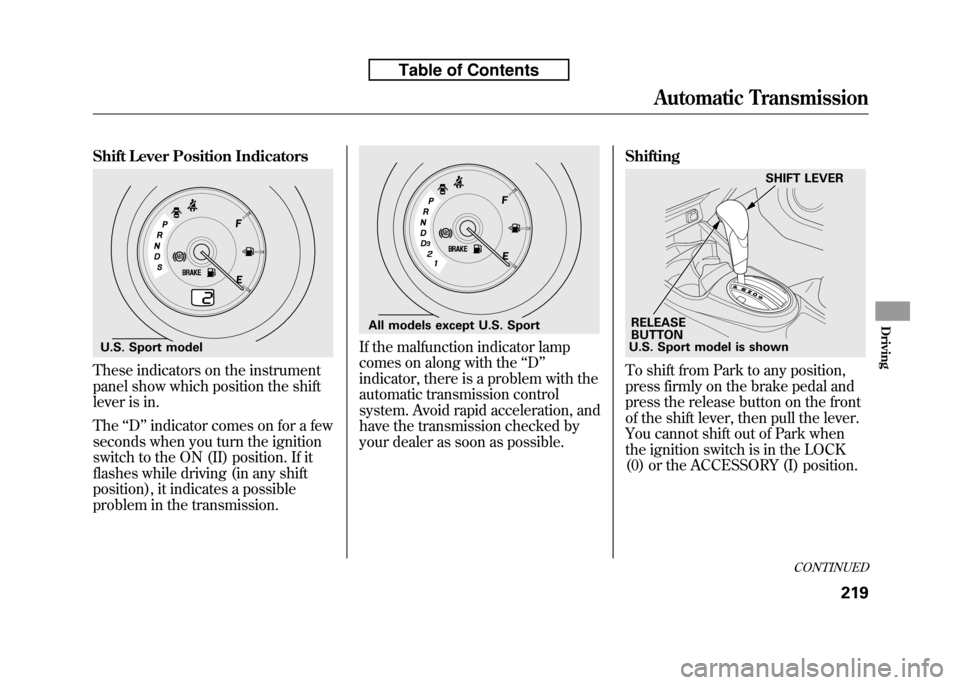
Shift Lever Position Indicators
These indicators on the instrument
panel show which position the shift
lever is in. The‘‘D ’’indicator comes on for a few
seconds when you turn the ignition
switch to the ON (II) position. If it
flashes while driving (in any shift
position), it indicates a possible
problem in the transmission.
If the malfunction indicator lamp
comes on along with the ‘‘D ’’
indicator, there is a problem with the
automatic transmission control
system. Avoid rapid acceleration, and
have the transmission checked by
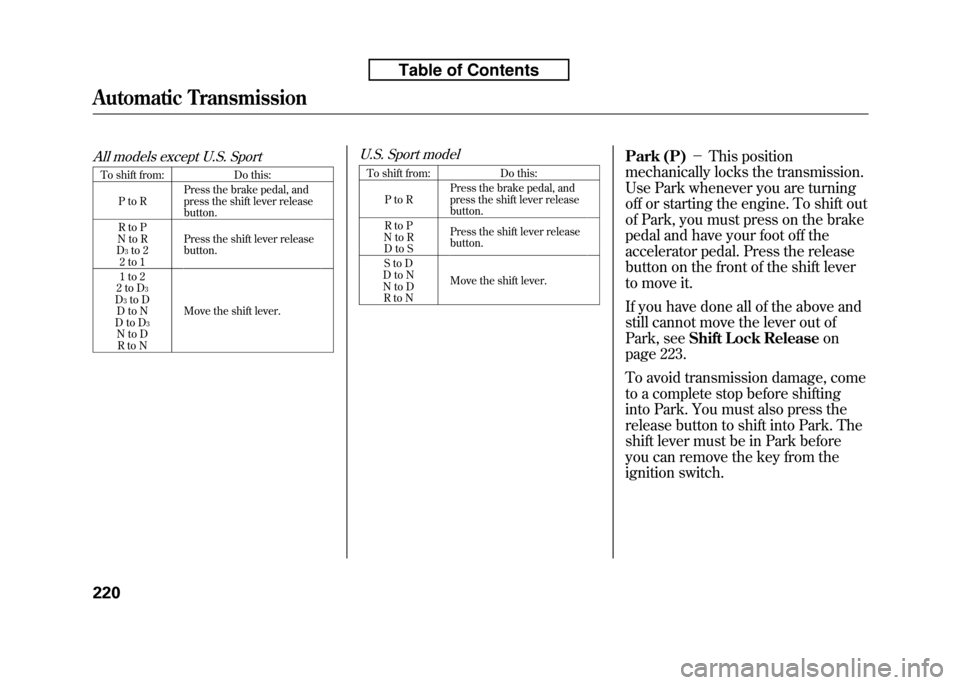
your dealer as soon as possible. Shifting
To shift from Park to any position,
press firmly on the brake pedal and
press the release button on the front
of the shift lever, then pull the lever.
You cannot shift out of Park when
the ignition switch is in the LOCK
(0) or the ACCESSORY (I) position.
U.S. Sport model
All models except U.S. Sport
U.S. Sport model is shown
RELEASE
BUTTON SHIFT LEVER
CONTINUED
Automatic Transmission
219
Driving
Table of Contents
Page 235 of 351
All models except U.S. Sport
To shift from: Do this:PtoR Press the brake pedal, and
press the shift lever releasebutton.
RtoP
NtoR
D 3to 2
2to1 Press the shift lever releasebutton.
1to2
2toD 3
D 3to D
DtoN
DtoD 3
NtoD
RtoN Move the shift lever.
U.S. Sport model
To shift from: Do this:
PtoR Press the brake pedal, and
press the shift lever releasebutton.
RtoP
NtoR
DtoS Press the shift lever releasebutton.
StoD
DtoN
NtoD RtoN Move the shift lever. Park (P)
-This position
mechanically locks the transmission.
Use Park whenever you are turning
off or starting the engine. To shift out
of Park, you must press on the brake
pedal and have your foot off the
accelerator pedal. Press the release
button on the front of the shift lever
to move it.
If you have done all of the above and
still cannot move the lever out of
Park, see Shift Lock Release on
page 223.
To avoid transmission damage, come
to a complete stop before shifting
into Park. You must also press the
release button to shift into Park. The
shift lever must be in Park before
you can remove the key from the
ignition switch.
Automatic Transmission
220
Table of Contents
Page 236 of 351
Reverse (R)-Press the brake
pedal and press the release button on
the front of the shift lever to shift
from Park to reverse. To shift from
reverse to neutral, come to a
complete stop, and then shift. Press
the release button before shifting
into reverse from neutral.
Neutral (N) -Use neutral if you
need to restart a stalled engine, or if
it is necessary to stop briefly with the
engine idling. Shift to the Park
position if you need to leave your
vehicle for any reason. Press on the
brake pedal when you are moving
the shift lever from neutral to
another gear. Drive (D)
-Use this position for
your normal driving. The
transmission automatically selects a
suitable gear (1 through 5) for your
speed and acceleration. You may
notice the transmission shifting up at
higher engine speeds when the
engine is cold. This helps the engine
warm up faster.
All models except U.S. Sport
Drive (D 3) - This position is similar
to D, except only the first three gears
are selected. Use D 3to provide
engine braking when going down a
steep hill. D 3can also keep the
transmission from cycling between
third and fourth gears in stop-and-godriving.
All models except U.S. Sport
Second (2) -To shift to second,
press the release button on the front
of the shift lever. This position locks
the transmission in second gear. It
does not downshift to first gear when
you come to a stop.
Use second gear:
● For more power when climbing.
● To increase engine braking when
going down steep hills.
● For starting out on a slippery
surface or in deep snow.
● To help reduce wheel spin.
CONTINUED
Automatic Transmission
221
Driving
Table of Contents
Page 238 of 351
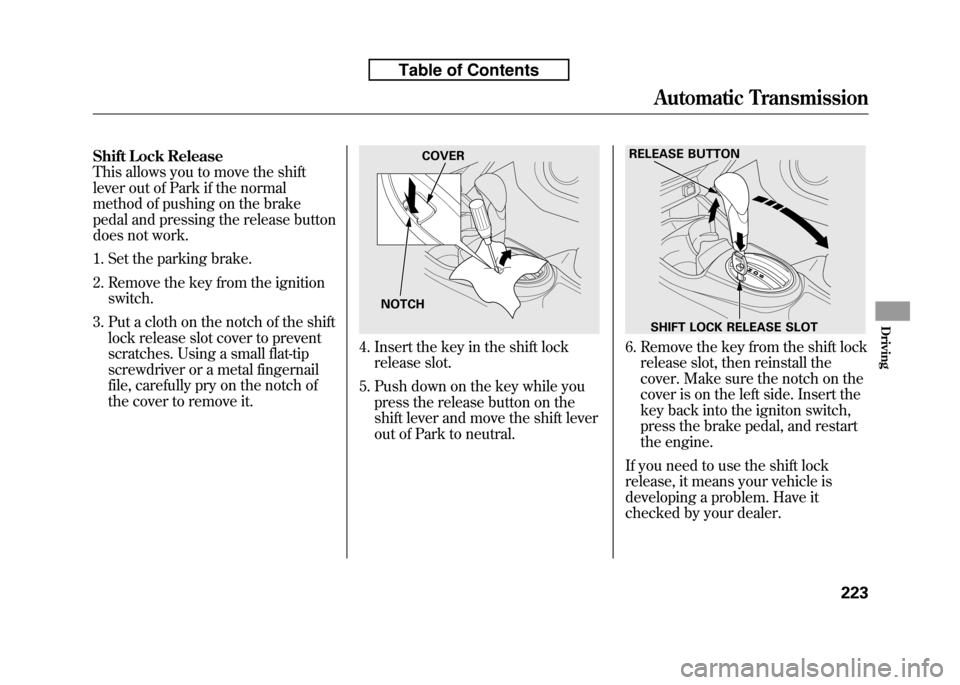
Shift Lock Release
This allows you to move the shift
lever out of Park if the normal
method of pushing on the brake
pedal and pressing the release button
does not work.
1. Set the parking brake.
2. Remove the key from the ignitionswitch.
3. Put a cloth on the notch of the shift lock release slot cover to prevent
scratches. Using a small flat-tip
screwdriver or a metal fingernail
file, carefully pry on the notch of
the cover to remove it.
4. Insert the key in the shift lockrelease slot.
5. Push down on the key while you press the release button on the
shift lever and move the shift lever
out of Park to neutral.6. Remove the key from the shift lockrelease slot, then reinstall the
cover. Make sure the notch on the
cover is on the left side. Insert the
key back into the igniton switch,
press the brake pedal, and restart
the engine.
If you need to use the shift lock
release, it means your vehicle is
developing a problem. Have it
checked by your dealer.
NOTCH COVER
RELEASE BUTTON
SHIFT LOCK RELEASE SLOT
Automatic Transmission
223
Driving
Table of Contents
Page 242 of 351
When you accelerate from a stop, the
transmission starts in first gear, and
you must manually upshift between
first and fifth gears. Make sure you
upshift before the engine speed
reaches the tachometer's red zone.
The transmission remains in the
selected gear (5, 4, 3, 2, or 1). There
is no automatic downshift when you
push the accelerator pedal to thefloor.
When you are driving in 4th or 5th
gear, the transmission downshifts to
the lower gear under the followingconditions:● The vehicle slows down to a
certain speed.
● You press the brake pedal. Downshifting with the paddle shifter
allows you to increase the engine
braking when going down steep or
long hills, and provides more power
when climbing uphills. You can
upshift the transmission manually to
reduce the rpm. Driving in the
higher gear helps fuel economy.
The transmission also shifts
automatically as the vehicle comes to
a complete stop. It downshifts to first
gear when the vehicle speed reaches
6 mph (10 km/h) or less.
The automatic transmission will not
allow you to shift up or down if:
● You downshift before the engine
speed reaches the highest
threshold of the lower gear.
If you try to do this, the gear position
indicator will flash the number of the
lower gear several times, then return
to a higher gear.
CONTINUED
Driving with the Paddle Shifters (Sport only)
227
Driving
Table of Contents
Page 244 of 351
Always use the parking brake when
you park your vehicle. Make sure the
parking brake is set firmly, or your
vehicle may roll if it is parked on anincline.
If your vehicle has an automatic
transmission, set the parking brake
before you put the transmission in
Park. This keeps the vehicle from
moving and putting pressure on the
parking mechanism in thetransmission.Parking Tips
● Make sure the windows areclosed.
● Turn off the lights.
● Place any packages, valuables, etc.
in the cargo area or take them withyou.
● Lock the doors and the tailgate.
On Sport model
Check the indicator on the
instrument panel to verify that the
security system is set.
● Never park over dry leaves, tall
grass, or other flammable
materials. The hot three way
catalytic converter could cause
these materials to catch on fire. ●
If the vehicle is facing uphill, turn
the front wheels away from the
curb. If your vehicle has a manual
transmission, put it in first gear
and set the parking brake.
● If the vehicle is facing downhill,
turn the front wheels toward the
curb. If your vehicle has a manual
transmission, put it in reverse gear
and set the parking brake.
● Make sure the parking brake is
fully released before driving away.
Driving with the parking brake
partially set can overheat or
damage the rear brakes.
Parking
229
Driving
Table of Contents
Page 245 of 351
Your vehicle is equipped with front
disc brakes. The brakes on the rear
wheels are drum. A power assist
helps reduce the effort needed on the
brake pedal. The anti-lock brake
system (ABS) helps you retain
steering control when braking veryhard.
Resting your foot on the pedal keeps
the brakes applied lightly, builds up
heat, and reduces their effectiveness
and reduces brake pad life. In
addition, fuel economy can be
reduced. It also keeps your brake
lights on all the time, confusing
drivers behind you.
Constant application of the brakes
when going down a long hill builds
up heat and reduces their
effectiveness. Use the engine to
assist the brakes by taking your foot
off the accelerator and downshifting
to a lower gear.Check your brakes after driving
through deep water. Apply the
brakes moderately to see if they feel
normal. If not, apply them gently and
frequently until they do. Be extra
cautious and alert in your driving.
Braking System Design
The hydraulic system that operates
the brakes has two separate circuits.
Each circuit works diagonally across
the vehicle (the left-front brake is
connected with the right-rear brake,
etc.). If one circuit should develop a
problem, you will still have braking
at two wheels.
Brake Pad Wear Indicators
If the front brake pads need
replacing, you will hear a distinctive,
metallic screeching sound when you
apply the brake pedal. If you do not
have the brake pads replaced, they
will screech all the time. It is normal
for the brakes to occasionally squeal
or squeak when you apply them.
Braking System
230
Table of Contents
Page 246 of 351
The anti-lock brake system (ABS)
helps prevent the wheels from
locking up, and helps you retain
steering control by pumping the
brakes rapidly, much faster than a
person can do it.
The electronic brake distribution
(EBD) system, which is part of the
ABS, also balances the front-to-rear
braking distribution according to
vehicle loading.
You should never pump the brake pedal.
Let the ABS work for you by always
keeping firm, steady pressure on the
brake pedal. This is sometimes
referred to as‘‘stomp and steer. ’’You will feel a pulsation in the brake
pedal when the ABS activates, and
you may hear some noise. This is
normal: it is the ABS rapidly
pumping the brakes. On dry
pavement, you will need to press on
the brake pedal very hard before the
ABS activates. However, you may
feel the ABS activate immediately if
you are trying to stop on snow or ice.
ABS Indicator
If the ABS indicator comes on, the
anti-lock function of the braking
system has shut down. The brakes
still work like a conventional system,
but without anti-lock. You should
have your dealer inspect your vehicle
as soon as possible.
If the ABS indicator comes on while
driving, test the brakes as shown on
page 305.
CONTINUED
Anti-lock Brakes (ABS)
231
Driving
Table of Contents
Page 247 of 351
If the ABS indicator and the brake
system indicator come on together,
and the parking brake is fully
released, the EBD system may also
be shut down.
Test your brakes as instructed on
page 305. If the brakes feel normal,
drive slowly and have your vehicle
repaired by your dealer as soon as
possible. Avoid sudden hard braking
which could cause the rear wheels to
lock up and possibly lead to a loss ofcontrol.
On vehicles with VSA system
The VSA indicator will come on
along with the ABS indicator.Important Safety Reminders
ABS does not reduce the time or
distance it takes to stop thevehicle.
It only helps with the
steering control during braking.
ABS will not prevent a skid that
results from changing directionabruptly, such as trying to take a
corner too fast or making a sudden
lane change. Always drive at a safe
speed for the road and weatherconditions.
ABS cannot prevent a loss of stability. Always steer moderately
when you are braking hard. Severe
or sharp steering wheel movement
can still cause your vehicle to veer
into oncoming traffic or off the road. A vehicle with ABS may require a
longer distance to stop
on loose or
uneven surfaces, such as gravel or
snow, than a vehicle without anti-lock.
Anti-lock Brakes (ABS)
232
Table of Contents