display HONDA HR-V 2021 Navigation Manual (in English)
[x] Cancel search | Manufacturer: HONDA, Model Year: 2021, Model line: HR-V, Model: HONDA HR-V 2021Pages: 139, PDF Size: 3.46 MB
Page 18 of 139
16
System Setup
Start-up
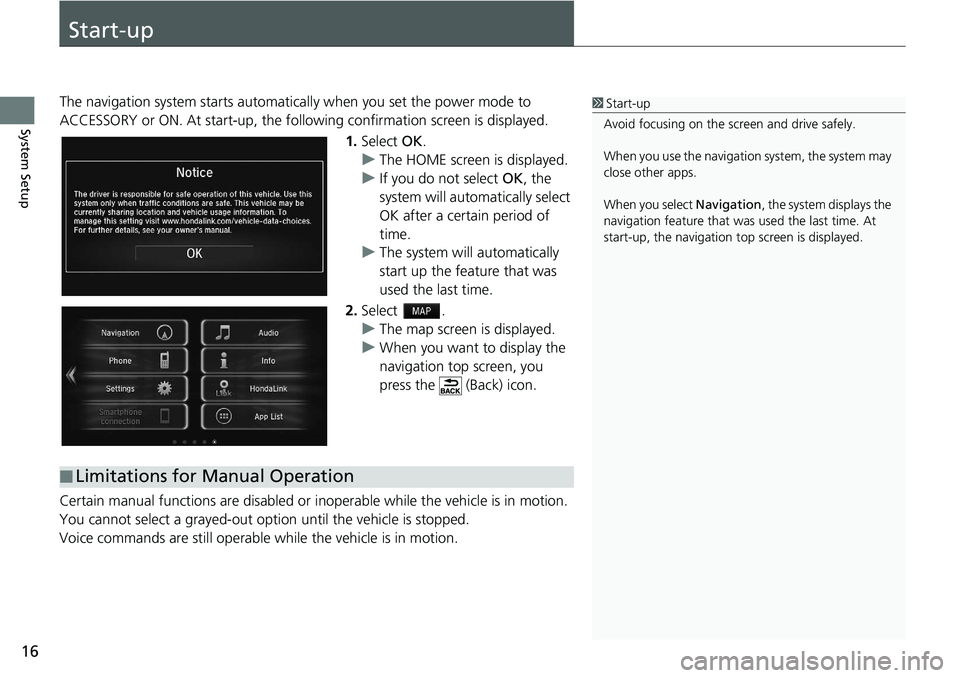
The navigation system starts automatically when yo u set the power mode to
ACCESSORY or ON. At start-up, the follow ing confirmation screen is displayed.
1. Select OK.
u The HOME screen is
displayed.
u If yo
u do not select OK, the
system will automatically select
OK after a certain period of
time.
u The system
will automatically
start up the feature that was
used the last time.
2. Select .
u The map
screen is displayed.
u When y
ou want to display the
navigation top screen, you
press the (Back) icon.
Certain manual functions are disabled or i nope
rable while the vehicle is in motion.
You cannot select a grayed-out option until the vehicle is stopped.
Voice commands are still operable while the vehicle is in motion.
1 Start-up
Avoid focusing on the scre en and drive safely.
When you use the navigation system, the system may
close other apps.
When you select Navigation , the system displays the
navigation feature that was used the last time. At
start-up, the navigation top screen is displayed.
■Limitations for Manual Operation
Page 20 of 139
18
System Setup
Personal Information
Setting Home Location
H u u (Menu)
From any location, select Go Home and the syste
m will provide you with one or
more return routes to your home. Before you can use this feature, you need to
register your home ad dress with the system.
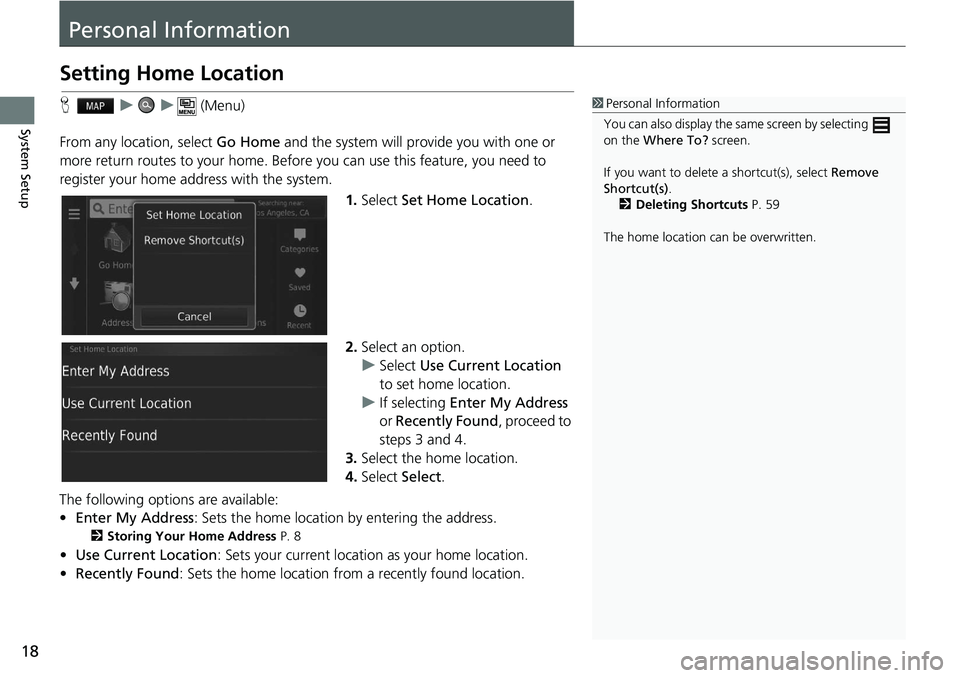
1.Select Set Home
Location.
2. Select an
option.
u Select Us
e Current Location
to set home location.
u If selecting Enter
My Address
or Recently Found , proceed to
steps 3 and 4.
3. Select
the home location.
4.Select Select.
The following options are available:
• E
nter My Address : Sets the home location by entering the address.
2Storing Your Home Address P. 8
• Use Current Location : Sets your current location as your home location.
• Recen
tly Found: Sets the home location from a recently found location.
1Personal Information
You can also display the same screen by selecting
on the Where To? screen.
If you want to delete a shortcut(s), select Remove
Shortcut(s) .
2 Deleting Shortcuts P. 59
The home location ca n be overwritten.
Page 23 of 139
Continued21
uu Personal Information u Saved Locations
System SetupH u (Back) u View Map
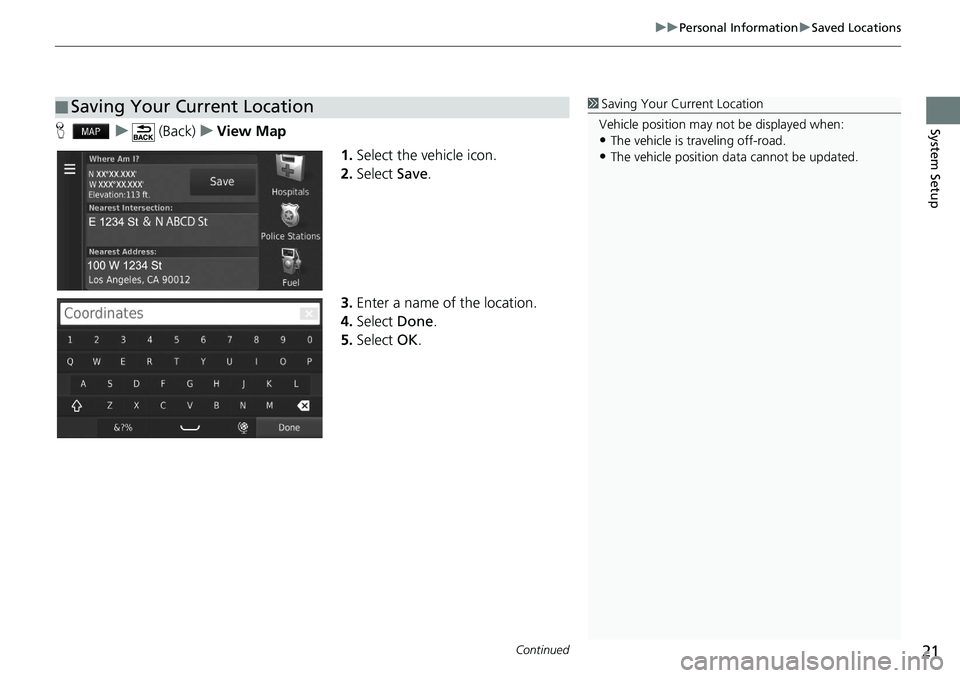
1.Select the vehicle icon.
2. Select Save.
3. Enter a
name of the location.
4.Select Done.
5. Select OK.
■Saving Your Current Location1
Saving Your Current Location
Vehicle position may not be displayed when:
•The vehicle is traveling off-road.
•The vehicle position da ta cannot be updated.
Page 28 of 139
26
System Setup
Display Mode Settings
Switching Display Mode Manually
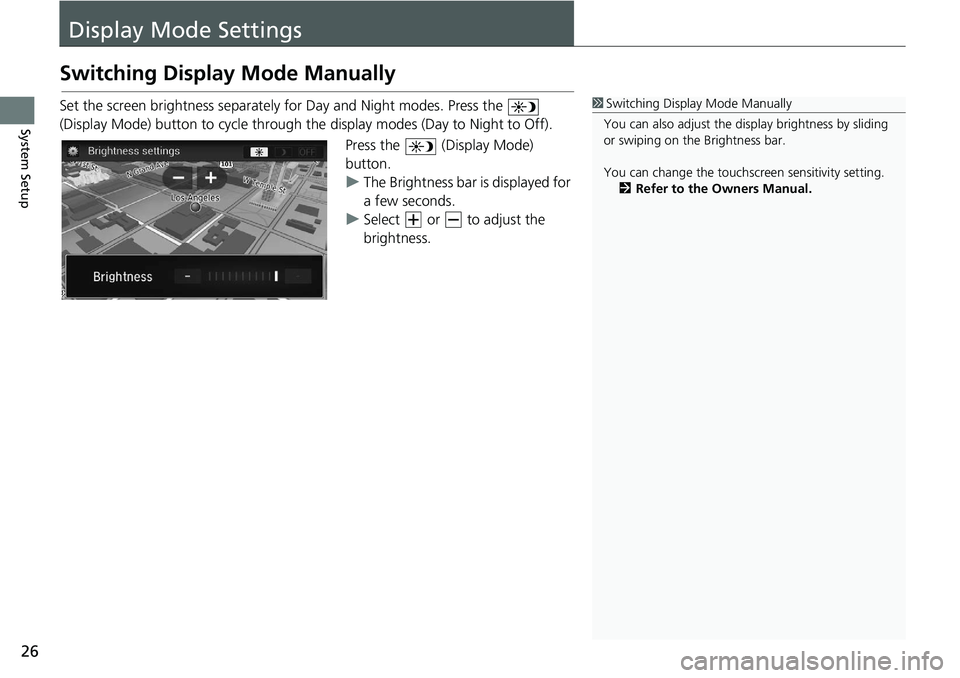
Set the screen brightness separately for Day and Night modes. Press the
(Display Mode) button to cycle through th e
display modes (Day to Night to Off).
Press the (Display Mode)
button.
u The Brigh
tness bar is displayed for
a few seconds.
u Select or to adjust the
brightness.
1 Switching Display Mode Manually
You can also adjust the display brightness by sliding
or swiping on the Brightness bar.
You can change the touchs creen sensitivity setting.
2 Refer to the Owners Manual.
Page 29 of 139
27
uu Display Mode Settings u Switching Display Mode Manually
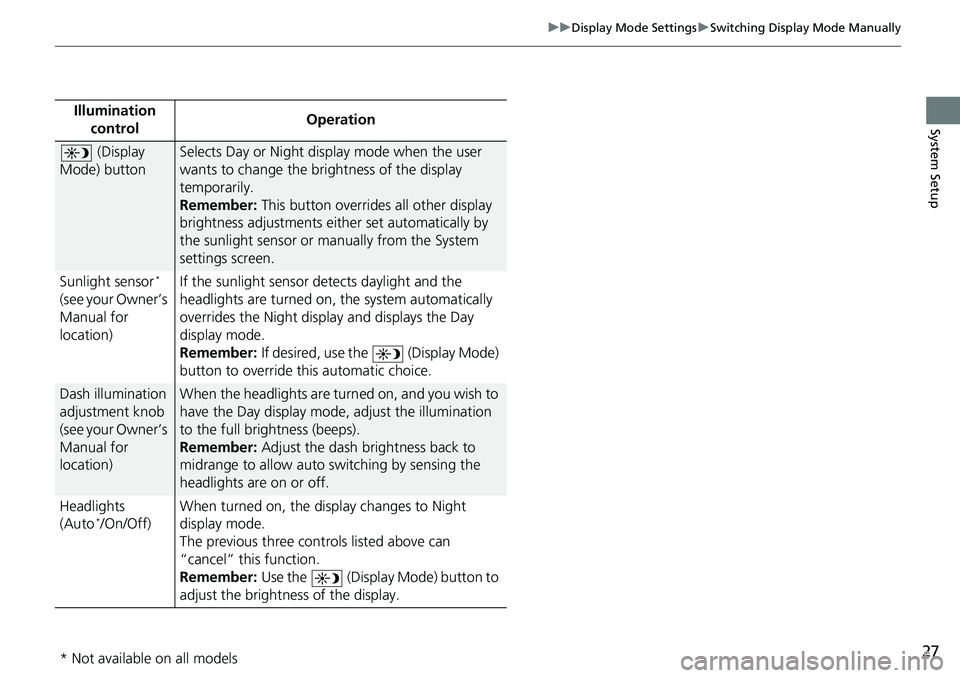
System SetupIllumination
controlOperation
(Display
Mode) button
Selects Day or Night display mode when the user
wants to change the brightness of the display
temporarily.
Remember: This button overrides all other display
brigh
tness adjustments either set automatically by
the sunlight sensor or manually from the System
settings screen.
Sunlight sensor
*
(see your Owner’s
Manual for
location) If the sunlight sensor detects daylight and the
headlights are
turned on, the system automatically
overrides the Nigh t display and displays the Day
display mode.
Remember: If desired, use the (Display Mode)
button to override this automatic choice.
Dash illumination
adjustment knob
(see your Owner’s
Manual for
location)When the headlights are turn ed on, and you wish to
have the Day display mode, adjust the illumination
to the full brightness (beeps).
Remember: Adjust the dash brightness back to
mi
drange to allow auto switching by sensing the
headlights are on or off.
Headlights
(Au
to */On/Off) When turned on, the di
sp
lay changes to Night
display mode.
The previous three controls listed above can
“cancel” this
function.
Remember: Use the (Display Mode) button to
adjust the brightness of the display.
* Not available on all models
Page 32 of 139
30
uu Map & Vehicle u Driving Map View (Map Orientation)
System Setup
Driving Map View (Map Orientation)
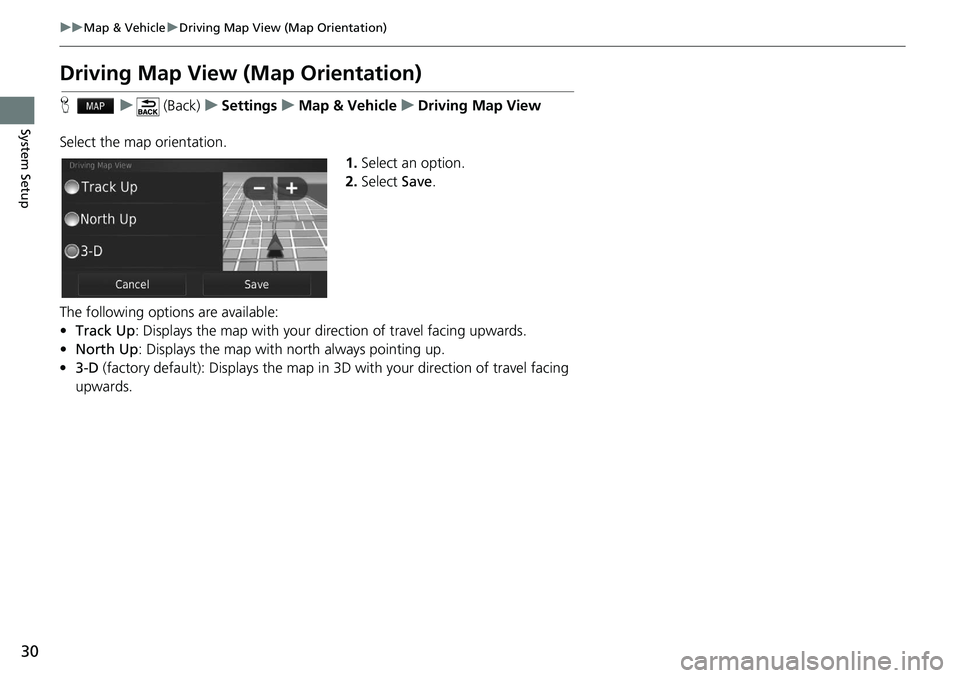
H u (Back) u Settings u Map & Vehicle u Driving Map View
Select the map orientation. 1.Select an
option.
2. Select Save.
The following options are available:
• T
rack Up : Displays the map with your di rection of travel facing upwards.
• Nort
h Up: Displays the map with no rth always pointing up.
• 3-
D (factory default): Displays the map in 3D with your direction of travel facing
up
wards.
Page 42 of 139
40
uu Navigation u Custom Avoidances
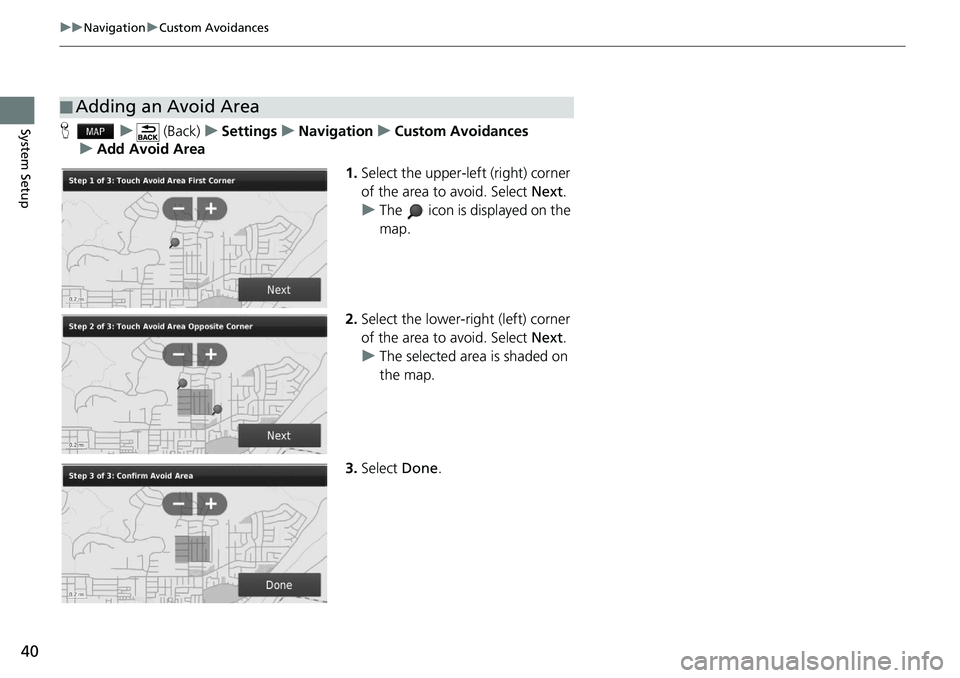
System SetupH u (Back) u Settings u Navigation u Custom Avoidances
u Add Avoid Area
1.Select the upper-left (r
ight) corner
of the area to avoid. Select Next.
u The icon is displayed on the
map.
2. Select
the lower-right (left) corner
of the area to avoid. Select Next.
u The selected
area is shaded on
the map.
3. Select Done.
■Adding an Avoid Area
Page 43 of 139
41
uu Navigation u Custom Avoidances
Continued
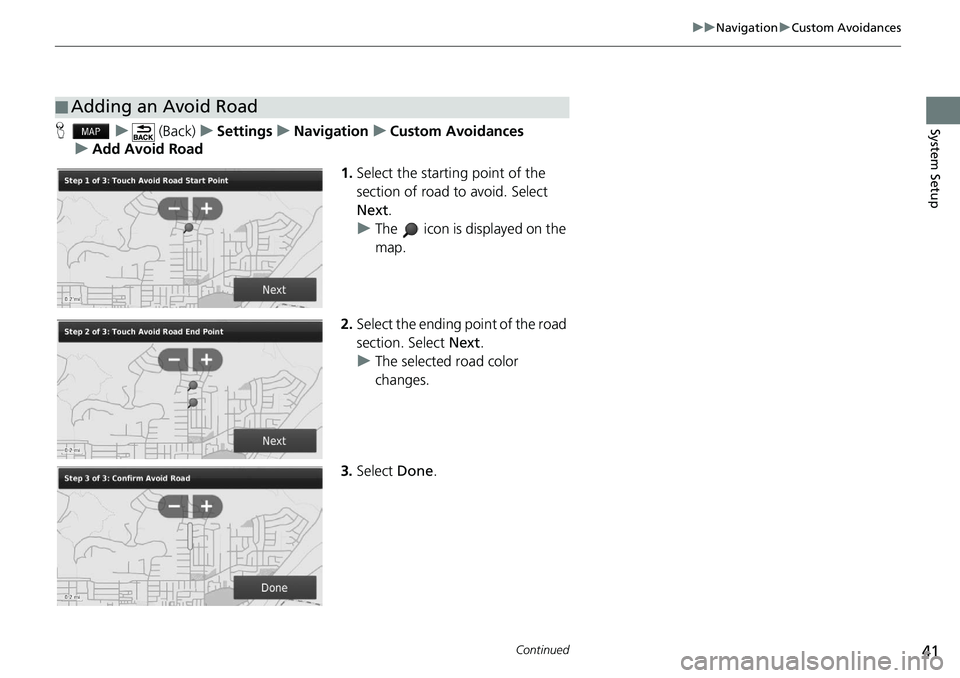
System SetupH u (Back) u Settings u Navigation u Custom Avoidances
u Add Avoid Road
1.Select the start
ing point of the
section of road to avoid. Select
Next .
u The icon is displayed on the
map.
2. Select the ending point
of the road
section. Select Next.
u The
selected road color
changes.
3. Select Done.
■Adding an Avoid Road
Page 44 of 139
42
uu Navigation u Custom Avoidances
System SetupH u (Back) u Settings u Navigation u Custom Avoidances
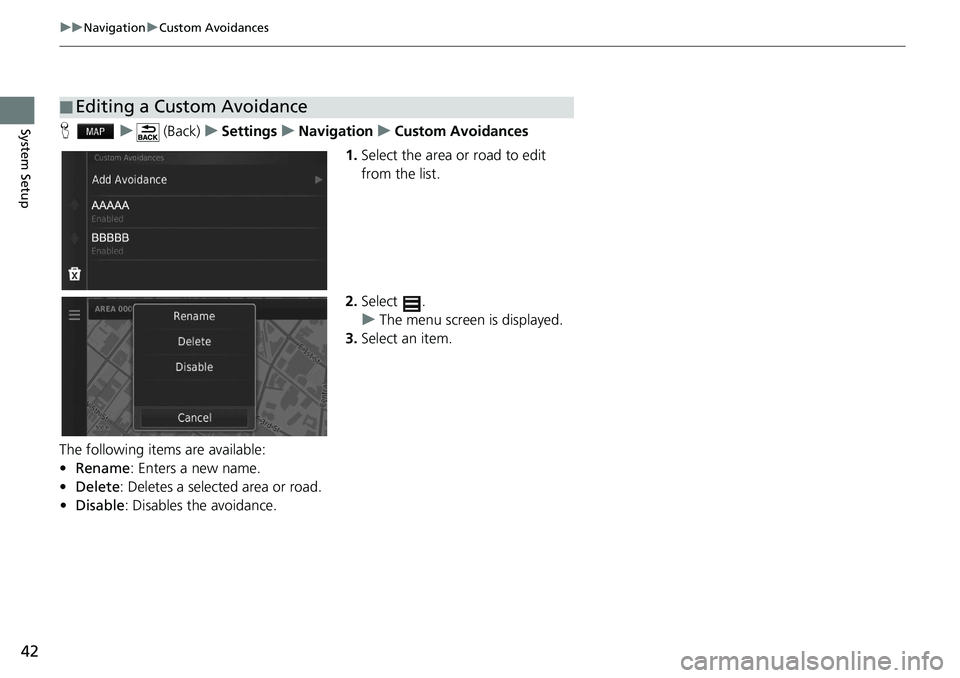
1. Select
the area or road to edit
from the list.
2. Select .
u The menu scr
een is displayed.
3. Select an
item.
The following items are available:
• Rename: Enters a new name.
• De
lete: Deletes a selected area or road.
• Disa
ble: Disables the avoidance.
■Editing a Custom Avoidance
Page 46 of 139
44
System Setup
Traffic
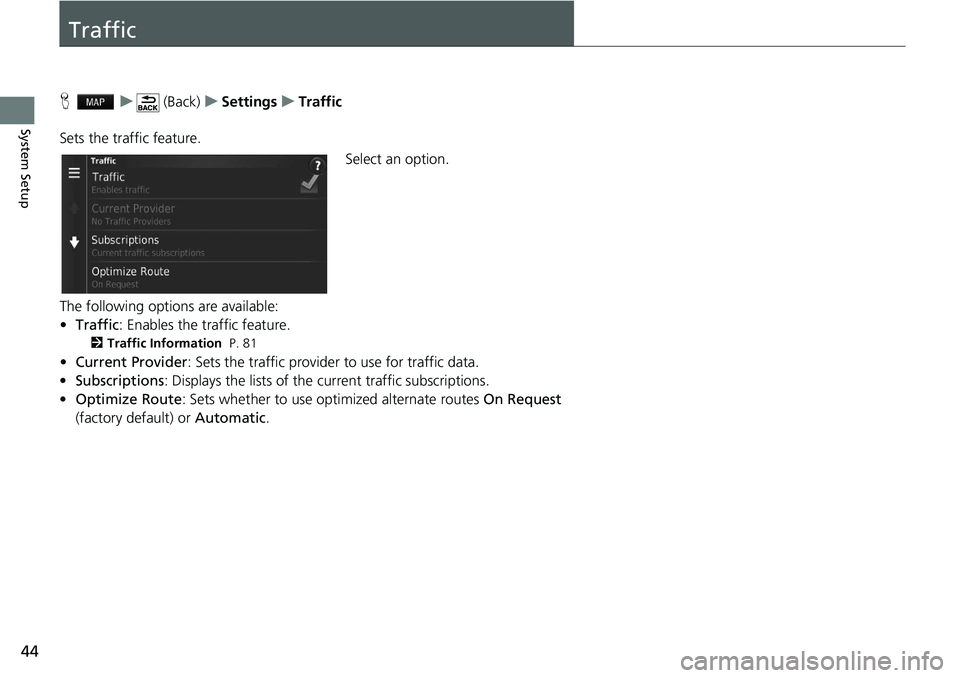
H u (Back) u Settings u Traffic
Sets the traffic feature. Select an option.
The following options are available:
• Tr
affic : Enables the traffic feature.
2 Traffic Information P. 81
•Current Provider : Sets the traffic provider to use for traffic data.
• Subscriptions : Displays the lists of the current traffic subscriptions.
• Op
timize Route : Sets whether to use optimized alternate routes On Request
(factory default) or Automatic.