engine HONDA INSIGHT 2019 (in English) Repair Manual
[x] Cancel search | Manufacturer: HONDA, Model Year: 2019, Model line: INSIGHT, Model: HONDA INSIGHT 2019Pages: 675, PDF Size: 36.97 MB
Page 571 of 675
569
uuMaintenance Under the Hood uCooling System
Continued
Maintenance
Cooling System
This coolant is premixed with 50% an tifreeze and 50% water. Do not add any
straight antifreeze or water.
We recommend you check the engine coolant level every time you refuel. Check the
reserve tank first. If it is completely empty, also check the coolant level in the
radiator. Add the engine coolant accordingly.
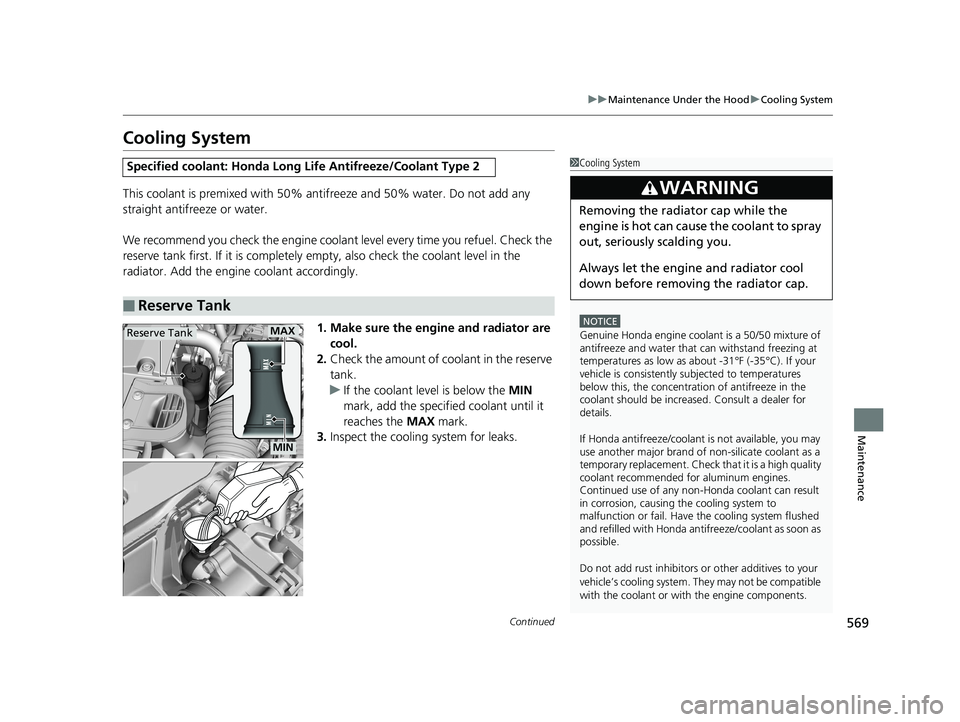
1. Make sure the engine and radiator are cool.
2. Check the amount of coolant in the reserve
tank.
u If the coolant level is below the MIN
mark, add the specified coolant until it
reaches the MAX mark.
3. Inspect the cooling system for leaks.
Specified coolant: Ho nda Long Life Antifreeze/Coolant Type 2
■Reserve Tank
1Cooling System
NOTICE
Genuine Honda engine coolan t is a 50/50 mixture of
antifreeze and water that can withstand freezing at
temperatures as low as a bout -31°F (-35°C). If your
vehicle is consistently subjected to temperatures
below this, the concentration of antifreeze in the
coolant should be increased. Consult a dealer for
details.
If Honda antifreeze /coolant is not available, you may
use another major brand of non-silicate coolant as a
temporary replacement. Check that it is a high quality
coolant recommended for aluminum engines.
Continued use of any non-Honda coolant can result
in corrosion, causing the cooling system to
malfunction or fail. Have the cooling system flushed
and refilled with Honda antifreeze/coolant as soon as
possible.
Do not add rust inhibitors or other additives to your
vehicle’s cooling system. They may not be compatible
with the coolant or with the engine components.
3WARNING
Removing the radiator cap while the
engine is hot can cause the coolant to spray
out, seriously scalding you.
Always let the engine and radiator cool
down before removing the radiator cap.
Reserve TankMAX
MIN
19 INSIGHT HMIN-31TXM6000.book 569 ページ 2018年4月20日 金曜日 午後4時22分
Page 572 of 675
uuMaintenance Under the Hood uCooling System
570
Maintenance
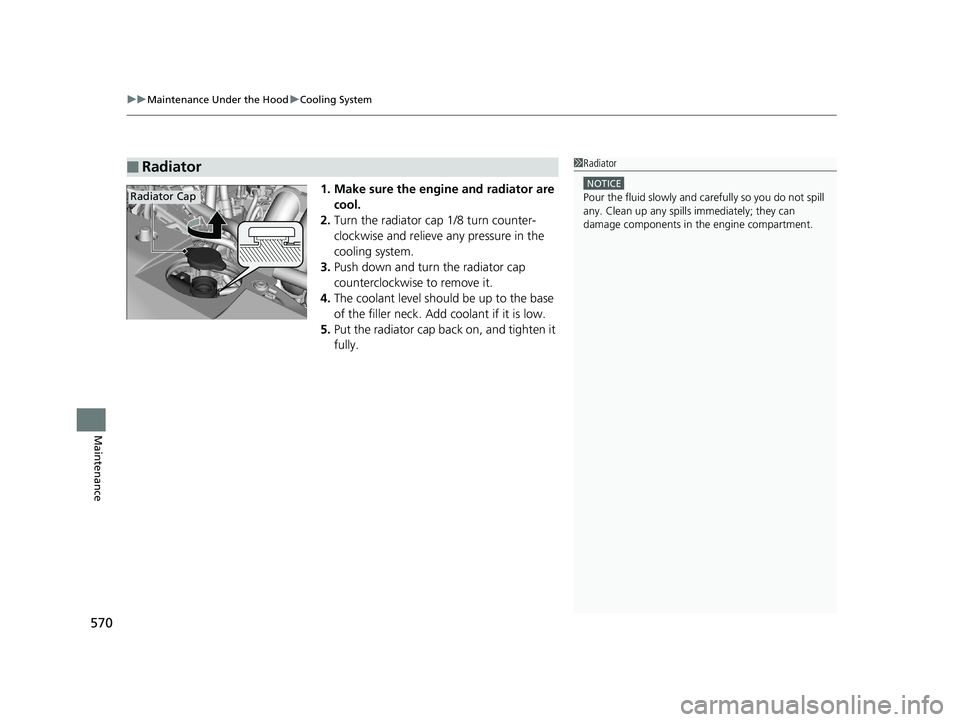
1. Make sure the engine and radiator are
cool.
2. Turn the radiator cap 1/8 turn counter-
clockwise and relieve any pressure in the
cooling system.
3. Push down and turn the radiator cap
counterclockwise to remove it.
4. The coolant level should be up to the base
of the filler neck. Add coolant if it is low.
5. Put the radiator cap back on, and tighten it
fully.
■Radiator1Radiator
NOTICE
Pour the fluid slowly and ca refully so you do not spill
any. Clean up any spills immediately; they can
damage components in the engine compartment.Radiator Cap
19 INSIGHT HMIN-31TXM6000.book 570 ページ 2018年4月20日 金曜日 午後4時22分
Page 573 of 675
571
uuMaintenance Under the Hood uInverter Coolant
Maintenance
Inverter Coolant
This coolant is premixed with 50% an tifreeze and 50% water. Do not add any
straight antifreeze or water.
We recommend you check the inverter coolant level every time you refuel.
Have a dealer replace the inverter coolant.
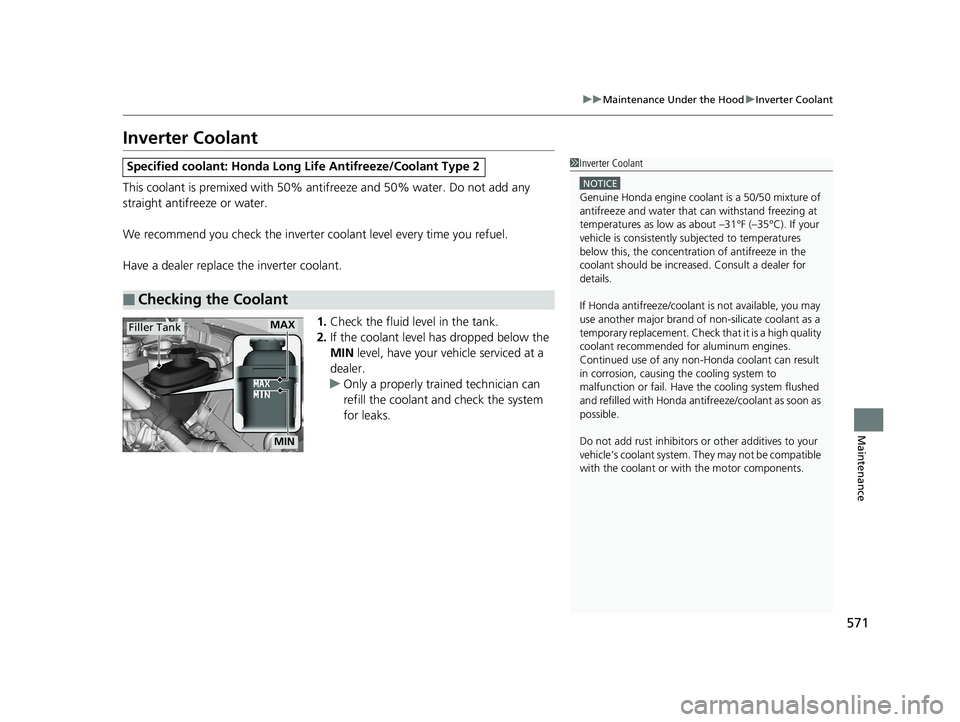
1.Check the fluid level in the tank.
2. If the coolant level has dropped below the
MIN level, have your ve hicle serviced at a
dealer.
u Only a properly trained technician can
refill the coolant and check the system
for leaks.
Specified coolant: Ho nda Long Life Antifreeze/Coolant Type 2
■Checking the Coolant
1Inverter Coolant
NOTICE
Genuine Honda engine coolan t is a 50/50 mixture of
antifreeze and water that can withstand freezing at
temperatures as low as a bout –31°F (–35°C). If your
vehicle is consistently subjected to temperatures
below this, the concentration of antifreeze in the
coolant should be increased. Consult a dealer for
details.
If Honda antifreeze /coolant is not available, you may
use another major brand of non-silicate coolant as a
temporary replacement. Check that it is a high quality
coolant recommended for aluminum engines.
Continued use of any non-Honda coolant can result
in corrosion, causing the cooling system to
malfunction or fail. Have the cooling system flushed
and refilled with Honda antifreeze/coolant as soon as
possible.
Do not add rust inhibitors or other additives to your
vehicle’s coolant system. They may not be compatible
with the coolant or with the motor components.
MAX
MIN
Filler Tank
19 INSIGHT HMIN-31TXM6000.book 571 ページ 2018年4月20日 金曜日 午後4時22分
Page 576 of 675
574
uuMaintenance Under the Hood uRefilling Window Washer Fluid
Maintenance
Refilling Window Washer Fluid
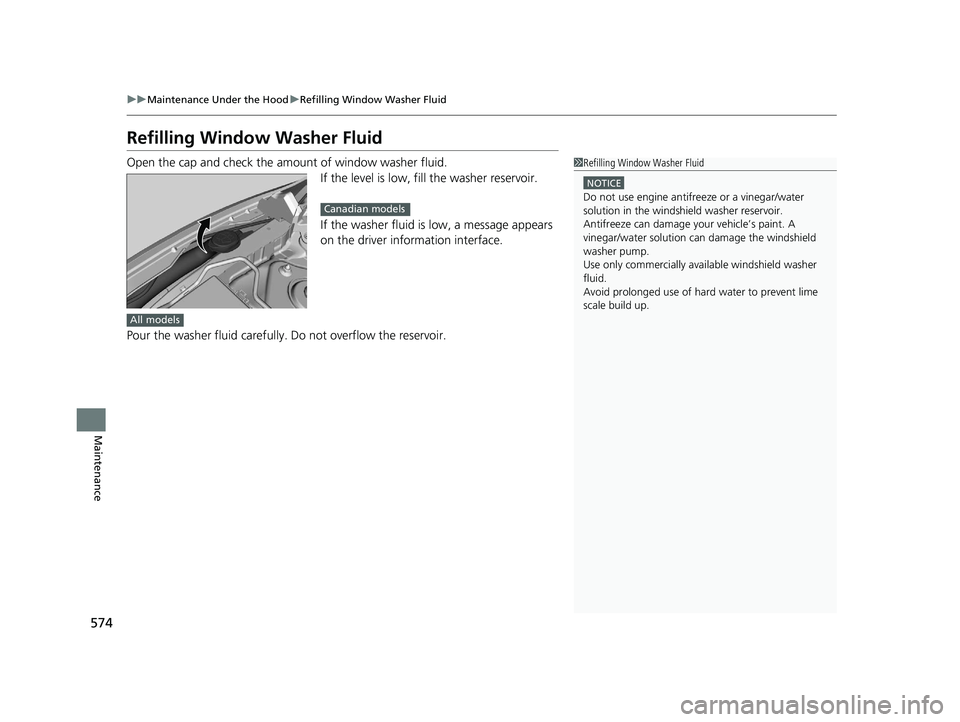
Open the cap and check the amount of window washer fluid.
If the level is low, fill the washer reservoir.
If the washer fluid is low, a message appears
on the driver information interface.
Pour the washer fluid carefully. Do not overflow the reservoir.1 Refilling Window Washer Fluid
NOTICE
Do not use engine antifreeze or a vinegar/water
solution in the windshield washer reservoir.
Antifreeze can damage y our vehicle’s paint. A
vinegar/water solution ca n damage the windshield
washer pump.
Use only commercially avai lable windshield washer
fluid.
Avoid prolonged use of hard water to prevent lime
scale build up.Canadian models
All models
19 INSIGHT HMIN-31TXM6000.book 574 ページ 2018年4月20日 金曜日 午後4時22分
Page 596 of 675
594
Maintenance
Climate Control System Maintenance
Air Conditioning
To ensure proper and safe operation, th e Society of Automotive Engineers (SAE
J2845) recommends that the refrigerant system only be serviced by trained and
certified technicians.
Never repair or replace the air conditioning evaporator (cooling coil) with one
removed from a used or salvaged vehicle.
New replacement mobile air conditioning evaporators must be certified (and
labeled) as meeting SAE Standard J2842.
Dust and Pollen Filter
The climate control system is equipped with a dust and pollen filter that collects
pollen, dust, and other debris in the air. The Maintenance MinderTM messages will let
you know when to replace the filter.
We recommend that you replace the dust a nd pollen filter sooner when using your
vehicle in areas with high concentrations of dust.
1 Air Conditioning
NOTICE
Vented refrigerant is harmful to the environment.
To avoid refrigerant from venting, never replace the
evaporator with one re moved from a used or
salvaged vehicle.
Refrigerant in your vehicle’s air conditioning system is
flammable and can be igni ted during servicing if
proper procedures are not followed.
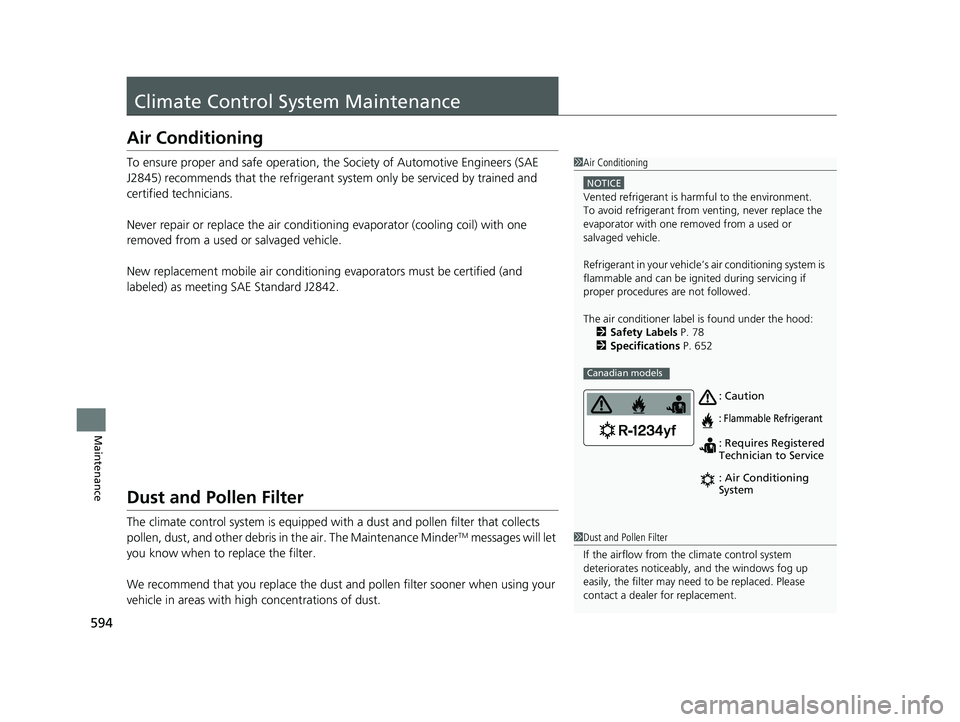
The air conditioner labe l is found under the hood:
2 Safety Labels P. 78
2 Specifications P. 652
Canadian models
: Caution
: Flammable Refrigerant
: Requires Registered
Technician to Service
: Air Conditioning
System
1Dust and Pollen Filter
If the airflow from the climate control system
deteriorates noticeably, and the windows fog up
easily, the filter may need to be replaced. Please
contact a dealer for replacement.
19 INSIGHT HMIN-31TXM6000.book 594 ページ 2018年4月20日 金曜日 午後4時22分
Page 599 of 675
597
uuCleaning uExterior Care
Continued
Maintenance
Exterior Care
Dust off the vehicle body afte r you drive. Regularly inspect your vehicle for scratches
on painted surfaces. A scratch on a painted surface can result in body rust. If you
find a scratch, promptly repair it.
Wash the vehicle regularly. Wash more fr equently when driving in the following
conditions:
• If driving on roads with road salt.
• If driving in coastal areas.
• If tar, soot, bird droppings, insects, or tree sap are stuck to painted surfaces.
• Make sure to follow the instructions indicated on the automated car wash.
• Fold in the door mirrors.
• For models equipped with automatic intermittent wipers, turn the wipers off.
• Keep sufficient distance between the cleaning nozzle and the vehicle body.
• Take particular care around the windows. Standing too close may cause water to
enter the vehicle interior.
• Do not spray high pressure water direct ly into the engine compartment. Instead,
use low pressure water and a mild detergent.
■Washing the Vehicle
■Using an Automated Car Wash
■Using High Pressure Cleaners
1 Washing the Vehicle
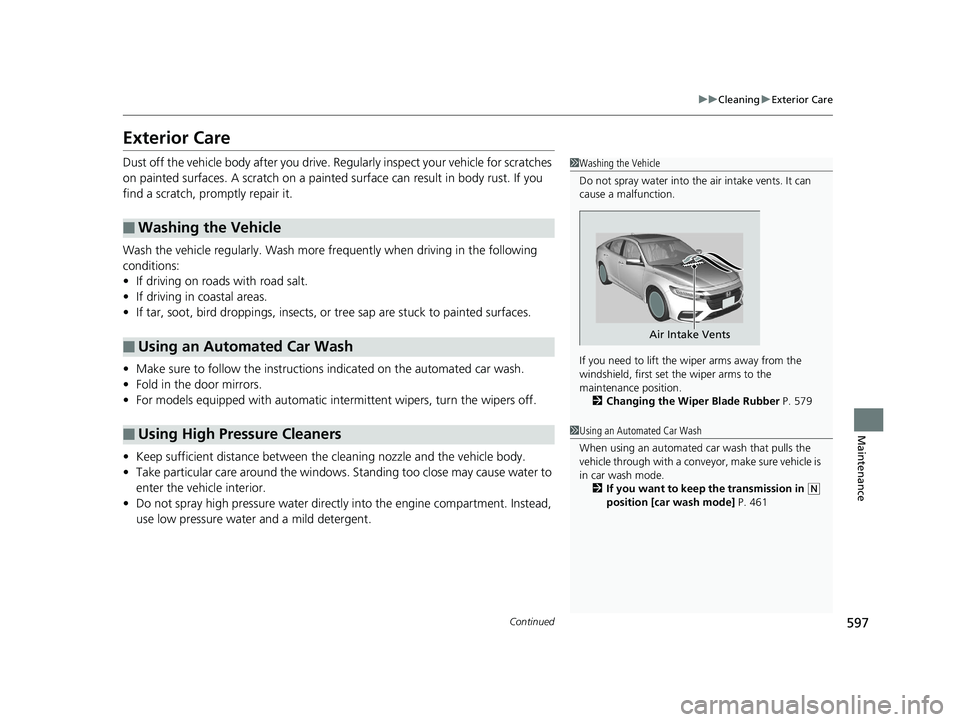
Do not spray water into the air intake vents. It can
cause a malfunction.
If you need to lift the wiper arms away from the
windshield, first set the wiper arms to the
maintenance position. 2 Changing the Wiper Blade Rubber P. 579
Air Intake Vents
1Using an Automated Car Wash
When using an automated car wash that pulls the
vehicle through with a convey or, make sure vehicle is
in car wash mode. 2 If you want to keep the transmission in
(N
position [car wash mode] P. 461
19 INSIGHT HMIN-31TXM6000.book 597 ページ 2018年4月20日 金曜日 午後4時22分
Page 600 of 675
uuCleaning uExterior Care
598
Maintenance
A good coat of automotive body wax helps protect your vehicle’s paint from the
elements. Wax will wear off over time and expose your vehicle’s paint to the
elements, so reapply as necessary.
If you get gasoline, oil, engine coolant, or battery fluid on resin coated parts, they
may be stained or the coating may peel. Prom ptly wipe it away using a soft cloth and
clean water.
Wipe using a glass cleaner.
Aluminum is susceptible to deterioration caused by salt and other road
contaminants. When necessary, as early as possible use a sponge and mild detergent
to wipe away these contaminants. Do no t use a stiff brush or harsh chemicals
(including some commercial wheel cleaners). These can damage the protective finish
on aluminum alloy wheels, resulting in corrosion. Depending on the type of finish,
the wheels also may lose their luster or appear burnished. To avoid water stains,
wipe the wheels dry with a cloth while they are still wet.
■Applying Wax
■Maintaining the Bumpers and Other Resin Coated Parts
■Cleaning the Window
■Maintaining Aluminum Wheels
1 Applying Wax
NOTICE
Chemical solvents and st rong cleaners can damage
the paint, metal, and plasti c on your vehicle. Wipe
away spills immediately.
1 Maintaining the Bumpers an d Other Resin Coated Parts
Ask a dealer about the corr ect coating material when
you want to repair the painted surface of the parts
made of resin.
19 INSIGHT HMIN-31TXM6000.book 598 ページ 2018年4月20日 金曜日 午後4時22分
Page 603 of 675
601
Maintenance
Accessories and Modifications
Accessories
When installing accessories, check the following:
• Do not install accessories on the windsh ield. They can obstruct your view and
delay your reaction to driving conditions.
• Do not install any accessories over areas marked SRS Airbag, on the sides or backs
of the front seats, on front or side pillars, or near the side windows.
Accessories installed in these areas may interfere with proper operation of the
vehicle’s airbags or may be propelled into you or another occupant if the airbags
deploy.
• Be sure electronic accessories do not overload electrical circuits or interfere with
proper operation of your vehicle.
2 Fuses P. 642
•Before installing any electro nic accessory, have the installer contact a dealer for
assistance. If possible, have a deal er inspect the final installation.
1Accessories and Modifications
Honda Genuine accessor ies are recommended to
ensure proper operati on on your vehicle.
3WARNING
Improper accessories or modifications can
affect your vehicle’s handling, stability, and
performance, and cause a crash in which
you can be seriously hurt or killed.
Follow all instruction s in this owner’s
manual regarding accessories and
modifications.
3WARNING
Use of improperly desi gned, engineered or
manufactured high-voltage battery
assemblies could cause a fire in your
vehicle.
A vehicle fire could result in a crash or
injury.
Only use a genuine Honda high-voltage
battery assembly, or its equivalent, in your
vehicle.
19 INSIGHT HMIN-31TXM6000.book 601 ページ 2018年4月20日 金曜日 午後4時22分
Page 604 of 675
602
uuAccessories and Modifications uModifications
Maintenance
Modifications
Do not modify your vehicle in a manner that may affect its handling, stability, or
reliability, or install non-genuine Honda parts or accessories that may have a similar
effect.
Even minor modifications to vehicle system s can affect overall vehicle performance.
Always make sure all equipment is prop erly installed and maintained, and do not
make any modification to your vehicle or its systems that might cause your vehicle
to no longer meet federal, state, province, territory, and local regulations.
The on-board diagnostic port (OBD-II/SAE J1962 connector) installed on this vehicle
is intended to be used with automobile system diagnostic devices or with other
devices that Honda has approved. Use of any other type of device may adversely
affect the vehicle’s electronic systems or allow them to be compromised, possibly
resulting in a system malfunction, draine d battery, or other unexpected problems.
Do not modify or attempt to repair your vehicle's high-voltage hybrid power system
or otherwise modify vehicle electrical systems. Disassemb ling or modifying electrical
equipment can result in a crash or a fire.
If you ever need to replace your vehicle’s high-voltage battery assembly outside of
warranty coverage, we highly recommend that you only use a genuine Honda
highvoltage battery assembly. Genuine Honda high-voltage battery assemblies are
designed to work with your vehicle’s hybr id power system and have been designed,
engineered and manufactured to avoid overcharging situations. Non-genuine high-
voltage battery assemblies may not have be en similarly designed, engineered and
manufactured, and installation of such assemb lies could result in overcharging, fires,
loss of power, or other conditions that may increase the likelihood of a crash or
injury.
19 INSIGHT HMIN-31TXM6000.book 602 ページ 2018年4月20日 金曜日 午後4時22分
Page 617 of 675
Continued615
uuIf a Tire Goes Flat uTemporarily Repairing a Flat Tire
Handling the Unexpected
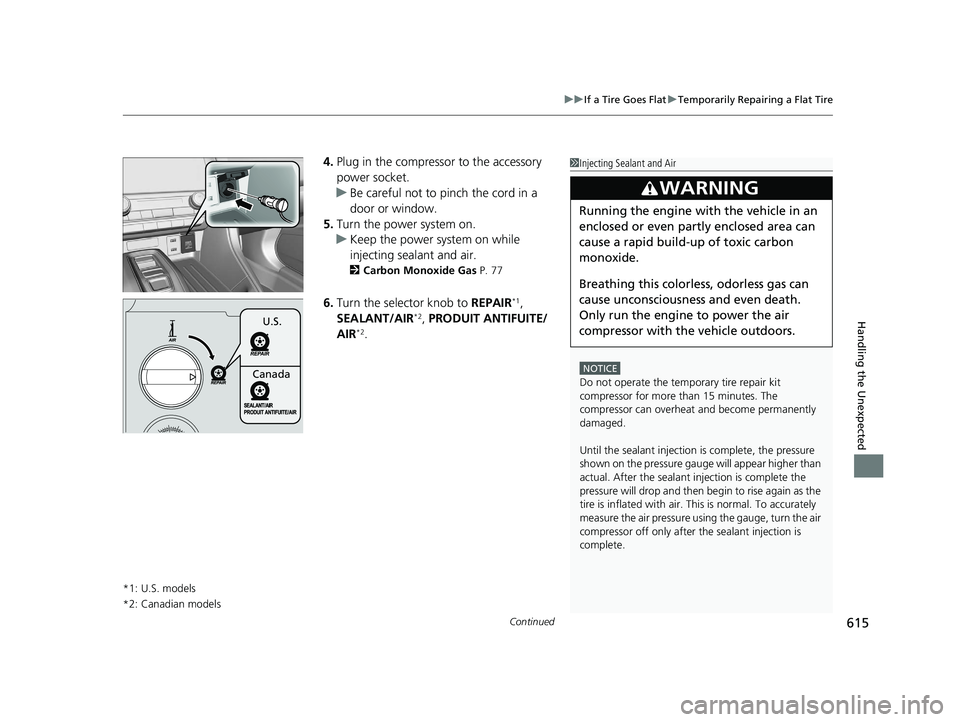
4. Plug in the compressor to the accessory
power socket.
u Be careful not to pinch the cord in a
door or window.
5. Turn the power system on.
u Keep the power system on while
injecting sealant and air.
2 Carbon Monoxide Gas P. 77
6.Turn the selector knob to REPAIR*1,
SEALANT/AIR*2, PRODUIT ANTIFUITE/
AIR*2.
*1: U.S. models
*2: Canadian models
1 Injecting Sealant and Air
NOTICE
Do not operate the temporary tire repair kit
compressor for more than 15 minutes. The
compressor can overheat and become permanently
damaged.
Until the sealant injection is complete, the pressure
shown on the pressure gauge will appear higher than
actual. After the sealant injection is complete the
pressure will drop and then begin to rise again as the
tire is inflated with air. This is normal. To accurately
measure the air pressure usi ng the gauge, turn the air
compressor off only after the sealant injection is
complete.
3WARNING
Running the engine with the vehicle in an
enclosed or even partly enclosed area can
cause a rapid build-up of toxic carbon
monoxide.
Breathing this colorless, odorless gas can
cause unconsciousness and even death.
Only run the engine to power the air
compressor with th e vehicle outdoors.
U.S.
Canada
19 INSIGHT HMIN-31TXM6000.book 615 ページ 2018年4月20日 金曜日 午後4時22分