door lock HONDA ODYSSEY 1996 User Guide
[x] Cancel search | Manufacturer: HONDA, Model Year: 1996, Model line: ODYSSEY, Model: HONDA ODYSSEY 1996Pages: 240, PDF Size: 2.64 MB
Page 41 of 240
Controls Near the Steering Wheel
Headlights
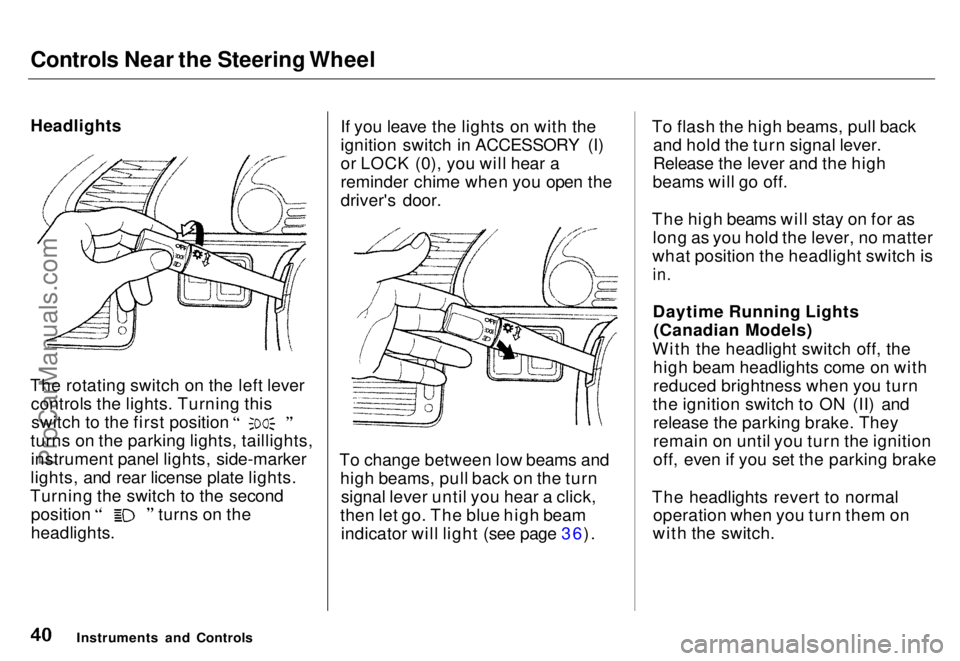
The rotating switch on the left lever controls the lights. Turning this switch to the first position
turns on the parking lights, taillights, instrument panel lights, side-marker
lights, and rear license plate lights.
Turning the switch to the second position turns on the
headlights. If you leave the lights on with the
ignition switch in ACCESSORY (I)
or LOCK (0), you will hear a
reminder chime when you open the
driver's door.
To change between low beams and high beams, pull back on the turnsignal lever until you hear a click,
then let go. The blue high beam indicator will light (see page 36). To flash the high beams, pull back
and hold the turn signal lever.
Release the lever and the high
beams will go off.
The high beams will stay on for as long as you hold the lever, no matter
what position the headlight switch is
in.
Daytime Running Lights (Canadian Models)
With the headlight switch off, the high beam headlights come on with
reduced brightness when you turn
the ignition switch to ON (II) and release the parking brake. They
remain on until you turn the ignition
off, even if you set the parking brake
The headlights revert to normal operation when you turn them on
with the switch.
Instruments and ControlsProCarManuals.comMain Menu s t Table of Contents
Page 50 of 240
Keys and Locks
Keys
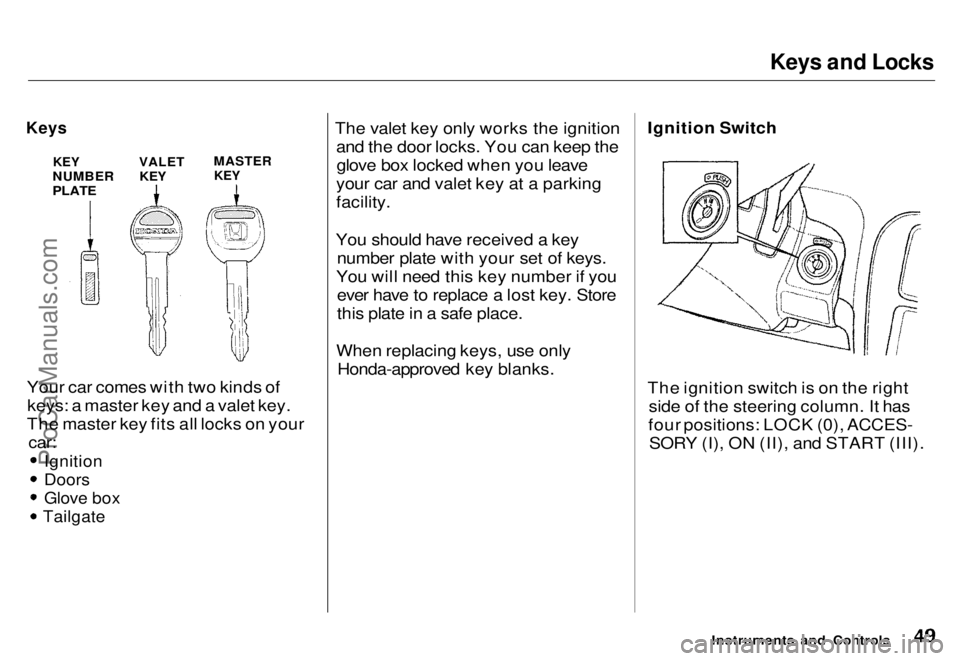
Your car comes with two kinds ofkeys: a master key and a valet key.
The master key fits all locks on your
car:
Ignition
Doors
Glove box
Tailgate
The valet key only works the ignition
and the door locks. You can keep theglove box locked when you leave
your car and valet key at a parking
facility.
You should have received a key number plate with your set of keys.
You will need this key number if you ever have to replace a lost key. Store
this plate in a safe place.
When replacing keys, use only Honda-approved key blanks.
Ignition Switch
The ignition switch is on the right
side of the steering column. It has
four positions: LOCK (0), ACCES- SORY (I), ON (II), and START (III).
Instruments and Controls
KEY
NUMBER
PLATE
VALET
KEY
MASTER
KEYProCarManuals.comMain Menu s t Table of Contents
Page 51 of 240
Keys and Locks
LOCK (0) — You can insert or
remove the key only in this position.
When you turn the key from LOCK to ACCESSORY, you may have to
turn the steering wheel to release the anti-theft lock. To switch from
ACCESSORY to LOCK, you must push the key in slightly as you turn it.
The shift lever must also be in Park. The anti-theft lock will lock the steering column when you remove
the key.
ACCESSORY (I) — In this position, you can operate the audio systemand cigarette lighter.
ON (II) — This is the normal key
position when driving. All features and accessories on the car are usable.
Several of the lights on the instru-
ment panel come on as a test when
you turn the ignition switch from
ACCESSORY to ON (see page 35 ). START (III) — Use this position
only to start the engine. The switch
returns to ON when you let go of the
key.
You will hear a reminder beeper if
you open the driver's door with the key in the LOCK or ACCESSORYposition. Remove the key to turn itoff. Power Door Locks
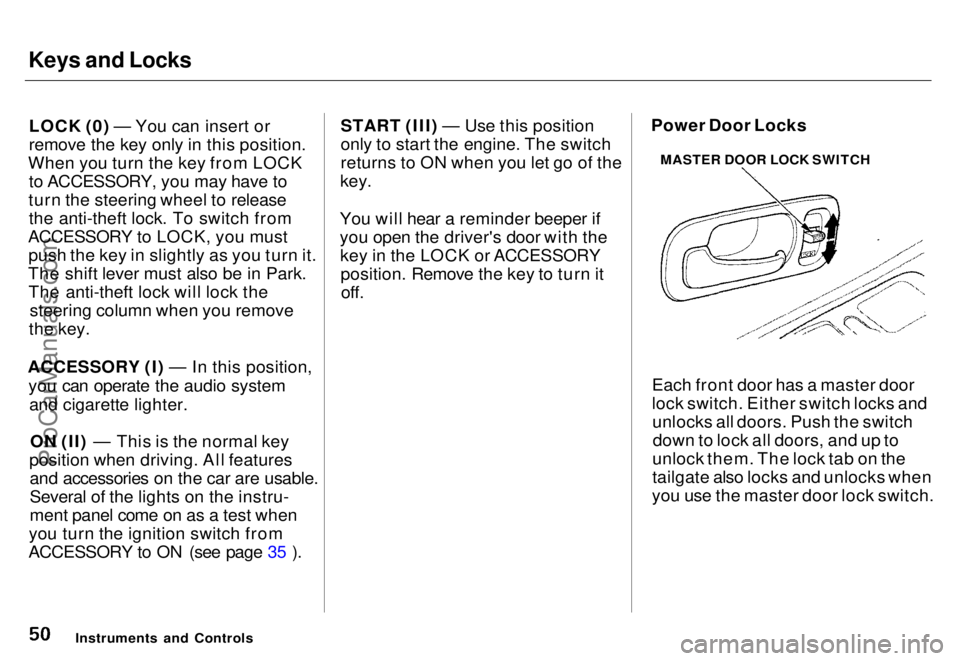
Each front door has a master door
lock switch. Either switch locks andunlocks all doors. Push the switchdown to lock all doors, and up to
unlock them. The lock tab on the
tailgate also locks and unlocks when
you use the master door lock switch.
Instruments and Controls MASTER DOOR LOCK SWITCHProCarManuals.comMain Menu s t Table of Contents
Page 52 of 240
Keys and Locks
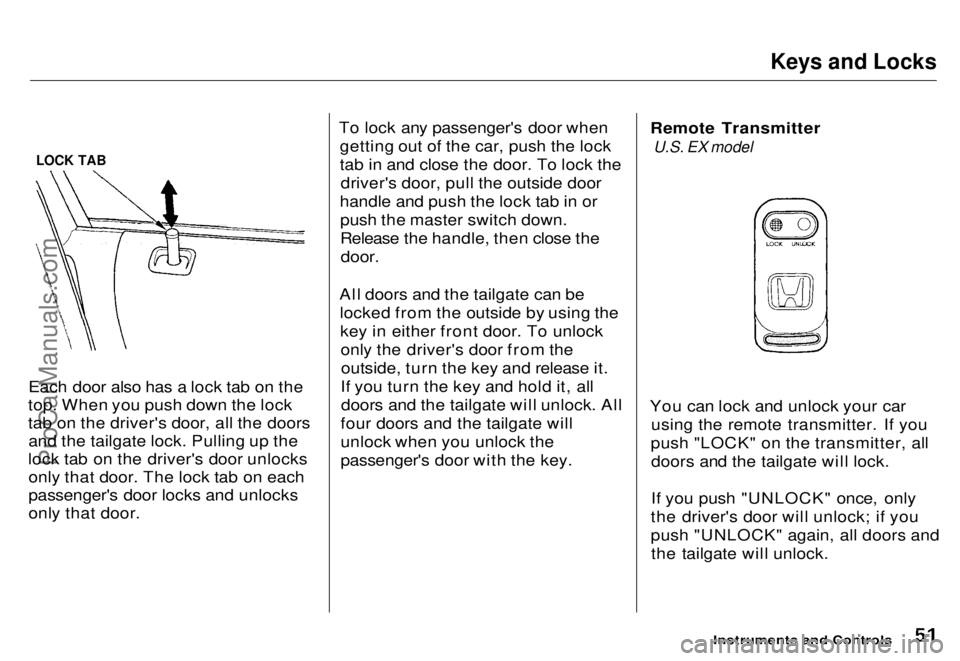
LOCK TAB
Each door also has a lock tab on the
top. When you push down the lock
tab on the driver's door, all the doors and the tailgate lock. Pulling up the
lock tab on the driver's door unlocks only that door. The lock tab on each
passenger's door locks and unlocks
only that door. To lock any passenger's door when
getting out of the car, push the lock
tab in and close the door. To lock thedriver's door, pull the outside door
handle and push the lock tab in or push the master switch down.
Release the handle, then close the
door.
All doors and the tailgate can be locked from the outside by using thekey in either front door. To unlockonly the driver's door from theoutside, turn the key and release it.
If you turn the key and hold it, all doors and the tailgate will unlock. All
four doors and the tailgate will
unlock when you unlock the
passenger's door with the key. Remote Transmitter
U.S. EX model
You can lock and unlock your car using the remote transmitter. If you
push "LOCK" on the transmitter, all doors and the tailgate will lock.
If you push "UNLOCK" once, only
the driver's door will unlock; if you
push "UNLOCK" again, all doors and the tailgate will unlock.
Instruments and ControlsProCarManuals.comMain Menu s t Table of Contents
Page 53 of 240
Keys and Locks
If you use the unlock feature on the
remote transmitter, and a door or the
tailgate is not opened within 20 seconds, all doors and the tailgate
will automatically lock. The remote transmitter will not work if the key isin the ignition.
This device complies with Part 15 of the
FCC rules. Operation is subject to the
following two conditions: (1) This device
may not cause harmful interference, and
(2) this device must accept any
interference received, including
interference that may cause undesired
operation.
Changes or modifications not expressly
approved by the party responsible for
compliance should void the user's
authority to operate the equipment.
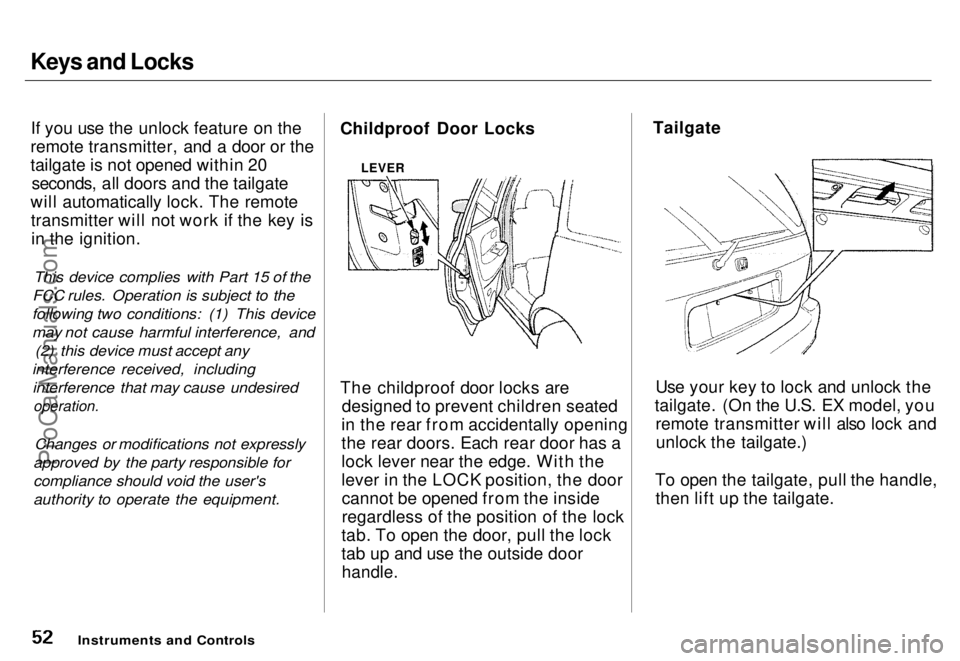
Childproof Door Locks
The childproof door locks are
designed to prevent children seated
in the rear from accidentally opening
the rear doors. Each rear door has a
lock lever near the edge. With the
lever in the LOCK position, the door cannot be opened from the inside
regardless of the position of the lock
tab. To open the door, pull the lock
tab up and use the outside door
handle.
Tailgate
Use your key to lock and unlock the
tailgate. (On the U.S. EX model, you remote transmitter will also lock andunlock the tailgate.)
To open the tailgate, pull the handle, then lift up the tailgate.
Instruments and Controls
LEVERProCarManuals.comMain Menu s t Table of Contents
Page 118 of 240
Preparing to Drive
You should do the following checks
and adjustments every day before
you drive your car.
1. Make sure all windows, mirrors, and outside
lights are clean and
unobstructed. Remove frost, snow,
or ice.
2. Check that the hood and tailgate are fully closed.
3. Visually check the tires. If a tire looks low, use a gauge to check its
pressure.
4. Check that any items you may be carrying with you inside are stored
properly or fastened down
securely. 5. Check the adjustment of the seat
(see page 54).
6. Check the adjustment of the inside and outside mirrors (see
page 64).
7. Check the adjustment of the steering wheel (see page 44).
8. Make sure the doors are securely closed and locked.
9. Fasten your seat belt. Check that your passengers have fastened
their seat belts (see page 7 ). 10.Turn the ignition ON (II). Check
the indicator lights in the instru-
ment panel.
11. Start the engine (see page 119 ).
12. Check the gauges and indicator lights in the instrument panel (see
page 33 ).
DrivingProCarManuals.comMain Menu s t Table of Contents
Page 181 of 240
Storing Your Car
If you need to park your car for an
extended period (more than 1
month), there are several things you should do to prepare it for storage.
Proper preparation helps prevent
deterioration and makes it easier to
get your car back on the road. It is
best to store your car indoors if at all
possible.
Fill the fuel tank.
Change the engine oil and filter
(see page 148). Wash and dry the exterior
completely.
Clean the interior. Make sure the
carpeting, floor mats, etc. are
completely dry.
Leave the parking brake off. Put
the transmission in Park. Block the rear wheels.
If the car is to be stored for a
longer period, it should be supported on jackstands so the
tires are off the ground.
Leave one window open slightly (if
the car is being stored indoors).
Disconnect the battery.Support the front and rear wiper
blade arms with a folded towel or
rag so they do not touch the
windshield. Apply a silicone spray lubricant to
all door and tailgate seals. Also,
apply wax to the painted surfaces
that mate with the door and
tailgate seals. Cover the car with a "breathable"
car cover, one made from a porous
material such as cotton.
Nonporous materials, such as
plastic sheeting, trap moisture
which can damage the paint. If possible, run the engine for a
while periodically (preferably once
a month).
If you store your car for 12 months or longer, have your Honda dealer
perform the inspections called for in
the 24 months/48,000 km (30,000 miles) maintenance schedule (Normal Conditions) as soon as you
take it out of storage (see page 140 )
The replacements called for in the maintenance schedule are not
needed unless the car has actually
reached that time or mileage.
MaintenanceProCarManuals.comMain Menu s t Table of Contents
Page 232 of 240
Index
Accessories
Installation.................................. 115
ACCESSORY (Ignition Key
Position)........................................ 50
Adding Automatic Transmission
Fluid........................................ 155
Brake Fluid................................. 156
Engine Coolant........................... 151
Engine Oil................................... 146
Power Steering Fluid................. 157
Windshield Washer Fluid......... 154
Additional Safety Information........ 18
Door Locks................................... 19Driving with Pets......................... 19
Head Restraint Position.............. 18
Seat-back Position........................ 18
Storing Cargo Safely................... 19
Additives, Engine Oil..................... 148
Adjustments
Mirrors.......................................... 64
Head Restraints........................... 56
Seats.............................................. 54
Steering Wheel............................ 44
Airbag (SRS).................................... 12
Air Cleaner..................................... 158
Air Conditioning............................... 74
Maintenance............................... 168
Usage............................................. 74
Air Outlets (Vents).......................... 76
Air Pressure, Tires........................ 170
Alcohol and Drugs........................... 28
Alcohol in Gasoline........................ 108
Antifreeze....................................... 150
Anti-lock Brakes (ABS)
Description................................. 220
Indicator Light..................... 35, 125
Operation.................................... 125
Anti-theft Steering Column Lock.. 49
Appearance Care........................... 183
Ashtray.............................................. 69
Audio System................................... 83
Automatic Speed Control................ 48
Automatic Transmission............... 120
Capacity, Fluid........................... 218
Checking Fluid Level................ 155
Shifting........................................ 120
Shift Lever Positions................. 120
Shift Lock Release..................... 123 Battery
Charging System Light............... 34
Jump Starting............................. 200 Maintenance............................... 162
Specifications............................. 219
Before Driving............................... 107
Belts, Seat........................................... 5
Beverage Holder.............................. 66
Body Repair.................................... 189
Brakes Anti-lock System (ABS)............ 125Break-in, New Linings .............. 108
Fluid............................................ 156
Light, Burned-out...................... 179
Parking.......................................... 65
System Indicator.......................... 34
Wear Indicators......................... 124
Brakes, ABS Description................................. 220Operation.................................... 125
System Indicator.................. 35, 125
Braking System.............................. 124
CONTINUEDProCarManuals.comMain Menu s t
Page 233 of 240
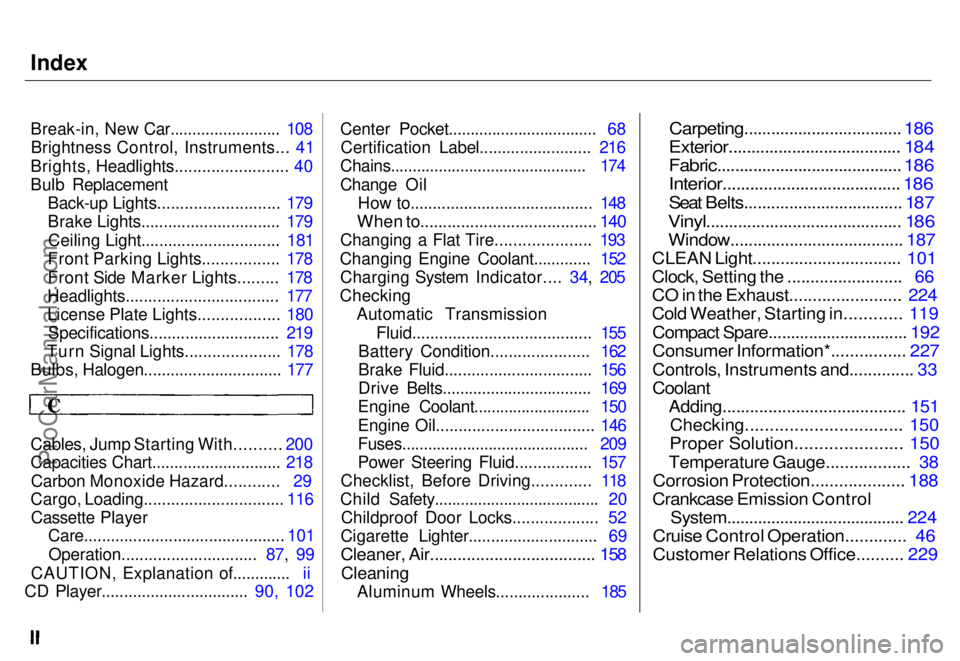
Index
Break-in, New Car......................... 108
Brightness Control, Instruments... 41
Brights, Headlights......................... 40
Bulb Replacement Back-up Lights........................... 179
Brake Lights............................... 179
Ceiling Light............................... 181
Front Parking Lights................. 178
Front Side Marker Lights......... 178
Headlights.................................. 177
License Plate Lights.................. 180 Specifications............................. 219
Turn Signal Lights..................... 178
Bulbs, Halogen............................... 177
Cables, Jump Starting With.......... 200
Capacities Chart............................. 218
Carbon Monoxide Hazard............ 29
Cargo, Loading............................... 116
Cassette Player Care............................................. 101
Operation.............................. 87, 99
CAUTION, Explanation of............. ii
CD Player................................. 90, 102 Center Pocket.................................. 68
Certification Label......................... 216
Chains............................................. 174
Change Oil How to......................................... 148
When to....................................... 140
Changing a Flat Tire..................... 193
Changing Engine Coolant............. 152 Charging System Indicator.... 34, 205
Checking Automatic Transmission
Fluid........................................ 155
Battery Condition...................... 162
Brake Fluid................................. 156
Drive Belts.................................. 169
Engine Coolant........................... 150
Engine Oil................................... 146
Fuses........................................... 209
Power Steering Fluid................. 157
Checklist, Before Driving............. 118
Child Safety...................................... 20 Childproof Door Locks................... 52
Cigarette Lighter............................. 69
Cleaner, Air.................................... 158
Cleaning
Aluminum Wheels..................... 185
Carpeting................................... 186
Exterior...................................... 184
Fabric......................................... 186
Interior....................................... 186
Seat Belts................................... 187
Vinyl........................................... 186
Window...................................... 187
CLEAN Light................................ 101
Clock, Setting the .........................
66
CO in the Exhaust........................
224
Cold Weather, Starting in............ 119
Compact Spare............................... 192
Consumer Information*................ 227
Controls, Instruments and.............. 33
Coolant
Adding........................................
151
Checking................................ 150
Proper Solution......................
150
Temperature Gauge.................. 38
Corrosion Protection.................... 188
Crankcase Emission Control
System........................................ 224
Cruise Control Operation............. 46
Customer Relations Office.......... 229ProCarManuals.comMain Menu s t
Page 234 of 240
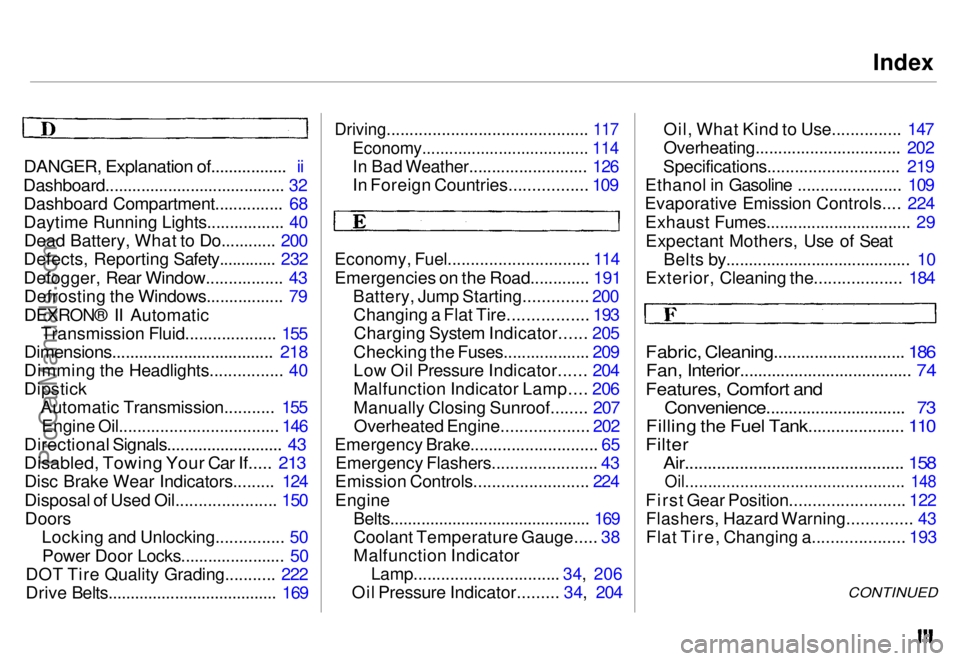
Index
DANGER, Explanation of................. ii
Dashboard........................................ 32 Dashboard Compartment............... 68
Daytime Running Lights................. 40Dead Battery, What to Do............ 200
Defects, Reporting Safety............. 232
Defogger, Rear Window................. 43 Defrosting the Windows................. 79
DEXRON® II Automatic Transmission Fluid.................... 155
Dimensions.................................... 218
Dimming the Headlights................ 40
Dipstick Automatic Transmission........... 155
Engine Oil................................... 146
Directional Signals.......................... 43
Disabled, Towing Your Car If..... 213
Disc Brake Wear Indicators......... 124
Disposal of Used Oil...................... 150Doors Locking and Unlocking............... 50
Power Door Locks....................... 50
DOT Tire Quality Grading........... 222
Drive Belts...................................... 169
Driving............................................ 117
Economy..................................... 114
In Bad Weather.......................... 126
In Foreign Countries................. 109
Economy, Fuel............................... 114
Emergencies on the Road............. 191
Battery, Jump Starting.............. 200
Changing a Flat Tire................. 193
Charging System Indicator...... 205
Checking the Fuses................... 209
Low Oil Pressure Indicator...... 204
Malfunction Indicator Lamp.... 206
Manually Closing Sunroof........ 207
Overheated Engine................... 202
Emergency Brake............................ 65
Emergency Flashers....................... 43
Emission Controls......................... 224
Engine
Belts............................................. 169
Coolant Temperature Gauge..... 38
Malfunction Indicator
Lamp................................ 34,
206
Oil Pressur e
Indicator......... 34, 204Oil, What Kind to Use............... 147
Overheating................................ 202
Specifications............................. 219
Ethanol in Gasoline ....................... 109
Evaporative Emission Controls.... 224
Exhaust Fumes................................ 29Expectant Mothers, Use of Seat Belts by......................................... 10
Exterior, Cleaning the................... 184
Fabric, Cleaning............................. 186
Fan, Interior...................................... 74
Features, Comfort and
Convenience............................... 73
Filling the Fuel Tank..................... 110
Filter
Air................................................ 158
Oil................................................ 148
First Gear Position......................... 122
Flashers, Hazard Warning.............. 43
Flat Tire, Changing a.................... 193
CONTINUEDProCarManuals.comMain Menu s t