service indicator HONDA ODYSSEY 1998 Owners Manual
[x] Cancel search | Manufacturer: HONDA, Model Year: 1998, Model line: ODYSSEY, Model: HONDA ODYSSEY 1998Pages: 272, PDF Size: 2.67 MB
Page 1 of 272

1998 Odyssey Online Reference Owner's Manual
Use these links (and links throughout this manual) to navigate through\
this reference.
For a printed owner's manual, click on authorized manuals or go to www.h\
elminc.com.
Contents
Owner's Identification Form
Introduction ........................................................................\
............................................................... i
A Few Words About Safety........................................................................\
....................................... ii
Driver and Passenger Safety ........................................................................\
.................................... 3
Proper use and care of your vehicle's seat belts, and Supplemental Restr\
aint System.
Instruments and Control s........................................................................\
........................................ 49
Instrument panel indicator and gauge, and how to use dashboard and steering colu\
mn controls.
Comfort and Convenience Features ........................................................................\
...................... 93
How to operate the climate control system, the audio system, and other c\
onvenience features.
Before Driving........................................................................\
..........................................................127
What gasoline to use, how to break -in your new vehicle, and how to load luggage and other cargo.
Driving ........................................................................\
......................................................................139
The proper way to start the engine, shift the transmission, and park, pl\
us towing a trailer.
Maintenance........................................................................\
.............................................................159
The Maintenance Schedule shows you when you need to take you r vehicle to the dealer.
Appearance Car e........................................................................\
..................................................... .213
Tips on cleaning and protecting your vehicle. Things to look for if your\
vehicle ever needs body repairs.
Taking Care of the Unexpecte d........................................................................\
..............................221
This section covers several problems motorists sometimes experience, an d how to handle them.
Technical Informatio n........................................................................\
.............................................245
ID numbers, dimensions, capacities, and technical information.
Warranty and Customer Relations (U.S. and Canada)................................................................259
A summary of the warranties covering your new Acura, and how to contact \
us.
Authorized Manu als (U.S. only)........................................................................\
..............................265
How to order manuals and other technical literature.
Index........................................................................\
.............................................................................. I
Service Information Summary
A summary of information you need when you pull up to the fuel pump.
ProCarManuals.com
Page 4 of 272
Driver and Passenger Safety
This section gives you important information about how to protect
yourself and your passengers. It
shows you how to use seat belts
properly. It explains your Supple-
mental Restraint System. And it tells
you how to properly restrain infants
and children in your vehicle.
Important Safety Precautions .......... 4
Your Vehicle's Safety Features........ 5
Seat Belts........................................ 6
Airbags............................................ 7
Seats & Seat-Backs........................ 8
Head Restraints............................. 8
Door Locks..................................... 9
Pre-Drive Safety Checklist........... 9
Protecting Adults............................. 10 1. Close and Lock the Doors...... 10
2. Adjust the Front Seats............ 10
3. Adjust the Seat-Backs............. 11
4. Adjust the Head Restraints.... 12
5. Fasten and Position the Seat
Belts...................................... 13
6. Adjust the Steering Wheel..... 16
7. Maintain a Proper Sitting
Position................................. 16
Advice for Pregnant Women...... 17
Additional Safety Precautions.... 17
Protecting Children......................... 19
All Children Must Be Restrained................................ 19
Children Should Sit in the Back
Seat............................................ 20
The Passenger's Airbag Poses Serious Risks to Children....... 20
If You Must Drive with Several Children.................................... 21 If a Child Requires Close
Attention................................... 22
Additional Safety Precautions.... 22
General Guidelines for Using
Child Seats................................ 23
Protecting Infants........................ 27
Protecting Small Children.......... 31
Protecting Larger Children........ 35 Using Child Seats with Tethers...................................... 38
Additional Information About Your Seat Belts.................................. 41
Seat Belt System Components... 41
Lap/Shoulder Belt....................... 41
Lap Belt......................................... 42
Seat Belt Maintenance................ 42
Additional Information About Your
SRS........................................... 44
SRS Components......................... 44
How Your Airbags Work............ 44
How Your SRS Indicator Light
Works........................................ 45
SRS Service................................... 46
Additional Safety Precautions.... 46
Carbon Monoxide Hazard.............. 47
Safety Labels.................................... 48
Driver and Passenger SafetyProCarManuals.comMain Menu s t
Page 47 of 272
Additional Information About Your SRS
If the light comes on or flashes on
and off while you drive.
If you see any of these indications,
your airbags may not deploy when
you need them. See your Honda dealer as soon as possible. SRS Service
Your Supplemental Restraint System is virtually maintenance-free, and
there are no parts you can safely service. However, you must have
your vehicle serviced if:
Your airbags ever inflate. The
airbags and the control unit must
be replaced. Do not try to remove or replace the airbags yourself.
This must be done by a Honda dealer or a knowledgeable body
shop.
The SRS indicator light alerts you
to a problem. Take your vehicle to
an authorized Honda dealer as
soon as possible. If you ignore this
indication, the airbags might not
inflate when you need them. Additional Safety Precautions Do not attempt to deactivate your
airbags. Together, airbags and
seat belts provide the best
protection in a severe frontal collision. Do not tamper with SRS
components or wiring for any
reason. Tampering could cause
the airbags to deploy, possibly causing very serious injury.
See page 115 for further information
and precautions relating to your SRS.
Driver and Passenger Safety
Ignoring the SRS indicator light
can result in serious injury or
death if the airbags do not inflate when needed.
Have your vehicle checked by a
dealer as soon as possible if
the SRS light alerts you to a potential problem.ProCarManuals.comMain Menu Table of Contents s t
Page 128 of 272

Break-in Period, Gasoline
Break-in Period
Help assure your vehicle's future
reliability and performance by paying extra attention to how you drive
during the first 600 miles (1,000 km).
During this period:
Avoid full-throttle starts and rapid
acceleration.
Avoid hard braking. New brakes
need to be broken-in by moderate
use for the first 200 miles (300
km).
You should follow these same re- commendations with an overhauled
or exchanged engine, or when the
brakes are relined.
Gasoline
Your Honda is designed to operate on unleaded gasoline with a pump
octane number of 86 or higher. Use
of a lower octane gasoline can cause
a persistent, heavy metallic rapping
noise in the engine that can lead to
mechanical damage.
We recommend gasolines containing detergent additives that help prevent
fuel system and engine deposits.
Using gasoline containing lead will
damage your vehicle's emissions
controls. This contributes to air
pollution. In Canada, some gasolines contain
an octane-enhancing additive called
MMT. If you use such gasolines,
your emission control system performance may deteriorate and
the Malfunction Indicator Lamp on
your instrument panel may turn on. If this happens, contact your
authorized Honda dealer for service.
Before DrivingProCarManuals.comMain Menu Table of Contents s t
Page 129 of 272
Service Station Procedures
Filling the Fuel Tank
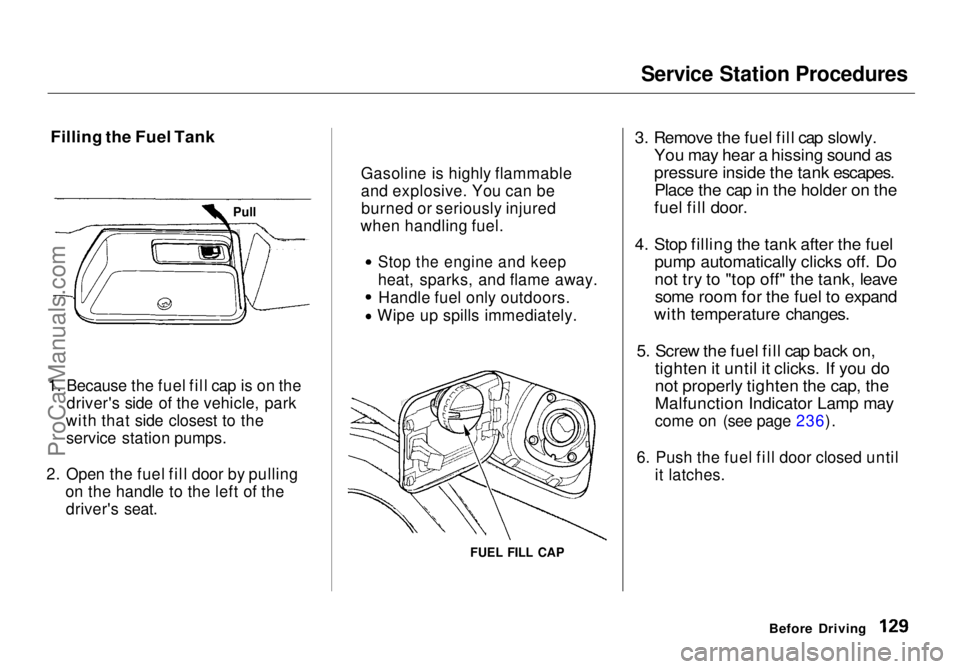
1. Because the fuel fill cap is on the driver's side of the vehicle, park
with that side closest to the service station pumps.
2. Open the fuel fill door by pulling on the handle to the left of thedriver's seat.
FUEL FILL CAP
3. Remove the fuel fill cap slowly.
You may hear a hissing sound as
pressure inside the tank escapes.Place the cap in the holder on the
fuel fill door.
4. Stop filling the tank after the fuel pump automatically clicks off. Do
not try to "top off" the tank, leavesome room for the fuel to expand
with temperature changes.
5. Screw the fuel fill cap back on, tighten it until it clicks. If you do
not properly tighten the cap, the
Malfunction Indicator Lamp may
come on (see page 236).
6. Push the fuel fill door closed until it latches.
Before Driving
Gasoline is highly flammable
and explosive. You can be
burned or seriously injured
when handling fuel.
Stop the engine and keep
heat, sparks, and flame away.
Handle fuel only outdoors.
Wipe up spills immediately.
PullProCarManuals.comMain Menu Table of Contents s t
Page 232 of 272
Charging System Indicator
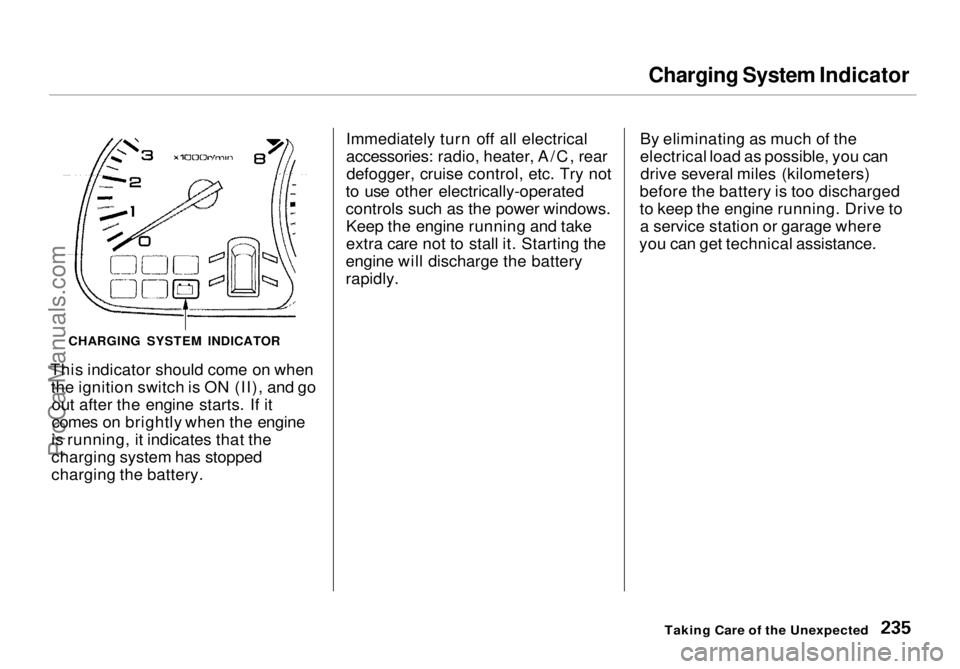
This indicator should come on when the ignition switch is ON (II), and goout after the engine starts. If it
comes on brightly when the engine
is running, it indicates that the
charging system has stopped
charging the battery. Immediately turn off all electrical
accessories: radio, heater, A/C, rear
defogger, cruise control, etc. Try not
to use other electrically-operated
controls such as the power windows. Keep the engine running and take
extra care not to stall it. Starting the
engine will discharge the battery
rapidly. By eliminating as much of the
electrical load as possible, you can
drive several miles (kilometers)
before the battery is too discharged
to keep the engine running. Drive to a service station or garage where
you can get technical assistance.
Taking Care of the Unexpected
CHARGING SYSTEM INDICATORProCarManuals.comMain Menu Table of Contents s t
Page 234 of 272
Brake System Indicator
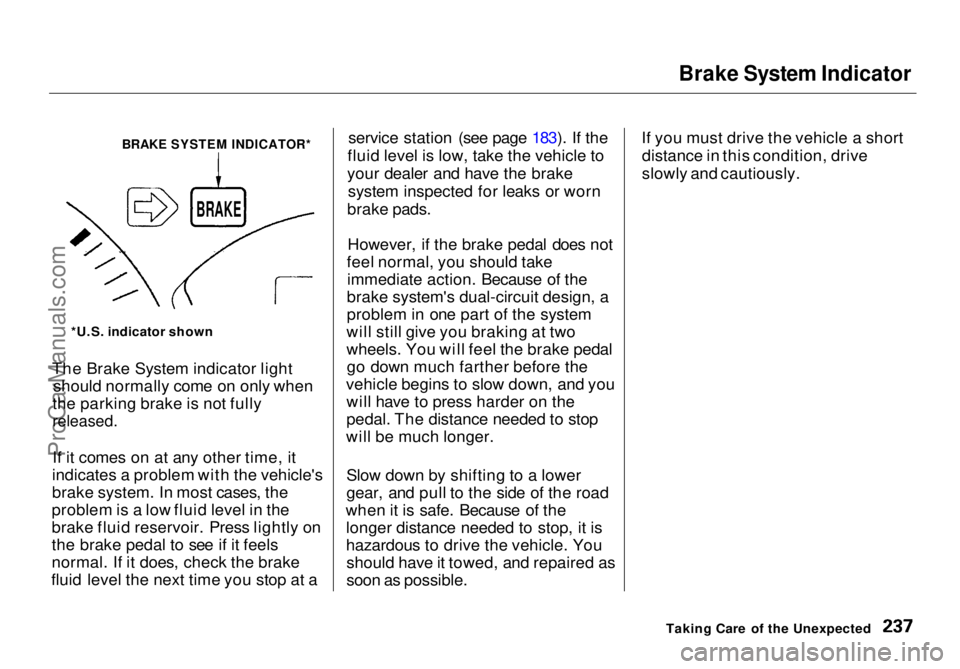
The Brake System indicator light should normally come on only when
the parking brake is not fully
released.
If it comes on at any other time, it
indicates a problem with the vehicle's
brake system. In most cases, the
problem is a low fluid level in the
brake fluid reservoir. Press lightly on
the brake pedal to see if it feels
normal. If it does, check the brake
fluid level the next time you stop at a service station (see page 183). If the
fluid level is low, take the vehicle to
your dealer and have the brake system inspected for leaks or worn
brake pads.
However, if the brake pedal does not
feel normal, you should take immediate action. Because of the
brake system's dual-circuit design, a
problem in one part of the system
will still give you braking at two
wheels. You will feel the brake pedal go down much farther before the
vehicle begins to slow down, and you will have to press harder on the
pedal. The distance needed to stop
will be much longer.
Slow down by shifting to a lower
gear, and pull to the side of the road
when it is safe. Because of the longer distance needed to stop, it is
hazardous to drive the vehicle. Youshould have it towed, and repaired as
soon as possible. If you must drive the vehicle a short
distance in this condition, drive
slowly and cautiously.
Taking Care of the Unexpected
BRAKE SYSTEM INDICATOR*
*U.S. indicator shown
BRAKEProCarManuals.comMain Menu Table of Contents s t
Page 269 of 272
Index
Safety Belts......................................... 6
Safety Defects, Reporting* .......... 264
Safety Features.................................. 5
Air bags........................................... 7Door Locks..................................... 9
Head Restraints............................. 8
Seat Belts........................................ 6
Seats & Seat-Backs........................ 8
Safety Labels, Location of.............. 48
Safety Messages................................ ii
Seat Belt, Additional Information ..41 Lap Belt......................................... 42
Lap/Shoulder Belt....................... 41
Seat Belt Maintenance................ 42
Seat Belt System Components... 41
Seat Belts............................................ 6
Cleaning...................................... 217
Maintenance................................. 42
Reminder Light and Beeper....... 52
System Components.................... 41
Tether Attachment Points.......... 38 Use During Pregnancy................ 17
Seats.................................................. 74
Adjustments................................. 74
Driver's Seat Power
Height Adjustment.................. 75
Folding the Second Seats........... 78
Folding the Third Seats.............. 80
Head Restraints........................... 76
Passenger Seating....................... 74
Reclining the Second Seat.......... 79 Removing the Second Seats....... 78
Third Seat Access........................ 77
Serial Number................................ 246
Service Intervals*.......................... 164
Service Manual.............................. 265 Service Station Procedures .......... 129
Setting the Clock............................. 86
Shifting the Automatic Transmission.............................. 142
Shift Lever Position Indicator...... 142
Shift Lever Positions..................... 142
Side Marker Lights, Bulb
Replacement in.......................... 207
Signaling Turns................................ 59
Snow Tires...................................... 201
Solvent-type Cleaners.................... 214
Sound System................................. 103
Spare Tire
Inflating....................................... 222
Specifications............................. 249
Spark Plugs, Replacing................. 187
Specifications Charts..................... 248
Speed Control................................... 64
Speedometer.................................... 55
SRS, Additional Information........... 42
Additional Safety Precautions.... 46How Your Airbags Work............ 44
How Your SRS Indicator
Works........................................ 46
SRS Components......................... 44
SRS Service................................... 46
SRS Indicator.............................. 46, 52
START (Ignition Key Position)..... 70
Starting the Engine........................ 141 In Cold Weather at High
Altitude................................... 141
With a Dead Battery................. 230
Steam Coming from Engine......... 232
Steering Wheel
Adjustment................................... 62
Anti-theft Column Lock.............. 70
Stereo Sound System.................... 103
CONTINUEDProCarManuals.comMain Menu s t