cruise control HONDA ODYSSEY 2000 RA6-RA9 / 2.G Owners Manual
[x] Cancel search | Manufacturer: HONDA, Model Year: 2000, Model line: ODYSSEY, Model: HONDA ODYSSEY 2000 RA6-RA9 / 2.GPages: 352, PDF Size: 4.43 MB
Page 58 of 352
Instrument
s an d Control s
This section gives information about
the controls and displays that
contribute to the daily operation of
your Honda. All the essential
controls are within easy reach.
Control Locations............................
56
Indicator Lights...............................
. 57
Gauges.............................................. 62
Controls Near the Steering
Wheel........................................ 65
Headlights.................................... 66
Automatic Lighting Off
Feature......................................
67
Daytime Runnin
g Lights.............
67
Instrument
Pane
l Brightness.....
67
Turn
Signals................................
.
68
Windshield
Wipers.....................
. 68
Windshield Washers................... 70
Rear Window Wiper and Washer...................................... 70
Hazard Warning........................ 70
Rear Windo
w Defogger.............. 71
Steering Wheel Adjustment....... 72
Steering Wheel Controls................ 73
Cruise Control.............................. 73
Remote Audio Controls .............. 76
Keys and Locks................................ 76
Keys............................................... 76
Immobilizer System..................... 77
Ignition Switch............................. 78
Power Door Locks....................... 79
Remote Transmitter.................... 81
Childproof Door Locks............... 85
Tailgate......................................... 85
Glove Box..................................... 87
Manual Sliding Doors...................... 88
Power Sliding Doors........................ 89
HomeLink Universal Transmitter.................................. 95
Seats.................................................. 99
Passenger Seating....................... 99
Seat Adjustments....................... 100
Driver's Seat Power
Adjustments........................... 102
Armrests..................................... 103
Head Restraints......................... 104
Third Seat Access...................... 105 Moving the Second Row Bucket Seat............................ 106
Removing the Bucket Seats in the Second Row................. 108
Folding the Third Seat.............. 109
Power Windows............................. 112
Mirrors............................................ 115
Parking Brake................................ 116
Digital Clock................................... 117 Center Table................................... 117
Beverage Holder............................ 118
Sunglasses Holder......................... 120
Sun Visor......................................... 121
Vanity Mirror................................. 121 Rear Compartment........................ 122
Center Pocket................................ 122Coin Holder.................................... 122
Storage Box.................................... 123
Coat Hook....................................... 123
Accessory Power Sockets............. 124 Interior Lights................................ 125
Instrument s an d Control s
Page 60 of 352
Indicator Light s
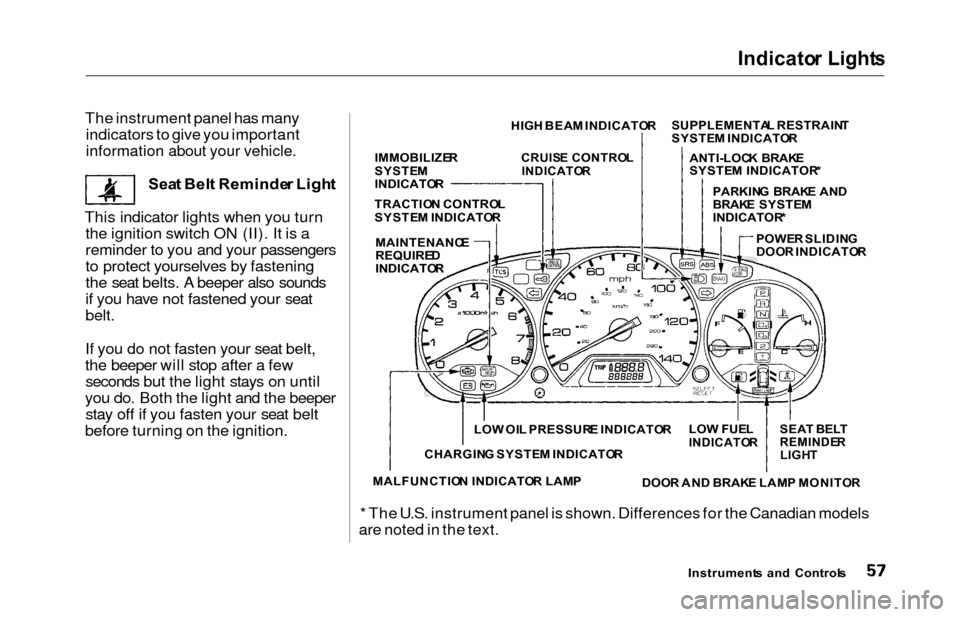
The instrument panel has many
indicators to give you important
information about your vehicle.
Sea t Bel t Reminde r Ligh t
This indicator lights when you turn the ignition switch ON (II). It is a
reminder to you and your passengers
to protect yourselves by fastening
the seat belts. A beeper also sounds
if you have not fastened your seat
belt.
If you do not fasten your seat belt,
the beeper will stop after a few seconds but the light stays on until
you do. Both the light and the beeper stay off if you fasten your seat belt
before turning on the ignition.
* The U.S. instrument panel is shown. Differences for the Canadian models
are noted in the text.
Instrument s an d Control s
HIG
H BEA M INDICATO RSUPPLEMENTA
L RESTRAIN T
SYSTE M INDICATO R
ANTI-LOC K BRAK E
SYSTE M INDICATOR *
POWE R SLIDIN G
DOO R INDICATO R
PARKIN
G BRAK E AN D
BRAK E SYSTE M
INDICATOR *
IMMOBILIZE
R
SYSTE M
INDICATO R
CRUISE CONTRO L
INDICATO R
TRACTION CONTRO L
SYSTE M INDICATO R
MAINTENANC E
REQUIREDINDICATO R
SEAT BEL T
REMINDE RLIGHT
LOW FUE LINDICATO R
DOOR AN D BRAK E LAM P MONITO R
LO
W OI L PRESSUR E INDICATO R
CHARGIN G SYSTE M INDICATO R
MALFUNCTIO N INDICATO R LAM P
Page 64 of 352
Indicator Light s
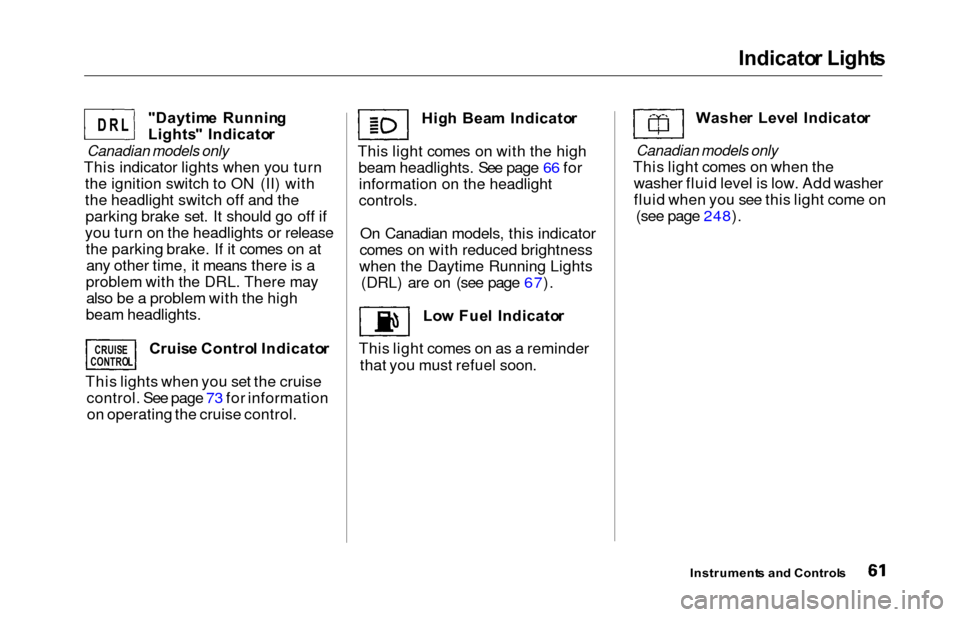
"Daytim e Runnin g
Lights " Indicato r
Canadian models only
This indicator lights when you turn
the ignition switch to ON (II) with
the headlight switch off and theparking brake set. It should go off if
you turn on the headlights or release the parking brake. If it comes on atany other time, it means there is a
problem with the DRL. There may also be a problem with the high
beam headlights.
Cruise Contro l Indicato r
This lights when you set the cruise control. See page 73 for informationon operating the cruise control. Hig
h Bea m Indicato r
This light comes on with the high beam headlights. See page 66 forinformation on the headlight
controls.
On Canadian models, this indicator
comes on with reduced brightness
when the Daytime Running Lights (DRL) are on (see page 67).
Low Fue l Indicato r
This light comes on as a reminder that you must refuel soon. Washe
r Leve l Indicato r
Canadian models only
This light comes on when the
washer fluid level is low. Add washer
fluid when you see this light come on (see page 248).
Instrument s an d Control s
D R L
CRUIS E
CONTRO L
Page 68 of 352
Controls Nea r th e Steerin g Whee l
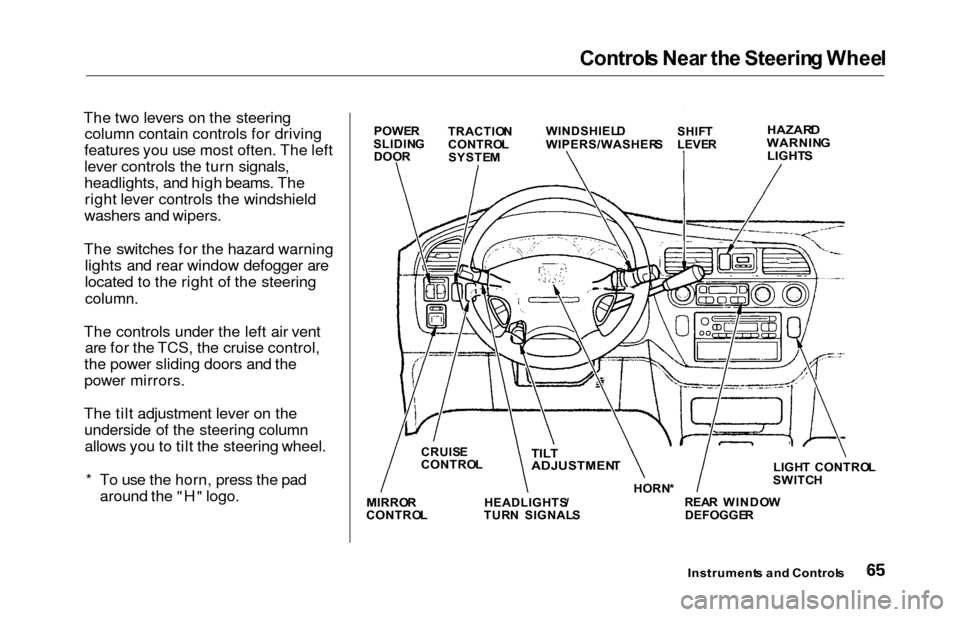
The two levers on the steering
column contain controls for driving
features you use most often. The left
lever controls the turn signals,
headlights, and high beams. The right lever controls the windshield
washers and wipers.
The switches for the hazard warning lights and rear window defogger are
located to the right of the steering
column.
The controls under the left air vent are for the TCS, the cruise control,
the power sliding doors and the
power mirrors.
The tilt adjustment lever on the underside of the steering columnallows you to tilt the steering wheel.
* To use the horn, press the pad around the "H" logo.
Instrument s an d Control s
POWER
SLIDIN G
DOO R TRACTIO
N
CONTRO L
SYSTE M WINDSHIEL
D
WIPERS/WASHER SSHIFT
LEVE RHAZAR DWARNIN G
LIGHT S
LIGHT CONTRO L
SWITC H
REA R WINDO W
DEFOGGE R
HORN
*TILT
ADJUSTMEN T
HEADLIGHTS /
TUR N SIGNAL S
CRUIS
E
CONTRO L
MIRRO R
CONTRO L
Page 76 of 352
Steering Whee l Control s
Cruise Contro l
Cruise control allows you to maintain
a set speed above 25 mph (40 km/h)
without keeping your foot on the accelerator pedal. It should be used for cruising on straight, open
highways. It is not recommended for conditions such as city driving,
winding roads, slippery roads, heavy rain, or bad weather. You should
have full control of the vehicle under
those conditions.Using the Cruise Control
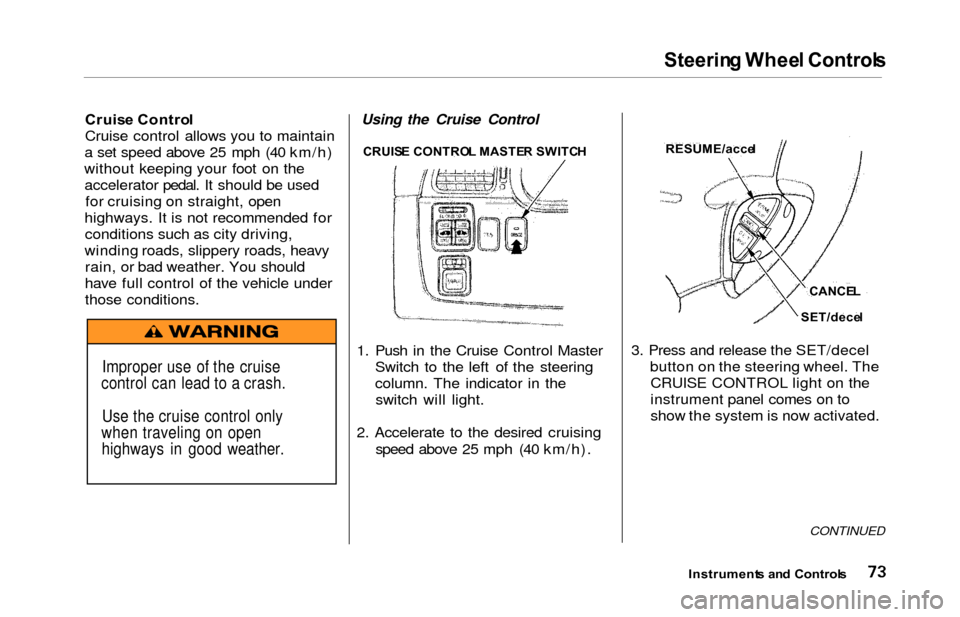
1. Push in the Cruise Control Master Switch to the left of the steering
column. The indicator in theswitch will light.
2. Accelerate to the desired cruising speed above 25 mph (40 km/h). 3. Press and release the SET/decel
button on the steering wheel. TheCRUISE CONTROL light on the
instrument panel comes on to
show the system is now activated.
CONTINUED
Instrument s an d Control s
Improper use of the cruise
control can lead to a crash.
Use the cruise control only
when traveling on open highways in good weather.
CRUIS E CONTRO L MASTE R SWITC HRESUME/acce l
CANCEL
SET/dece l
Page 77 of 352
Steering Whee l Control s
The cruise control may not hold the
set speed when you are going up and
down hills. If your speed increases
going down a hill, use the brakes to slow down to the desired speed. This
will cancel the cruise control. To resume the set speed, press theRESUME/accel button. The
CRUISE CONTROL light on the
instrument panel comes on.
When climbing a steep hill, the automatic transmission maydownshift to hold the set speed.Changing the Set Speed
You can increase the set cruising speed in any of these ways:
Press and hold the RESUME/
accel button. The vehicle will
accelerate. When you reach thedesired cruising speed, release the
button.
Push on the accelerator pedal. Ac-
celerate to the desired cruising
speed and press the SET/decel
button.
To increase your speed in very small amounts, tap the RESUME/accel button repeatedly. Each time
you do this, your vehicle will speed up about 1 mph (1.6 km/h). You can decrease the set cruising
speed in any of these ways:
Press and hold the SET/decel
button. The vehicle will decelerate. Release the button when you
reach the desired speed.
To slow down in very small amounts, tap the SET/decel
button repeatedly. Each time you do this, your vehicle will slow
down about 1 mph (1.6 km/h).
Tap the brake pedal lightly with your foot. The CRUISE CONTROL light on the instru-
ment panel will go out. When the
vehicle slows to the desired speed, press the SET/decel button. The
vehicle will then maintain the desired speed.
Instrument s an d Control s
Page 78 of 352
Steering Whee l Control s
Even with the cruise control turned
on, you can still use the accelerator
pedal to speed up for passing. After completing the pass, take your foot
off the accelerator pedal. The vehicle
will return to the set cruising speed.
Resting your foot on the brake pedal
will cause the cruise control to
cancel.
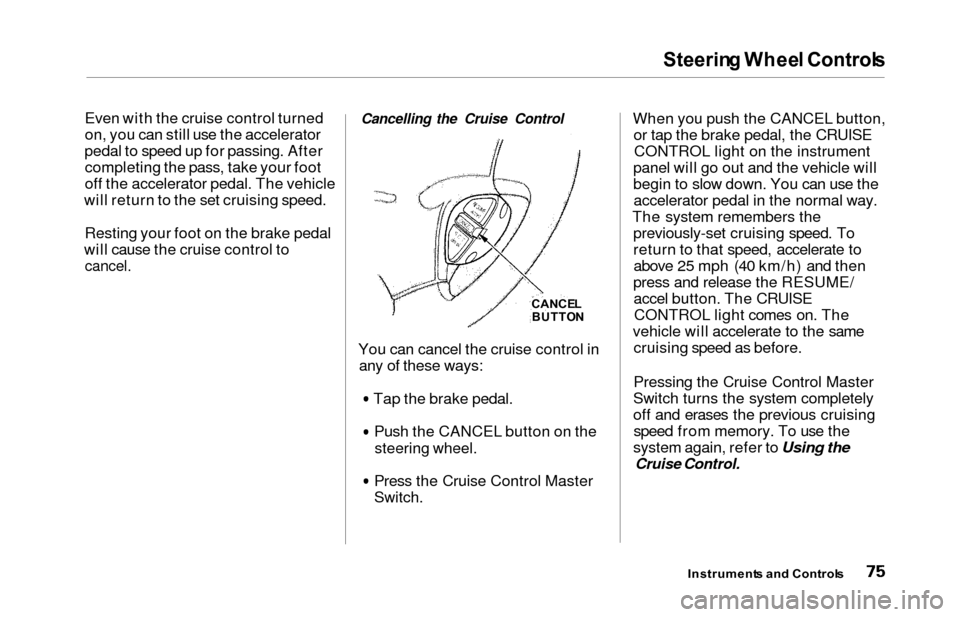
Cancelling the Cruise Control
You can cancel the cruise control in any of these ways:
Tap the brake pedal.Push the CANCEL button on the
steering wheel.
Press the Cruise Control Master
Switch.
When you push the CANCEL button,or tap the brake pedal, the CRUISECONTROL light on the instrument
panel will go out and the vehicle will
begin to slow down. You can use the accelerator pedal in the normal way.
The system remembers the previously-set cruising speed. To
return to that speed, accelerate toabove 25 mph (40 km/h) and then
press and release the RESUME/ accel button. The CRUISECONTROL light comes on. The
vehicle will accelerate to the same cruising speed as before.
Pressing the Cruise Control Master
Switch turns the system completely
off and erases the previous cruising speed from memory. To use the
system again, refer to Using the
Cruise Control.
Instrument s an d Control s
CANCEL
BUTTO N
Page 197 of 352
Fuel Econom y
The condition of your vehicle and
your driving habits are the two most important things that affect the fuelmileage you get.
Vehicl e Conditio n
Always maintain your vehicle accord- ing to the maintenance schedule.
This will keep it in top operating
condition.
An important part of that mainte- nance is the Owne r Maintenanc e
Check s (see page 237 ). For
example, an underinflated tire
causes more "rolling resistance,"
which uses fuel. It also wears out faster, so check the tire pressure atleast monthly.
In winter, the build-up of snow on
your vehicle's underside adds weight and rolling resistance. Frequent
cleaning helps your fuel mileage and
reduces the chance of corrosion. Drivin
g Habit s
You can improve fuel economy by driving moderately. Rapid acceler-ation, abrupt cornering, and hard
braking use more fuel.
Always drive in the highest gear that allows the engine to run and acceler-
ate smoothly.
Depending on traffic conditions, try
to maintain a constant speed. Every
time you slow down and speed up,
your vehicle uses extra fuel. Use the cruise control, when appropriate, toincrease fuel economy. A cold engine uses more fuel than a
warm engine. It is not necessary to"warm-up" a cold engine by letting itidle for a long time. You can drive
away in about a minute, no matter
how cold it is outside. The engine
will warm up faster, and you get better fuel economy. To cut down on
the number of "cold starts," try to
combine several short trips into one.
The air conditioning puts an extra load on the engine which makes ituse more fuel. Turn off the A/C to
cut down on air conditioning use. Use the flow-through ventilation
when the outside air temperature is
moderate.
Befor e Drivin g
Page 219 of 352
Driving in Ba d Weathe r
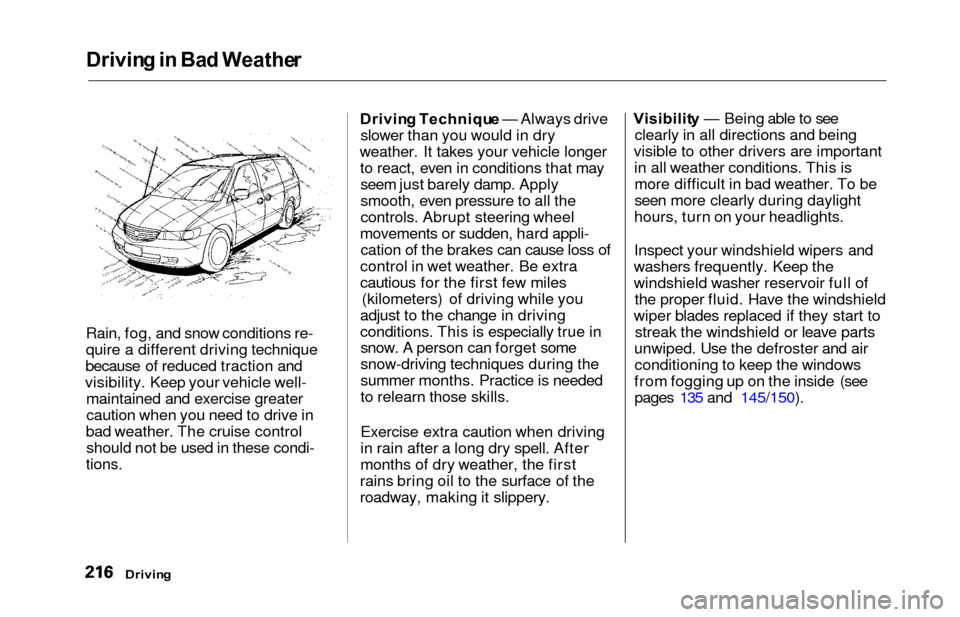
Rain, fog, and snow conditions re-
quire a different driving technique
because of reduced traction and
visibility. Keep your vehicle well- maintained and exercise greater
caution when you need to drive in
bad weather. The cruise control should not be used in these condi-
tions.
Drivin g Techniqu e — Always drive
slower than you would in dry
weather. It takes your vehicle longer to react, even in conditions that mayseem just barely damp. Apply
smooth, even pressure to all the
controls. Abrupt steering wheel
movements or sudden, hard appli- cation of the brakes can cause loss of
control in wet weather. Be extra
cautious for the first few miles (kilometers) of driving while you
adjust to the change in driving
conditions. This is especially true in snow. A person can forget some
snow-driving techniques during the
summer months. Practice is needed
to relearn those skills.
Exercise extra caution when driving
in rain after a long dry spell. After
months of dry weather, the first
rains bring oil to the surface of the
roadway, making it slippery. Visibilit
y — Being able to see
clearly in all directions and being
visible to other drivers are important in all weather conditions. This ismore difficult in bad weather. To be
seen more clearly during daylight
hours, turn on your headlights.
Inspect your windshield wipers and
washers frequently. Keep the
windshield washer reservoir full of the proper fluid. Have the windshield
wiper blades replaced if they start to streak the windshield or leave parts
unwiped. Use the defroster and air conditioning to keep the windows
from fogging up on the inside (see pages 135 and 145/150).
Drivin g
Page 311 of 352
Charging Syste m Indicato r
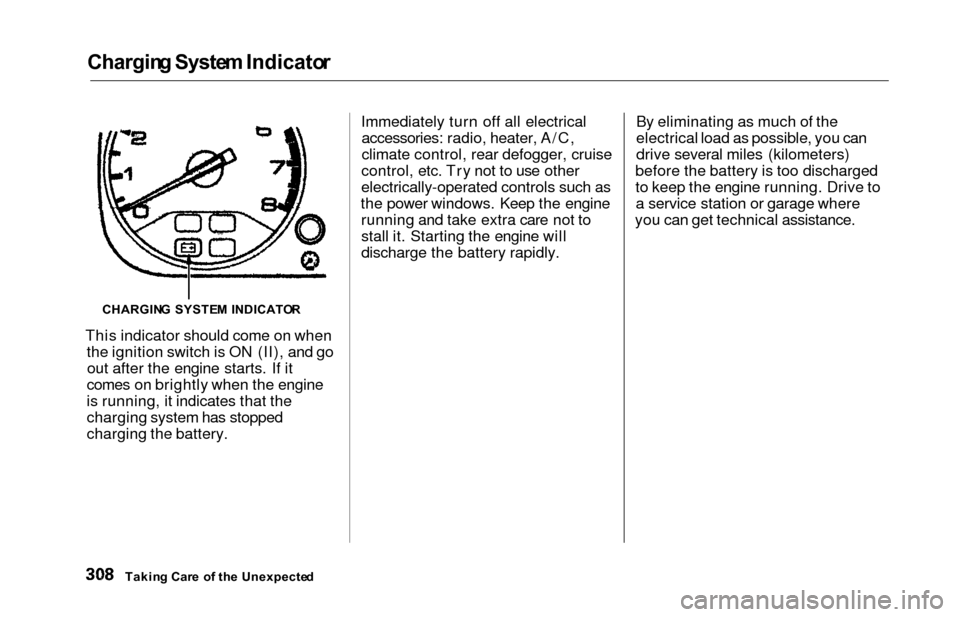
This indicator should come on when
the ignition switch is ON (II), and goout after the engine starts. If it
comes on brightly when the engine
is running, it indicates that the
charging system has stopped
charging the battery. Immediately turn off all electrical
accessories: radio, heater, A/C,
climate control, rear defogger, cruise
control, etc. Try not to use other
electrically-operated controls such as
the power windows. Keep the engine running and take extra care not to
stall it. Starting the engine will
discharge the battery rapidly. By eliminating as much of the
electrical load as possible, you can
drive several miles (kilometers)
before the battery is too discharged
to keep the engine running. Drive to a service station or garage where
you can get technical assistance.
Takin g Car e o f th e Unexpecte d
CHARGIN
G SYSTE M INDICATO R