hood HONDA ODYSSEY 2003 RB1-RB2 / 3.G Owners Manual
[x] Cancel search | Manufacturer: HONDA, Model Year: 2003, Model line: ODYSSEY, Model: HONDA ODYSSEY 2003 RB1-RB2 / 3.GPages: 415, PDF Size: 5.28 MB
Page 5 of 415
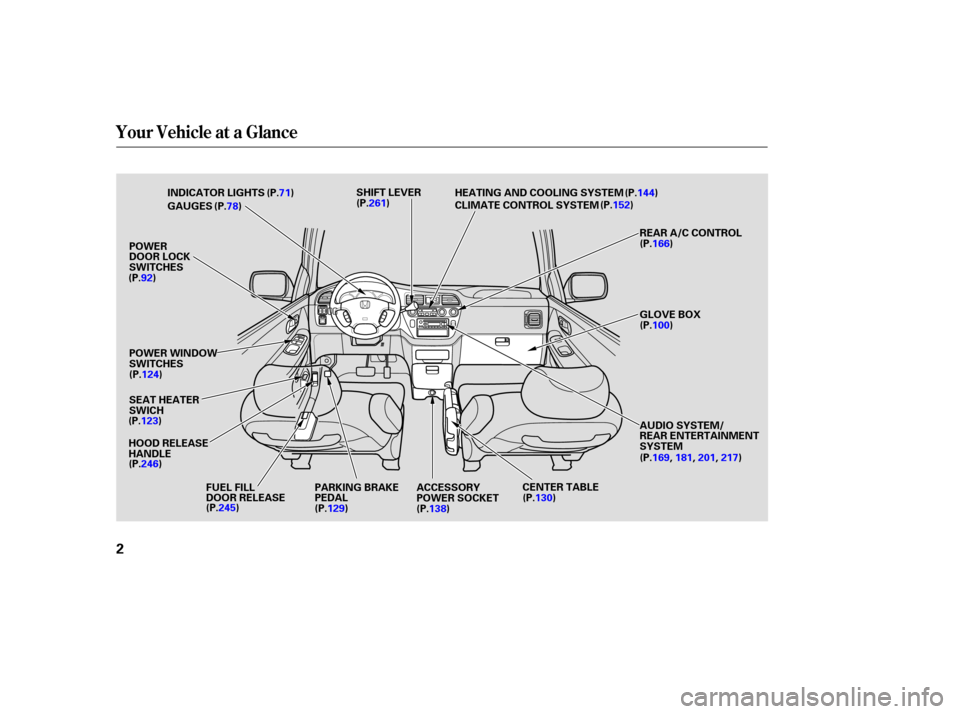
Your Vehicle at a Glance
2
INDICATOR LIGHTS
GAUGESSHIFT LEVER
HEATING AND COOLING SYSTEM
CLIMATE CONTROL SYSTEM
REAR A/C CONTROL
GLOVE BOX
AUDIO SYSTEM/
REAR ENTERTAINMENT
SYSTEM
CENTER TABLE
ACCESSORY
POWER SOCKET
PARKING BRAKE
PEDAL
FUEL FILL
DOOR RELEASE
HOOD RELEASE
HANDLE POWER WINDOW
SWITCHES POWER
DOOR LOCK
SWITCHES
(P.71)
(P.78) (P.261) (P.144)
(P.152)
(P.166)
(P.100)
(P.169,181,201,217)
(P.130)
(P.138)
(P.129)
(P.245)
(P.246)
(P.123) (P.124)
(P.92)
SEAT HEATER
SWICH
Page 70 of 415
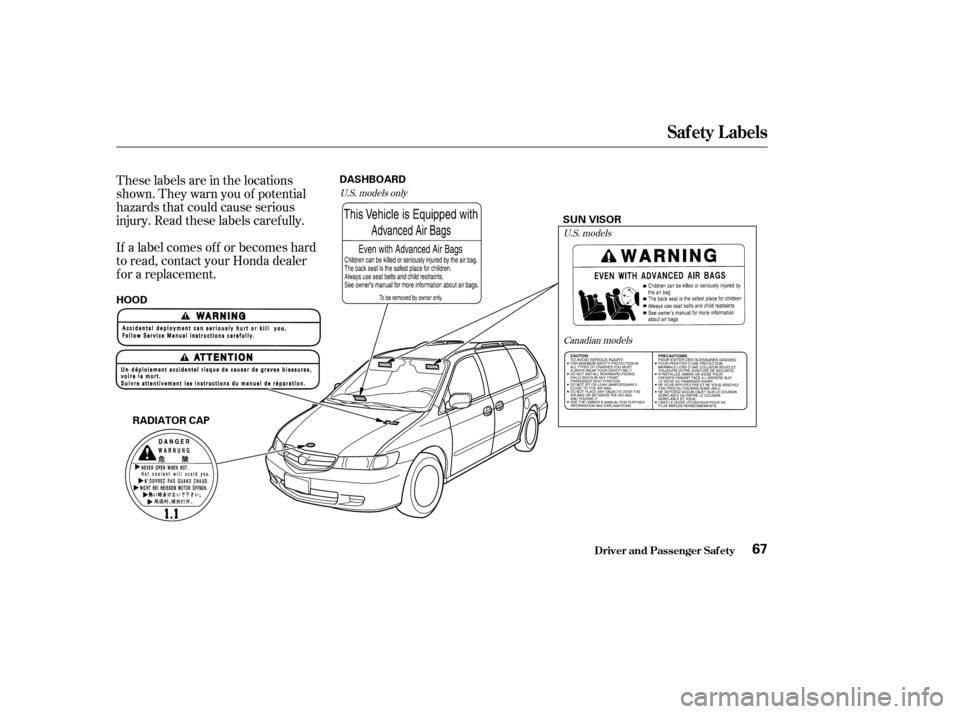
These labels are in the locations
shown. They warn you of potential
hazards that could cause serious
injury. Read these labels caref ully.
If a label comes of f or becomes hard
to read, contact your Honda dealer
f or a replacement.U.S. models onlyU.S. models
Canadian models
Saf ety L abels
Driver and Passenger Saf ety67
RADIATOR CAP SUN VISOR
HOOD DASHBOARD
Page 73 of 415
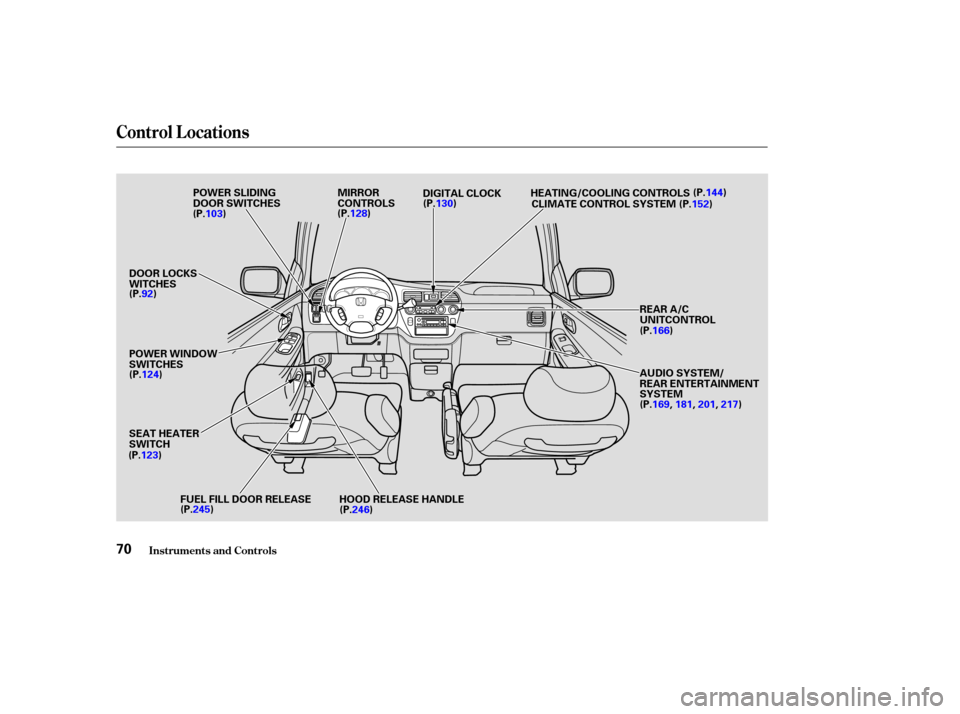
Control L ocations
Inst rument s and Cont rols70
MIRROR
CONTROLSDIGITAL CLOCK
HEATING/COOLING CONTROLS
CLIMATE CONTROL SYSTEM
HOOD RELEASE HANDLE
FUEL FILL DOOR RELEASE (P.103)
(P.128)(P.130) (P.144)
(P.152)
(P.166)
(P.169, 181,201,217)
(P.246)
(P.245)
(P.123) (P.124) (P.92) POWER SLIDING
DOOR SWITCHES
REAR A/C
UNITCONTROL
AUDIO SYSTEM/
REAR ENTERTAINMENT
SYSTEM
POWER WINDOW
SWITCHES DOOR LOCKS
WITCHES
SEAT HEATER
SWITCH
Page 237 of 415
The security system helps to protect
your vehicle and valuables f rom thef t.
The horn sounds and a combination
of headlights, parking lights, side
marker lights and taillights f lashes if
someone attempts to break into your
vehicleorremovetheradio.This
alarm continues f or two minutes,
then the alarm stops. To reset an
alarming system before the two
minutes have elapsed, unlock either
f ront door with the key or the
remote transmitter.
The security system sets
automatically fifteen seconds after
you lock the doors, hood, and
tailgate. For the system to activate,
you must lock the doors f rom the
outside with the key, the lock tab,
the door lock switch, or the remote
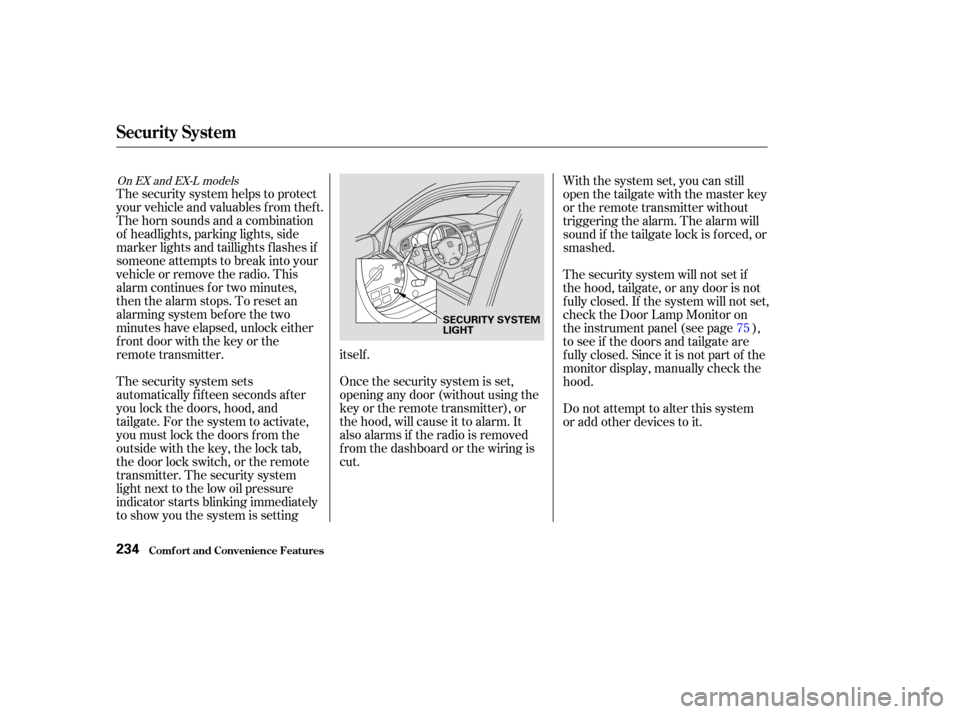
transmitter. The security system
light next to the low oil pressure
indicator starts blinking immediately
to show you the system is settingitself .
Once the security system is set,
opening any door (without using the
key or the remote transmitter), or
the hood, will cause it to alarm. It
also alarms if the radio is removed
f rom the dashboard or the wiring is
cut.With the system set, you can still
open the tailgate with the master key
or the remote transmitter without
triggering the alarm. The alarm will
sound if the tailgate lock is f orced, or
smashed.
The security system will not set if
the hood, tailgate, or any door is not
f ully closed. If the system will not set,
check the Door Lamp Monitor on
the instrument panel (see page ),
to see if the doors and tailgate are
f ully closed. Since it is not part of the
monitor display, manually check the
hood.
Do not attempt to alter this system
or add other devices to it.
75
On EX and EX-L models
Security System
Comf ort and Convenience Feat ures234
SECURITY SYSTEM
LIGHT
Page 246 of 415

Bef ore you begin driving your Honda,
youshouldknowwhatgasolineto
use, and how to check the levels of
important f luids. You also need to
know how to properly store luggage
or packages. The inf ormation in this
section will help you. If you plan to
add any accessories to your vehicle,
please read the inf ormation in this
section f irst..............................
Break-in Period .244
.........................................
Gasoline .244
.........
Service Station Procedures . 245
................
Filling the Fuel Tank . 245
....................
Opening the Hood .246
...............................
Oil Check .248
.........
Engine Coolant Check . 249
...............................
Fuel Economy .250
.....................
Vehicle Condition .250
...........................
Driving Habits .250
...
Accessories and Modif ications . 251
.............................
Carrying Cargo .253
Bef ore Driving
Bef ore Driving243
Page 249 of 415
Remove the f uel f ill cap slowly.
You may hear a hissing sound as
pressure inside the tank escapes.
Place the cap in the holder on the
fuel fill door.
Stop f illing the tank af ter the f uel
nozzle automatically clicks of f . Do
not try to ‘‘top off’’ the tank, leave
some room f or the f uel to expand
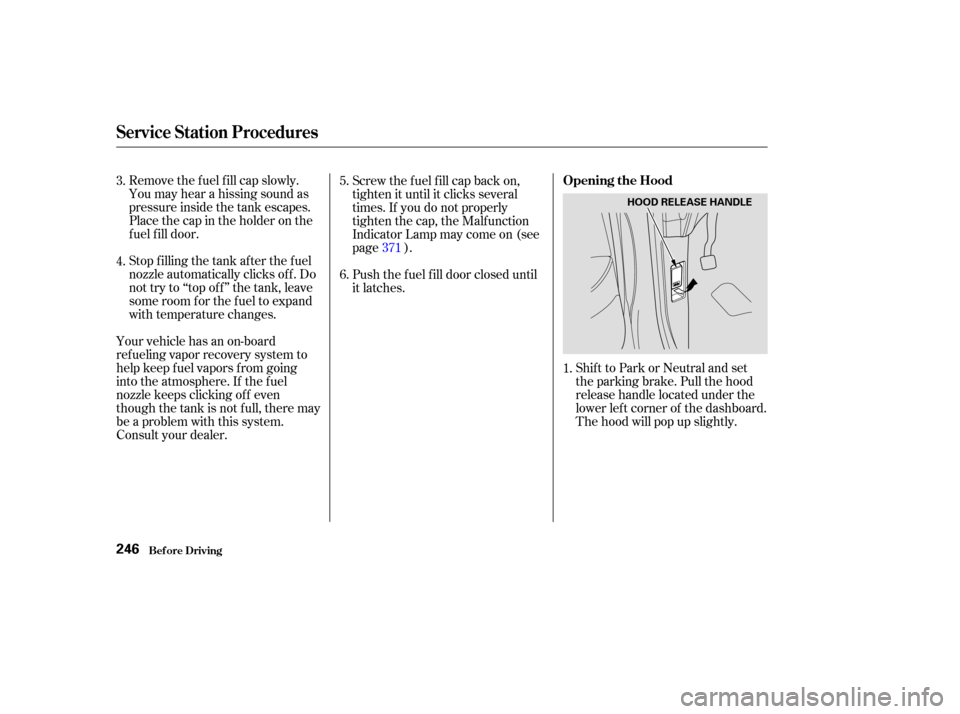
with temperature changes.Shift to Park or Neutral and set
the parking brake. Pull the hood
release handle located under the
lower lef t corner of the dashboard.
The hood will pop up slightly.
Screw the f uel f ill cap back on,
tighten it until it clicks several
times. If you do not properly
tighten the cap, the Malfunction
Indicator Lamp may come on (see
page ).
Push the f uel f ill door closed until
it latches.
Your vehicle has an on-board
ref ueling vapor recovery system to
help keep f uel vapors f rom going
into the atmosphere. If the fuel
nozzle keeps clicking of f even
though the tank is not full, there may
be a problem with this system.
Consult your dealer. 1.
3.
4.
5.
6.
371
Service Station Procedures
Bef ore Driving
Opening the Hood
246
HOOD RELEASE HANDLE
Page 250 of 415
CONT INUED
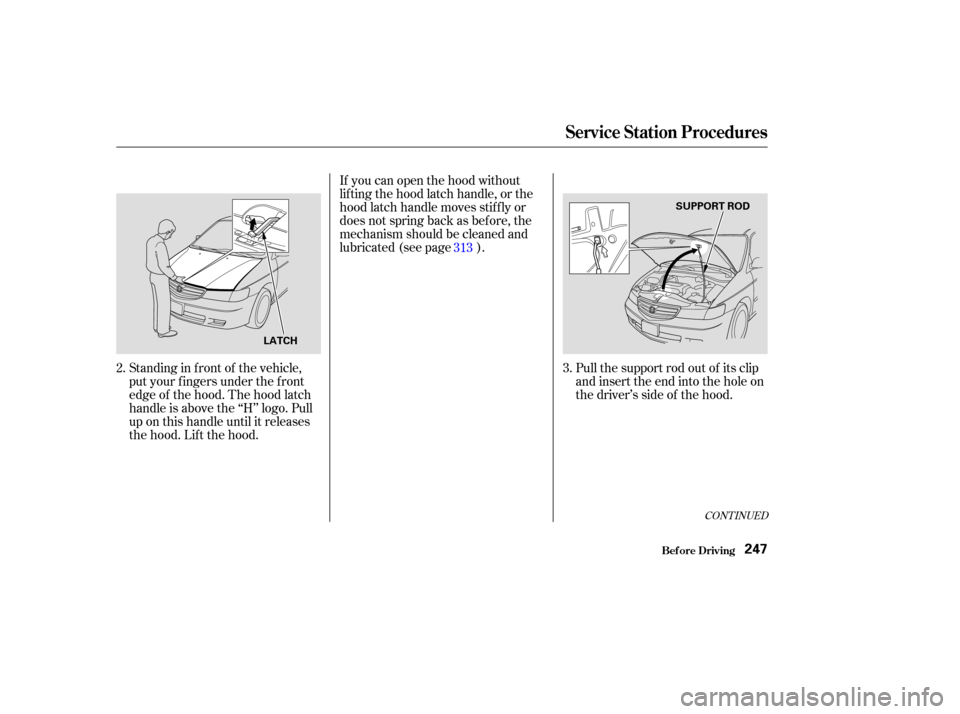
Pull the support rod out of its clip
and insert the end into the hole on
the driver’s side of the hood.
If you can open the hood without
lifting the hood latch handle, or the
hood latch handle moves stif f ly or
does not spring back as bef ore, the
mechanism should be cleaned and
lubricated (see page ).
Standing in f ront of the vehicle,
put your f ingers under the f ront
edge of the hood. The hood latch
handle is above the ‘‘H’’ logo. Pull
up on this handle until it releases
the hood. Lif t the hood. 3.
2. 313
Service Station Procedures
Bef ore Driving247
LATCH SUPPORT ROD
Page 251 of 415
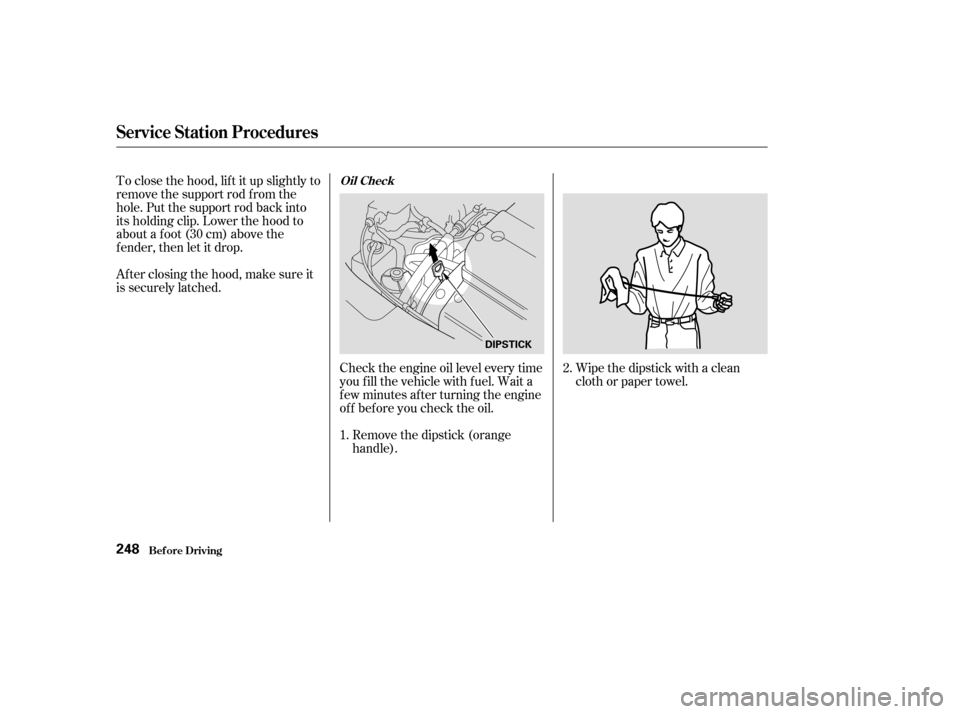
Wipe the dipstick with a clean
cloth or paper towel.
Check the engine oil level every time
you f ill the vehicle with f uel. Wait a
f ew minutes af ter turning the engine
of f bef ore you check the oil.
Remove the dipstick (orange
handle).
To close the hood, lif t it up slightly to
remove the support rod f rom the
hole. Put the support rod back into
its holding clip. Lower the hood to
about a f oot (30 cm) above the
fender,thenletitdrop.
Afterclosingthehood,makesureit
is securely latched.
2.
1.
Service Station Procedures
Bef ore Driving
Oil Check
248
DIPSTICK
Page 261 of 415

Youshoulddothefollowingchecks
and adjustments every day bef ore
you drive your vehicle.Make sure all windows, mirrors,
and outside lights are clean and
unobstructed. Remove f rost, snow,
or ice. Check the adjustment of the seat
(see page ).
Check the adjustment of the
inside and outside mirrors (see
page ).
Check the adjustment of the
steering wheel (see page ).
Fasten your seat belt. Check that
your passengers have f astened
their seat belts (see page ).Turn the ignition switch ON (II).
Check the indicator lights in the
instrument panel.
Start the engine (see page ).
Check the gauges and indicator
lights in the instrument panel (see
page ).
Check that any items you may be
carrying with you inside are stored
properly or f astened down
securely. Visually check the tires. If a tire
looks low, use a gauge to check its
pressure. Check that the hood and tailgate
arefullyclosed. Makesurethedoorsandtailgate
are securely closed and locked.
3. 2.
1.
4. 5.
6.
7.
8.
9. 11.
12. 10.
128 88
17 259
71
110
Preparing to Drive
Driving258
Page 286 of 415
This section explains the importance
of keeping your vehicle well
maintained and why you should
f ollow basic maintenance saf ety
precautions.
If you have the skills and tools to per-
f orm more complex maintenance
tasks on your Honda, you may want
to purchase the Service Manual. See
page f or inf ormation on how to
obtain a copy, or see your Honda
dealer. This section also includes
Maintenance Schedules f or normal
driving and severe driving conditions,
a Maintenance Record, and instruc-
tions f or simple maintenance tasks
you may want to take care of
yourself .......................
Maintenance Saf ety .284
.
Important Safety Precautions . 285
.................
Maintenance Schedule . 286
...
Required Maintenance Record . 293
.......
Owner Maintenance Checks . 295
..............................
Fluid Locations .296
......................................
Engine Oil .297
..................................
Adding Oil .297
....................
Recommended Oil .297
..............................
Synthetic Oil .298
....................................
Additives .299
.....
Changing the Oil and Filter . 299
.............................
Cooling System .301
............
Adding Engine Coolant . 301
.......
Replacing Engine Coolant . 303
....................
Windshield Washers .306
....
Automatic Transmission Fluid . 307
....................................
Brake Fluid .309
............................
Brake System .309
..............................
Power Steering .310
.....................
Air Cleaner Element .311
....................................
Hood Latch .313
....................................
Spark Plugs .313
..............................
Replacement .313
............................
Specif ications .316
...........................................
Battery .317 .................................
Wiper Blades .319
..............
Air Conditioning System . 321
..................
Dust and Pollen Filter . 322
.....................................
Drive Belts .322
....................................
Timing Belt .323
...............................................
Tires .323
......................................
Inf lation .323
..................................
Inspection .325
..............................
Maintenance .326
.............................
Tire Rotation .326
...
Replacing Tires and Wheels . 327
......................
Wheels and Tires .328
..........................
Winter Driving .328
.............................
Snow Tires .329
............................
Tire Chains .329
.............................................
Lights .330
.....................
Headlight Aiming .332
........................
Replacing Bulbs .332
....................
Storing Your Vehicle .341
401
Maintenance
Maint enance283