key HONDA ODYSSEY 2006 RB1-RB2 / 3.G Owner's Manual
[x] Cancel search | Manufacturer: HONDA, Model Year: 2006, Model line: ODYSSEY, Model: HONDA ODYSSEY 2006 RB1-RB2 / 3.GPages: 420, PDF Size: 6.01 MB
Page 170 of 420
Turnthekeyclockwiseagain,and
hold it. All f our windows start to
open. To stop the windows,
release the key.
To open the windows further, turn
andholdthekeyagain(within
15 seconds).
To close: Insert the key in the driver’s door
lock.
Turn the key counterclockwise,
then release it.
Turn the key counterclockwise
again, and hold it. All four
windowsstarttoclose.Tostopthe
windows, release the key.
To close the windows further, turn
andholdthekeyagain(within
15 seconds). If the windows stop bef ore the
desired position, repeat steps 2 and 3.
Turn the key clockwise, then
release it. Insert the key in the driver’s door
lock.
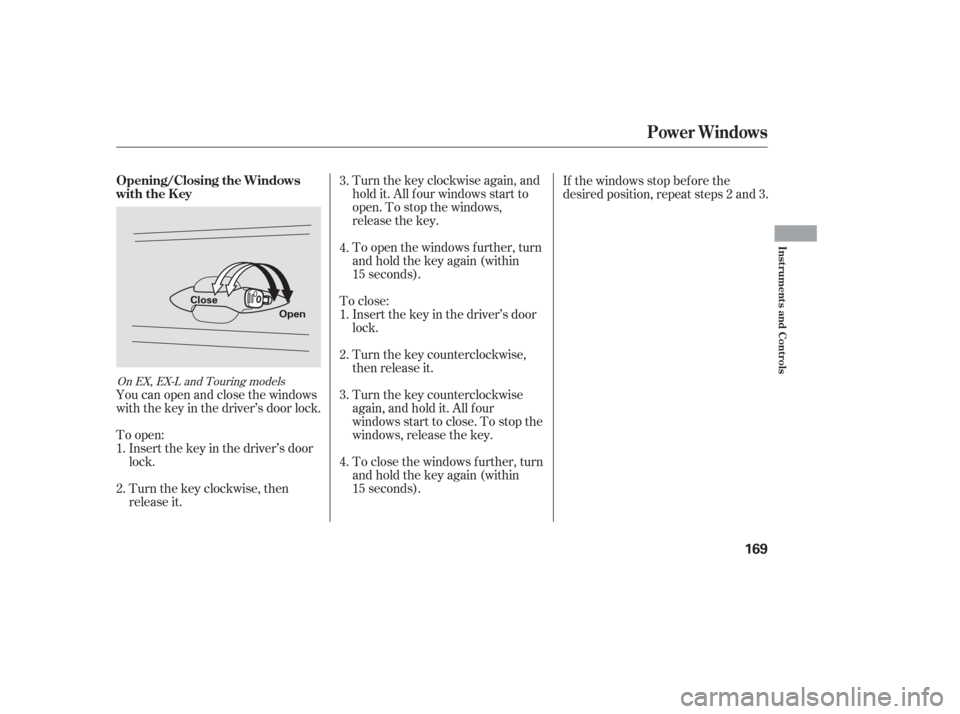
To open: You can open and close the windows
with the key in the driver’s door lock. 1.
2. 3.
4.
1.
2. 3.
4.
On EX, EX-L and Touring models
Opening/Closing the Windows
with the Key
Power Windows
Inst rument s and Cont rols
169
Open
Close
Page 171 of 420
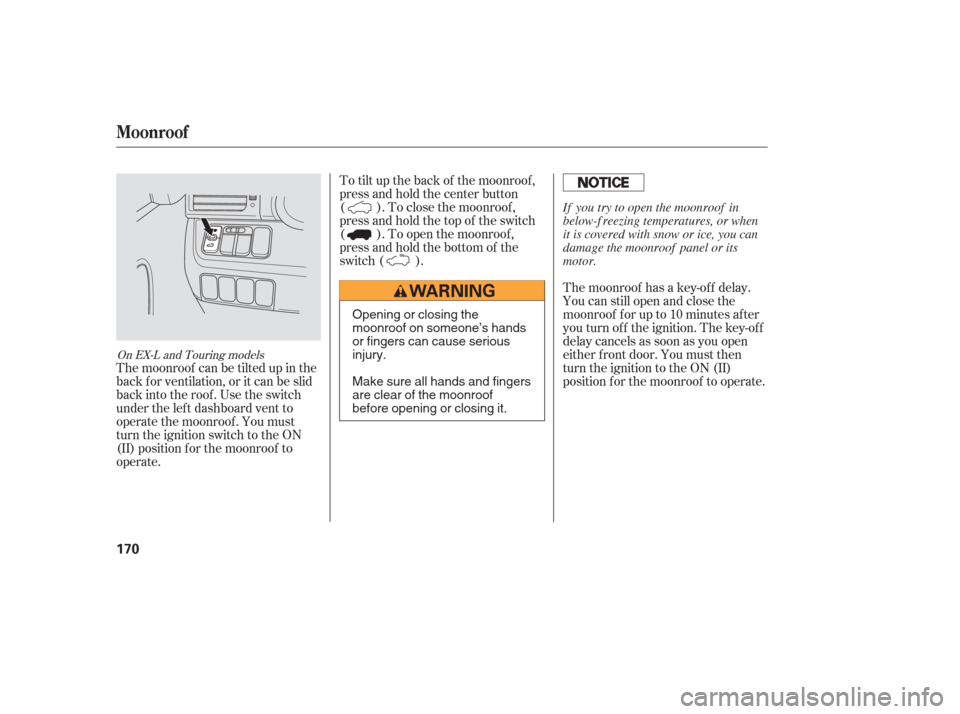
To tilt up the back of the moonroof ,
press and hold the center button
( ). To close the moonroof ,
press and hold the top of the switch
( ). To open the moonroof ,
press and hold the bottom of the
switch ( ).The moonroof has a key-of f delay.
You can still open and close the
moonroof f or up to 10 minutes af ter
you turn of f the ignition. The key-of f
delay cancels as soon as you open
either f ront door. You must then
turn the ignition to the ON (II)
position f or the moonroof to operate.
The moonroof can be tilted up in the
back f or ventilation, or it can be slid
back into the roof. Use the switch
under the lef t dashboard vent to
operate the moonroof . You must
turn the ignition switch to the ON
(II) position f or the moonroof to
operate.
On EX-L and Touring models
Moonroof
170
Opening or closing the
moonroof on someone’s hands
or fingers can cause serious
injury.
Make sure all hands and fingers
are clear of the moonroof
before opening or closing it. If you try to open the moonroof in
below-f reezing temperatures, or when
it is covered with snow or ice, you can
damage the moonroof panel or its
motor.
Page 182 of 420
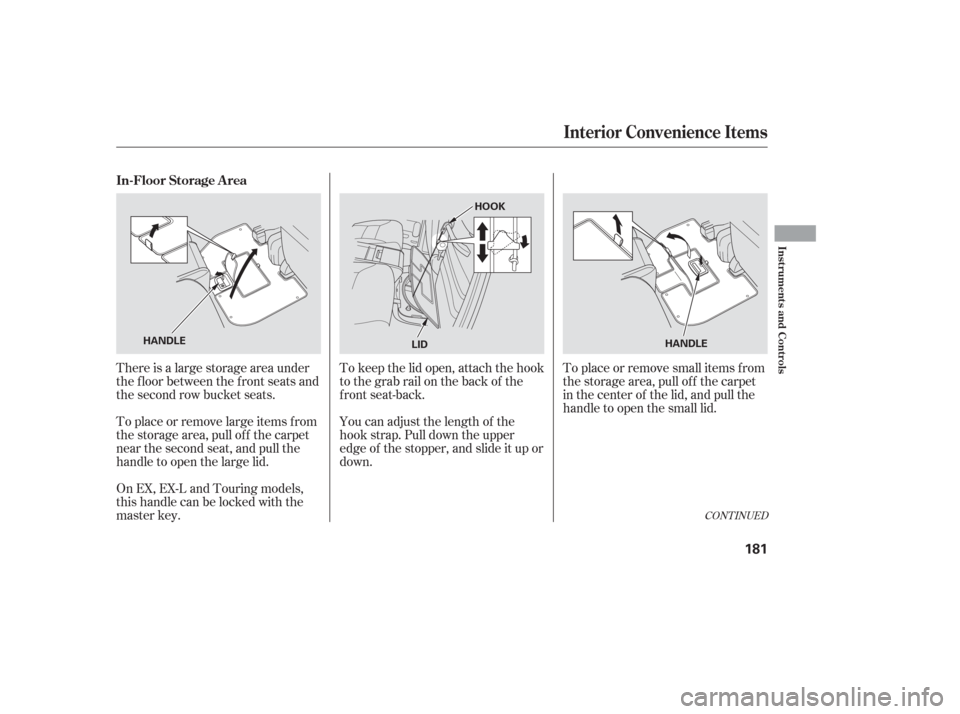
There is a large storage area under
the floor between the front seats and
the second row bucket seats.
To place or remove large items f rom
the storage area, pull off the carpet
near the second seat, and pull the
handle to open the large lid.To place or remove small items f rom
the storage area, pull off the carpet
in the center of the lid, and pull the
handle to open the small lid.
On EX, EX-L and Touring models,
this handle can be locked with the
master key. To keep the lid open, attach the hook
to the grab rail on the back of the
f ront seat-back.
You can adjust the length of the
hook strap. Pull down the upper
edge of the stopper, and slide it up or
down.
CONT INUED
In-Floor Storage A rea
Interior Convenience Items
Inst rument s and Cont rols
181
HANDLE HOOK
LID HANDLE
Page 185 of 420
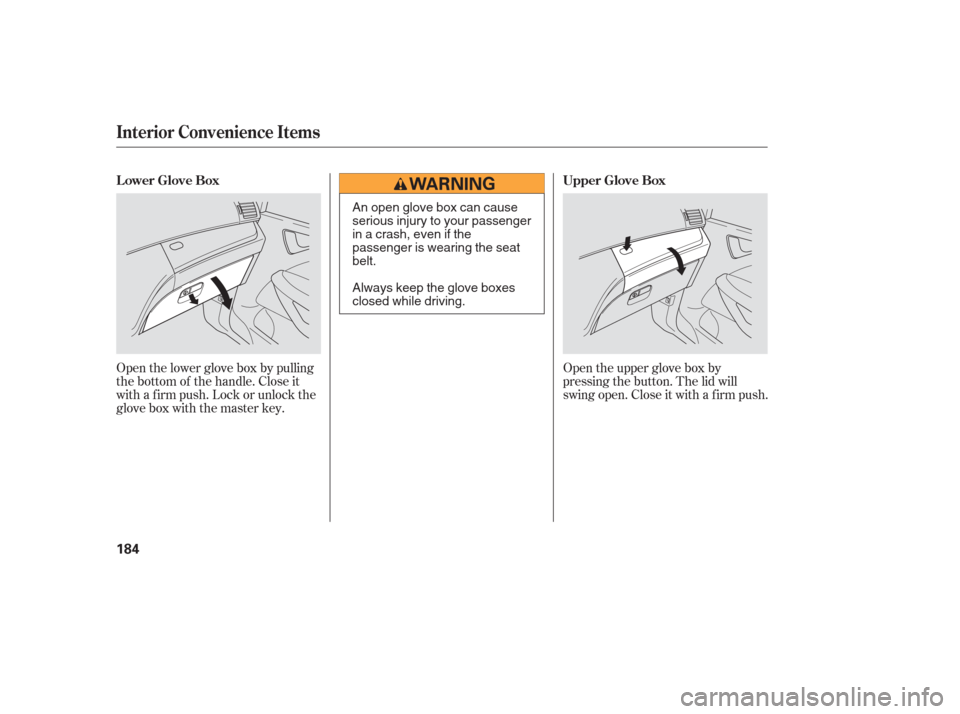
Open the upper glove box by
pressing the button. The lid will
swing open. Close it with a f irm push.
Open the lower glove box by pulling
the bottom of the handle. Close it
with a f irm push. Lock or unlock the
glove box with the master key.
Interior Convenience Items
LowerGloveBox
UpperGloveBox
184
An open glove box can cause
serious injury to your passenger
inacrash,evenifthe
passenger is wearing the seat
belt.
Always keep the glove boxes
closed while driving.
Page 249 of 420
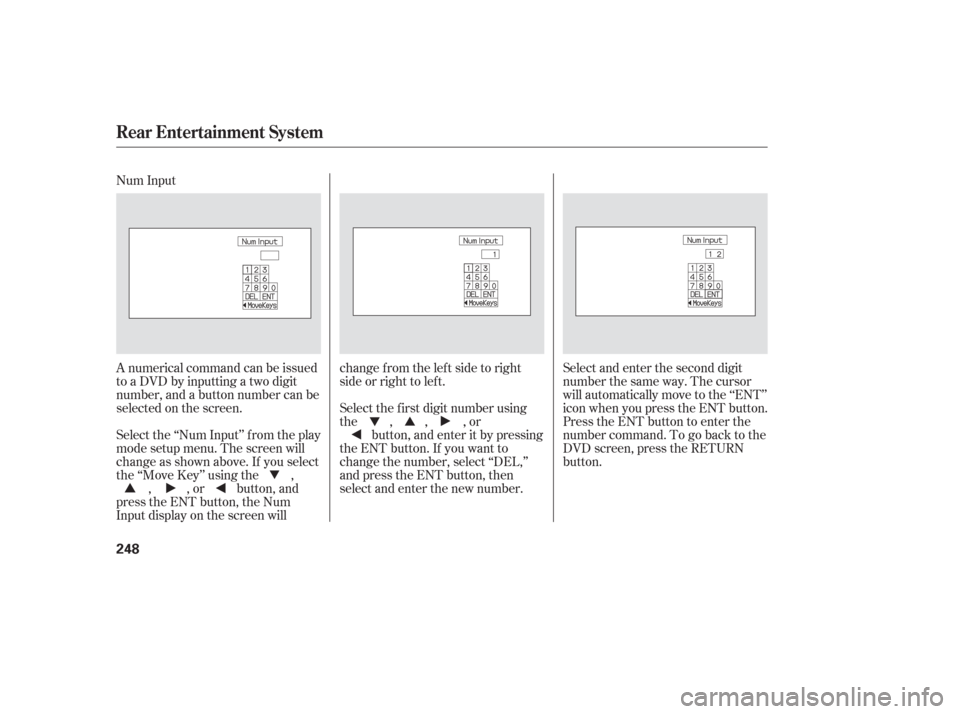
Num Input
A numerical command can be issued
to a DVD by inputting a two digit
number, and a button number can be
selected on the screen.Select and enter the second digit
number the same way. The cursor
will automatically move to the ‘‘ENT’’
icon when you press the ENT button.
Press the ENT button to enter the
number command. To go back to the
DVD screen, press the RETURN
button.
Select the f irst digit number using
the , , , or
button, and enter it by pressing
the ENT button. If you want to
change the number, select ‘‘DEL,’’
and press the ENT button, then
select and enter the new number.
Select the ‘‘Num Input’’ f rom the play
mode setup menu. The screen will
change as shown above. If you select
the ‘‘Move Key’’ using the ,
, , or button, and
press the ENT button, the Num
Input display on the screen will changefromtheleftsidetoright
side or right to lef t.
Rear Entertainment System
248
Page 269 of 420
The security system automatically
sets 15 seconds after you lock the
doors, hood, and the tailgate. For the
system to activate, you must lock the
doorsandthetailgatefromthe
outside with the key, the lock tab,
the door lock switch, or the remote
transmitter. The security system
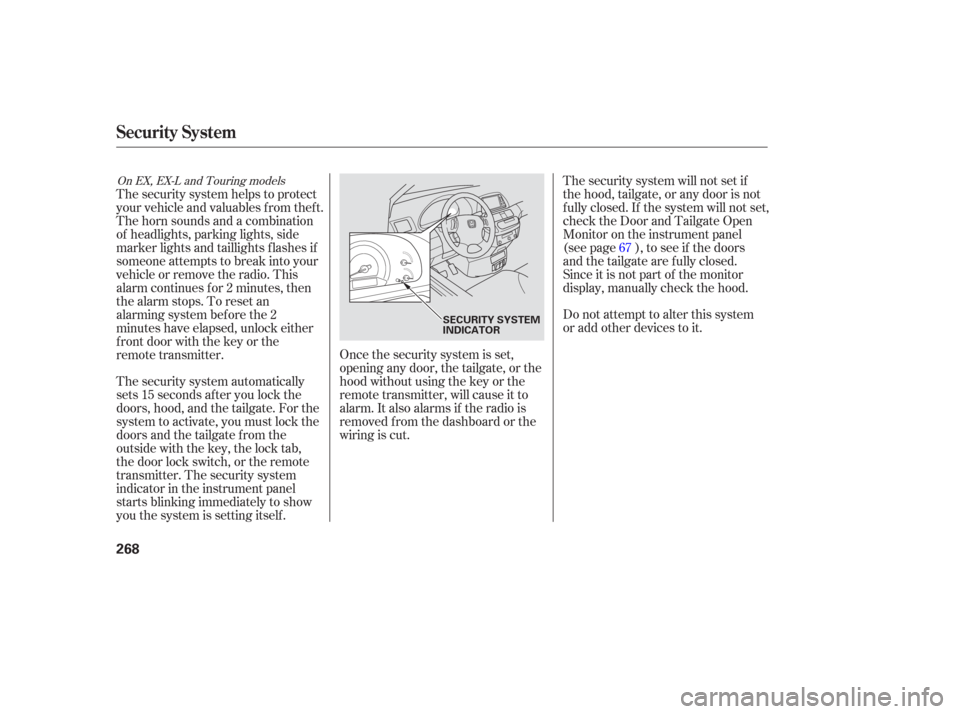
indicator in the instrument panel
starts blinking immediately to show
you the system is setting itself .Once the security system is set,
opening any door, the tailgate, or the
hood without using the key or the
remote transmitter, will cause it to
alarm. It also alarms if the radio is
removed f rom the dashboard or the
wiring is cut.The security system will not set if
the hood, tailgate, or any door is not
f ully closed. If the system will not set,
check the Door and Tailgate Open
Monitor on the instrument panel
(see page ), to see if the doors
and the tailgate are f ully closed.
Since it is not part of the monitor
display, manually check the hood.
Do not attempt to alter this system
or add other devices to it.
The security system helps to protect
your vehicle and valuables f rom thef t.
The horn sounds and a combination
of headlights, parking lights, side
marker lights and taillights f lashes if
someone attempts to break into your
vehicleorremovetheradio.This
alarm continues f or 2 minutes, then
the alarm stops. To reset an
alarming system before the 2
minutes have elapsed, unlock either
f ront door with the key or the
remote transmitter.
67
On EX, EX-L and Touring models
Security System
268
SECURITY SYSTEM
INDICATOR
Page 300 of 420
Apply the parking brake.
In cold weather, turn of f all
electrical accessories to reduce
the drain on the battery.
Make sure the shif t lever is in
Park. Press on the brake pedal.If the engine fails to start, press
the accelerator pedal all the way
down, and hold it there while
starting to clear flooding. If the
engine still does not start, return
to step 5.
Without touching the accelerator
pedal, turn the ignition key to the
START (III) position. Do not hold
the key in the START (III)
position f or more than 15 seconds
at a time. If the engine does not
start right away, pause for at least
10 seconds bef ore trying again.
If the engine does not start within
15 seconds, or starts but stalls
right away, repeat step 4 with the
accelerator pedal pressed halfway
down. If the engine starts, release
pressure on the accelerator pedal
so the engine does not race.
5. 6.
1.
2.
3. 4.
Starting the Engine
Driving
299
Immobilizer SystemThe engine is harder to start in cold
weather. Also, the thinner air f ound at
altitudes above 8,000 f eet (2,400
meters) adds to this problem.
T he immobilizer system protects your
vehicle f rom thef t. If an improperly-
coded key (or other device) is used, the
engine’s f uel system is disabled. See
on page .133
Page 304 of 420
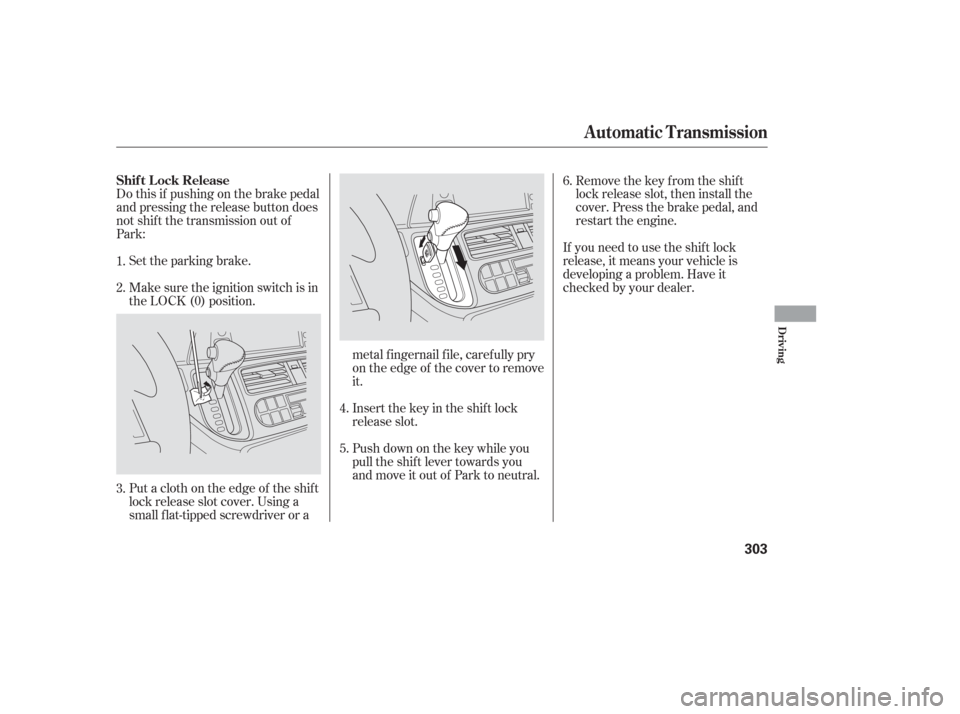
Do this if pushing on the brake pedal
and pressing the release button does
not shif t the transmission out of
Park:Set the parking brake.
Make sure the ignition switch is in
the LOCK (0) position.
Put a cloth on the edge of the shif t
lock release slot cover. Using a
small f lat-tipped screwdriver or a metal f ingernail f ile, caref ully pry
on the edge of the cover to remove
it.Remove the key from the shift
lock release slot, then install the
cover. Press the brake pedal, and
restart the engine.
If you need to use the shif t lock
release, it means your vehicle is
developing a problem. Have it
checked by your dealer.
Push down on the key while you
pull the shif t lever towards you
and move it out of Park to neutral. Insert the key in the shift lock
release slot.
5. 6.
4.
3. 1.
2.
Automatic Transmission
Shif t L ock Release
Driving
303
Page 374 of 420
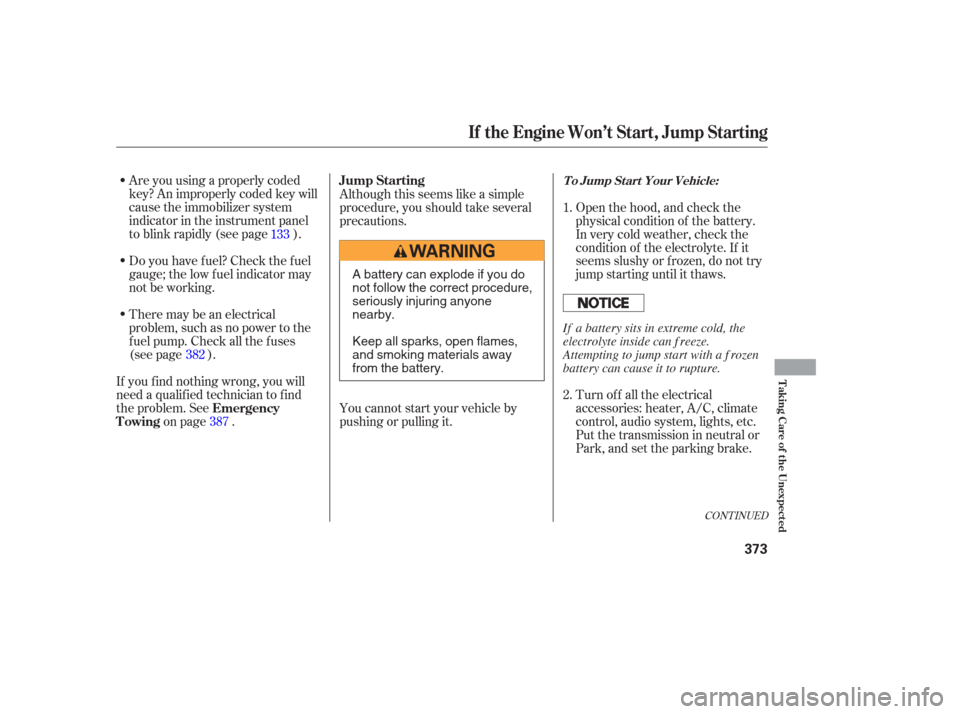
Are you using a properly coded
key? An improperly coded key will
cause the immobilizer system
indicator in the instrument panel
to blink rapidly (see page ).
Do you have f uel? Check the f uel
gauge; the low f uel indicator may
not be working.
There may be an electrical
problem, such as no power to the
f uel pump. Check all the f uses
(see page ).
If youfindnothingwrong,youwill
need a qualif ied technician to f ind
the problem. See on page . Although this seems like a simple
procedure, you should take several
precautions.
Open the hood, and check the
physical condition of the battery.
In very cold weather, check the
condition of the electrolyte. If it
seems slushy or f rozen, do not try
jump starting until it thaws.
You cannot start your vehicle by
pushing or pulling it. Turn of f all the electrical
accessories: heater, A/C, climate
control, audio system, lights, etc.
Put the transmission in neutral or
Park, and set the parking brake.
1.
2.
133
382 387
CONT INUED
Emergency
Towing Jump Starting
To Jump Start Your Vehicle:
If the Engine Won’t Start, Jump Starting
T aking Care of t he Unexpect ed
373
A battery can explode if you do
not follow the correct procedure,
seriously injuring anyone
nearby.
Keep all sparks, open flames,
and smoking materials away
from the battery.
If a battery sits in extreme cold, the
electrolyte inside can f reeze.
Attempting to jump start with a f rozen
battery can cause it to rupture.
Page 410 of 420
CONT INUED
....................................
Accessories .290
ACCESSORY (Ignition Key .....................................
Position) .134
............
Accessory Power Sockets .186
...........................
AC Power Outlet .186
....................
Additives, Engine Oil .335
Adjustable Driver’s Foot
.........................................
Pedals .173
...............
AdvancedAirbagSystem .29
.............................
Airbag (SRS) .11,25
..............
Air Conditioning System .193
.............
Rear A/C Control .198,201
.......................
Air Outlets (Vents) .195
.......................
Air Pressure, Tires .353
.......................
Alcohol in Gasoline .284
......................................
Antif reeze .337
Anti-lock Brakes (ABS) ...............................
Indicator .65,306
...................................
Operation .306
..............
Anti-thef t, Audio System .234
Anti-thef t Steering Column
............................................
Lock .134
........................................
Armrests .156
...............
Audio Controls, Remote . 233................................
Audio System .203
...
Automatic Seat Belt Tensioners . 23
.
Automatic Lighting Off Feature . 128
.............
Automatic Speed Control . 269
..............
Automatic Transmission . 300
..........................
Capacity, Fluid .392
...............
Checking Fluid Level . 340
.......................................
Shif ting .300
Shif t Lever Position ...............................
Indicators .300
................
Shif t Lever Positions . 300
....................
Shif t Lock Release . 303
Battery Charging System ...........................
Indicator .63, 377
............................
Jump Starting .373
..............................
Maintenance .359
............................
Specif ications .393
..............................
Bef ore Driving .283
..................................
Belts, Seat .10, 22
.........................
Beverage Holders .175
..................................
Booster Seats .53 Brakes
...........
Anti-lock System (ABS) . 306
.............
Break-in, New Linings . 284
....................
Bulb Replacement .347
...........................................
Fluid .341
.......................................
Parking .172
.................
System Indicator . 63,379
........................
Wear Indicators .305
.............................
Braking System .305
.................
Break-in, New Vehicle . 284
Brightness Control, ...............................
Instruments .129
......................
Brights, Headlights .126
Bulb Replacement ..........................
Back-up Lights .348
..............................
Brake Lights .347
................
Front Parking Lights . 345
........
Front Side Marker Lights . 345
...........
Front Turn Signal Light . 344
.................................
Headlights .343
.........................
Rear Bulbs .347, 348
............
Rear Turn Signal Light . 347
............................
Specif ications .393
..............................
Bulbs, Halogen .343
Index
A
B
INDEX
I