stop start HONDA ODYSSEY 2012 RB3-RB4 / 4.G User Guide
[x] Cancel search | Manufacturer: HONDA, Model Year: 2012, Model line: ODYSSEY, Model: HONDA ODYSSEY 2012 RB3-RB4 / 4.GPages: 441, PDF Size: 14.07 MB
Page 301 of 441
300
uuWhen DrivinguAutomatic Transmission
Driving
Automatic TransmissionThe following conditions cause the engine to run at high revolutions, and increase
creeping:
•Immediately after the engine starts.
•When the heating and cooling system
*/climate control system
* is in use.
Keep the brake pedal firmly depressed when stopped.
Quickly depressing the accelerator pedal while driving uphill may cause the
transmission to drop to a lower gear, unexpectedly increasing vehicle speed. Depress
the accelerator pedal carefully, especially on slippery roads and curves.
■
Creeping
■
Kickdown
* Not available on all models
Page 308 of 441
307
uuWhen DrivinguVSA
® (Vehicle Stability Assist), aka ESC (Electronic Stability Control), System
Driving
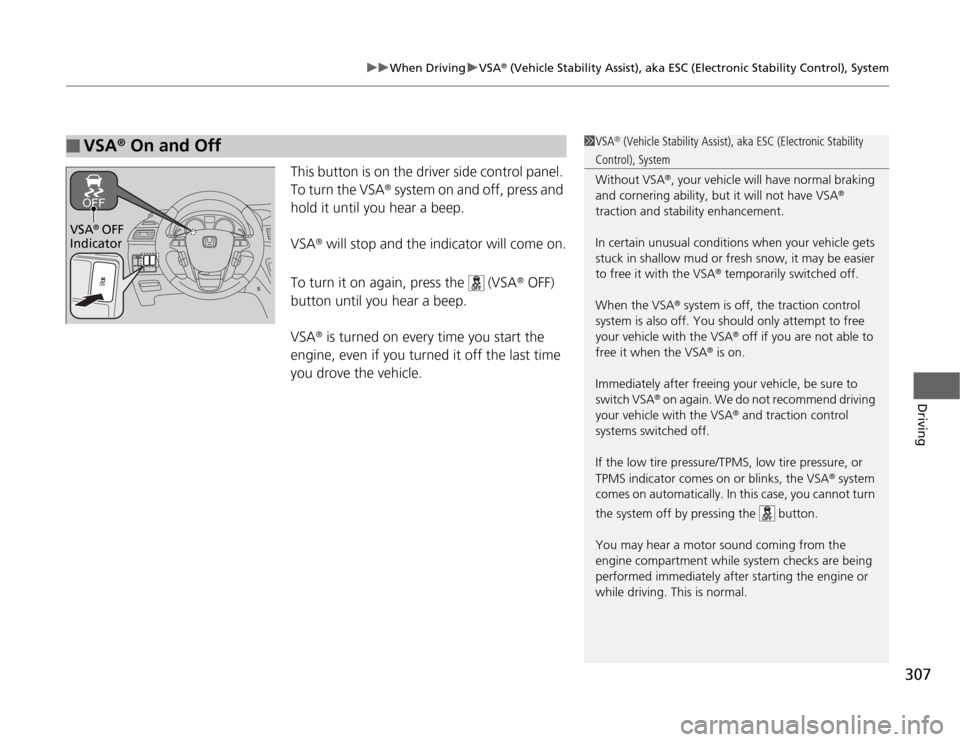
This button is on the driver side control panel.
To turn the VSA
® system on and off, press and
hold it until you hear a beep.
VSA
® will stop and the indicator will come on.
To turn it on again, press the (VSA
® OFF)
button until you hear a beep.
VSA
® is turned on every time you start the
engine, even if you turned it off the last time
you drove the vehicle.
■
VSA
® On and Off
1VSA
® (Vehicle Stability Assist), aka ESC (Electronic Stability
Control), System
Without VSA
®, your vehicle will have normal braking
and cornering ability, but it will not have VSA
®
traction and stability enhancement.
In certain unusual conditions when your vehicle gets
stuck in shallow mud or fresh snow, it may be easier
to free it with the VSA
® temporarily switched off.
When the VSA
® system is off, the traction control
system is also off. You should only attempt to free
your vehicle with the VSA
® off if you are not able to
free it when the VSA
® is on.
Immediately after freeing your vehicle, be sure to
switch VSA
® on again. We do not recommend driving
your vehicle with the VSA
® and traction control
systems switched off.
If the low tire pressure/TPMS, low tire pressure, or
TPMS indicator comes on or blinks, the VSA
® system
comes on automatically. In this case, you cannot turn
the system off by pressing the button.
You may hear a motor sound coming from the
engine compartment while system checks are being
performed immediately after starting the engine or
while driving. This is normal.
VSA
® OFF
Indicator
Page 315 of 441
314Driving
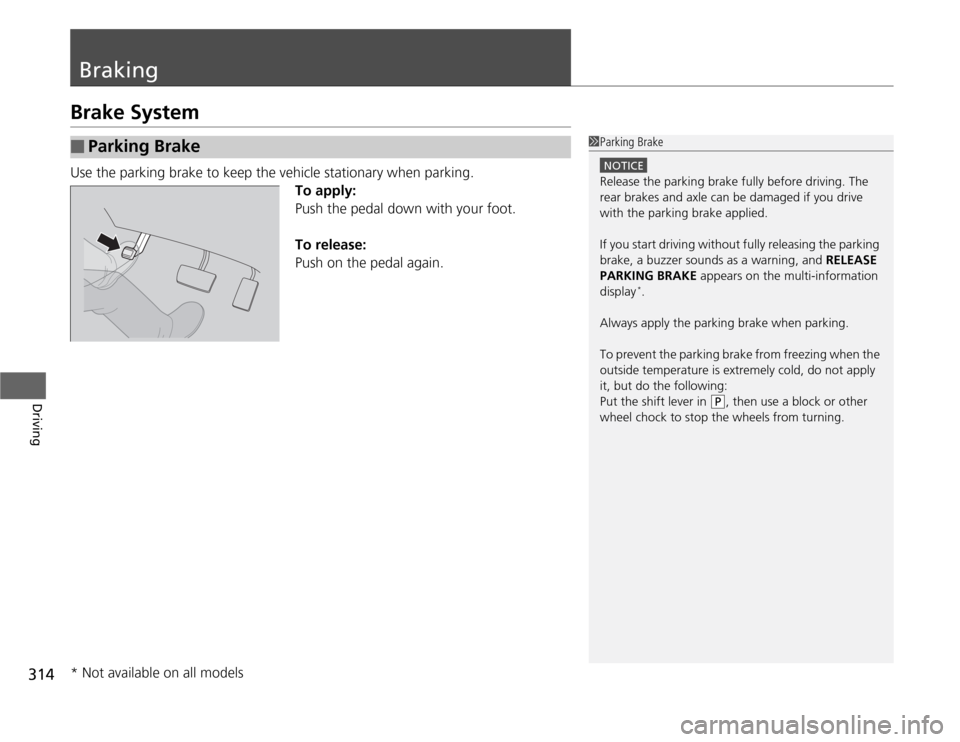
BrakingBrake SystemUse the parking brake to keep the vehicle stationary when parking.
To apply:
Push the pedal down with your foot.
To release:
Push on the pedal again.■
Parking Brake
1Parking Brake
NOTICERelease the parking brake fully before driving. The
rear brakes and axle can be damaged if you drive
with the parking brake applied.
If you start driving without fully releasing the parking
brake, a buzzer sounds as a warning, and RELEASE
PARKING BRAKE appears on the multi-information
display
*.
Always apply the parking brake when parking.
To prevent the parking brake from freezing when the
outside temperature is extremely cold, do not apply
it, but do the following:
Put the shift lever in
(P
, then use a block or other
wheel chock to stop the wheels from turning.
* Not available on all models
Page 317 of 441
316
uuBrakinguABS (Anti-lock Brake System)
Driving
ABS (Anti-lock Brake System)Helps prevent the wheels from locking up, and helps you retain steering control by
pumping the brakes rapidly, much faster than you.
The electronic brake distribution (EBD) system, which is part of the ABS, also
balances the front-to-rear braking distribution according to vehicle loading.
You should never pump the brake pedal. Let the ABS work for you by always
keeping firm, steady pressure on the brake pedal. This is sometimes referred to as
"stomp and steer."■
ABS operation
The brake pedal may pulsate slightly when the ABS is working. Keep holding the
pedal firmly down. On dry pavement, you will need to press on the brake pedal very
hard before the ABS activates. However, you may feel the ABS activate immediately
if you are trying to stop on snow or ice.
When the vehicle speed goes under 6 mph (10 km/h), the ABS stops.
■
ABS
1ABS (Anti-lock Brake System)
NOTICEThe ABS may not function correctly if you use an
incorrect tire type and size.
When the ABS indicator comes on while driving,
there may be a problem with the system.
While normal braking is not affected, there is a
possibility of the ABS not operating. Have the vehicle
checked by a dealer immediately.
The ABS does not reduce the time or distance it takes
to stop the vehicle. It only helps with steering control
during hard braking.
In the following cases, your vehicle may need more
stopping distance than a vehicle without the ABS:•When driving on rough road surfaces, including
when driving on uneven surfaces, such as gravel or
snow.•When tire chains are installed.
You may hear a motor sound coming from the
engine compartment while system checks are being
performed immediately after starting the engine or
while driving. This is normal.
Page 350 of 441
349
uuMaintenance Under the HooduChanging the Engine Oil and Oil Filter
Maintenance
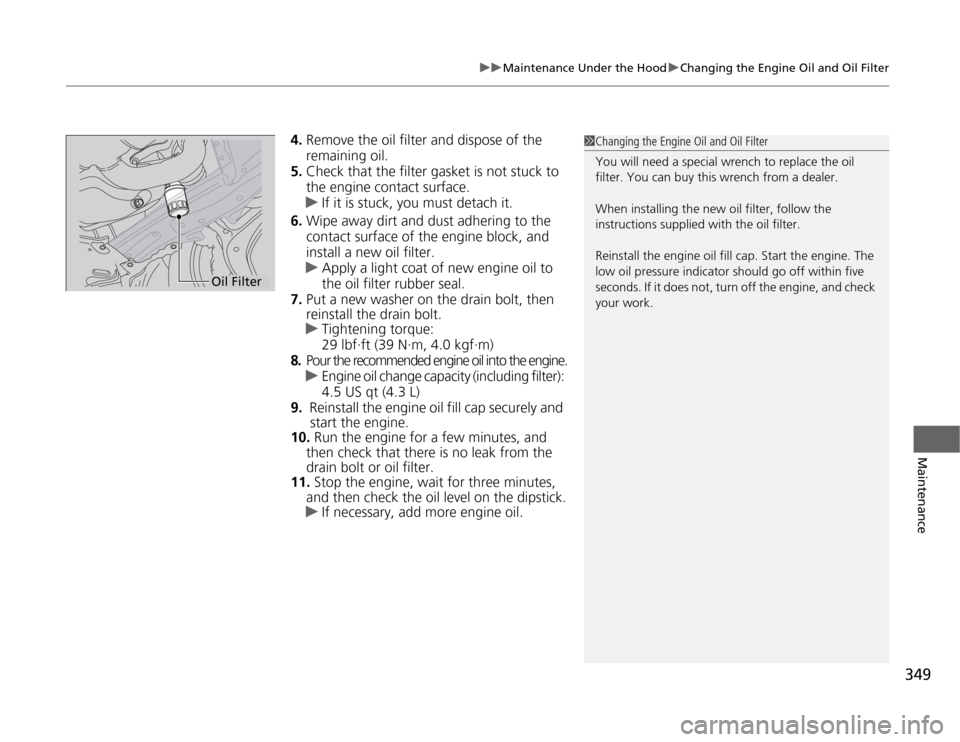
4.Remove the oil filter and dispose of the
remaining oil.
5.Check that the filter gasket is not stuck to
the engine contact surface.
uIf it is stuck, you must detach it.
6.Wipe away dirt and dust adhering to the
contact surface of the engine block, and
install a new oil filter.
uApply a light coat of new engine oil to
the oil filter rubber seal.
7.Put a new washer on the drain bolt, then
reinstall the drain bolt.
uTightening torque:
29 lbf∙ft (39 N∙m, 4.0 kgf∙m)
8.Pour the recommended engine oil into the engine.
uEngine oil change capacity (including filter):
4.5 US qt (4.3 L)
9. Reinstall the engine oil fill cap securely and
start the engine.
10. Run the engine for a few minutes, and
then check that there is no leak from the
drain bolt or oil filter.
11. Stop the engine, wait for three minutes,
and then check the oil level on the dipstick.
uIf necessary, add more engine oil.
1Changing the Engine Oil and Oil Filter
You will need a special wrench to replace the oil
filter. You can buy this wrench from a dealer.
When installing the new oil filter, follow the
instructions supplied with the oil filter.
Reinstall the engine oil fill cap. Start the engine. The
low oil pressure indicator should go off within five
seconds. If it does not, turn off the engine, and check
your work.
Oil Filter
Page 406 of 441
405
uuOverheatinguHow to Handle Overheating
Handling the Unexpected
■
Next thing to do
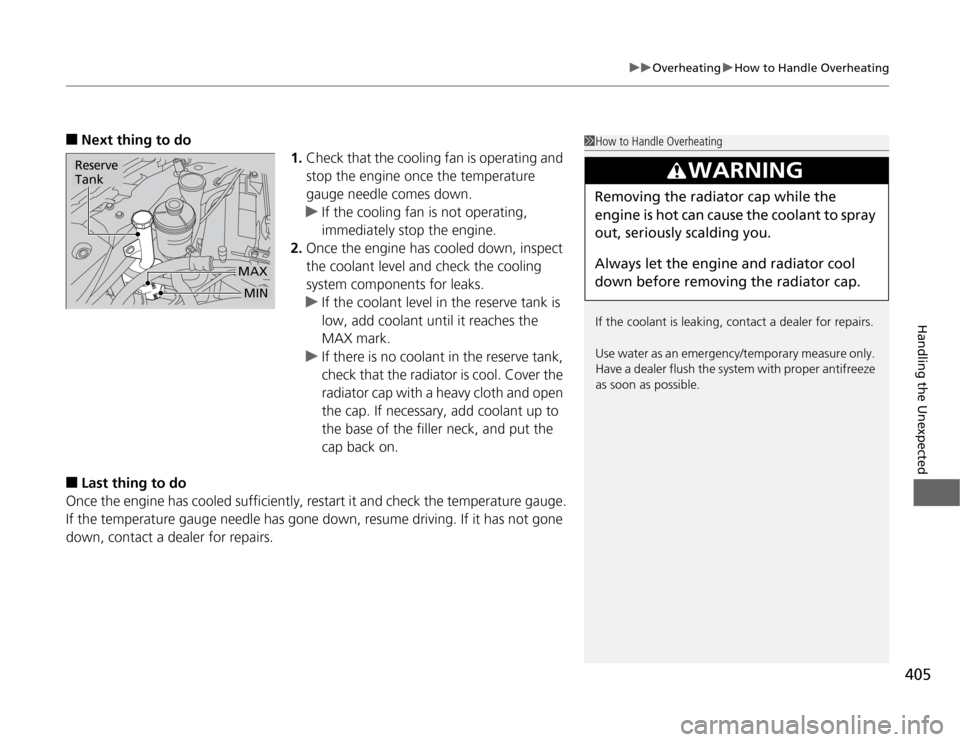
1.Check that the cooling fan is operating and
stop the engine once the temperature
gauge needle comes down.
uIf the cooling fan is not operating,
immediately stop the engine.
2.Once the engine has cooled down, inspect
the coolant level and check the cooling
system components for leaks.
uIf the coolant level in the reserve tank is
low, add coolant until it reaches the
MAX mark.
uIf there is no coolant in the reserve tank,
check that the radiator is cool. Cover the
radiator cap with a heavy cloth and open
the cap. If necessary, add coolant up to
the base of the filler neck, and put the
cap back on.
■
Last thing to do
Once the engine has cooled sufficiently, restart it and check the temperature gauge.
If the temperature gauge needle has gone down, resume driving. If it has not gone
down, contact a dealer for repairs.
1How to Handle Overheating
If the coolant is leaking, contact a dealer for repairs.
Use water as an emergency/temporary measure only.
Have a dealer flush the system with proper antifreeze
as soon as possible.
3
WARNING
Removing the radiator cap while the
engine is hot can cause the coolant to spray
out, seriously scalding you.
Always let the engine and radiator cool
down before removing the radiator cap.
MAX
Reserve
Tank
MIN
Page 407 of 441
406Handling the Unexpected
Indicator, Coming On/BlinkingIf the Low Oil Pressure Indicator Comes On
■
Reasons for the indicator to come on
Comes on when the engine oil pressure is low.
■
What to do as soon as the indicator comes on
1.Immediately park the vehicle in a safe place.
2.If necessary, turn the hazard warning lights on.
■
What to do after parking the vehicle
1.Stop the engine and let it sit for about one minute.
2.Open the hood and check the oil level.
uAdd oil as necessary.
3.Start the engine and check the low oil pressure indicator.
uThe light goes out: Start driving again.
uThe light does not go out within 10 seconds: Stop the engine and
contact a dealer for repairs immediately.
If the Charging System Indicator Comes On
■
Reasons for the indicator to come on
Comes on when the battery is not being charged.
■
What to do when the indicator comes on
Turn off the heating and cooling system
*/climate control system
*, rear
defogger, and other electrical systems, and immediately contact a dealer
for repairs.
1If the Low Oil Pressure Indicator Comes On
NOTICERunning the engine with low oil pressure can cause
serious mechanical damage almost immediately.1If the Charging System Indicator Comes On
If you need to stop temporarily, do not turn off the
engine. Restarting the engine may rapidly discharge
the battery.
* Not available on all models
Page 408 of 441
407
uuIndicator, Coming On/BlinkinguIf the Malfunction Indicator Lamp Comes On or Blinks
Handling the Unexpected
If the Malfunction Indicator Lamp Comes On or Blinks
■
Reasons for indicator lamp to come on or blink
•Comes on when there is a problem with the engine emissions control
system, or the fuel fill cap is missing, or loose.
•Blinks when engine misfiring is detected.
■
What to do when the indicator lamp comes on
Avoid high speeds and immediately get your vehicle inspected at a
dealer.
■
What to do when the indicator lamp blinks
Park the vehicle in a safe place with no flammable items and wait at least
ten minutes or more with the engine stopped until it cools.
■
The message appears on when:
An evaporative system leak is detected. This may be caused by the fuel fill cap being
loose or not being installed.
■
What to do when the message appears:
1.Stop the engine.
2.Check that the fuel fill cap is fully installed.
uIf not, loosen the cap, and then retighten it until it clicks at least once.
3.Drive for several days of normal driving.
uThe message should go off.
■
When the malfunction indicator lamp comes on
Malfunction indicator lamp comes on if the system continues to detect a leak of
gasoline vapor. If this happens, check the fuel fill cap using the procedures described
above.
■
Check/Tighten Fuel Cap Message
1If the Malfunction Indicator Lamp Comes On or Blinks
NOTICEIf you drive with the malfunction indicator lamp on,
the emissions control system and the engine could be
damaged.
If the malfunction indicator lamp blinks again when
restarting the engine, drive to the nearest dealer at
31 mph (50 km/h) or less. Have your vehicle
inspected.
Page 440 of 441

439
Index
Rear Seats ............................................... 162
Seat Heaters ........................................... 181
Security System........................................ 134
Immobilizer System Indicator..................... 80
Security System Alarm Indicator ................ 81
SEL/RESET Knob.................................... 87, 98
Select Lever........................................ 17, 301
Operation ......................................... 17, 302
Releasing ................................................ 403
Won’t Move ........................................... 403
Selecting a Child Seat................................ 58
Selector Knob (Audio)............................. 202
Setting the Clock...................................... 108
Shift Lever.......................................... 17, 301
Shift Lever Position Indicator............ 74, 302
Shifting (Transmission)............................ 301
Shoulder Anchor.................................. 34, 35
Side Airbags............................................... 46
Cutoff System ........................................... 48
Off Indicator ............................................. 48
Side Curtain Airbags.................................. 49
Sliding Door............................................. 126
Power Sliding Door ................................. 128
Sliding the Second Row Outer Seats
Outward................................................. 164
Snow Tires................................................ 378
Spare Tire......................................... 391, 421
Spark Plugs............................................... 420
Specifications........................................... 420
Specified Fuel................................... 325, 420
Speedometer.............................................. 86SRS Airbags (Airbags)................................. 42
Starting the Engine.................................. 297
Does Not Start ......................................... 400
Engine Switch Buzzer .............................. 141
Jump Starting .......................................... 401
Steering Wheel......................................... 151
Adjusting ................................................. 151
Stopping.................................................... 318
Summer Tires............................................ 378
Sunglasses Holder..................................... 180
Supplemental Restraint System (SRS)........ 42
Switches
(Around the Steering Wheel)........ 2, 3, 141
System Message Indicator.......................... 79
TTachometer................................................. 86
Tailgate..................................................... 120
Unable to Open ....................................... 418
Temperature
Gauge ....................................................... 86
Outside Temperature Display ............. 89, 100
Temperature Gauge................................... 86
Temperature Sensor................... 89, 100, 192
Time (Setting)........................................... 108
Tire Pressure Monitoring System
(TPMS)..................................................... 308
Indicator .................................... 78, 409, 410
Tires........................................................... 370
Air Pressure ..................................... 371, 421Checking and Maintaining ...................... 370
Inspection ............................................... 370
Labeling .................................................. 371
Puncture (Flat Tire) .................................. 391
Regulations ............................................. 373
Rotation .................................................. 377
Spare Tire ........................................ 391, 421
Summer .................................................. 378
Tire Chains .............................................. 378
Wear Indicators ....................................... 375
Winter..................................................... 378
Tools.......................................................... 390
Towing a Trailer....................................... 291
Equipment and Accessories ..................... 292
Load Limits .............................................. 291
Towing Your Vehicle
Emergency .............................................. 417
TPMS (Tire Pressure Monitoring
System).................................................... 308
Indicator.................................... 78, 409, 410
Transmission............................................. 301
Automatic ............................................... 301
Fluid ........................................................ 352
Number................................................... 422
Shift Lever Position Indicator.............. 74, 302
Trip Meter....................................... 88, 92, 99
Troubleshooting....................................... 389
Blown Fuse.............. 411, 412, 413, 414, 415
Brake Pedal Vibrates .................................. 21
Buzzer Sounds When Opening Door.......... 22
Emergency Towing .................................. 417