stop start HONDA ODYSSEY 2012 RB3-RB4 / 4.G Owners Manual
[x] Cancel search | Manufacturer: HONDA, Model Year: 2012, Model line: ODYSSEY, Model: HONDA ODYSSEY 2012 RB3-RB4 / 4.GPages: 441, PDF Size: 14.07 MB
Page 73 of 441
72Instrument Panel
IndicatorsIndicator
Name
On/Blinking
Explanation
Message
*
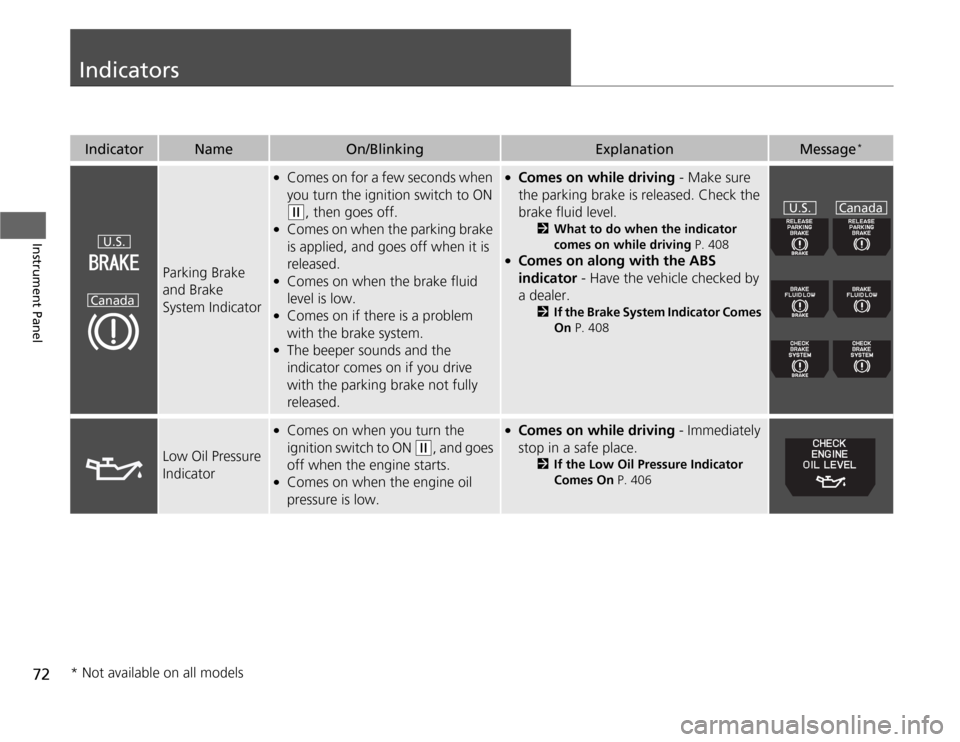
Parking Brake
and Brake
System Indicator
●
Comes on for a few seconds when
you turn the ignition switch to ON (w
, then goes off.
●
Comes on when the parking brake
is applied, and goes off when it is
released.
●
Comes on when the brake fluid
level is low.
●
Comes on if there is a problem
with the brake system.
●
The beeper sounds and the
indicator comes on if you drive
with the parking brake not fully
released.
●
Comes on while driving - Make sure
the parking brake is released. Check the
brake fluid level.
2What to do when the indicator
comes on while driving P. 408
●
Comes on along with the ABS
indicator - Have the vehicle checked by
a dealer.
2If the Brake System Indicator Comes
On P. 408
Low Oil Pressure
Indicator
●
Comes on when you turn the
ignition switch to ON
(w
, and goes
off when the engine starts.
●
Comes on when the engine oil
pressure is low.
●
Comes on while driving - Immediately
stop in a safe place.
2If the Low Oil Pressure Indicator
Comes On P. 406
U.S.
Canada
U.S. Canada
* Not available on all models
Page 74 of 441
73
uuIndicatorsu
Continued
Instrument Panel
Indicator
Name
On/Blinking
Explanation
Message
*
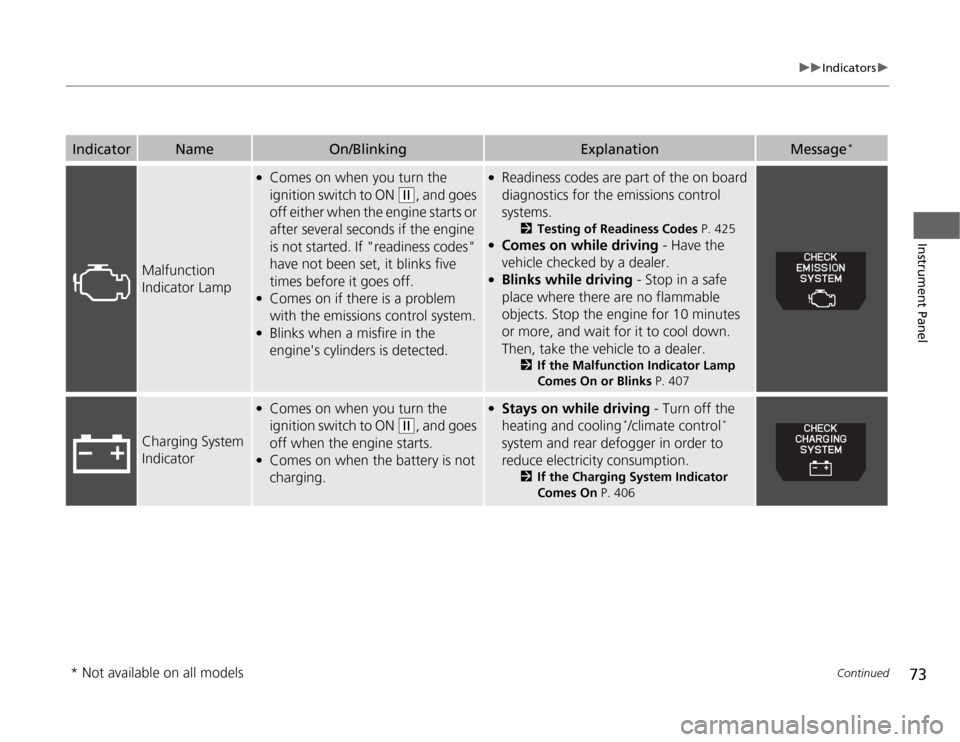
Malfunction
Indicator Lamp
●
Comes on when you turn the
ignition switch to ON
(w
, and goes
off either when the engine starts or
after several seconds if the engine
is not started. If "readiness codes"
have not been set, it blinks five
times before it goes off.
●
Comes on if there is a problem
with the emissions control system.
●
Blinks when a misfire in the
engine's cylinders is detected.
●
Readiness codes are part of the on board
diagnostics for the emissions control
systems.
2Testing of Readiness Codes P. 425
●
Comes on while driving - Have the
vehicle checked by a dealer.
●
Blinks while driving - Stop in a safe
place where there are no flammable
objects. Stop the engine for 10 minutes
or more, and wait for it to cool down.
Then, take the vehicle to a dealer.
2If the Malfunction Indicator Lamp
Comes On or Blinks P. 407
Charging System
Indicator
●
Comes on when you turn the
ignition switch to ON
(w
, and goes
off when the engine starts.
●
Comes on when the battery is not
charging.
●
Stays on while driving - Turn off the
heating and cooling
*/climate control
*
system and rear defogger in order to
reduce electricity consumption.
2If the Charging System Indicator
Comes On P. 406
* Not available on all models
Page 111 of 441
110Controls
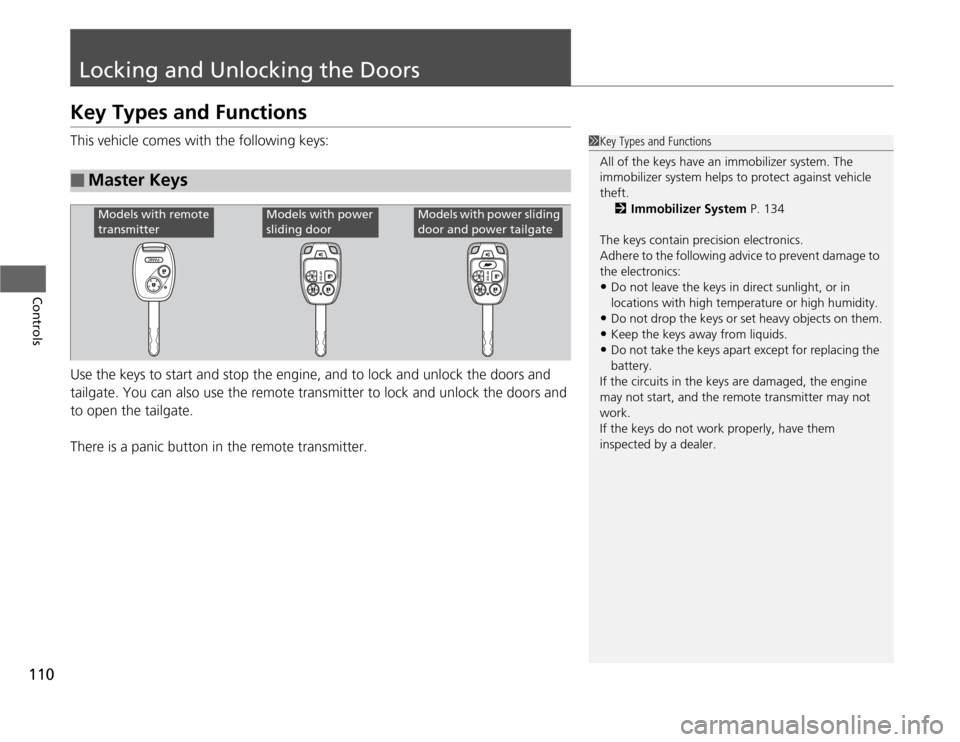
Locking and Unlocking the DoorsKey Types and FunctionsThis vehicle comes with the following keys:
Use the keys to start and stop the engine, and to lock and unlock the doors and
tailgate. You can also use the remote transmitter to lock and unlock the doors and
to open the tailgate.
There is a panic button in the remote transmitter.■
Master Keys
1Key Types and Functions
All of the keys have an immobilizer system. The
immobilizer system helps to protect against vehicle
theft.
2Immobilizer System P. 134
The keys contain precision electronics.
Adhere to the following advice to prevent damage to
the electronics:•Do not leave the keys in direct sunlight, or in
locations with high temperature or high humidity.•Do not drop the keys or set heavy objects on them.•Keep the keys away from liquids.•Do not take the keys apart except for replacing the
battery.
If the circuits in the keys are damaged, the engine
may not start, and the remote transmitter may not
work.
If the keys do not work properly, have them
inspected by a dealer.
Models with remote
transmitter
Models with power
sliding door
Models with power sliding
door and power tailgate
Page 112 of 441
111
uuLocking and Unlocking the DoorsuKey Types and Functions
Controls
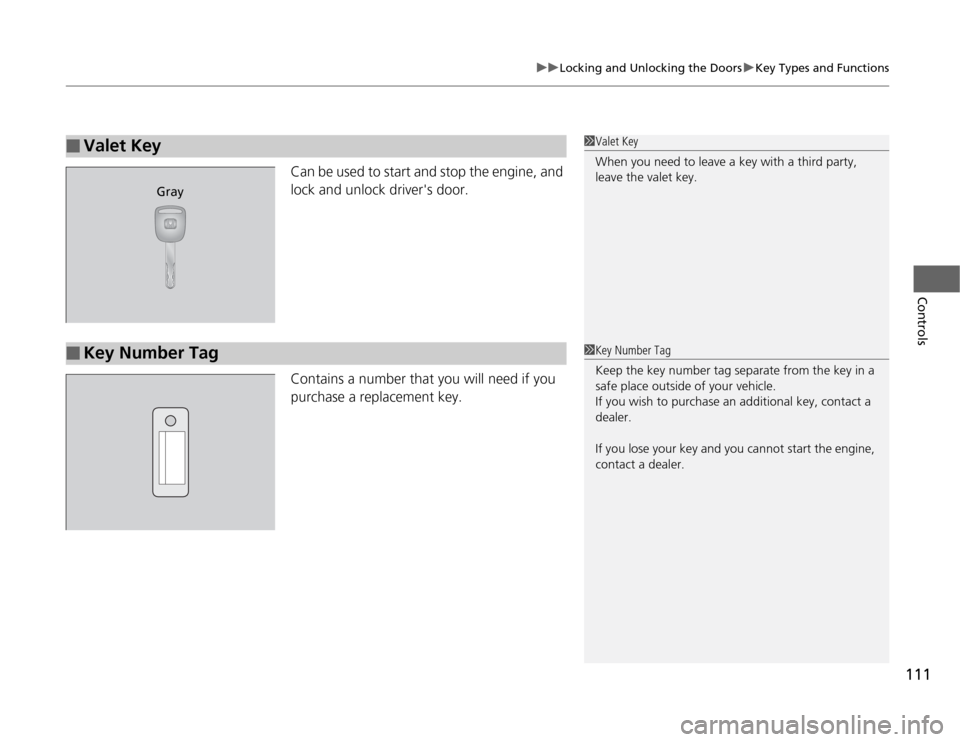
Can be used to start and stop the engine, and
lock and unlock driver's door.
Contains a number that you will need if you
purchase a replacement key.
■
Valet Key
1Valet Key
When you need to leave a key with a third party,
leave the valet key.
Gray
■
Key Number Tag
1Key Number Tag
Keep the key number tag separate from the key in a
safe place outside of your vehicle.
If you wish to purchase an additional key, contact a
dealer.
If you lose your key and you cannot start the engine,
contact a dealer.
Page 133 of 441
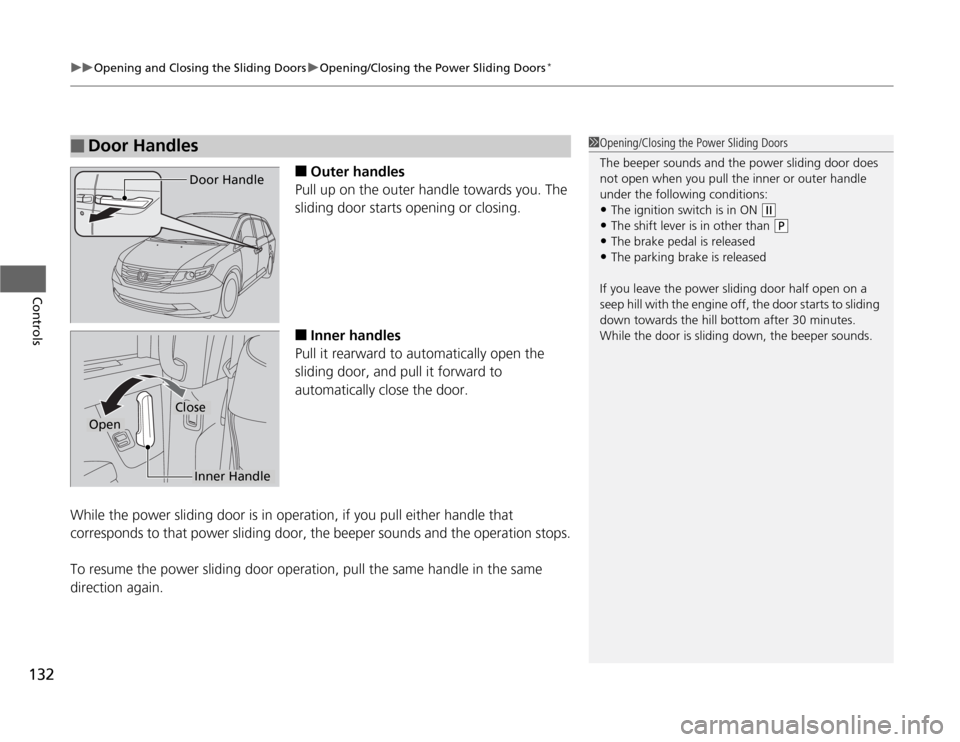
uuOpening and Closing the Sliding DoorsuOpening/Closing the Power Sliding Doors
*
132Controls
■
Outer handles
Pull up on the outer handle towards you. The
sliding door starts opening or closing.
■
Inner handles
Pull it rearward to automatically open the
sliding door, and pull it forward to
automatically close the door.
While the power sliding door is in operation, if you pull either handle that
corresponds to that power sliding door, the beeper sounds and the operation stops.
To resume the power sliding door operation, pull the same handle in the same
direction again.
■
Door Handles
1Opening/Closing the Power Sliding Doors
The beeper sounds and the power sliding door does
not open when you pull the inner or outer handle
under the following conditions:•The ignition switch is in ON
(w
•The shift lever is in other than
(P
•The brake pedal is released•The parking brake is released
If you leave the power sliding door half open on a
seep hill with the engine off, the door starts to sliding
down towards the hill bottom after 30 minutes.
While the door is sliding down, the beeper sounds.
Door HandleInner Handle
Close
Open
Page 142 of 441
141
Controls
Operating the Switches Around the Steering WheelIgnition Switch
1Ignition Switch
You cannot take the key out unless the shift lever is
in
(P
.
If you open the driver's door when the key is in LOCK
(0
or ACCESSORY
(q
, a warning buzzer will sound
to remind you to take the key out.
When this happens, the following messages appear
on the multi-information display
*:
•In LOCK
(0
: REMOVE KEY.
•In ACCESSORY
(q
: REMOVE KEY The buzzer will
stop when you take the key out.
If the key won't turn from LOCK
(0
to ACCESSORY
(q
, turn the key while moving the steering wheel left
and right. The steering wheel will unlock, allowing
the key to turn.
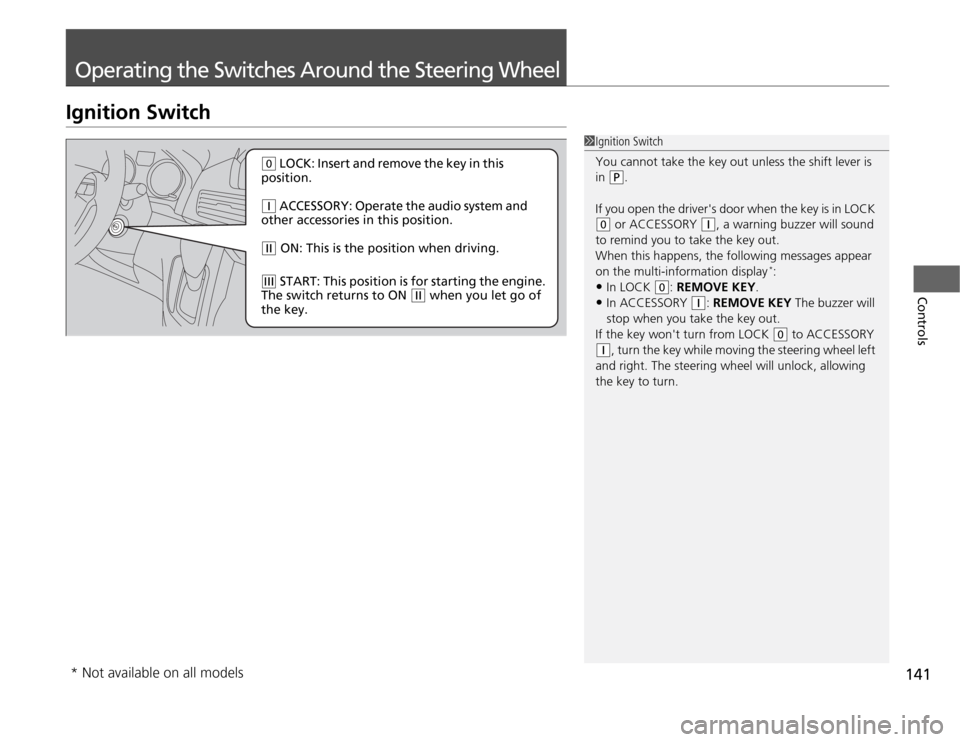
(0
LOCK: Insert and remove the key in this
position.
(q
ACCESSORY: Operate the audio system and
other accessories in this position.
(w
ON: This is the position when driving.
(e
START: This position is for starting the engine.
The switch returns to ON
(w
when you let go of
the key.
* Not available on all models
Page 146 of 441
145
uuOperating the Switches Around the Steering WheeluWipers and Washers
Continued
Controls
Wipers and Washers
The windshield wipers and washers can be
used when the ignition switch is in ON
(w
.
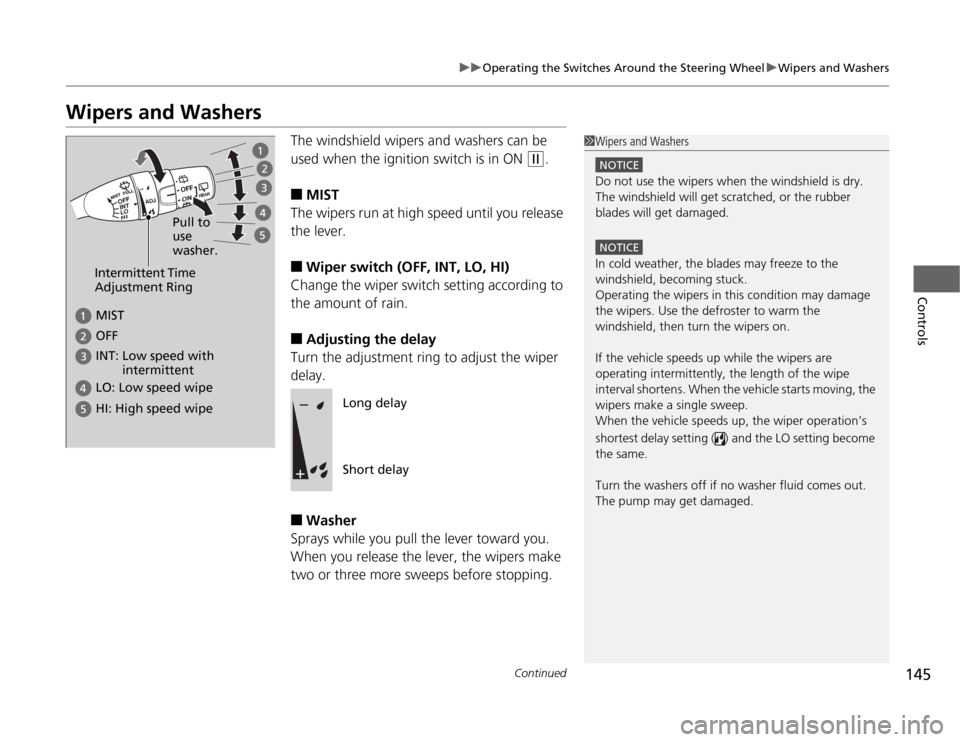
■
MIST
The wipers run at high speed until you release
the lever.
■
Wiper switch (OFF, INT, LO, HI)
Change the wiper switch setting according to
the amount of rain.
■
Adjusting the delay
Turn the adjustment ring to adjust the wiper
delay.
■
Washer
Sprays while you pull the lever toward you.
When you release the lever, the wipers make
two or three more sweeps before stopping.
1Wipers and Washers
NOTICEDo not use the wipers when the windshield is dry.
The windshield will get scratched, or the rubber
blades will get damaged.NOTICEIn cold weather, the blades may freeze to the
windshield, becoming stuck.
Operating the wipers in this condition may damage
the wipers. Use the defroster to warm the
windshield, then turn the wipers on.
If the vehicle speeds up while the wipers are
operating intermittently, the length of the wipe
interval shortens. When the vehicle starts moving, the
wipers make a single sweep.
When the vehicle speeds up, the wiper operation’s
shortest delay setting ( ) and the LO setting become
the same.
Turn the washers off if no washer fluid comes out.
The pump may get damaged.
Intermittent Time
Adjustment Ring
MIST INT: Low speed with
intermittent OFF LO: Low speed wipe HI: High speed wipe
Pull to
use
washer.
Long delay
Short delay
Page 152 of 441
151
uuOperating the Switches Around the Steering WheeluAdjusting the Steering Wheel
Controls
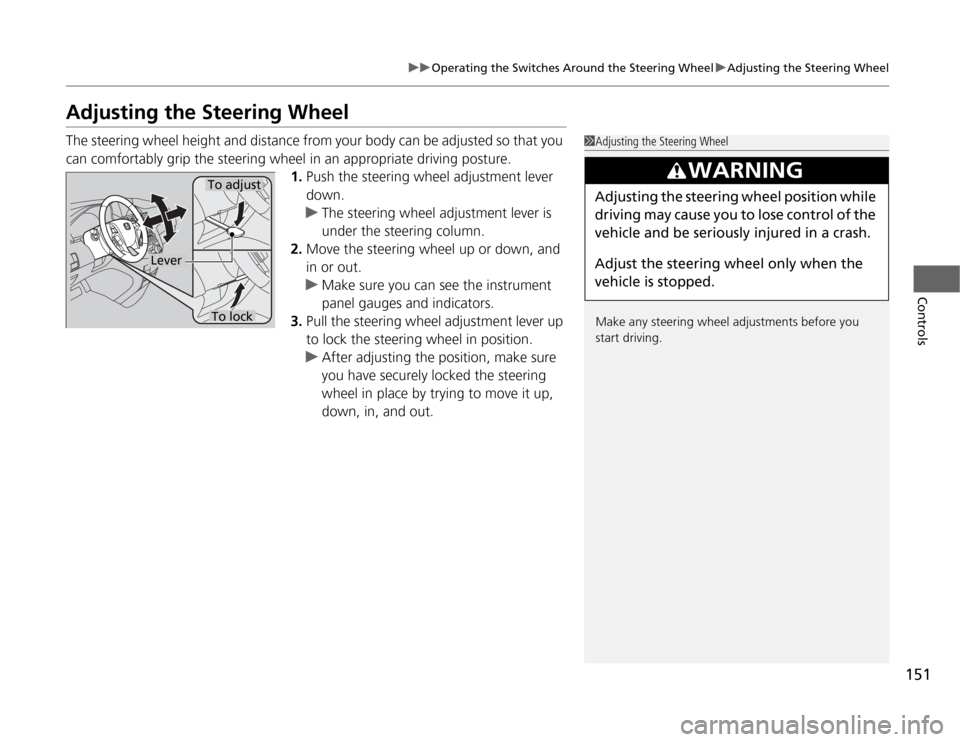
Adjusting the Steering WheelThe steering wheel height and distance from your body can be adjusted so that you
can comfortably grip the steering wheel in an appropriate driving posture.
1.Push the steering wheel adjustment lever
down.
uThe steering wheel adjustment lever is
under the steering column.
2.Move the steering wheel up or down, and
in or out.
uMake sure you can see the instrument
panel gauges and indicators.
3.Pull the steering wheel adjustment lever up
to lock the steering wheel in position.
uAfter adjusting the position, make sure
you have securely locked the steering
wheel in place by trying to move it up,
down, in, and out.
1Adjusting the Steering Wheel
Make any steering wheel adjustments before you
start driving.
3
WARNING
Adjusting the steering wheel position while
driving may cause you to lose control of the
vehicle and be seriously injured in a crash.
Adjust the steering wheel only when the
vehicle is stopped.
To adjustTo lock
Lever
Page 286 of 441
285
Driving
This chapter discusses driving, refueling, and information on items such as accessories.
Before Driving
Driving Preparation .......................... 286
Maximum Load Limit........................ 289
Towing a Trailer
Towing Preparation .......................... 291
Driving Safely with a Trailer .............. 295
Towing Your Vehicle ........................ 296
When Driving
Starting the Engine .......................... 297
Precautions While Driving................. 299
Automatic Transmission ................... 300
Shifting ............................................ 301Cruise Control ................................. 303
VSA
® (Vehicle Stability Assist), aka ESC
(Electronic Stability Control), System ...... 306
TPMS (Tire Pressure Monitoring System) ... 308
Tire Pressure Monitoring System (TPMS) -
Required Federal Explanation ......... 309BSI (Blind Spot Information) System
*.... 312
Braking
Brake System ................................... 314
ABS (Anti-lock Brake System) ........... 316
Brake Assist System.......................... 317
Parking Your Vehicle
When Stopped................................. 318Parking ............................................ 318
Parking Sensor System
*................... 319
Rearview Camera
*............................ 323
Rearview Display Image ................... 324
Refueling
Fuel Information .............................. 325
How to Refuel ................................. 326
Fuel Economy.................................... 328
Improving Fuel Economy .................. 328
Accessories and Modifications
Accessories ...................................... 329
Modifications................................... 329
* Not available on all models
Page 299 of 441
uuWhen DrivinguStarting the Engine
298Driving
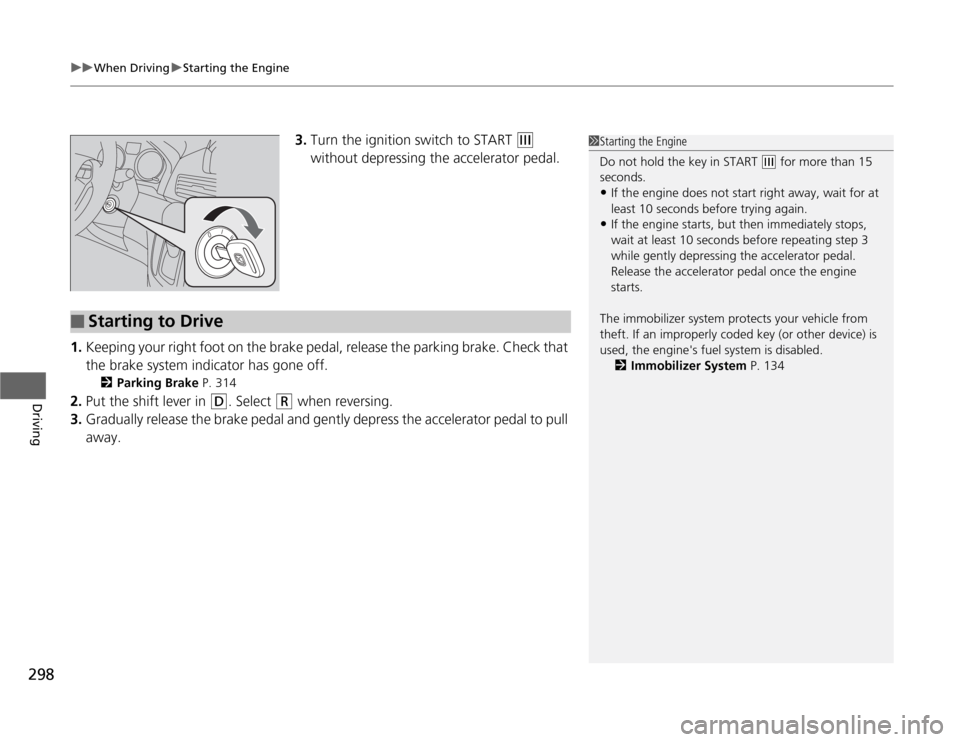
3.Turn the ignition switch to START
(e
without depressing the accelerator pedal.
1.Keeping your right foot on the brake pedal, release the parking brake. Check that
the brake system indicator has gone off.
2Parking Brake P. 314
2.Put the shift lever in
(D
. Select
(R
when reversing.
3.Gradually release the brake pedal and gently depress the accelerator pedal to pull
away.
1Starting the Engine
Do not hold the key in START
(e
for more than 15
seconds.
•If the engine does not start right away, wait for at
least 10 seconds before trying again.•If the engine starts, but then immediately stops,
wait at least 10 seconds before repeating step 3
while gently depressing the accelerator pedal.
Release the accelerator pedal once the engine
starts.
The immobilizer system protects your vehicle from
theft. If an improperly coded key (or other device) is
used, the engine's fuel system is disabled.
2Immobilizer System P. 134
■
Starting to Drive