Automatic HONDA ODYSSEY 2012 RB3-RB4 / 4.G Owner's Guide
[x] Cancel search | Manufacturer: HONDA, Model Year: 2012, Model line: ODYSSEY, Model: HONDA ODYSSEY 2012 RB3-RB4 / 4.GPages: 441, PDF Size: 14.07 MB
Page 149 of 441
148
uuOperating the Switches Around the Steering WheeluRear Defogger/Heated Door Mirror
* Button
Controls
Rear Defogger/Heated Door Mirror
* Button
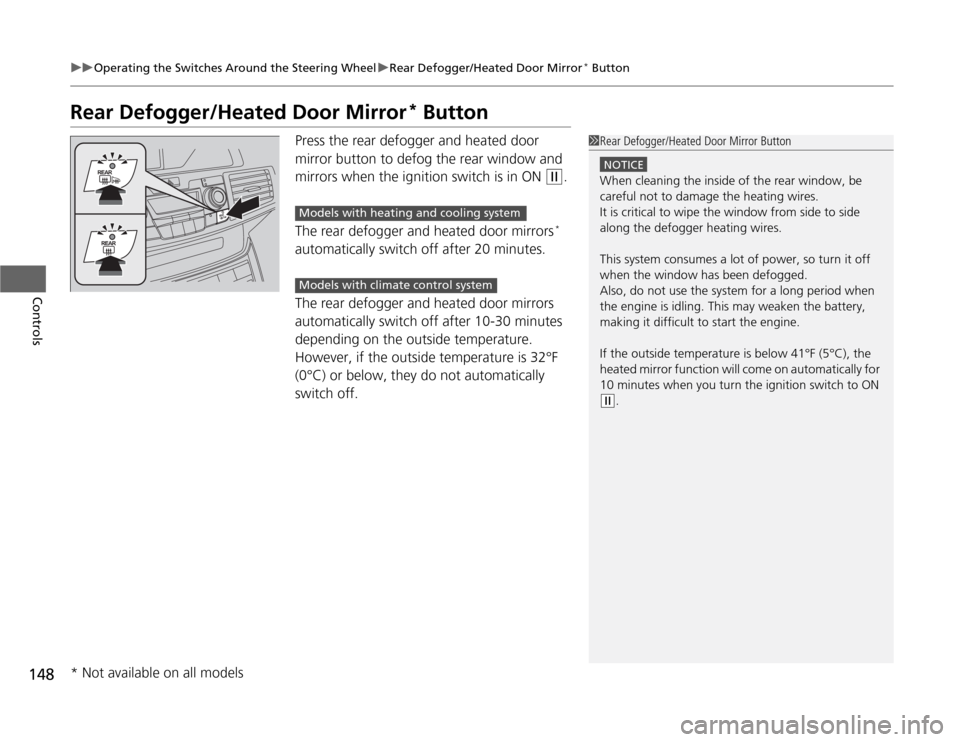
Press the rear defogger and heated door
mirror button to defog the rear window and
mirrors when the ignition switch is in ON
(w
.
The rear defogger and heated door mirrors*
automatically switch off after 20 minutes.
The rear defogger and heated door mirrors
automatically switch off after 10-30 minutes
depending on the outside temperature.
However, if the outside temperature is 32°F
(0°C) or below, they do not automatically
switch off.
1Rear Defogger/Heated Door Mirror Button
NOTICEWhen cleaning the inside of the rear window, be
careful not to damage the heating wires.
It is critical to wipe the window from side to side
along the defogger heating wires.
This system consumes a lot of power, so turn it off
when the window has been defogged.
Also, do not use the system for a long period when
the engine is idling. This may weaken the battery,
making it difficult to start the engine.
If the outside temperature is below 41°F (5°C), the
heated mirror function will come on automatically for
10 minutes when you turn the ignition switch to ON (w
.
Models with heating and cooling systemModels with climate control system
* Not available on all models
Page 150 of 441
149
uuOperating the Switches Around the Steering WheeluDriving Position Memory System
*
Continued
Controls
Driving Position Memory System
*
You can store two driver’s seat and outside mirrors position with the driving position
memory system.
When you unlock and open the driver’s door with a remote transmitter, the seat and
outside mirrors adjust automatically to one of the two preset positions.
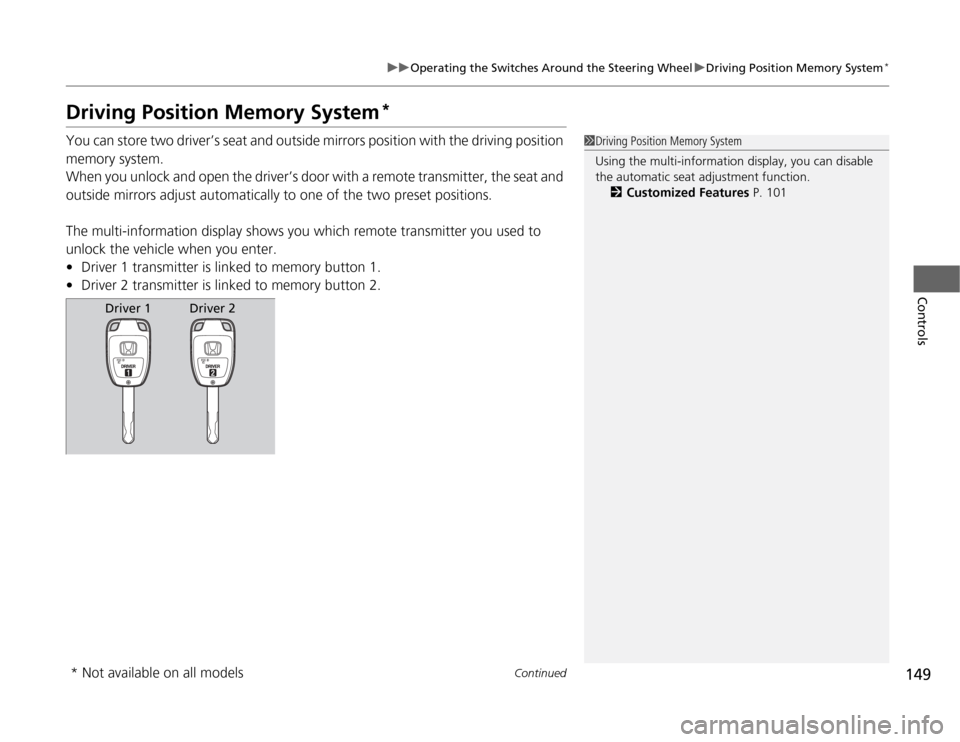
The multi-information display shows you which remote transmitter you used to
unlock the vehicle when you enter.
•Driver 1 transmitter is linked to memory button 1.
•Driver 2 transmitter is linked to memory button 2.
1Driving Position Memory System
Using the multi-information display, you can disable
the automatic seat adjustment function.
2Customized Features P. 101
Driver 1
Driver 2
* Not available on all models
Page 151 of 441
uuOperating the Switches Around the Steering WheeluDriving Position Memory System
*
150Controls
1.Adjust the driver’s seat and the outside
mirrors to the desired position, and turn the
ignition switch to ON
(w
.
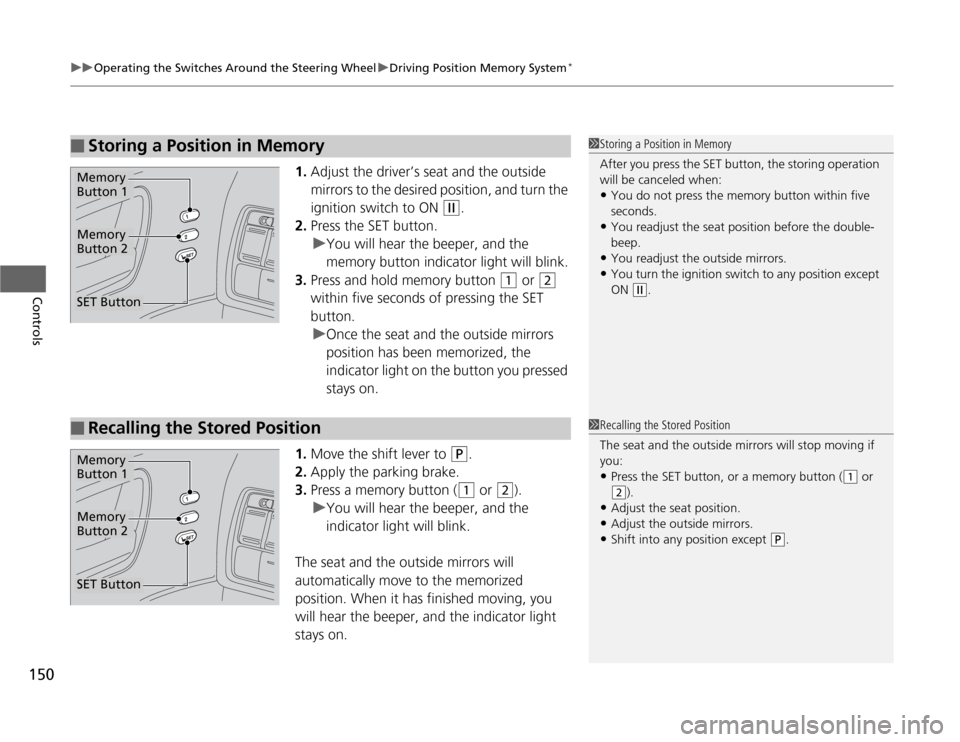
2.Press the SET button.
uYou will hear the beeper, and the
memory button indicator light will blink.
3.Press and hold memory button
(1
or
(2
within five seconds of pressing the SET
button.
uOnce the seat and the outside mirrors
position has been memorized, the
indicator light on the button you pressed
stays on.
1.Move the shift lever to
(P
.
2.Apply the parking brake.
3.Press a memory button ((1
or
(2
).
uYou will hear the beeper, and the
indicator light will blink.
The seat and the outside mirrors will
automatically move to the memorized
position. When it has finished moving, you
will hear the beeper, and the indicator light
stays on.
■
Storing a Position in Memory
1Storing a Position in Memory
After you press the SET button, the storing operation
will be canceled when: •You do not press the memory button within five
seconds.•You readjust the seat position before the double-
beep.•You readjust the outside mirrors.•You turn the ignition switch to any position except
ON
(w
.
Memory
Button 1Memory
Button 2SET Button■
Recalling the Stored Position
1Recalling the Stored Position
The seat and the outside mirrors will stop moving if
you: •Press the SET button, or a memory button (
(1
or
(2
).
•Adjust the seat position.•Adjust the outside mirrors.•Shift into any position except
(P
.
Memory
Button 1Memory
Button 2SET Button
Page 153 of 441
152Controls
Adjusting the MirrorsInterior Rearview MirrorAdjust the angle of the rearview mirror when you are sitting in the correct driving
position.
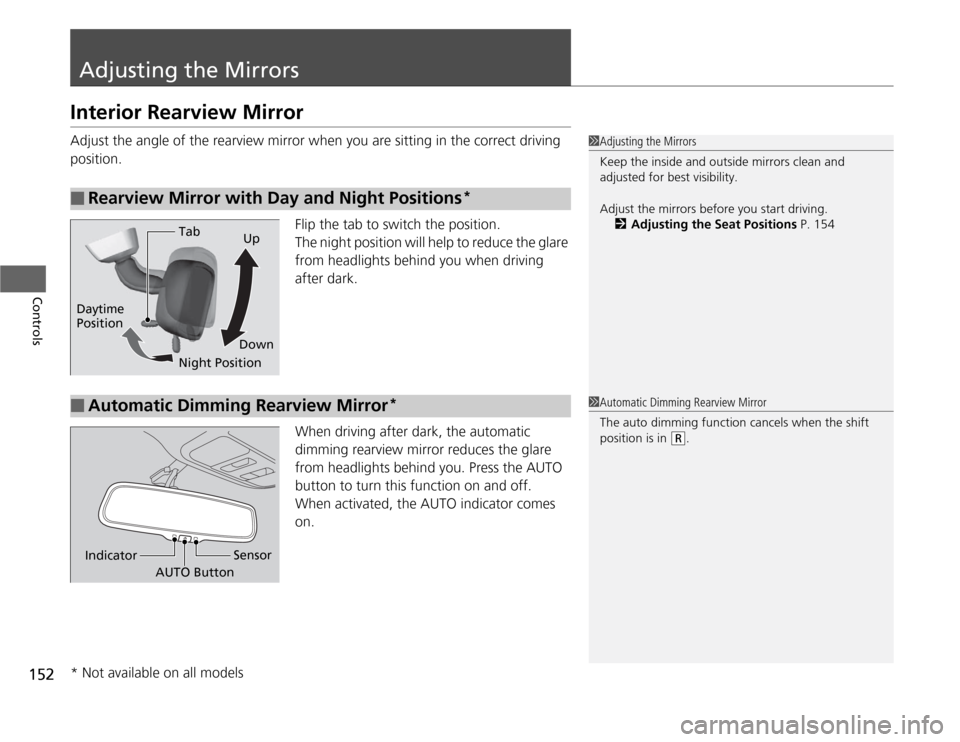
Flip the tab to switch the position.
The night position will help to reduce the glare
from headlights behind you when driving
after dark.
When driving after dark, the automatic
dimming rearview mirror reduces the glare
from headlights behind you. Press the AUTO
button to turn this function on and off.
When activated, the AUTO indicator comes
on.■
Rearview Mirror with Day and Night Positions
*
1Adjusting the Mirrors
Keep the inside and outside mirrors clean and
adjusted for best visibility.
Adjust the mirrors before you start driving.
2Adjusting the Seat Positions P. 154
Tab
Daytime
Position
Night PositionUp
Down■
Automatic Dimming Rearview Mirror
*
1Automatic Dimming Rearview Mirror
The auto dimming function cancels when the shift
position is in
(R
.
Sensor
AUTO Button Indicator
* Not available on all models
Page 154 of 441
153
uuAdjusting the MirrorsuPower Door Mirrors
Controls
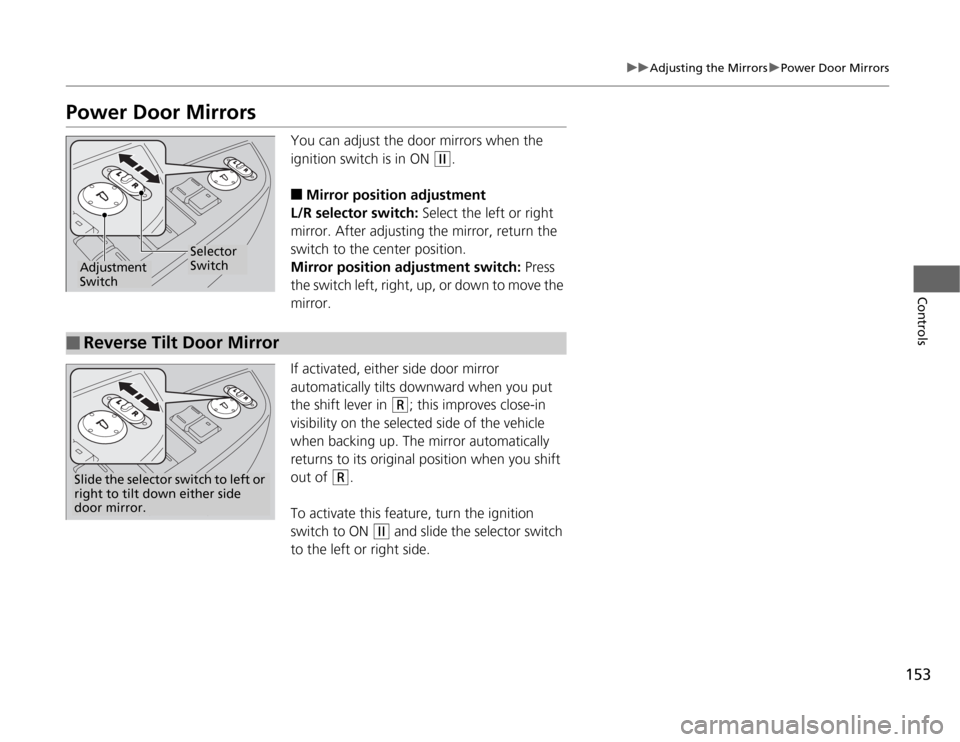
Power Door Mirrors
You can adjust the door mirrors when the
ignition switch is in ON
(w
.
■
Mirror position adjustment
L/R selector switch: Select the left or right
mirror. After adjusting the mirror, return the
switch to the center position.
Mirror position adjustment switch: Press
the switch left, right, up, or down to move the
mirror.
If activated, either side door mirror
automatically tilts downward when you put
the shift lever in
(R
; this improves close-in
visibility on the selected side of the vehicle
when backing up. The mirror automatically
returns to its original position when you shift
out of
(R
.
To activate this feature, turn the ignition
switch to ON
(w
and slide the selector switch
to the left or right side.
Selector
Switch
Adjustment
Switch
■
Reverse Tilt Door MirrorSlide the selector switch to left or
right to tilt down either side
door mirror.
Page 168 of 441
167
uuAdjusting the SeatsuRear Seats
Controls
■
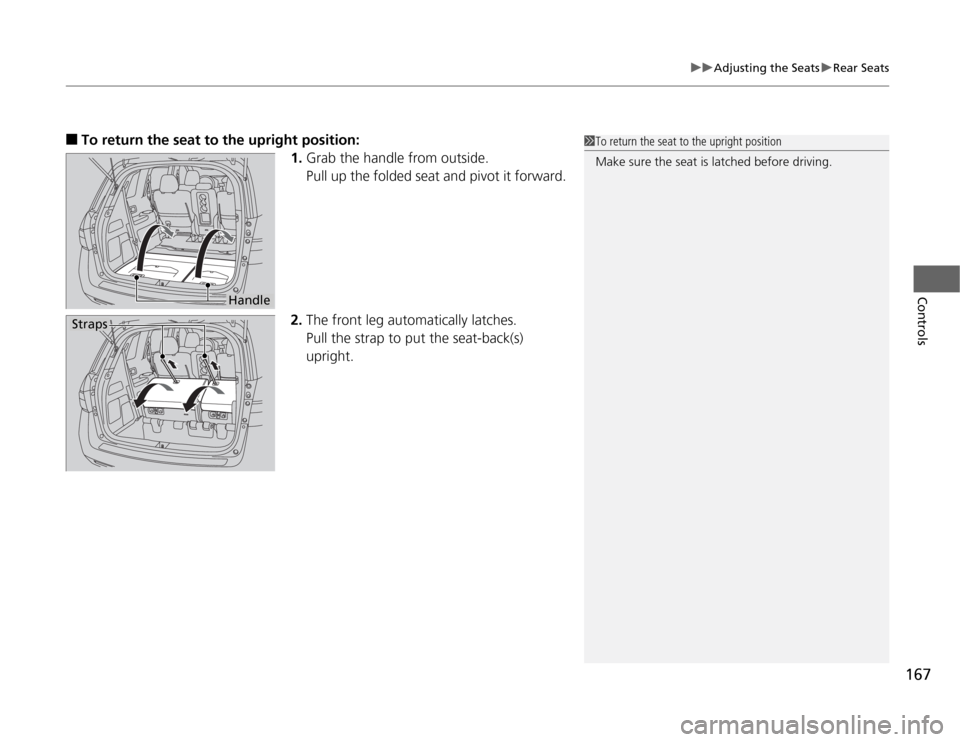
To return the seat to the upright position:
1.Grab the handle from outside.
Pull up the folded seat and pivot it forward.
2.The front leg automatically latches.
Pull the strap to put the seat-back(s)
upright.
1To return the seat to the upright position
Make sure the seat is latched before driving.
Handle
Straps
Page 174 of 441
Continued
173
uuInterior Lights/Interior Convenience ItemsuInterior Convenience Items
Controls
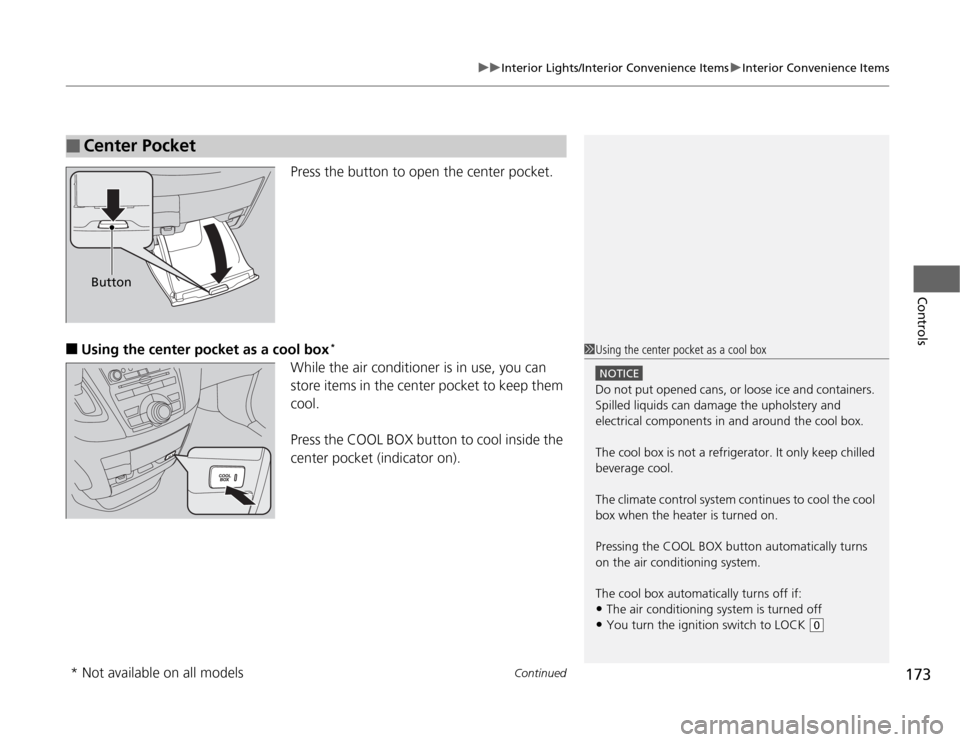
Press the button to open the center pocket.
■
Using the center pocket as a cool box
*
While the air conditioner is in use, you can
store items in the center pocket to keep them
cool.
Press the COOL BOX button to cool inside the
center pocket (indicator on).
■
Center PocketButton
1Using the center pocket as a cool box
NOTICEDo not put opened cans, or loose ice and containers.
Spilled liquids can damage the upholstery and
electrical components in and around the cool box.
The cool box is not a refrigerator. It only keep chilled
beverage cool.
The climate control system continues to cool the cool
box when the heater is turned on.
Pressing the COOL BOX button automatically turns
on the air conditioning system.
The cool box automatically turns off if:•The air conditioning system is turned off•You turn the ignition switch to LOCK
(0
* Not available on all models
Page 185 of 441
uuHeating and Cooling
*uUsing Vents, Heating and A/C
184Controls
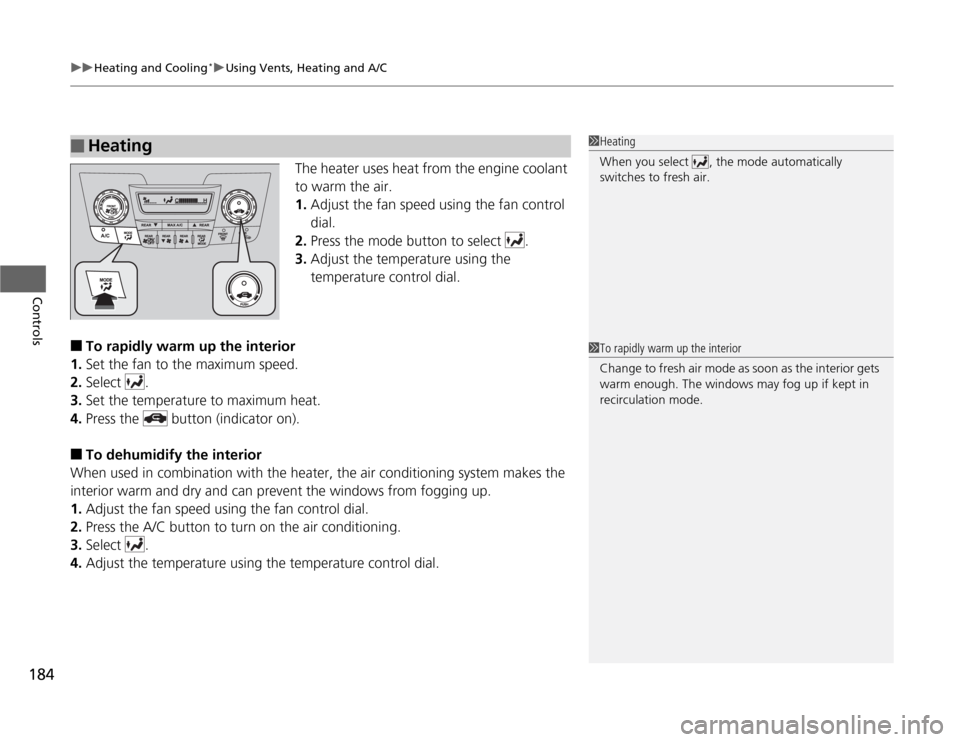
The heater uses heat from the engine coolant
to warm the air.
1.Adjust the fan speed using the fan control
dial.
2.Press the mode button to select .
3.Adjust the temperature using the
temperature control dial.
■
To rapidly warm up the interior
1.Set the fan to the maximum speed.
2.Select .
3.Set the temperature to maximum heat.
4.Press the button (indicator on).
■
To dehumidify the interior
When used in combination with the heater, the air conditioning system makes the
interior warm and dry and can prevent the windows from fogging up.
1.Adjust the fan speed using the fan control dial.
2.Press the A/C button to turn on the air conditioning.
3.Select .
4.Adjust the temperature using the temperature control dial.
■
Heating
1Heating
When you select , the mode automatically
switches to fresh air.1To rapidly warm up the interior
Change to fresh air mode as soon as the interior gets
warm enough. The windows may fog up if kept in
recirculation mode.
Page 186 of 441
185
uuHeating and Cooling
*uUsing Vents, Heating and A/C
Controls
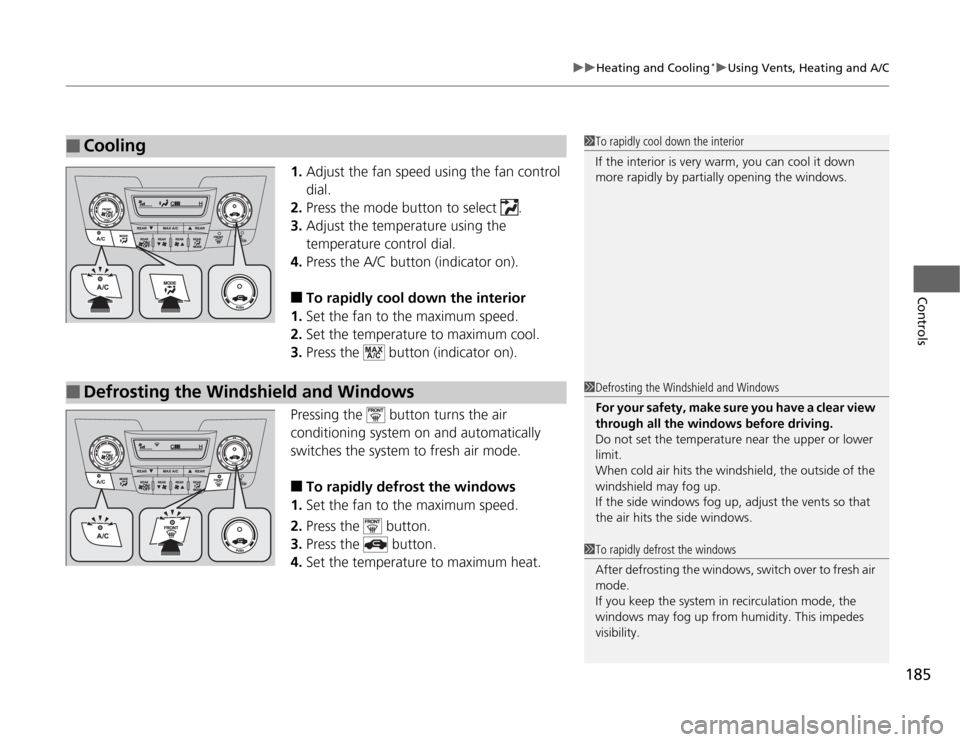
1.Adjust the fan speed using the fan control
dial.
2.Press the mode button to select .
3.Adjust the temperature using the
temperature control dial.
4.Press the A/C button (indicator on).■
To rapidly cool down the interior
1.Set the fan to the maximum speed.
2.Set the temperature to maximum cool.
3.Press the button (indicator on).
Pressing the button turns the air
conditioning system on and automatically
switches the system to fresh air mode.
■
To rapidly defrost the windows
1.Set the fan to the maximum speed.
2.Press the button.
3.Press the button.
4.Set the temperature to maximum heat.
■
Cooling
1To rapidly cool down the interior
If the interior is very warm, you can cool it down
more rapidly by partially opening the windows.
■
Defrosting the Windshield and Windows
1Defrosting the Windshield and Windows
For your safety, make sure you have a clear view
through all the windows before driving.
Do not set the temperature near the upper or lower
limit.
When cold air hits the windshield, the outside of the
windshield may fog up.
If the side windows fog up, adjust the vents so that
the air hits the side windows.1To rapidly defrost the windows
After defrosting the windows, switch over to fresh air
mode.
If you keep the system in recirculation mode, the
windows may fog up from humidity. This impedes
visibility.
Page 188 of 441
187
Continued
Controls
Climate Control System
*
Using Automatic Climate ControlThe automatic climate control system maintains the interior temperature you select.
The system also selects the proper mix of heated or cooled air that will as quickly as
possible, raise or lower the interior temperature to your preference.
Use the system when the engine is running.
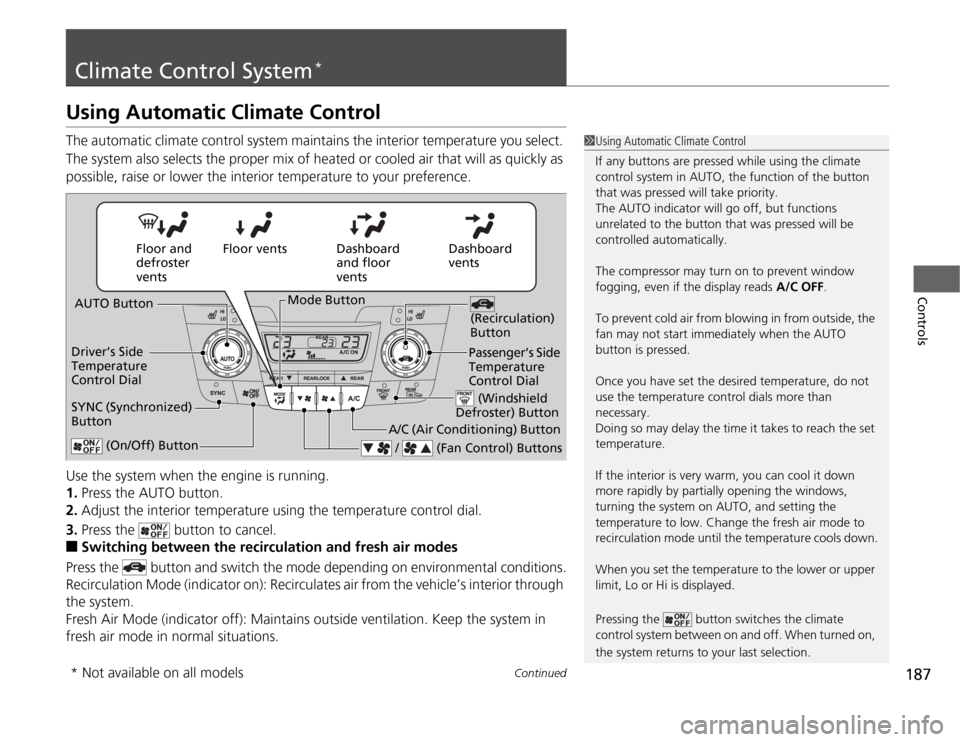
1.Press the AUTO button.
2.Adjust the interior temperature using the temperature control dial.
3.Press the button to cancel.■
Switching between the recirculation and fresh air modes
Press the button and switch the mode depending on environmental conditions.
Recirculation Mode (indicator on): Recirculates air from the vehicle’s interior through
the system.
Fresh Air Mode (indicator off): Maintains outside ventilation. Keep the system in
fresh air mode in normal situations.
1Using Automatic Climate Control
If any buttons are pressed while using the climate
control system in AUTO, the function of the button
that was pressed will take priority.
The AUTO indicator will go off, but functions
unrelated to the button that was pressed will be
controlled automatically.
The compressor may turn on to prevent window
fogging, even if the display reads A/C OFF.
To prevent cold air from blowing in from outside, the
fan may not start immediately when the AUTO
button is pressed.
Once you have set the desired temperature, do not
use the temperature control dials more than
necessary.
Doing so may delay the time it takes to reach the set
temperature.
If the interior is very warm, you can cool it down
more rapidly by partially opening the windows,
turning the system on AUTO, and setting the
temperature to low. Change the fresh air mode to
recirculation mode until the temperature cools down.
When you set the temperature to the lower or upper
limit, Lo or Hi is displayed.
Pressing the button switches the climate
control system between on and off. When turned on,
the system returns to your last selection.
Dashboard
vents Dashboard
and floor
vents Floor vents Floor and
defroster
vents
AUTO Button
Driver’s Side
Temperature
Control Dial
A/C (Air Conditioning) Button
/ (Fan Control) Buttons
(Recirculation)
Button
(On/Off) Button
SYNC (Synchronized)
Button
Passenger’s Side
Temperature
Control Dial (Windshield
Defroster) Button
Mode Button
* Not available on all models