radio HONDA ODYSSEY 2013 RC1-RC2 / 5.G Navigation Manual
[x] Cancel search | Manufacturer: HONDA, Model Year: 2013, Model line: ODYSSEY, Model: HONDA ODYSSEY 2013 RC1-RC2 / 5.GPages: 267, PDF Size: 8.64 MB
Page 138 of 267
136Audio
Playing XM® RadioSelecting XM Mode1.Press the XM button.
Press the XM button again, if necess ary, to select the band (XM1, XM2).
2. Select a channel using the buttons (Preset, SCAN), the bars (SKIP, CATEGORY),
and the TUNE knob.
The band and channel are displayed on the display.
Audio Screen ControlHAUDIO button (in XM mode)
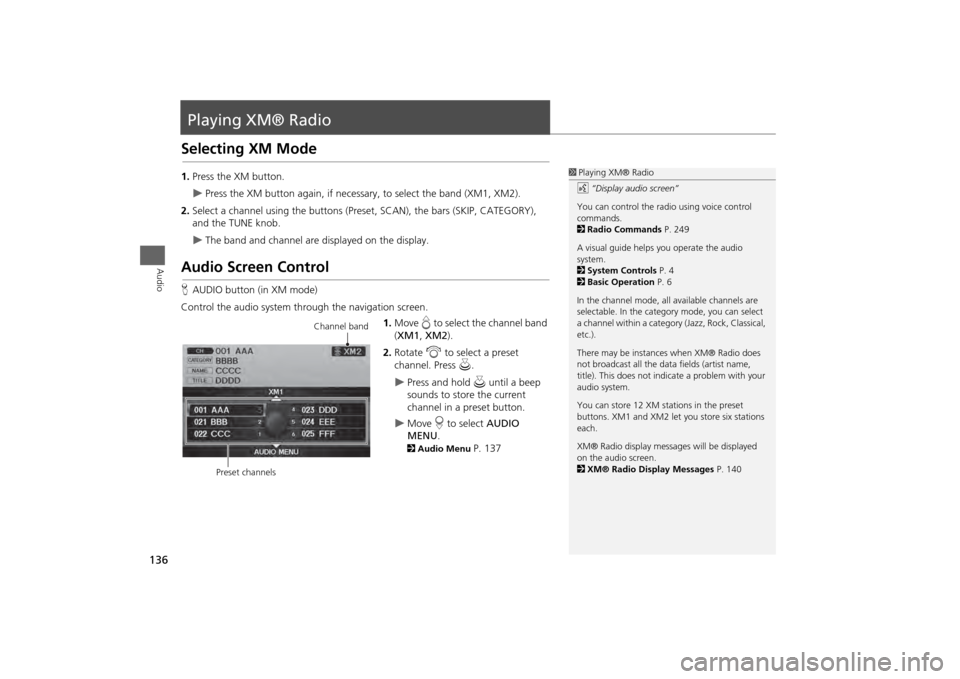
Control the audio system through the navigation screen. 1.Move e to select the channel band
( XM1 , XM2 ).
2. Rotate i to select a preset
channel. Press u.
Press and hold u until a beep
sounds to store the current
channel in a preset button.
Move r to select AUDIO
MENU . 2Audio Menu
P. 137
1Playing XM® Radio
d “Display audio screen”
You can control the radio using voice control
commands.
2 Radio Commands P. 249
A visual guide helps you operate the audio
system.
2 System Controls P. 4
2 Basic Operation P. 6
In the channel mode, all available channels are
selectable. In the categor y mode, you can select
a channel within a category (Jazz, Rock, Classical,
etc.).
There may be instance s when XM® Radio does
not broadcast all the data fields (artist name,
title). This does not indica te a problem with your
audio system.
You can store 12 XM stat ions in the preset
buttons. XM1 and XM2 let you store six stations
each.
XM® Radio display messag es will be displayed
on the audio screen.
2 XM® Radio Display Messages P. 140
Channel band
Preset channels
Page 139 of 267
137
Playing XM® Radio
Audio Menu
Audio
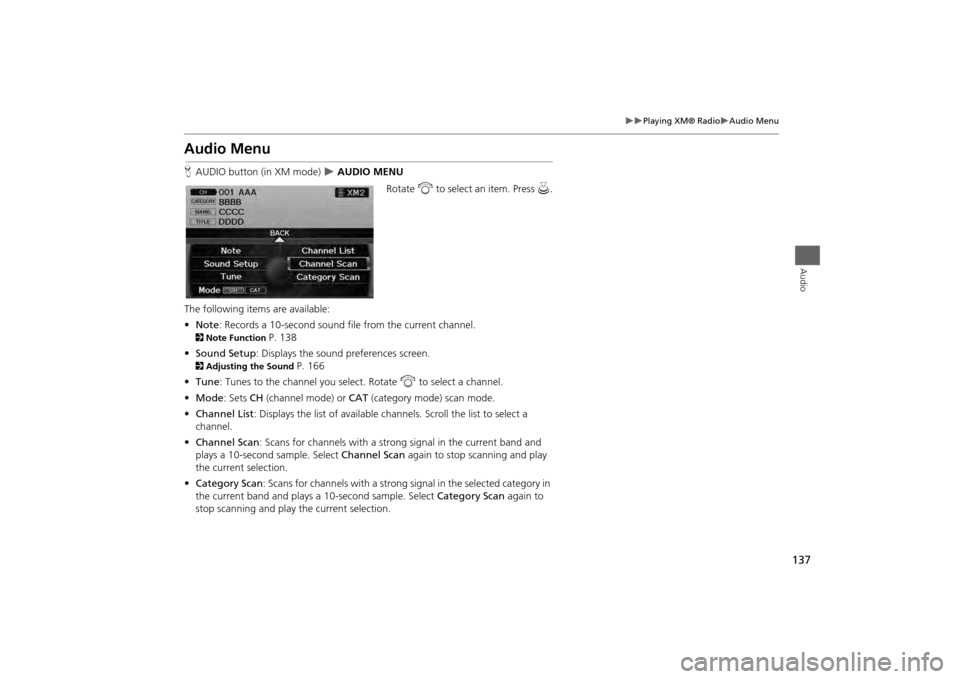
Audio MenuHAUDIO button (in XM mode)
AUDIO MENU
Rotate i to select an item. Press u.
The following items are available:
• Note: Records a 10-second sound file from the current channel.
2Note Function
P. 138
• Sound Setup : Displays the sound preferences screen.
2Adjusting the Sound
P. 166
• Tune : Tunes to the channel you select. Rotate i to select a channel.
• Mode : Sets CH (channel mode) or CAT (category mode) scan mode.
• Channel List : Displays the list of available ch annels. Scroll the list to select a
channel.
• Channel Scan : Scans for channels with a strong signal in the current band and
plays a 10-second sample. Select Channel Scan again to stop scanning and play
the current selection.
• Category Scan : Scans for channels with a strong signal in the selected category in
the current band and plays a 10-second sample. Select Category Scan again to
stop scanning and play the current selection.
Page 140 of 267
138
Playing XM® Radio
Note Function
Audio
Note FunctionRecord a 10-second sound file from the current channel that contains the channel,
category, name, and title information.
1.When tuned to the channel you want to record, press and hold the XM button for
a few seconds to start recording.
2. Press the XM button again to stop the recording if less than 10 seconds have
elapsed.
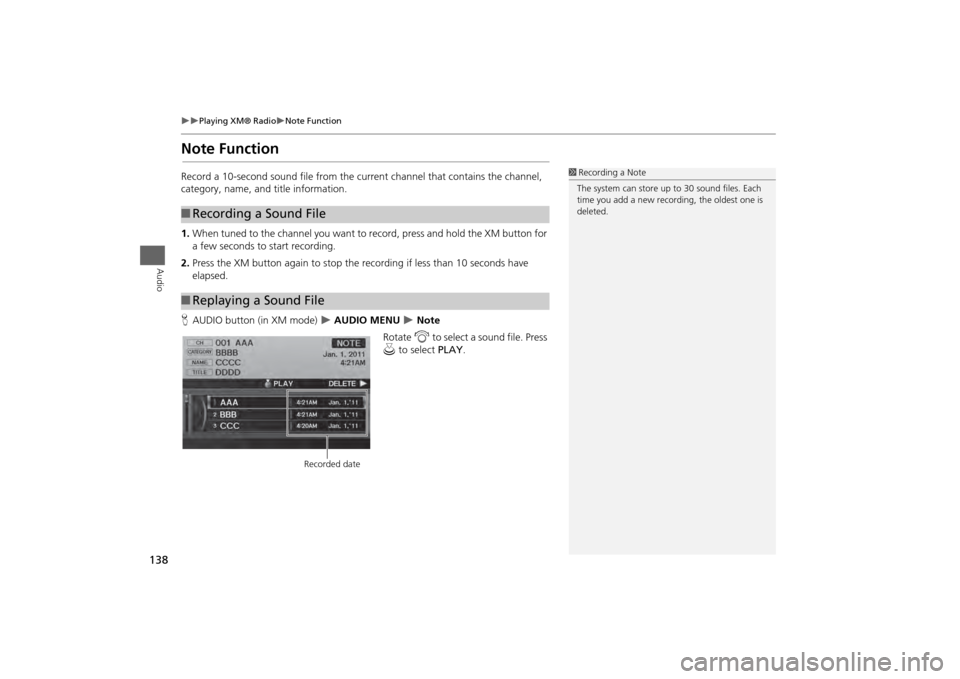
H AUDIO button (in XM mode)
AUDIO MENU
Note
Rotate i to select a sound file. Press
u to select PLAY.
■Recording a Sound File■Replaying a Sound File
1 Recording a Note
The system can store up to 30 sound files. Each
time you add a new recording, the oldest one is
deleted.
Recorded date
Page 141 of 267
139
Playing XM® Radio
Note Function
Audio
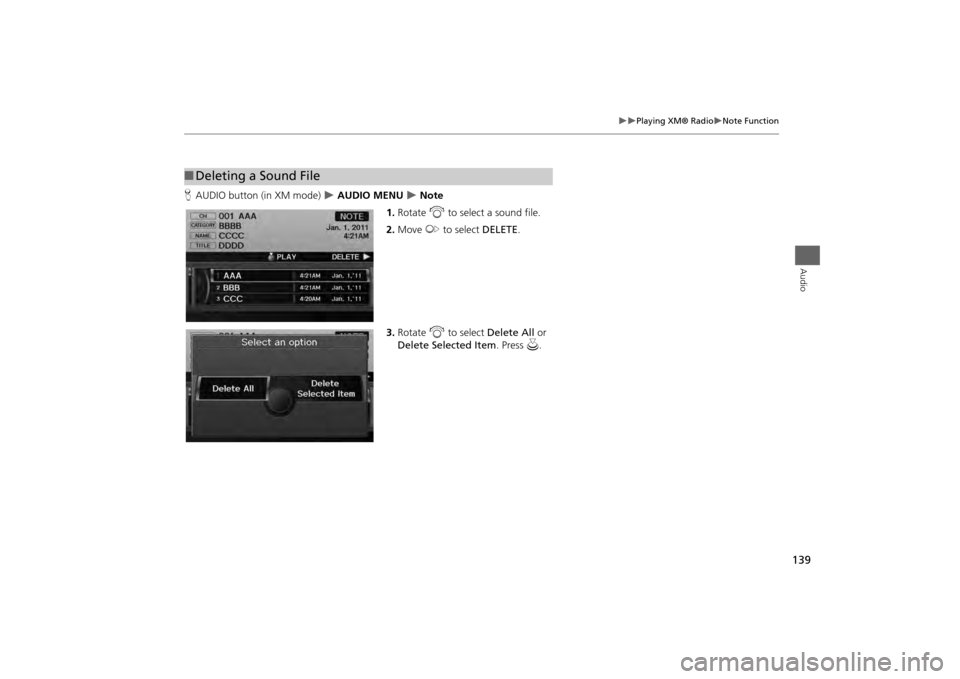
HAUDIO button (in XM mode)
AUDIO MENU
Note
1. Rotate i to select a sound file.
2. Move y to select DELETE .
3. Rotate i to select Delete All or
Delete Selected Item . Press u.
■Deleting a Sound File
Page 142 of 267
140
Playing XM® Radio
XM® Radio Service
Audio
XM® Radio Service1.You need your radio ID ready be fore registering for subscription.
To see the ID in the display, rotate the TUNE knob while in XM mode until “0”
appears in the center display.
2. Have your radio ID and credit card number ready, and either call XM or visit the
XM website to subscribe.
Press the XM button and stay in this mode for about 30 minutes until the service is
activated. Make sure your vehicle is in an open area with good reception.
LOADING: XM is loading the audio or program information.
OFF AIR : The channel is not currently broadcasting.
UPDATING : The encryption code is being updated. Channels 0 and 1 still work
normally.
NO SIGNAL : The signal is too weak in the current location.
--------: No such channel exists, the channel is not part of your subscription, or the
artist or title information is not available.
CHECK ANTENNA : There is a problem with the XM antenna. Contact a dealer.
■Subscribing to XM® Radio■Receiving XM® Radio■XM® Radio Display Messages
1 Subscribing to XM® Radio
Contact Information for XM® Radio:
U.S. : XM® Radio at www.siriusxm.com, or
(800) 852-9696
Canada : XM Canada at www.xmradio.ca , or
(877) 209-00791 Receiving XM® Radio
The XM satellites are in orbit over the equator;
therefore, objects south of the vehicle may cause
satellite reception interr uptions. Satellite signals
are more likely to be bl ocked by tall buildings
and mountains the farther north you travel from
the equator.
You may experience reception problems under
the following circumstances:•In a location with an obstruction to the south
of your vehicle•In tunnels•On the lower level of a multi-tiered road•Large items are carried on the roof rack
Page 168 of 267
166Audio
Adjusting the SoundHAUDIO button
AUDIO MENU
Sound Setup
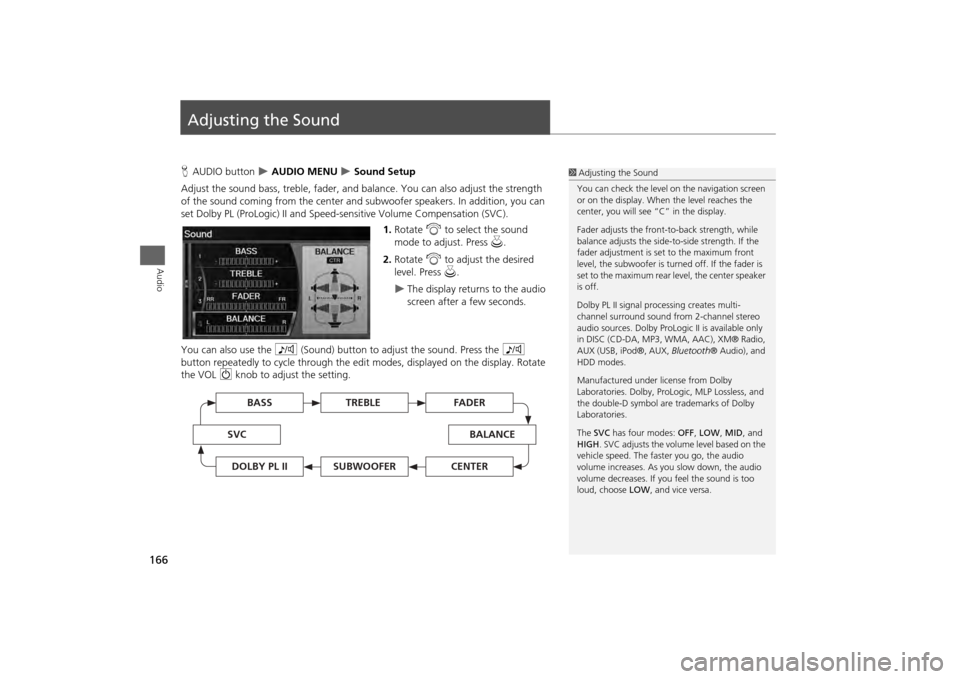
Adjust the sound bass, treble, fader, and ba lance. You can also adjust the strength
of the sound coming from the center and subwoofer speakers. In addition, you can
set Dolby PL (ProLogic) II and Speed-s ensitive Volume Compensation (SVC).
1.Rotate i to select the sound
mode to adjust. Press u.
2. Rotate i to adjust the desired
level. Press u.
The display returns to the audio
screen after a few seconds.
You can also use the 8 (Sound) button to adjust the sound. Press the 8
button repeatedly to cycle through the edit modes, displayed on the display. Rotate
the VOL 9 knob to adjust the setting.
1Adjusting the Sound
You can check the level on the navigation screen
or on the display. When the level reaches the
center, you will see “C” in the display.
Fader adjusts the front-t o-back strength, while
balance adjusts the side-to-side strength. If the
fader adjustment is set to the maximum front
level, the subwoofer is turned off. If the fader is
set to the maximum rear level, the center speaker
is off.
Dolby PL II signal proc essing creates multi-
channel surround sound fro m 2-channel stereo
audio sources. Dolby ProL ogic II is available only
in DISC (CD-DA, MP3, WMA, AAC), XM® Radio,
AUX (USB, iPod®, AUX, Bluetooth® Audio), and
HDD modes.
Manufactured under license from Dolby
Laboratories. Dolby, ProL ogic, MLP Lossless, and
the double-D symbol are trademarks of Dolby
Laboratories.
The SVC has four modes: OFF, LOW , MID, and
HIGH. SVC adjusts the volume level based on the
vehicle speed. The faster you go, the audio
volume increases. As you slow down, the audio
volume decreases. If you feel the sound is too
loud, choose LOW , and vice versa.
TREBLE
BASS
SVC
BALANCE
FADER
SUBWOOFER
DOLBY PL II
CENTER
Page 234 of 267
232Reference Information
System InitializationThe navigation system must be initialized if
power to the navigation system is
interrupted for any reason (e.g., the
battery was disconnected).Entering the Security CodeWhen you purchased the vehicle, you
should have received a card with the
navigation system security code and serial
number. Keep this card in a safe place. If
you lose the card, you must obtain the
security code from your dealer.
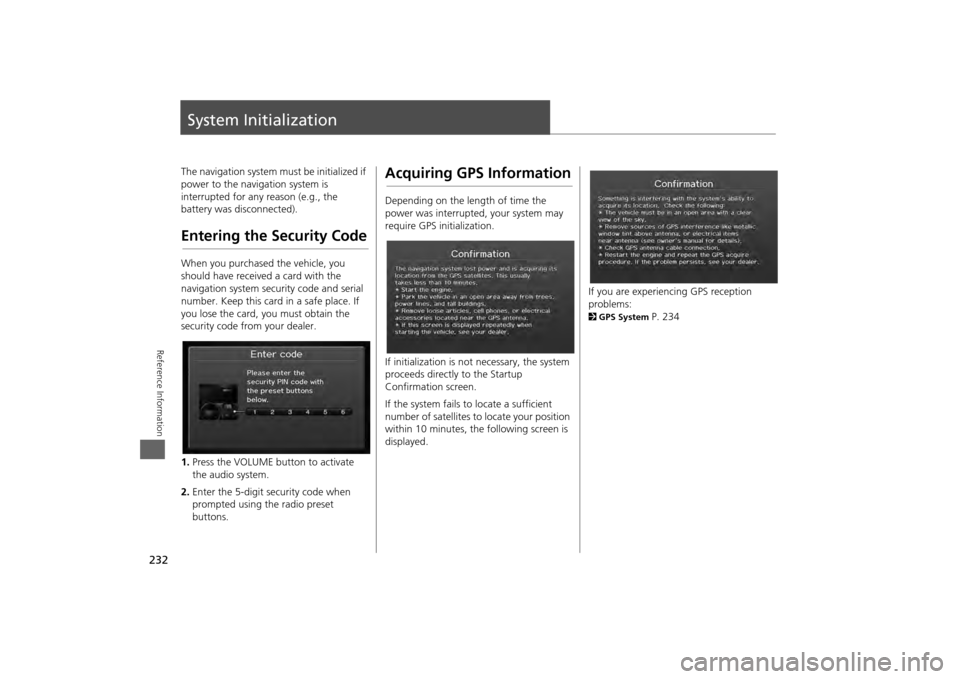
1.Press the VOLUME button to activate
the audio system.
2. Enter the 5-digit security code when
prompted using the radio preset
buttons.
Acquiring GPS InformationDepending on the length of time the
power was interrupted, your system may
require GPS initialization.
If initialization is not necessary, the system
proceeds directly to the Startup
Confirmation screen.
If the system fails to locate a sufficient
number of satellites to locate your position
within 10 minutes, th e following screen is
displayed.
If you are experiencing GPS reception
problems: 2 GPS System
P. 234
Page 240 of 267
238
Client Assistance
Traffic Information
Reference Information
Traffic Information•Continuously updated traffic
information is available in major
metropolitan areas across the 48
contiguous states and and Hawaii.
• Visit automobiles.honda.com/traffic for
a complete listing of coverage areas and
other information.
Operation in Alaska,
Hawaii, Canada, and Puerto RicoNavigation-equipped vehicles delivered to
Alaska, Hawaii, Canada, and Puerto Rico
are equipped with XM hardware, but XM
broadcasting is not available. There are
certain functions that rely on XM satellite
signal coverage which are not available.
Unavailable menu options will appear gray
on the LCD display.
All roads displayed on the map screens are
verified roads. Information in this manual
relating to “unverified” roads or areas is
not applicable.■ XM® Radio■Map Coverage
Entering a destination address or place/
landmark on another island may result in a
screen caution message. This is because
there are no ferry routes between islands
in the database.
If Street Name Guidance is set to ON, the
street names will not be read out by voice
guidance. This may change in a future data
update.Shipping a Vehicle to the U.S. MainlandTo receive XM audio, you must call XM
and set up an account at (800) 852-9696.■Address and Place Entry
Screens■Puerto Rico
Page 246 of 267

244
Legal Information
As required by the FCC
Reference Information
Gracenote reserves all rights in Gracenote
Data, the Gracenote Software, and the
Gracenote Servers, including all ownership
rights. Under no circumstances will
Gracenote become liable for any payment
to you for any information that you
provide. You agree that Gracenote, Inc.
may enforce its rights under this
Agreement against you directly in its own
name.
The Gracenote service uses a unique
identifier to track qu eries for statistical
purposes. The purpose of a randomly
assigned numeric identifier is to allow the
Gracenote service to count queries without
knowing anything about who you are. For
more information, see the web page for
the Gracenote Privacy Policy for the
Gracenote service.
The Gracenote Software and each item of
Gracenote Data are licensed to you “AS
IS.”
Gracenote makes no representations or
warranties, express or implied, regarding
the accuracy of any Gracenote Data from
in the Gracenote Servers. Gracenote
reserves the right to delete data from the
Gracenote Servers or to change data
categories for any cause that Gracenote deems sufficient. No warranty is made that
the Gracenote Software or Gracenote
Servers are error-free or
that functioning of
Gracenote Software or Gracenote Servers
will be uninterrupted.
Gracenote is not obligated to provide you
with new enhanced or additional data
types or categories that Gracenote may
provide in the future and is free to
discontinue its services at any time.
GRACENOTE DISCLAIMS ALL
WARRANTIES EXPRESS OR IMPLIED,
INCLUDING, BUT NOT LIMITED TO,
IMPLIED WARRANTIES OF
MERCHANTABILITY, FITNESS FOR A
PARTICULAR PURPOSE, TITLE, AND NON-
INFRINGEMENT. GRACENOTE DOES NOT
WARRANT THE RESULTS THAT WILL BE
OBTAINED BY YOUR USE OF THE
GRACENOTE SOFTWARE OR ANY
GRACENOTE SERVER. IN NO CASE WILL
GRACENOTE BE LIABLE FOR ANY
CONSEQUENTIAL OR INCIDENTAL
DAMAGES OR FOR ANY LOST PROFITS OR
LOST REVENUES.
copyright © 2000 to present Gracenote
As required by the FCC1. This device complies with Part 15 of the
FCC Rules and Canadian RSS-210/
RSSGen. Operation is subject to the
following two conditions: (1) this device
may not cause harmful interference, and
(2) this device must accept any
interference received, including
interference that may cause undesired
operation.
2. The FCC requires the user to be notified
that any changes or modifications made
to this device that are not expressly
approved by the party responsible for
compliance may void the user’s
authority to operate the equipment.
3. This product emits radio frequency
energy, but the radiated output power
of this device is far below the FCC and
IC radio frequency exposure limits. This
equipment complies with FCC and IC RF
radiation exposure limits set forth for an
uncontrolled environm ent. Nevertheless,
the device should be used in such a
manner that the potential for human
contact with the antenna during normal
operation is minimized.
Page 251 of 267
249
Voice Commands
Climate Control Commands
Voice Commands
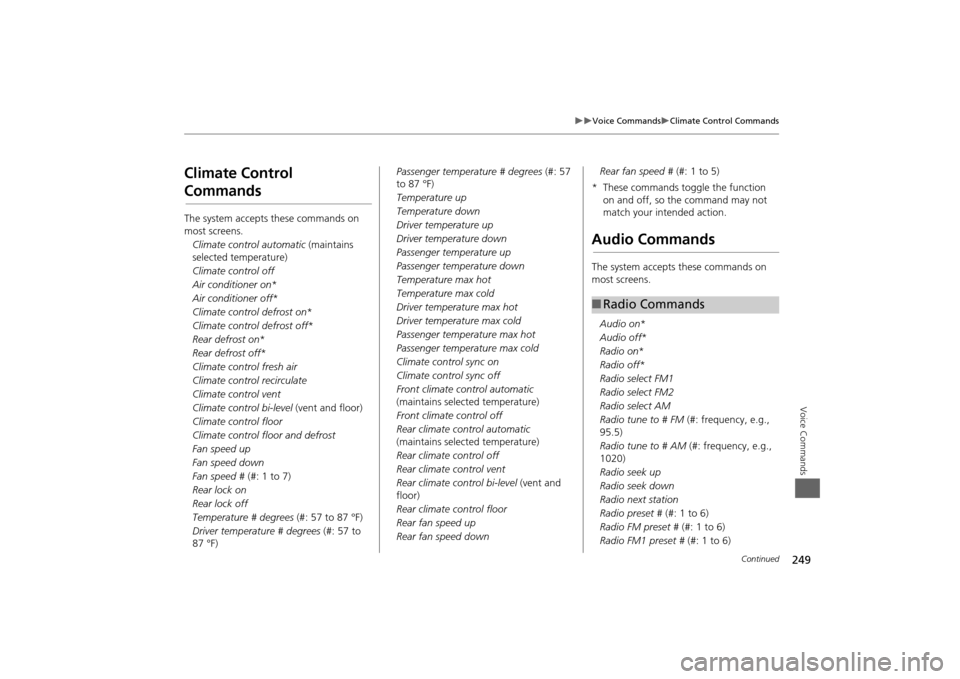
Climate Control CommandsThe system accepts these commands on
most screens.Climate control automatic (maintains
selected temperature)
Climate control off
Air conditioner on *
Air conditioner off *
Climate control defrost on *
Climate control defrost off *
Rear defrost on *
Rear defrost off *
Climate control fresh air
Climate control recirculate
Climate control vent
Climate control bi-level (vent and floor)
Climate control floor
Climate control floor and defrost
Fan speed up
Fan speed down
Fan speed # (#: 1 to 7)
Rear lock on
Rear lock off
Temperature # degrees (#: 57 to 87 °F)
Driver temperature # degrees (#: 57 to
87 °F) Passenger temperature # degrees
(#: 57
to 87 °F)
Temperature up
Temperature down
Driver temperature up
Driver temperature down
Passenger temperature up
Passenger temperature down
Temperature max hot
Temperature max cold
Driver temperature max hot
Driver temperature max cold
Passenger temperature max hot
Passenger temperature max cold
Climate control sync on
Climate control sync off
Front climate control automatic
(maintains selected temperature)
Front climate control off
Rear climate control automatic
(maintains selected temperature)
Rear climate control off
Rear climate control vent
Rear climate control bi-level (vent and
floor)
Rear climate control floor
Rear fan speed up
Rear fan speed down Rear fan speed #
(#: 1 to 5)
* These commands toggle the function on and off, so the command may not
match your intended action.
Audio CommandsThe system accepts these commands on
most screens.
Audio on *
Audio off *
Radio on *
Radio off *
Radio select FM1
Radio select FM2
Radio select AM
Radio tune to # FM (#: frequency, e.g.,
95.5)
Radio tune to # AM (#: frequency, e.g.,
1020)
Radio seek up
Radio seek down
Radio next station
Radio preset # (#: 1 to 6)
Radio FM preset # (#: 1 to 6)
Radio FM1 preset # (#: 1 to 6)■Radio Commands
Continued