radio HONDA ODYSSEY 2013 RC1-RC2 / 5.G Navigation Manual
[x] Cancel search | Manufacturer: HONDA, Model Year: 2013, Model line: ODYSSEY, Model: HONDA ODYSSEY 2013 RC1-RC2 / 5.GPages: 267, PDF Size: 8.64 MB
Page 3 of 267
Contents
2System Setup P. 19Start-up 20 Voice Control System 22 Inte rface Settings 24Personal Information 37
Music Search 45 Routing & Guidance 49 Clock Adjustment 58 Vehicle 61
Data Reset 642 Navigation P. 67Entering a Destination 68 Calculating the Route 90 Driving to Your Destination 93 Map Menu 98
Changing Your Route 116 Changing Your Destination 123 Resuming Your Trip 1272 Audio P. 129Audio System 130 Playing FM/AM Radio 132 Playing XM® Radio 136 Playing a Disc 141
Playing Hard Disc Drive (HDD)
Audio 145 Playing an iPod® 155
Searching for Music Using
Song By Voice™ (SBV) 159 Playing a USB Flash
Drive 160Playing Bluetooth® Audio 164
Adjusting the Sound 166 Audio Remote Controls 167
2
Bluetooth® HandsFreeLink® P. 169Bluetooth®
HandsFreeLink® 170 Pairing a Phone 172 Importing Phonebook
Data 177Setting Up Speed
Dialing 178
Editing User Name and
PIN 180 Making a Call 182 Receiving a Call 185 HFL Menus 1862
Rear Entertainment System P. 189Rear Entertainment
System 190 Rear Control Panel
Operation 192 Front Control Panel
Operation 203Wireless Headphones 2062
Other Features P. 209Trip Computer 210 Calendar 211 Calculator 213Information Functions 215
Multi-view Rear Camera 2172 Troubleshooting P. 219Troubleshooting 220 Error Messages 2272Reference Information P. 231System Initialization 232 System Limitations 234 Client Assistance 236 Legal Information 2392Voice Commands P. 245Voice Commands 246
Quick Reference Guide
P.2
System Setup
P.19
Navigation
P.67
Audio
P.129
Bluetooth
® HandsFreeLink®
P.169
Rear Entertainment System
P.189
Other Features
P.209
Troubleshooting
P.219
Reference Information
P.231
Voice Commands
P.245
Index
P.261
Page 5 of 267
3Quick Reference Guide
Other FeaturesMulti-view Rear Camera (P217)
Helps you check for obstacles around the rear of your vehicle on the navigation screen when reversing.Audio
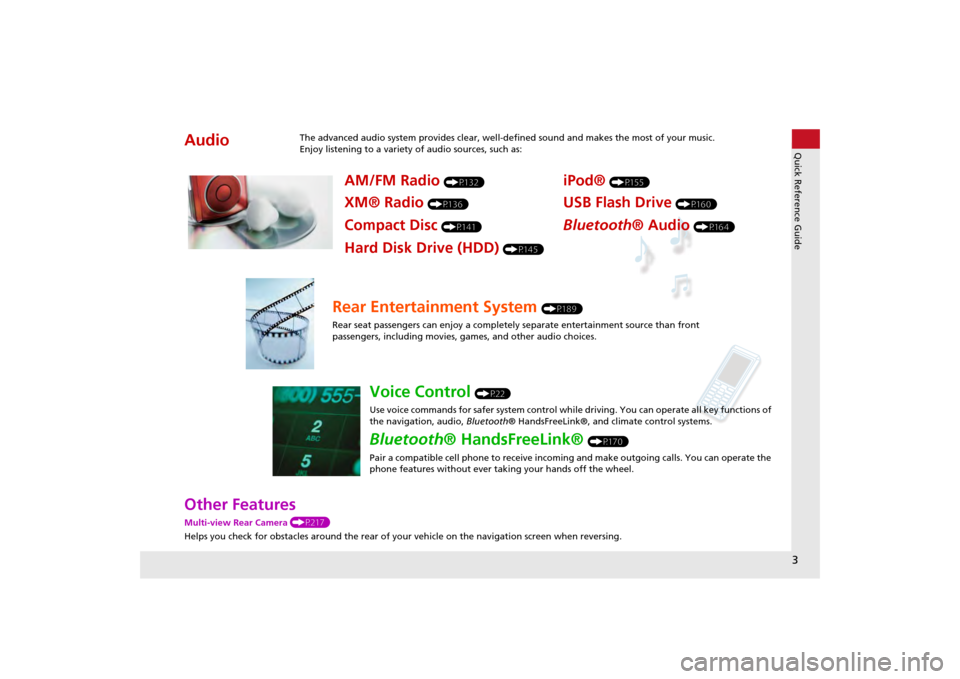
The advanced audio system provides clear, well-defined sound and makes the most of your music.
Enjoy listening to a variety of audio sources, such as:
AM/FM Radio
(P132)
XM® Radio
(P136)
Compact Disc
(P141)
iPod®
(P155)
USB Flash Drive
(P160)
Bluetooth® Audio
(P164)
Hard Disk Drive (HDD)
(P145)
Rear Entertainment System
(P189)
Rear seat passengers can enjoy a completely separate entertainment source than front
passengers, including movies, games, and other audio choices.
Voice Control
(P22)
Use voice commands for safer system control while driving. You can operate all key functions of
the navigation, audio, Bluetooth® HandsFreeLink®, and climate control systems.
Bluetooth ® HandsFreeLink®
(P170)
Pair a compatible cell phone to receive incoming and make outgoing calls. You can operate the
phone features without ever taking your hands off the wheel.
Page 9 of 267
7Quick Reference Guide
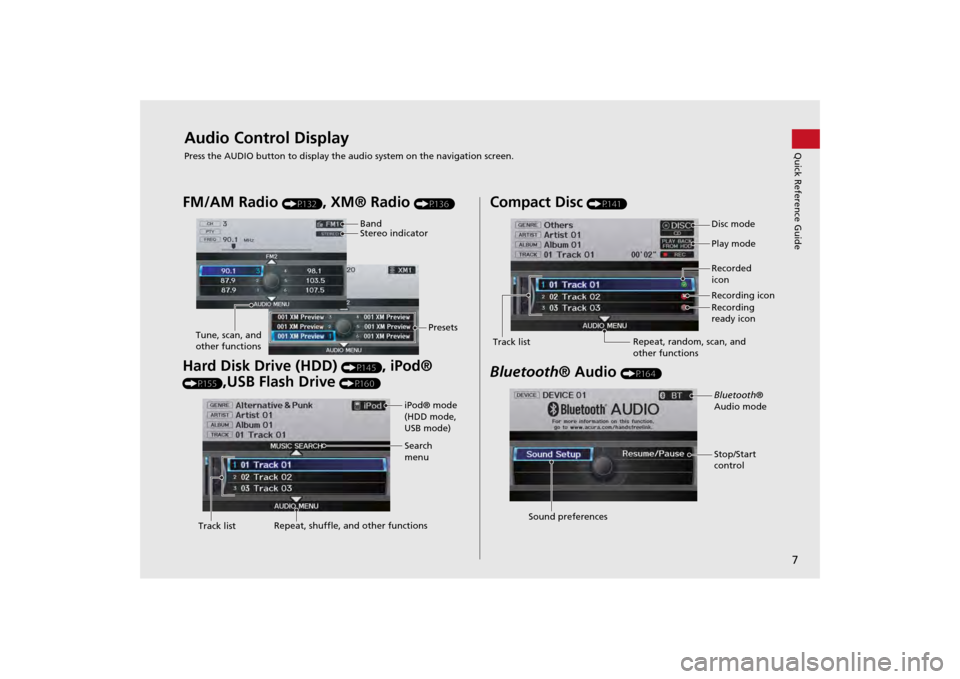
Audio Control DisplayPress the AUDIO button to display the audio system on the navigation screen.FM/AM Radio
(P132)
, XM® Radio
(P136)
Hard Disk Drive (HDD)
(P145)
, iPod®
(P155)
,USB Flash Drive
(P160)
Band
Stereo indicatorPresets
Tune, scan, and
other functions
iPod® mode
(HDD mode,
USB mode)
Search
menu
Track list Repeat, shuffle, and other functions
Compact Disc
(P141)
Bluetooth
® Audio
(P164)
Disc mode
Play mode
Recorded
icon
Recording icon
Recording
ready icon
Repeat, random, scan, and
other functions
Track listBluetooth®
Audio mode
Stop/Start
control
Sound preferences
Page 17 of 267
15Quick Reference Guide
Rear Entertainment System
(P189)
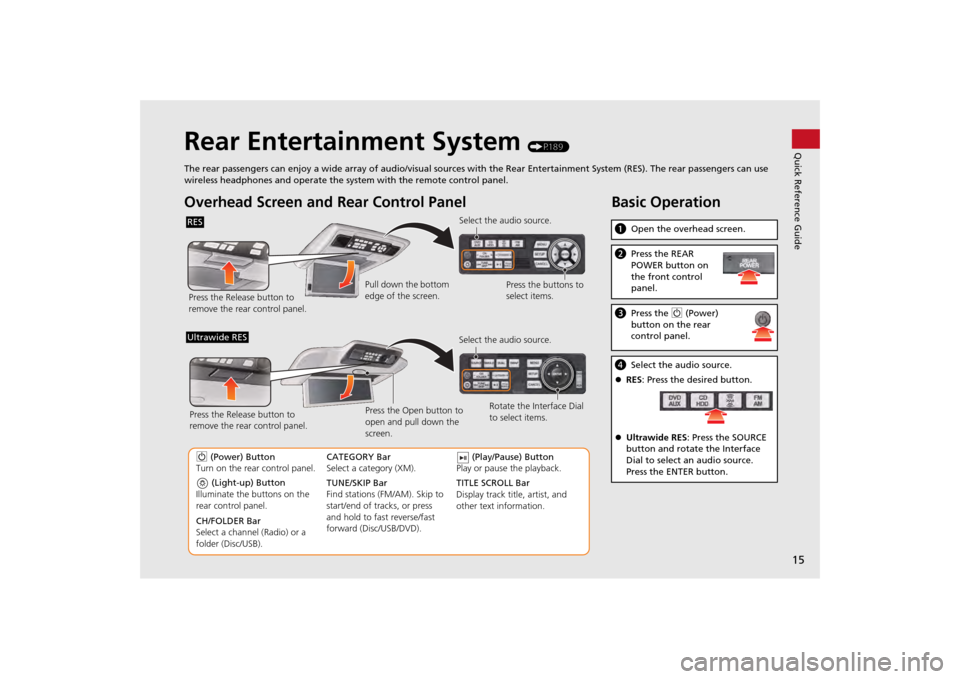
The rear passengers can enjoy a wide array of audio/visual sources with the Rear Entertainment System (RES). The rear passengers can use
wireless headphones and operate the system with the remote control panel.
Overhead Screen and Rear Control PanelRESPress the Release button to
remove the rear control panel. Select the audio source.
Press the buttons to
select items.
Pull down the bottom
edge of the screen.
(Light-up) Button
Illuminate the buttons on the
rear control panel.
9 (Power) Button
Turn on the rear control panel.
CH/FOLDER Bar
Select a channel (Radio) or a
folder (Disc/USB). TUNE/SKIP Bar
Find stations (FM/AM). Skip to
start/end of tracks, or press
and hold to fast reverse/fast
forward (Disc/USB/DVD). CATEGORY Bar
Select a category (XM).
(Play/Pause) Button
Play or pause the playback.
TITLE SCROLL Bar
Display track title, artist, and
other text information. Select the audio source.
Rotate the Interface Dial
to select items.
Ultrawide RES
Press the Open button to
open and pull down the
screen.
Press the Release button to
remove the rear control panel.
Basic Operationa
Open the overhead screen.bPress the REAR
POWER button on
the front control
panel.cPress the 9 (Power)
button on the rear
control panel.d Select the audio source.
RES : Press the desired button.
Ultrawide RES : Press the SOURCE
button and rotate the Interface
Dial to select an audio source.
Press the ENTER button.
Page 131 of 267
129
Audio
This section describes how to operate the audio system. You can play
music from a wide array of media s ources, and control the audio system
using the audio buttons, the Interface Dial, or voice control.
Audio System .................................................. 130
About Your Audio System .............................. 130
Auxiliary Input Jack ......... .......................... ..... 131
Audio System Theft Protection ....................... 131
Playing FM/AM Radio ..................................... 132
Selecting FM/AM Mode.................................. 132
Audio Screen Control ..................................... 132
Audio Menu .................................................. 133
Radio Data System (RDS) ................................ 134
Playing XM® Radio ......................................... 136
Selecting XM Mode........................................ 136
Audio Screen Control ..................................... 136
Audio Menu .................................................. 137
Note Function ................................................ 138
XM® Radio Service ........................................ 140
Playing a Disc ................................................... 141
Selecting Disc Mode ....................................... 141
Audio Screen Control ..................................... 141 Audio Menu ................................................... 142
Playing MP3/WMA/AAC Discs ........................ 143
Recommended Discs ...................................... 144
Playing Hard Disc Drive (HDD) Audio ............ 145
Selecting HDD Mode ...................................... 145
Audio Screen Control ..................................... 146
Audio Menu ................................................... 146
Recording a Music CD to HDD........................ 148
Searching for Music........................................ 150
Adding a Track to a User Playlist ..................... 151
Editing a Playlist ............................................. 151
Displaying Music Information ......................... 153
Updating Gracenote® Album Info .................. 154
Playing an iPod® ............................................. 155
Selecting iPod® Mode .................................... 156
Audio Screen Control ..................................... 156
Audio Menu ................................................... 157
Searching for Music........................................ 158 Searching for Music Using Song By Voice™
(SBV) ............................................................... 159
Playing a USB Flash Drive ............................... 160
Selecting USB Mode....................................... 161
Audio Screen Control..................................... 161
Audio Menu .................................................. 162
Playing Tracks in Folders................................. 163
Playing Bluetooth® Audio ............................. 164
Selecting Bluetooth® Audio Mode ................. 164
Switching to HFL Mode .................................. 165
Audio Screen Control..................................... 165
Adjusting the Sound ....................................... 166
Audio Remote Controls .................................. 167
Steering Wheel Controls ................................ 167
Page 132 of 267
130Audio
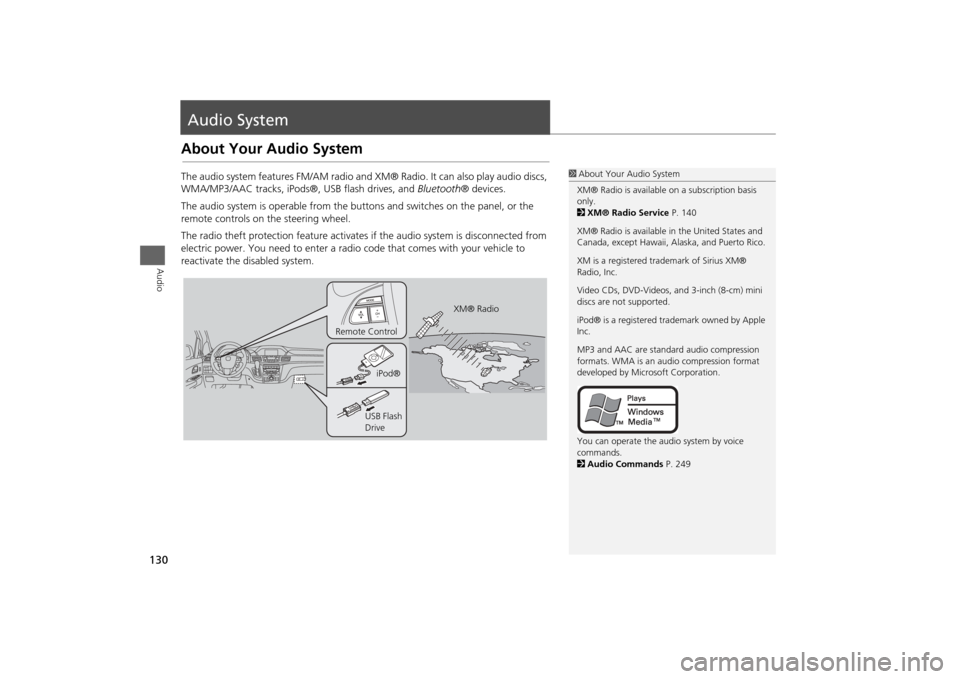
Audio SystemAbout Your Audio SystemThe audio system features FM/AM radio and XM® Radio. It can also play audio discs,
WMA/MP3/AAC tracks, iPods®, USB flash drives, and Bluetooth® devices.
The audio system is operable from the butto ns and switches on the panel, or the
remote controls on the steering wheel.
The radio theft protection feature activates if the audio system is disconnected from
electric power. You need to enter a radio code that comes with your vehicle to
reactivate the disabled system.
1 About Your Audio System
XM® Radio is available on a subscription basis
only.
2 XM® Radio Service P. 140
XM® Radio is available in the United States and
Canada, except Ha waii, Alaska, and Puerto Rico.
XM is a registered trademark of Sirius XM®
Radio, Inc.
Video CDs, DVD-Videos, and 3-inch (8-cm) mini
discs are not supported.
iPod® is a registered tra demark owned by Apple
Inc.
MP3 and AAC are standard audio compression
formats. WMA is an audio compression format
developed by Micr osoft Corporation.
You can operate the audio system by voice
commands.
2 Audio Commands P. 249
XM® Radio
Remote Control
iPod®
USB Flash
Drive
Page 134 of 267
132Audio
Playing FM/AM RadioSelecting FM/AM Mode1.Press the AM/FM button.
Press the AM/FM button again, if necessa ry, to select the frequency band (AM,
FM1, FM2).
2. Select a station using the buttons (Prese t, SCAN), the bars (SKIP, CATEGORY), and
the TUNE knob.
On the FM bands, you can also use the CATEGORY bar and TITLE button to
select a station provided by the Radio Data System (RDS).
The band and frequency are displayed on the display.
Audio Screen ControlH AUDIO button (in FM/AM mode)
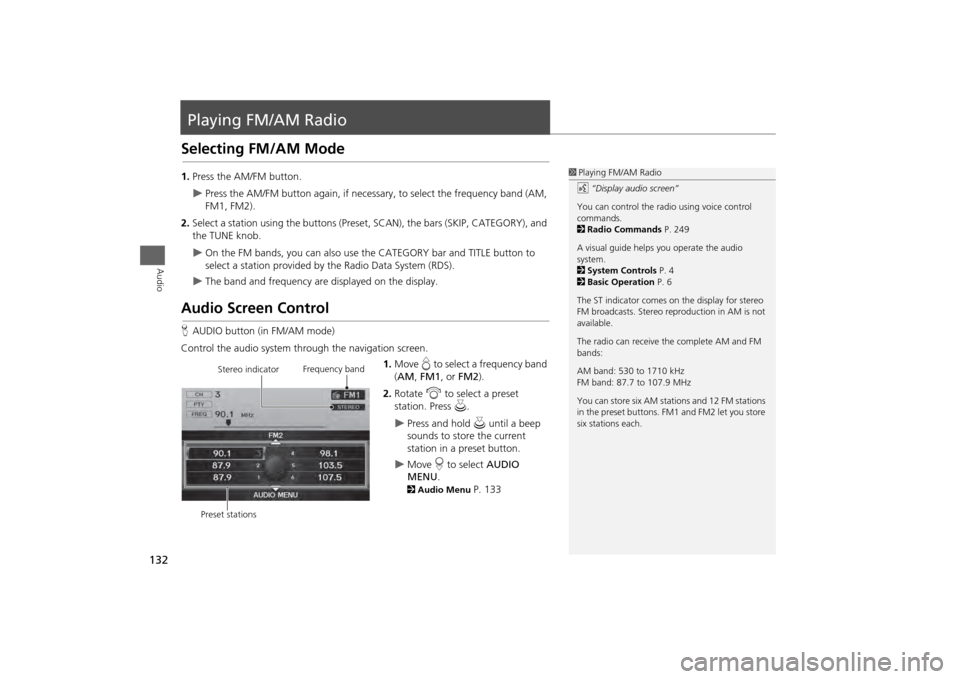
Control the audio system through the navigation screen. 1.Move e to select a frequency band
( AM , FM1 , or FM2 ).
2. Rotate i to select a preset
station. Press u .
Press and hold u until a beep
sounds to store the current
station in a preset button.
Move r to select AUDIO
MENU . 2Audio Menu
P. 133
1Playing FM/AM Radio
d “Display audio screen”
You can control the radio using voice control
commands.
2 Radio Commands P. 249
A visual guide helps you operate the audio
system.
2 System Controls P. 4
2 Basic Operation P. 6
The ST indicator comes on the display for stereo
FM broadcasts. Stereo re production in AM is not
available.
The radio can receive the complete AM and FM
bands:
AM band: 530 to 1710 kHz
FM band: 87.7 to 107.9 MHz
You can store six AM stati ons and 12 FM stations
in the preset buttons. FM1 and FM2 let you store
six stations each.
Stereo indicator Frequency band
Preset stations
Page 135 of 267
133
Playing FM/AM Radio
Audio Menu
Audio
Audio MenuHAUDIO button (in FM/AM mode)
AUDIO MENU
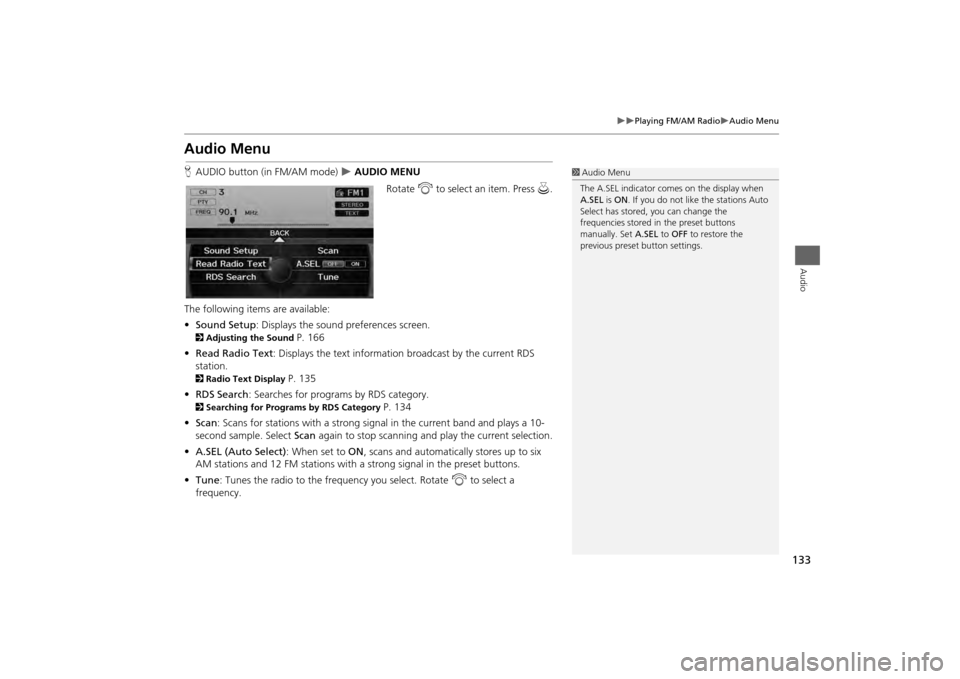
Rotate i to select an item. Press u.
The following items are available:
• Sound Setup : Displays the sound preferences screen.
2Adjusting the Sound
P. 166
• Read Radio Text : Displays the text information broadcast by the current RDS
station.
2 Radio Text Display
P. 135
• RDS Search : Searches for programs by RDS category.
2Searching for Programs by RDS Category
P. 134
• Scan : Scans for stations with a strong signal in the current band and plays a 10-
second sample. Select Scan again to stop scanning and play the current selection.
• A.SEL (Auto Select) : When set to ON, scans and automatically stores up to six
AM stations and 12 FM stations with a strong signal in the preset buttons.
• Tune : Tunes the radio to the frequency you select. Rotate i to select a
frequency.
1 Audio Menu
The A.SEL indicator comes on the display when
A.SEL is ON . If you do not like the stations Auto
Select has stored, you can change the
frequencies stored in the preset buttons
manually. Set A.SEL to OFF to restore the
previous preset button settings.
Page 136 of 267
134
Playing FM/AM Radio
Radio Data System (RDS)
Audio
Radio Data System (RDS)Provides text data information related to your selected RDS capable FM station.
Press the TITLE button to turn RDS informati on on or off. When set to ON, the name
of the FM station is displayed on the displa y. When set to OFF, the frequency of the
station is displayed.
H AUDIO button (in FM/AM mode)
AUDIO MENU
RDS Search
Search for FM stations with a strong signal that are broadcasting the selected RDS
category information.
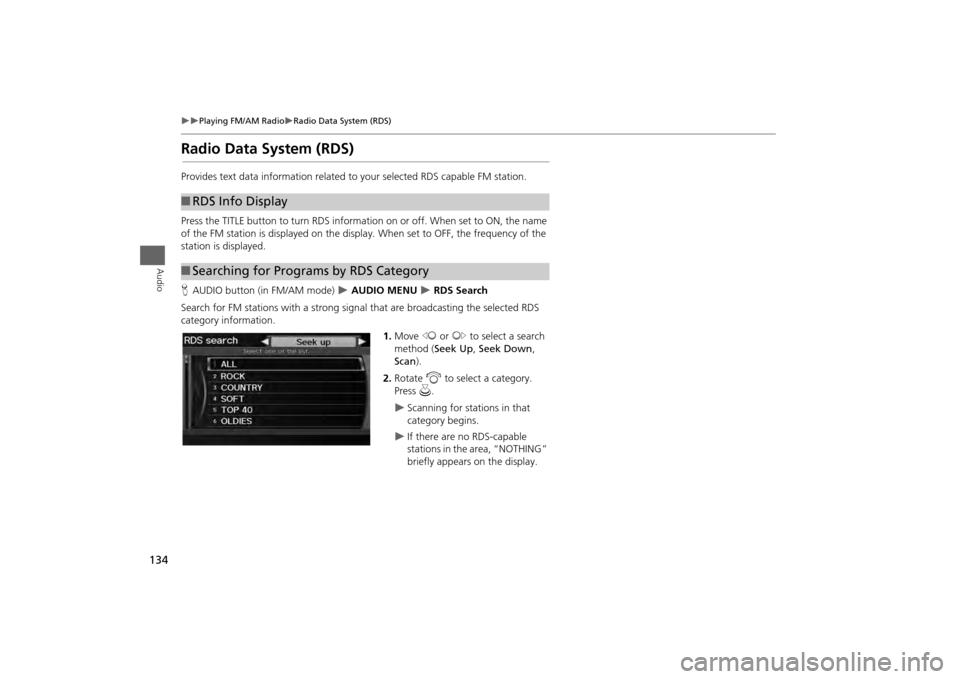
1.Move w or y to select a search
method ( Seek Up, Seek Down ,
Scan ).
2. Rotate i to select a category.
Press u.
Scanning for stations in that
category begins.
If there are no RDS-capable
stations in the area, “NOTHING”
briefly appears on the display.
■RDS Info Display■Searching for Programs by RDS Category
Page 137 of 267
135
Playing FM/AM Radio
Radio Data System (RDS)
Audio
HAUDIO button (in FM/AM mode)
AUDIO MENU
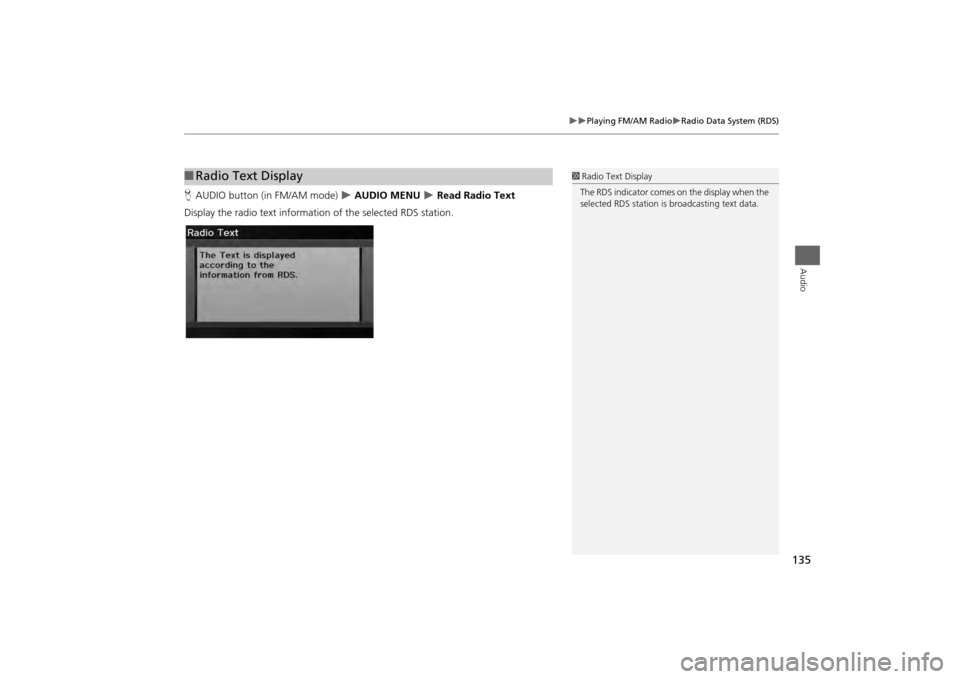
Read Radio Text
Display the radio text information of the selected RDS station.
■ Radio Text Display
1 Radio Text Display
The RDS indicator comes on the display when the
selected RDS station is broadcasting text data.