navigation system HONDA ODYSSEY 2013 RC1-RC2 / 5.G Navigation Manual
[x] Cancel search | Manufacturer: HONDA, Model Year: 2013, Model line: ODYSSEY, Model: HONDA ODYSSEY 2013 RC1-RC2 / 5.GPages: 267, PDF Size: 8.64 MB
Page 98 of 267
96
Driving to Your Destination
Viewing the Route
Navigation
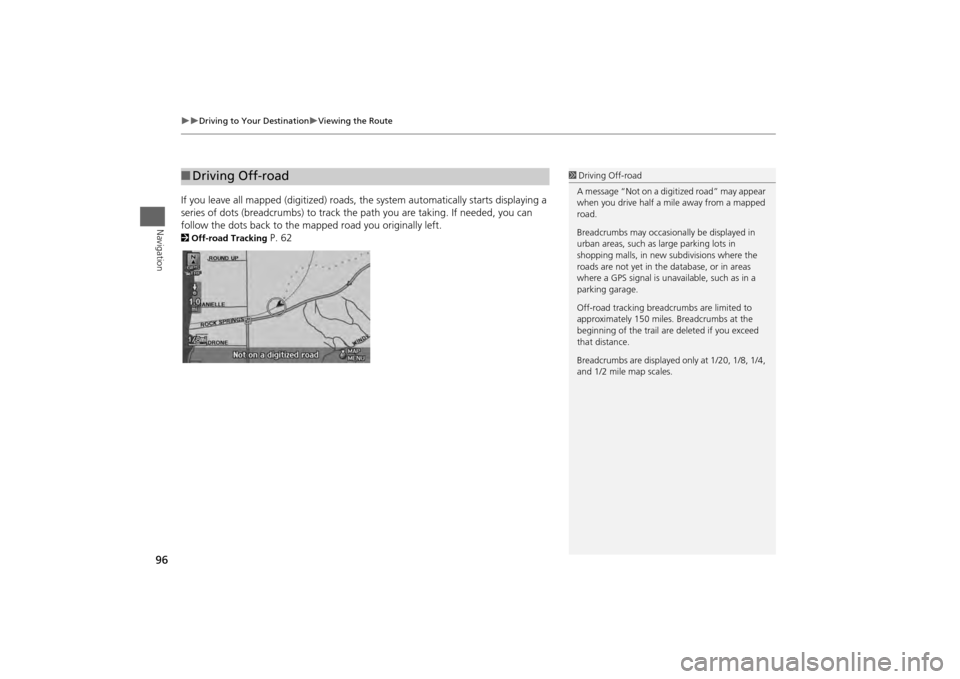
If you leave all mapped (digitized) roads, the system au tomatically starts displaying a
series of dots (breadcrumbs ) to track the path you are taking. If needed, you can
follow the dots back to the ma pped road you originally left. 2Off-road Tracking
P. 62
■Driving Off-road
1 Driving Off-road
A message “Not on a digi tized road” may appear
when you drive half a mi le away from a mapped
road.
Breadcrumbs may occasionally be displayed in
urban areas, such as large parking lots in
shopping malls, in new subdivisions where the
roads are not yet in the database, or in areas
where a GPS signal is unavailable, such as in a
parking garage.
Off-road tracking breadcrumbs are limited to
approximately 150 miles. Breadcrumbs at the
beginning of the trail are deleted if you exceed
that distance.
Breadcrumbs are displayed only at 1/20, 1/8, 1/4,
and 1/2 mile map scales.
Page 103 of 267
101
Map Menu
Guidance Menu
Navigation
HENTER button (on map)
Guidance Menu
Directions
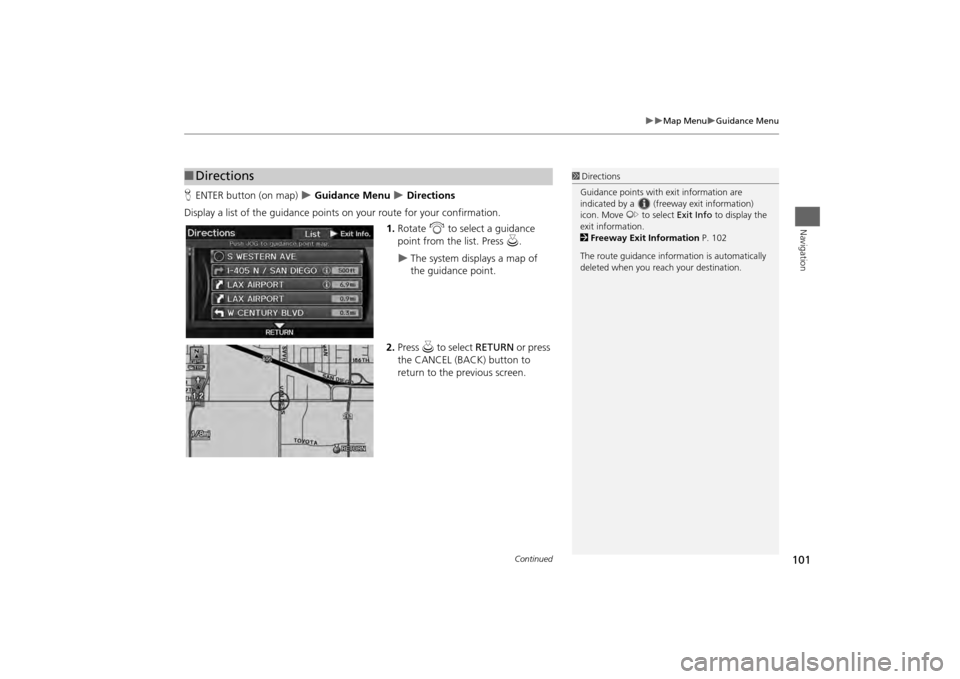
Display a list of the guidance points on your route for your confirmation.
1.Rotate i to select a guidance
point from the list. Press u.
The system displays a map of
the guidance point.
2. Press u to select RETURN or press
the CANCEL (BACK) button to
return to the previous screen.
■ Directions
1 Directions
Guidance points with exit information are
indicated by a (freeway exit information)
icon. Move y to select Exit Info to display the
exit information.
2 Freeway Exit Information P. 102
The route guidance inform ation is automatically
deleted when you reac h your destination.
Continued
Page 105 of 267
103
Map Menu
Guidance Menu
Navigation
HENTER button (on map)
Guidance Menu
Guidance Mode
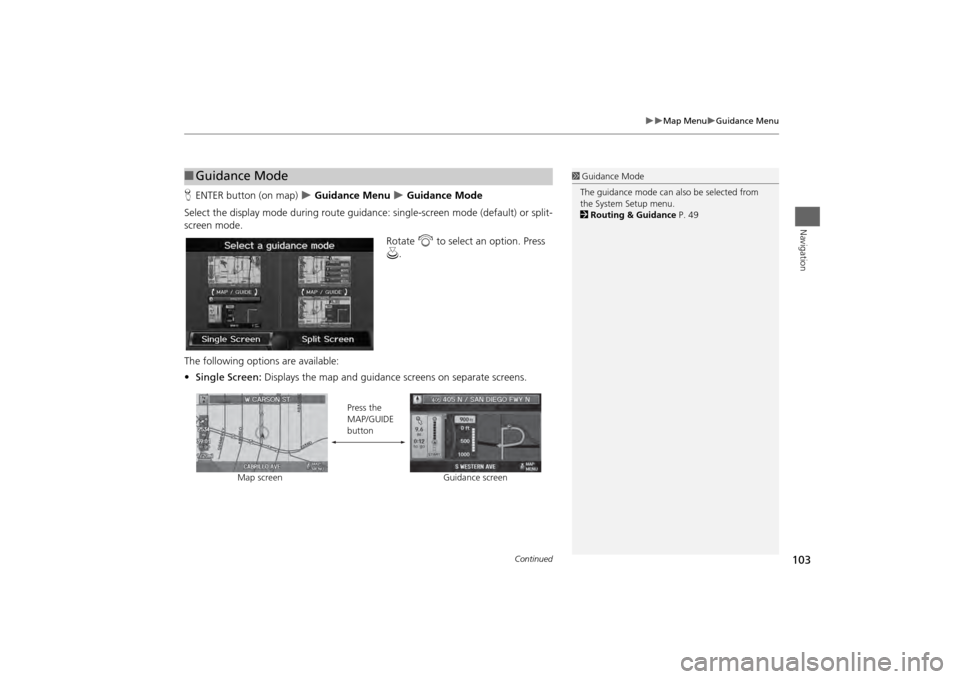
Select the display mode during route guidan ce: single-screen mode (default) or split-
screen mode.
Rotate i to select an option. Press
u .
The following options are available:
• Single Screen: Displays the map and guidance screens on separate screens.
■Guidance Mode
1 Guidance Mode
The guidance mode can al so be selected from
the System Setup menu.
2 Routing & Guidance P. 49
Map screen Press the
MAP/GUIDE
button
Guidance screen
Continued
Page 110 of 267
108
Map Menu
Map Information
Navigation
HENTER button (on map)
Map Information
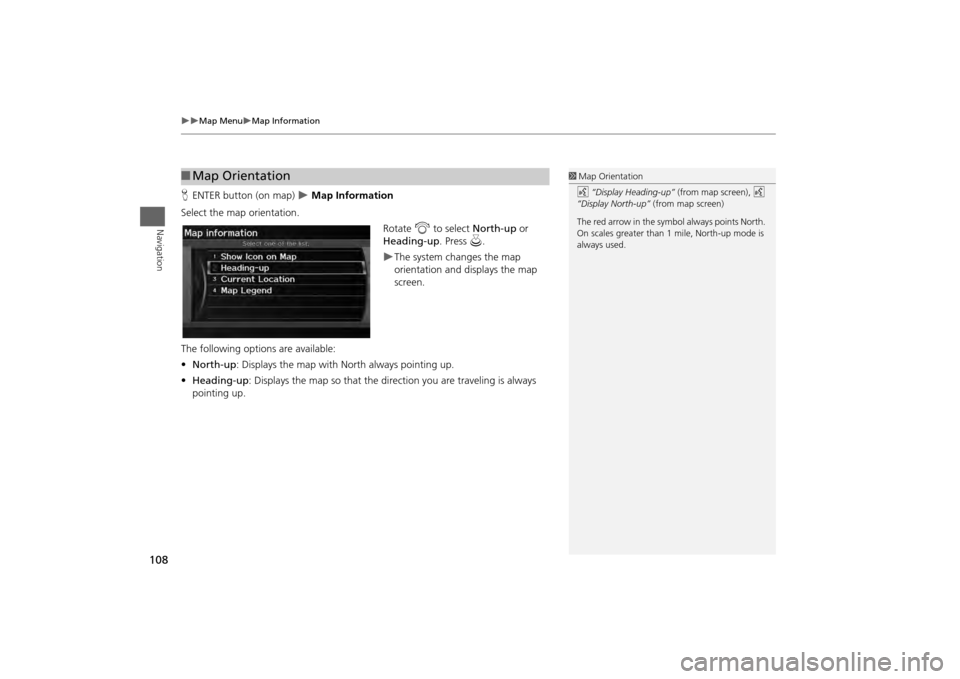
Select the map orientation. Rotate i to select North-up or
Heading-up . Press u.
The system changes the map
orientation and displays the map
screen.
The following options are available:
• North-up : Displays the map with North always pointing up.
• Heading-up: Displays the map so that the di rection you are traveling is always
pointing up.
■ Map Orientation
1 Map Orientation
d “Display Heading-up” (from map screen), d
“Display North-up” (from map screen)
The red arrow in the symbol always points North.
On scales greater than 1 mile, North-up mode is
always used.
Page 111 of 267
109
Map Menu
Map Information
Navigation
HENTER button (on map)
Map Information
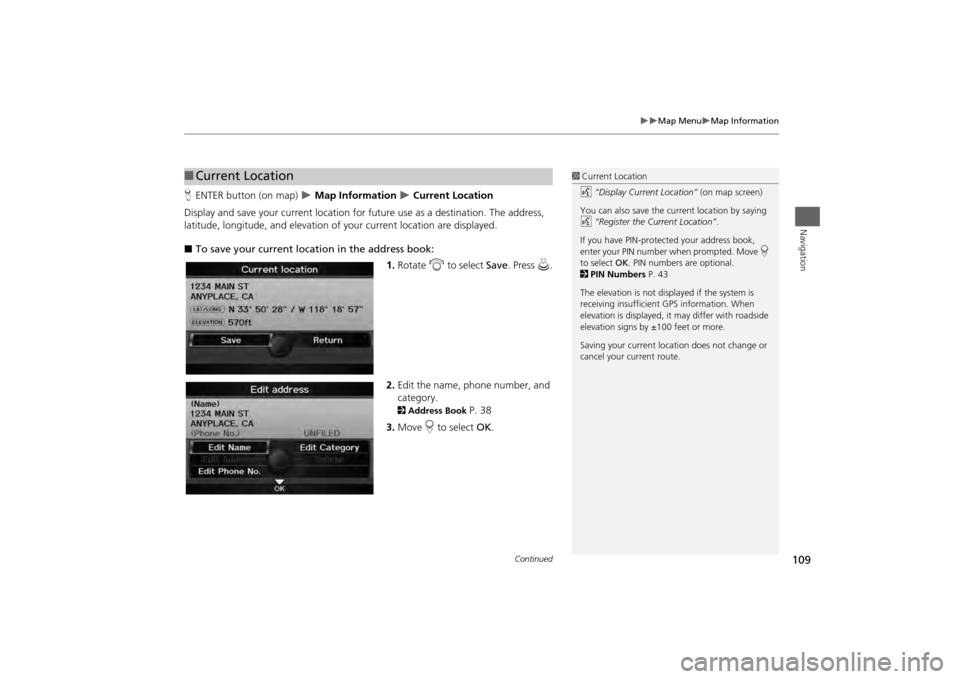
Current Location
Display and save your current location for fu ture use as a destination. The address,
latitude, longitude, and elevation of your current location are displayed.
■ To save your current loca tion in the address book:
1.Rotate i to select Save . Press u.
2. Edit the name, phone number, and
category.
2 Address Book
P. 38
3. Move r to select OK.
■Current Location
1 Current Location
d “Display Current Location” (on map screen)
You can also save the current location by saying
d “Register the Current Location” .
If you have PIN-protec ted your address book,
enter your PIN number when prompted. Move r
to select OK. PIN numbers are optional.
2 PIN Numbers P. 43
The elevation is not displayed if the system is
receiving insufficient GPS information. When
elevation is displayed, it may differ with roadside
elevation signs by ±100 feet or more.
Saving your current loca tion does not change or
cancel your current route.
Continued
Page 112 of 267
110
Map Menu
Map Information
Navigation
HENTER button (on map)
Map Information
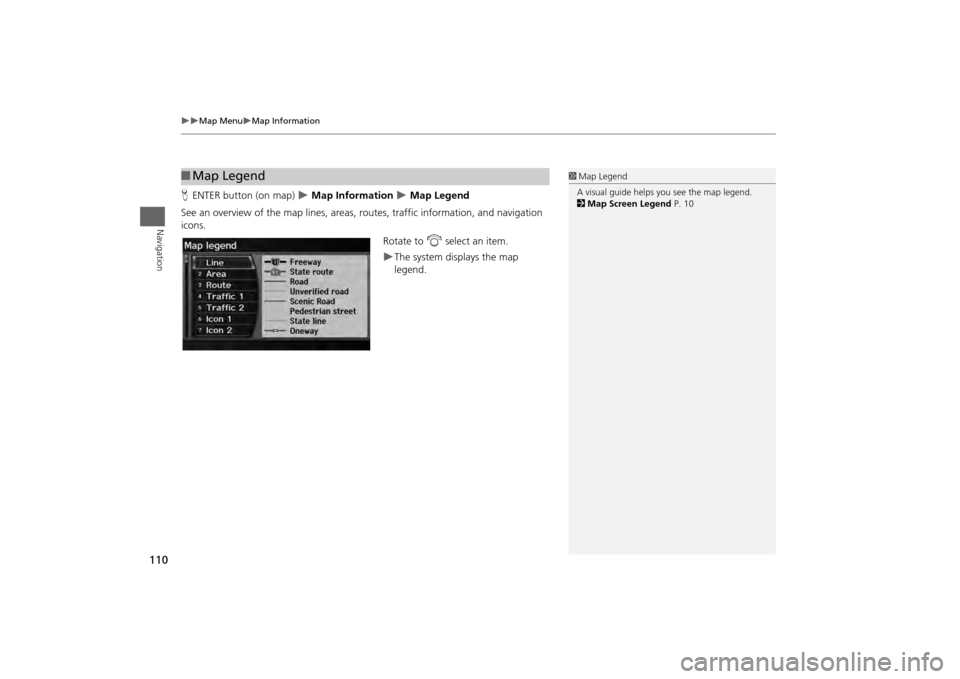
Map Legend
See an overview of the map lines, areas, routes, traffic information, and navigation
icons.
Rotate to i select an item.
The system displays the map
legend.
■Map Legend
1 Map Legend
A visual guide helps you see the map legend.
2 Map Screen Legend P. 10
Page 116 of 267
114
Map Menu
FM Traffic
Navigation
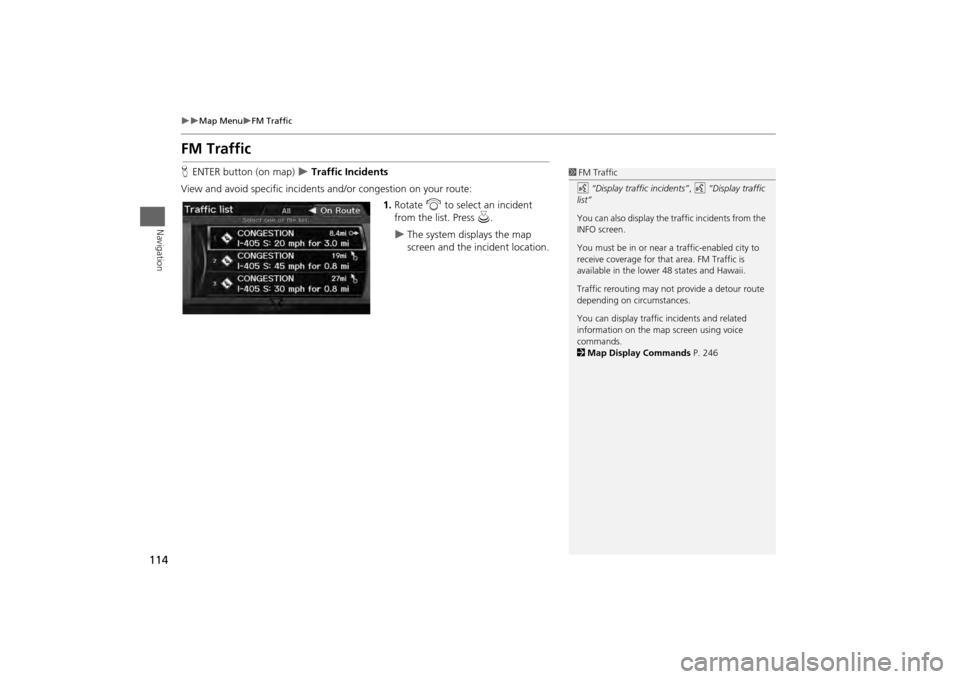
FM TrafficHENTER button (on map)
Traffic Incidents
View and avoid specific incidents and/or congestion on your route: 1.Rotate i to select an incident
from the list. Press u.
The system displays the map
screen and the incident location.
1FM Traffic
d “Display traffic incidents” , d “Display traffic
list”
You can also display the tr affic incidents from the
INFO screen.
You must be in or near a traffic-enabled city to
receive coverage for that area. FM Traffic is
available in the lower 48 states and Hawaii.
Traffic rerouting may not provide a detour route
depending on circumstances.
You can display traffic incidents and related
information on the map screen using voice
commands.
2 Map Display Commands P. 246
Page 117 of 267
115
Map Menu
FM Traffic
Navigation
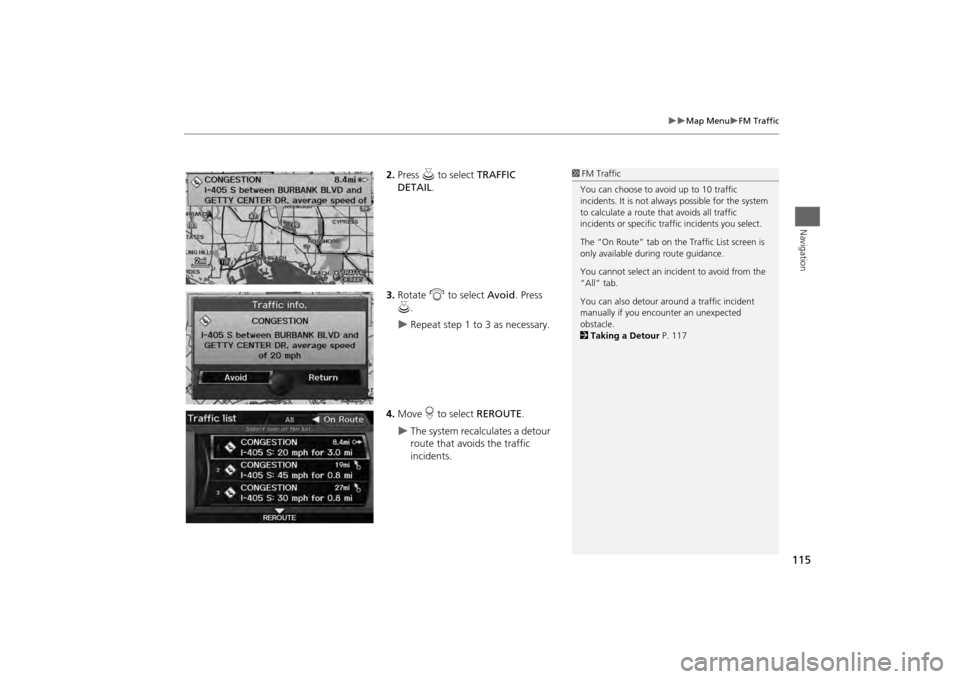
2.Press u to select TRAFFIC
DETAIL .
3. Rotate i to select Avoid. Press
u .
Repeat step 1 to 3 as necessary.
4. Move r to select REROUTE .
The system recalculates a detour
route that avoids the traffic
incidents.
1FM Traffic
You can choose to avoid up to 10 traffic
incidents. It is not alwa ys possible for the system
to calculate a route that avoids all traffic
incidents or specific traf fic incidents you select.
The “On Route” tab on the Traffic List screen is
only available duri ng route guidance.
You cannot select an inci dent to avoid from the
“All” tab.
You can also detour ar ound a traffic incident
manually if you encounter an unexpected
obstacle.
2 Taking a Detour P. 117
Page 119 of 267
117
Changing Your Route
Canceling the Route
Navigation
Canceling the RouteHDEST/ROUTE button (when en route)
Cancel Route
Cancel the route guidance and remove the destination and all waypoints from the
destination list. The system th en returns to the map screen.
Taking a DetourHDEST/ROUTE button (when en route)
Detour
Calculate a detour route manually. The syst em attempts to calculate a new route by
avoiding the next 5 miles (while on a freeway ) or 1 mile (while on a surface street).
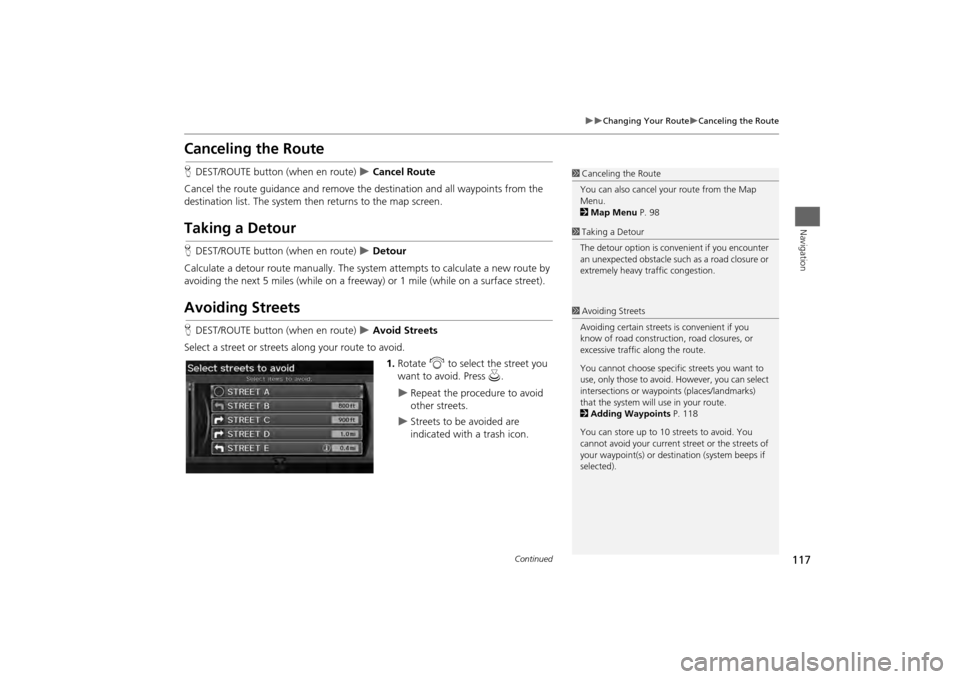
Avoiding StreetsHDEST/ROUTE button (when en route)
Avoid Streets
Select a street or streets along your route to avoid. 1.Rotate i to select the street you
want to avoid. Press u.
Repeat the procedure to avoid
other streets.
Streets to be avoided are
indicated with a trash icon.
1Canceling the Route
You can also cancel your route from the Map
Menu.
2 Map Menu P. 981Taking a Detour
The detour option is conv enient if you encounter
an unexpected obstacle such as a road closure or
extremely heavy tr affic congestion.1Avoiding Streets
Avoiding certain streets is convenient if you
know of road construction, road closures, or
excessive traffic along the route.
You cannot choose specific streets you want to
use, only those to avoid. However, you can select
intersections or waypoi nts (places/landmarks)
that the system will use in your route.
2 Adding Waypoints P. 118
You can store up to 10 streets to avoid. You
cannot avoid your current st reet or the streets of
your waypoint(s) or dest ination (system beeps if
selected).
Continued
Page 120 of 267
118
Changing Your Route
Adding Waypoints
Navigation
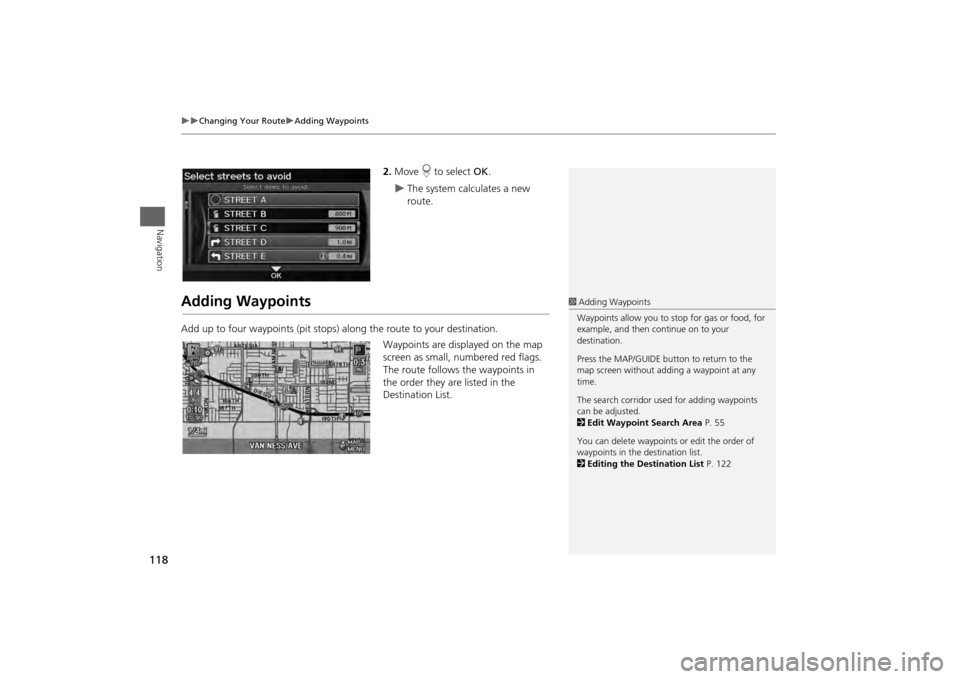
2.Move r to select OK.
The system calculates a new
route.
Adding WaypointsAdd up to four waypoints (pit stops) along the route to your destination.
Waypoints are displayed on the map
screen as small, numbered red flags.
The route follows the waypoints in
the order they are listed in the
Destination List.
1 Adding Waypoints
Waypoints allow you to stop for gas or food, for
example, and then continue on to your
destination.
Press the MAP/GUIDE button to return to the
map screen without adding a waypoint at any
time.
The search corridor used for adding waypoints
can be adjusted.
2 Edit Waypoint Search Area P. 55
You can delete waypoints or edit the order of
waypoints in the destination list.
2 Editing the Destination List P. 122