HONDA ODYSSEY 2015 RC1-RC2 / 5.G Navigation Manual
Manufacturer: HONDA, Model Year: 2015, Model line: ODYSSEY, Model: HONDA ODYSSEY 2015 RC1-RC2 / 5.GPages: 325, PDF Size: 17.97 MB
Page 1 of 325
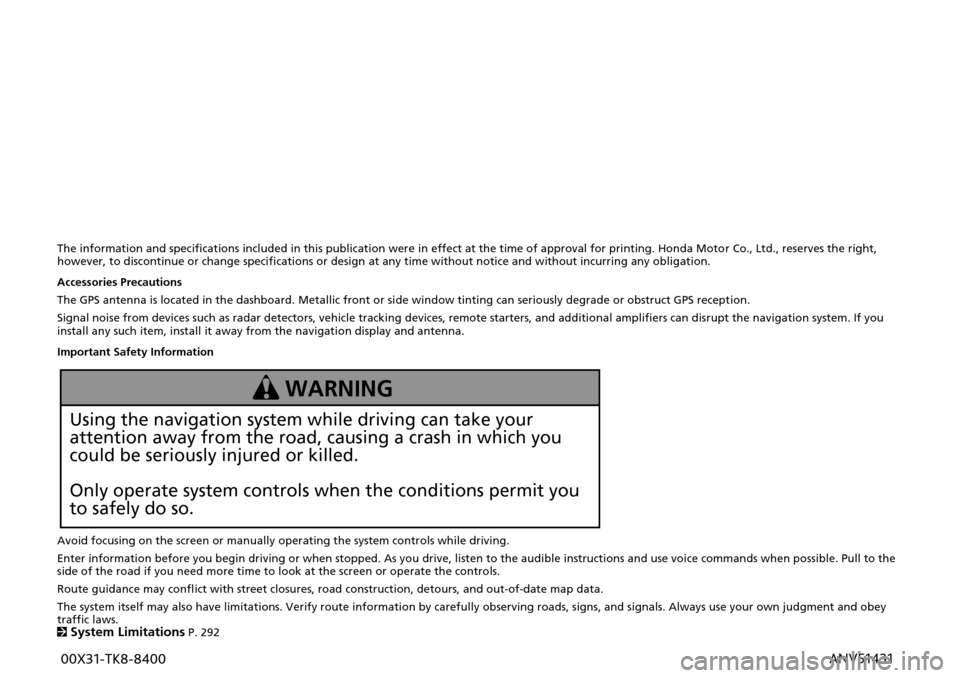
The information and specifications included in this publication were in effect at the time of approval for printing. Honda Motor Co., Ltd., reserves the right,
however, to discontinue or change specifications or design at any time without notice and without incurring any obligation.
Accessories Precautions
The GPS antenna is located in the dashboard. Metallic front or side window tinting can seriously degrade or obstruct GPS recept ion.
Signal noise from devices such as radar detectors, vehicle tracking devices, remote starters, and additional amplifiers can dis rupt the navigation system. If you
install any such item, install it away from the navigation display and antenna.
Important Safety Information
Avoid focusing on the screen or manually operating the system controls while driving.
Enter information before you begin driving or when stopped. As yo u drive, listen to the audible instructions and use voice commands when possible. Pull to the
side of the road if you need more time to look at the screen or operate the controls.
Route guidance may conflict with street closures, road construction, detours, and out-of-date map data.
The system itself may also have limitations. Verify route info rmation by carefully observing roads, signs, and signals. Always use your own judgment and obey
traffic laws.
2
System Limitations P. 292
Using the navigation system while driving can take your
attention away from the road, causing a crash in which you
could be seriously injured or killed.
Only operate system controls when the conditions permit you
to safely do so.
WARNING 00X31-TK8-8400 ANV51431
Page 2 of 325
Contents
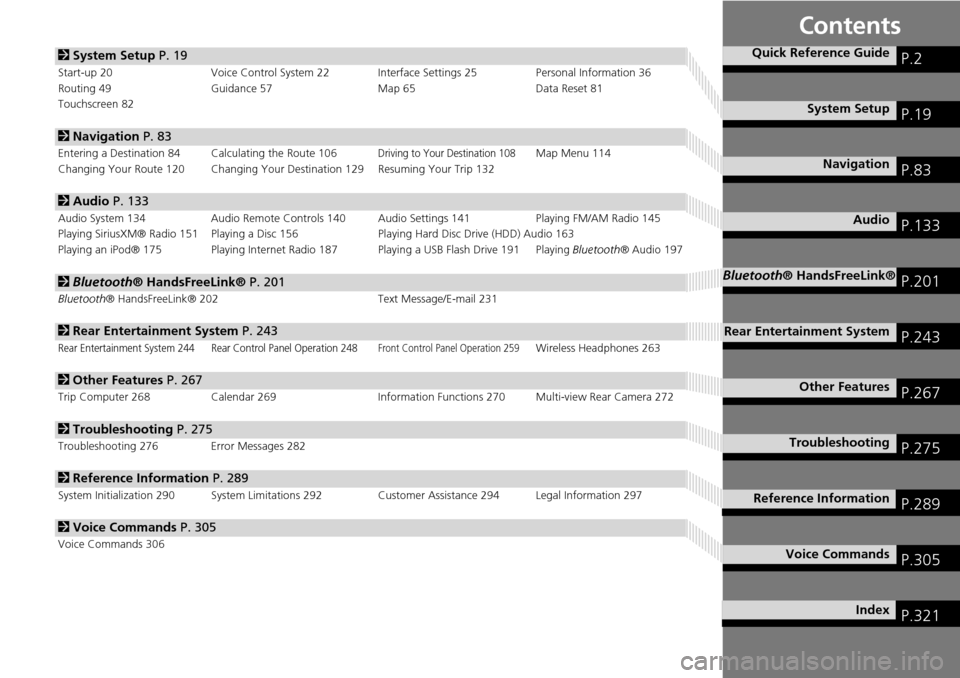
2System Setup P. 19
Start-up 20 Voice Control System 22 Interface Settings 25 Personal Information 36
Routing 49 Guidance 57 Map 65Data Reset 81
Touchscreen 82
2 Navigation P. 83
Entering a Destination 84 Calculating the Route 106Driving to Your Destination 108Map Menu 114
Changing Your Route 120 Changing Your De stination 129 Resuming Your Trip 132
2Audio P. 133
Audio System 134 Audio Remote Controls 140 Audio Settings 141 Playing FM/AM Radio 145
Playing SiriusXM® Radio 151 Playing a Disc 156 Playing Hard Disc Drive (HDD) Audio 163
Playing an iPod® 175 Playing Internet Radio 187 Playing a USB Flash Drive 191 Playing Bluetooth® Audio 197
2Bluetooth® HandsFreeLink® P. 201
Bluetooth® HandsFreeLink® 202 Text Message/E-mail 231
2Rear Entertainment System P. 243
Rear Entertainment System 244 Rear Control Panel Operation 248Front Control Panel Operation 259Wireless Headphones 263
2Other Features P. 267
Trip Computer 268 Calendar 269 Information Functions 270 Multi-view Rear Camera 272
2Troubleshooting P. 275
Troubleshooting 276 Error Messages 282
2Reference Information P. 289
System Initialization 290 System Limitations 292 Customer Assistance 294 Legal Information 297
2Voice Commands P. 305
Voice Commands 306
Quick Reference GuideP.2
System SetupP.19
NavigationP.83
AudioP.133
Bluetooth® HandsFreeLink®P.201
Rear Entertainment SystemP.243
Other FeaturesP.267
TroubleshootingP.275
Reference InformationP.289
Voice CommandsP.305
IndexP.321
Page 3 of 325
Quick Reference Guide
2
Overview—Functions at a Glance
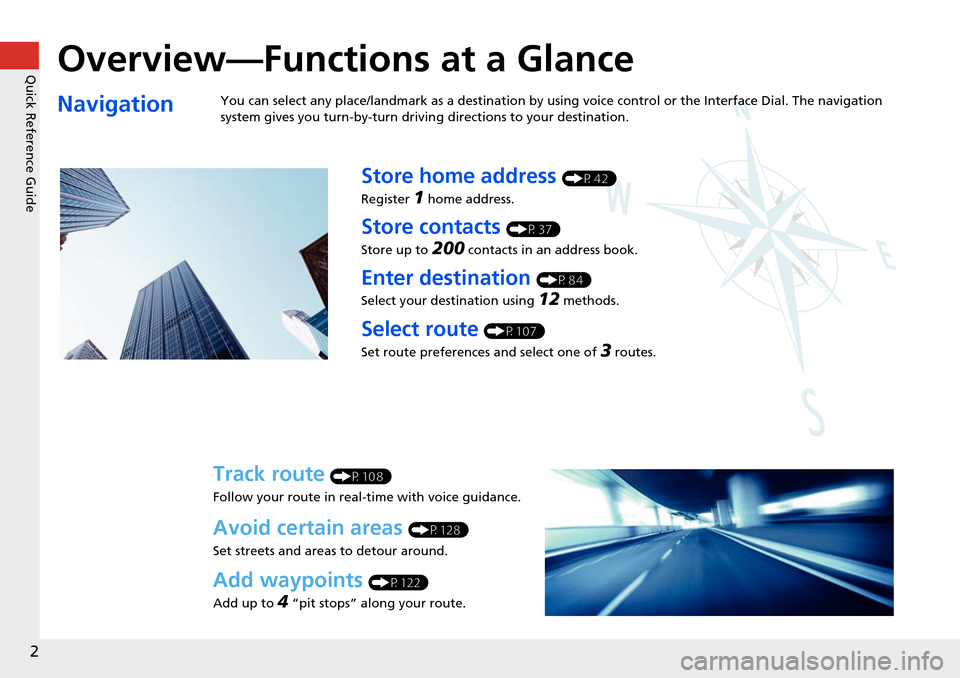
NavigationYou can select any place/landmark as a destination by using voice control or the Interface Dial. The navigation
system gives you turn-by-turn driving directions to your destination.
Store home address (P42)
Register
1 home address.
Store contacts (P37)
Store up to
200 contacts in an address book.
Enter destination (P84)
Select your destination using
12 methods.
Select route (P107)
Set route preferences and select one of
3 routes.
Track route (P108)
Follow your route in real-time with voice guidance.
Avoid certain areas (P128)
Set streets and areas to detour around.
Add waypoints (P122)
Add up to
4 “pit stops” along your route.
Page 4 of 325
3
Quick Reference Guide
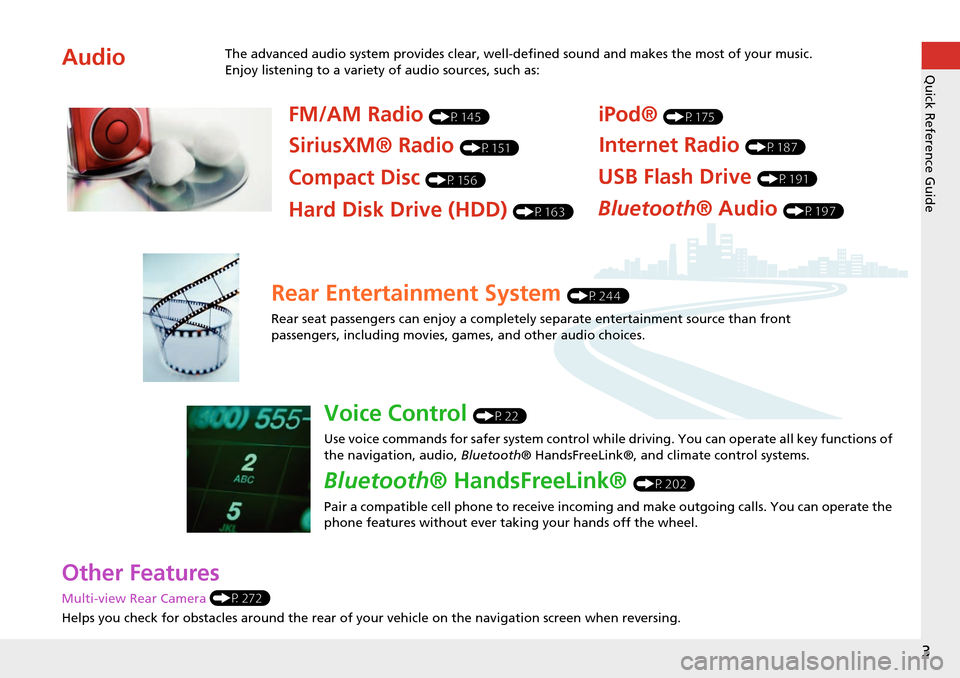
Other Features
Multi-view Rear Camera (P272)
Helps you check for obstacles around the rear of your vehicle on the navigation screen when reversing.
AudioThe advanced audio system provides clear, well-defined sound and makes the most of your music.
Enjoy listening to a variety of audio sources, such as:
FM/AM Radio (P145)
SiriusXM® Radio (P151)
Compact Disc (P156)
iPod® (P175)
USB Flash Drive (P191)
Bluetooth® Audio (P197)Hard Disk Drive (HDD) (P163)
Internet Radio (P187)
Rear Entertainment System (P244)
Rear seat passengers can enjoy a completely separate entertainment source than front
passengers, including movies, games, and other audio choices.
Voice Control (P22)
Use voice commands for safer system control while driving. You can operate all key functions of
the navigation, audio, Bluetooth® HandsFreeLink®, and climate control systems.
Bluetooth® HandsFreeLink® (P202)
Pair a compatible cell phone to receive incoming and make outgoing calls. You can operate the
phone features without ever taking your hands off the wheel.
Page 5 of 325
4
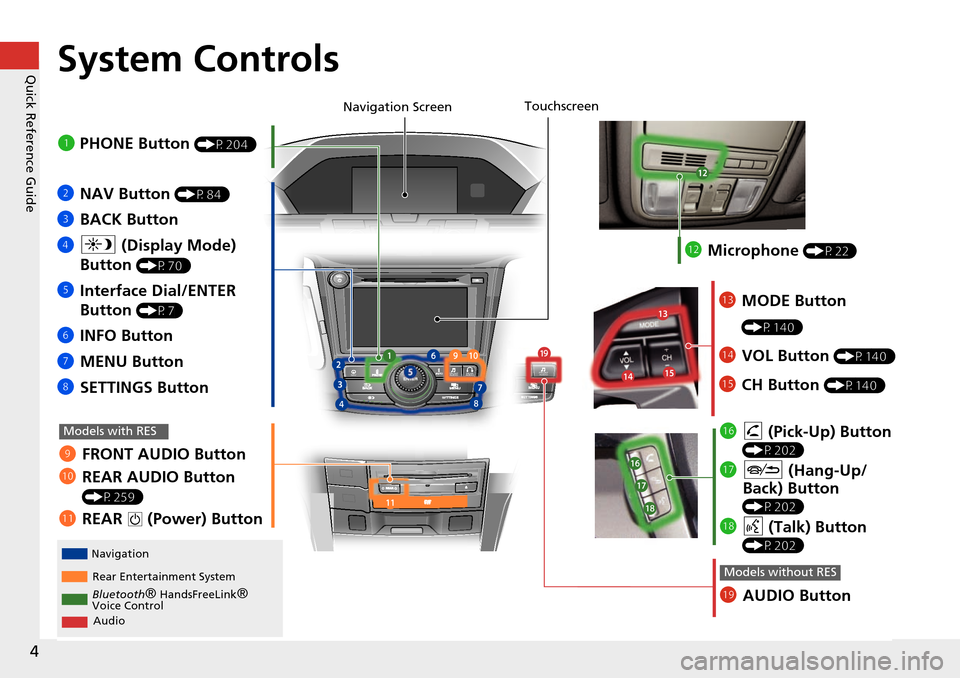
Quick Reference GuideSystem Controls
REAR
AUDIO
FRONT
AUDIO
NAVFRONT
AUDIONTDIOONDRAUAUAUAUREARUDIOUDIOUDIOUDIOFROAUDNAVFFFFFRRONTAAUDIOAUAUAUDIOAAAAAUDIOAAAAUDIOA
Navigation
Rear Entertainment System
Bluetooth
® HandsFreeLink®
Voice Control
Audio
1 PHONE Button (P204)
lj AUDIO Button
Models without RES
9FRONT AUDIO Button
0 REAR AUDIO Button
(P259)
lbREAR 9 (Power) Button
Models with RES
lcMicrophone (P22)
lgh (Pick-Up) Button
(P202)
lh J (Hang-Up/
Back) Button
(P202)
li d (Talk) Button
(P202)
ld MODE Button
(P140)
leVOL Button (P140)
lfCH Button (P140)
2NAV Button (P84)
3BACK Button
4 a (Display Mode)
Button
(P70)
5 Interface Dial/ENTER
Button
(P7)
6INFO Button
7 MENU Button
8 SETTINGS Button
Touchscreen
Navigation Screen
Page 6 of 325
5
Quick Reference GuideVoice Control Operation
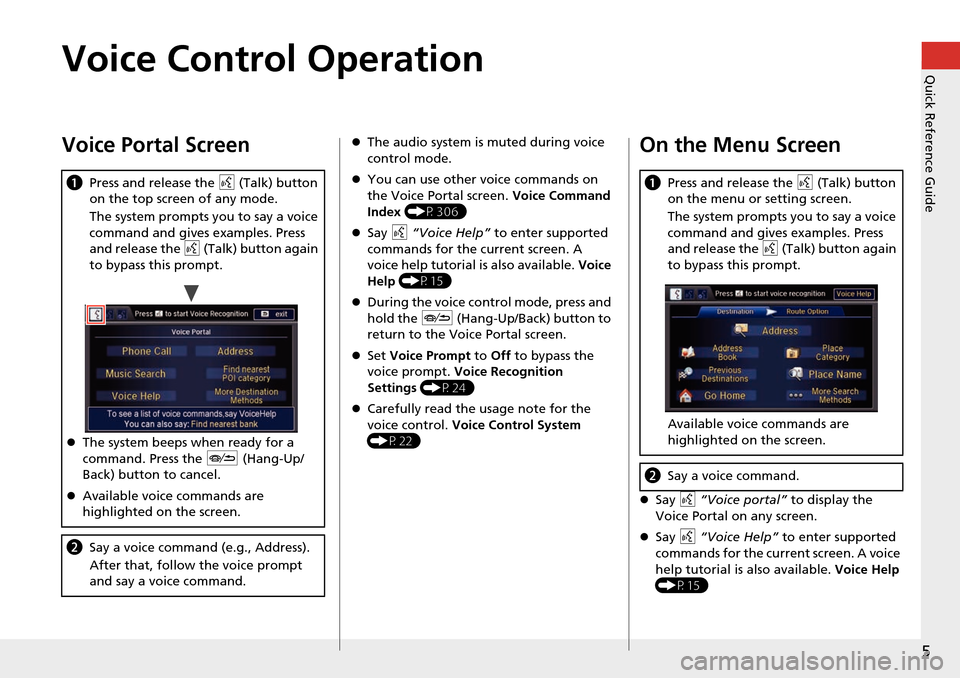
Voice Portal Screen
aPress and release the d (Talk) button
on the top screen of any mode.
The system prompts you to say a voice
command and gives examples. Press
and release the d (Talk) button again
to bypass this prompt.
The system beeps when ready for a
command. Press the J (Hang-Up/
Back) button to cancel.
Available voice commands are
highlighted on the screen.
b Say a voice command (e.g., Address).
After that, follow the voice prompt
and say a voice command.
The audio system is muted during voice
control mode.
You can use other voice commands on
the Voice Portal screen. Voice Command
Index (P306)
Say d “Voice Help” to enter supported
commands for the current screen. A
voice help tutorial is also available. Voice
Help (P15)
During the voice con trol mode, press and
hold the J (Hang-Up/Back) button to
return to the Voice Portal screen.
Set Voice Prompt to Off to bypass the
voice prompt. Voice Recognition
Settings (P24)
Carefully read the usage note for the
voice control. Voice Control System
(P22)On the Menu Screen
Say d “Voice portal” to display the
Voice Portal on any screen.
Say d “Voice Help” to enter supported
commands for the current screen. A voice
help tutorial is also available. Voice Help
(P15)
a Press and release the d (Talk) button
on the menu or setting screen.
The system prompts you to say a voice
command and gives examples. Press
and release the d (Talk) button again
to bypass this prompt.
Available voice commands are
highlighted on the screen.
b Say a voice command.
Page 7 of 325
6
Quick Reference GuideTouchscreen Basic Operation
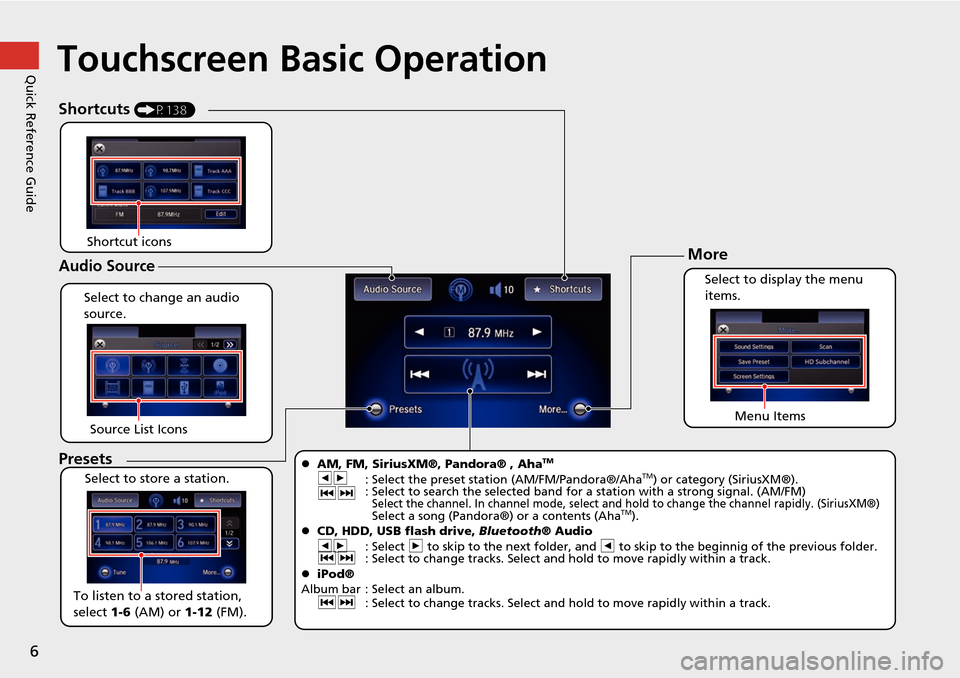
Select to change an audio
source.
Shortcuts (P138)
Audio Source
Presets
To listen to a stored station,
select 1-6 (AM) or 1-12 (FM).
Source List Icons
Select to store a station. Select to display the menu
items.
Menu Items
More
AM, FM, SiriusXM®, Pandora® , AhaTM
bn
: Select the preset station (AM/FM/Pandora®/AhaTM) or category (SiriusXM®).
cx : Select to search the selected band for a station with
a strong signal. (AM/FM)
Select the channel. In channel mode, select and hold to change the channel rapidly. (SiriusXM®) Select a song (Pandora®) or a contents (AhaTM).
CD, HDD, USB flash drive, Bluetooth® Audio
bn : Select n to skip to the next folder, and b to skip to the beginnig of the previous folder.
cx : Select to change tracks. Select and hold to move rapidly within a track.
iPod®
Album bar : Select an album. cx : Select to change tracks. Select and hold to move rapidly within a track.
Shortcut icons
Page 8 of 325
7
Quick Reference GuideInterface Dial/ENTER Button Operation
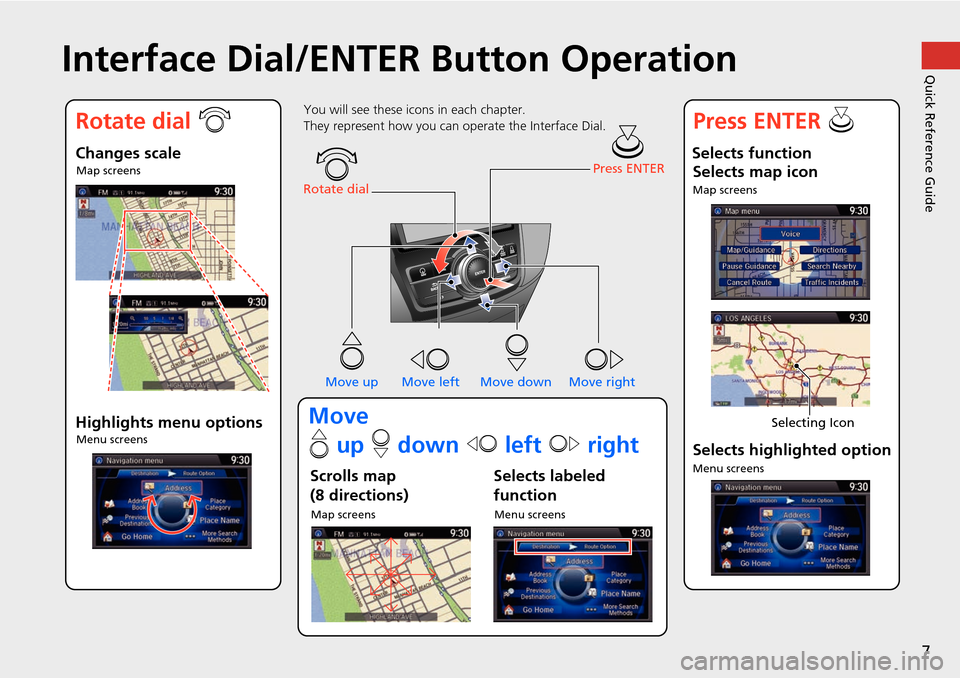
You will see these icons in each chapter.
They represent how you can operate the Interface Dial.
Changes scaleMap screens
Highlights menu optionsMenu screens
Rotate dial Press ENTER
Move up Move left Move down Move right
Scrolls map
(8 directions)
Map screens
Selects labeled
function
Menu screens
Selects function Selects map icon
Map screens
Selecting Icon
Selects highlighted option
Menu screens
Rotate dial i Press ENTER u
Move
e up r down w left y right
Page 9 of 325
8
Quick Reference GuideHow to Enter Information
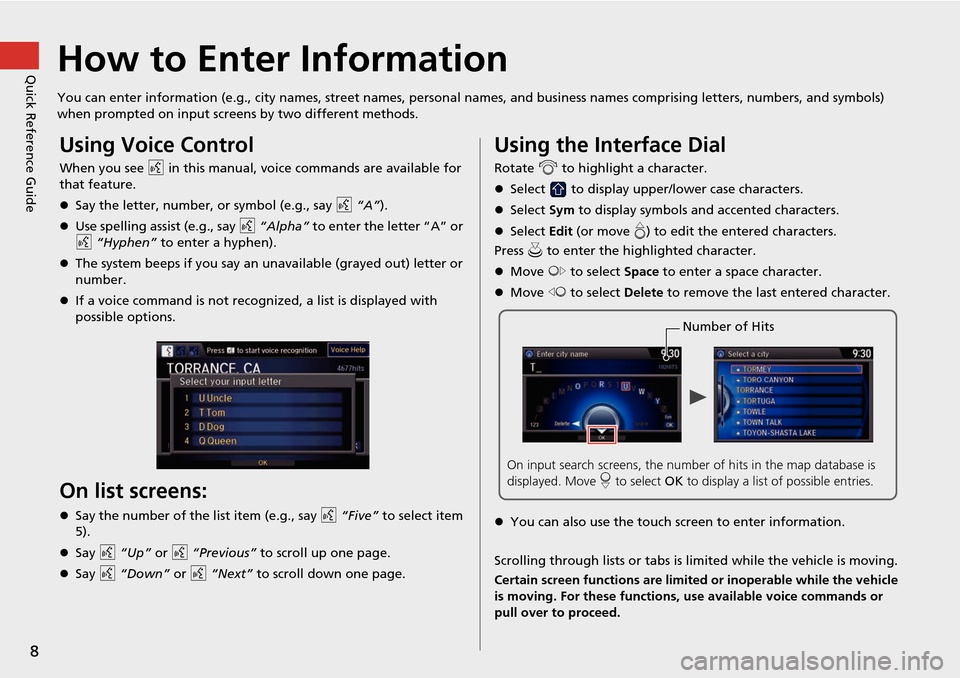
You can enter information (e.g., city names, street names, personal names, and business names comprising letters, numbers, and symbols)
when prompted on input screens by two different methods.
Using Voice Control
When you see d in this manual, voice commands are available for
that feature.
Say the letter, number, or symbol (e.g., say d “A”).
Use spelling assist (e.g., say d “Alpha” to enter the letter “A” or
d “Hyphen” to enter a hyphen).
The system beeps if you say an unavailable (grayed out) letter or
number.
If a voice command is not recognized, a list is displayed with
possible options.
On list screens:
Say the number of the list item (e.g., say d “Five” to select item
5).
Say d “Up” or d “Previous” to scroll up one page.
Say d “Down” or d “Next” to scroll down one page.
Using the Interface Dial
Rotate i to highlight a character.
Select to display upper/lower case characters.
Select Sym to display symbols an d accented characters.
Select Edit (or move e) to edit the entered characters.
Press u to enter the highlighted character.
Move y to select Space to enter a space character.
Move w to select Delete to remove the last entered character.
You can also use the touch screen to enter information.
Scrolling through lists or tabs is limited while the vehicle is moving.
Certain screen functions are limited or inoperable while the vehicle
is moving. For these functions, use available voice commands or
pull over to proceed.
Number of Hits
On input search screens, the number of hits in the map database is
displayed. Move r to select OK to display a list of possible entries.
Page 10 of 325
9
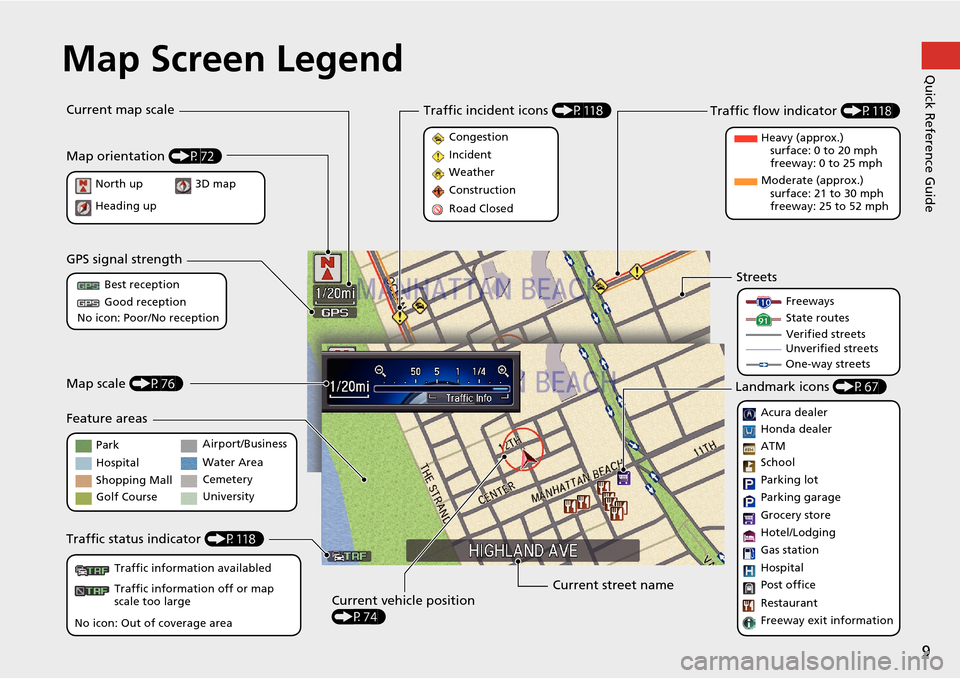
Quick Reference GuideMap Screen Legend
Landmark icons (P67)
Acura dealer
Honda dealer
ATM
School
Parking lot
Parking garage
Grocery store
Hotel/Lodging
Gas station
Hospital
Post office
Restaurant
Freeway exit information
Streets
Freeways
State routes
Verified streets
Unverified streets
One-way streets
Traffic flow indicator (P118)
Heavy (approx.)
surface: 0 to 20 mph
freeway: 0 to 25 mph
Moderate (approx.) surface: 21 to 30 mph
freeway: 25 to 52 mph
Congestion
Incident
Weather
Construction
Road Closed
Traffic incident icons
(P118)
Current street name
Current vehicle position
(P74)
Traffic status indicator
(P118)
Traffic information availabled
Traffic information off or map
scale too large
No icon: Out of coverage area Park
Hospital
Shopping Mall
Golf Course
Airport/Business
Water Area
Cemetery
University
Map scale
(P76)
Feature areas
GPS signal strength
Best reception
Good reception
No icon: Poor/No reception
Map orientation (P72)
North up
Heading up
Current map scale
3D map