light HONDA ODYSSEY 2015 RC1-RC2 / 5.G Navigation Manual
[x] Cancel search | Manufacturer: HONDA, Model Year: 2015, Model line: ODYSSEY, Model: HONDA ODYSSEY 2015 RC1-RC2 / 5.GPages: 325, PDF Size: 17.97 MB
Page 72 of 325
71
MapColor
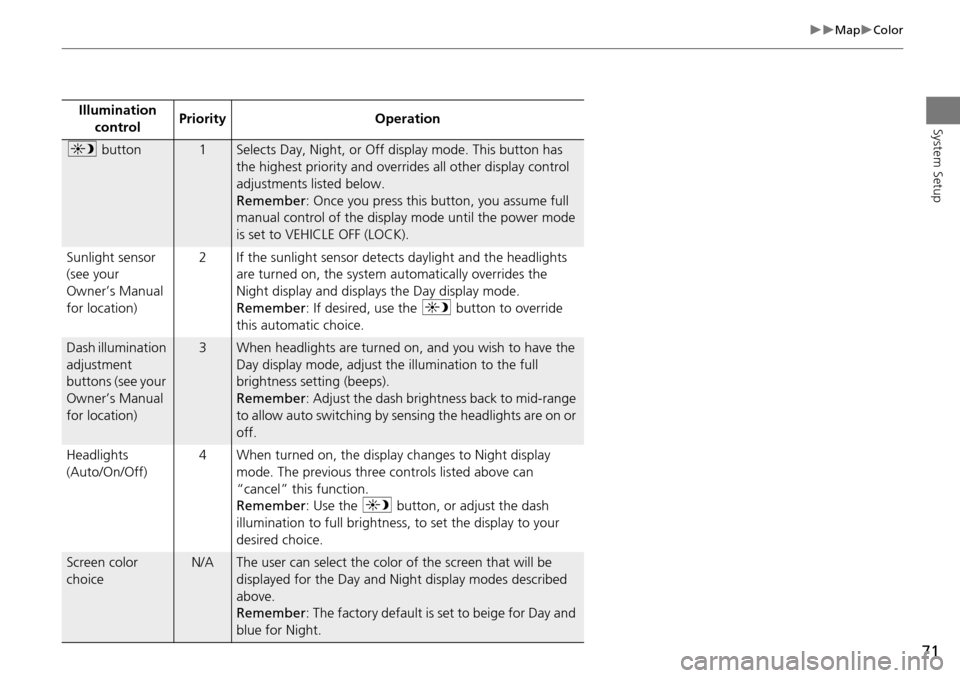
System SetupIllumination control Priority Operation
a
button1Selects Day, Night, or Off display mode. This button has
the highest priority and overrides all other display control
adjustments listed below.
Remember : Once you press this button, you assume full
manual control of the display mode until the power mode
is set to VEHICLE OFF (LOCK).
Sunlight sensor
(see your
Owner’s Manual
for location) 2 If the sunlight sensor detects daylight and the headlights
are turned on, the system automatically overrides the
Night display and displays the Day display mode.
Remember : If desired, use the a button to override
this automatic choice.
Dash illumination
adjustment
buttons (see your
Owner’s Manual
for location)3When headlights are turned on, and you wish to have the
Day display mode, adjust the illumination to the full
brightness setting (beeps).
Remember : Adjust the dash brightness back to mid-range
to allow auto switching by sensing the headlights are on or
off.
Headlights
(Auto/On/Off) 4 When turned on, the display changes to Night display
mode. The previous three controls listed above can
“cancel” this function.
Remember : Use the a button, or adjust the dash
illumination to full brightness, to set the display to your
desired choice.
Screen color
choiceN/AThe user can select the color of the screen that will be
displayed for the Day and Night display modes described
above.
Remember : The factory default is set to beige for Day and
blue for Night.
Page 90 of 325
89
Entering a DestinationAddress
Navigation
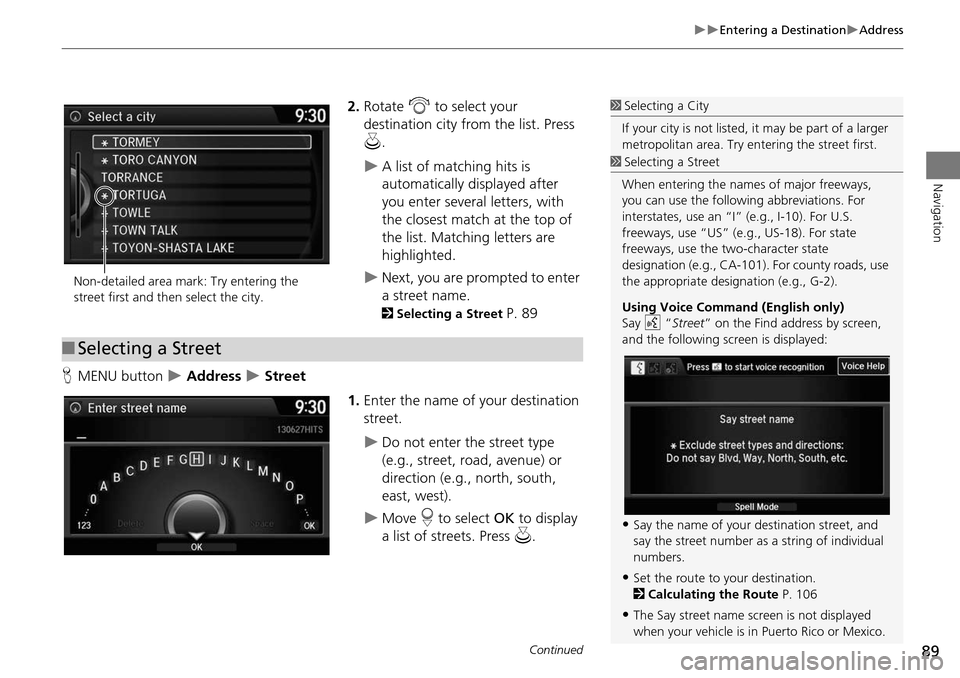
2.Rotate i to select your
destination city fr om the list. Press
u .
A list of matching hits is
automatically displayed after
you enter several letters, with
the closest match at the top of
the list. Matching letters are
highlighted.
Next, you are prompted to enter
a street name.
2Selecting a Street P. 89
H MENU button
Address Street
1.Enter the name of your destination
street.
Do not enter the street type
(e.g., street, road, avenue) or
direction (e.g., north, south,
east, west).
Move r to select OK to display
a list of streets. Press u.
1Selecting a City
If your city is not listed, it may be part of a larger
metropolitan area. Try entering the street first.
Non-detailed area mark: Try entering the
street first and then select the city.
■ Selecting a Street
1 Selecting a Street
When entering the names of major freeways,
you can use the following abbreviations. For
interstates, use an “I ” (e.g., I-10). For U.S.
freeways, use “US” (e.g., US-18). For state
freeways, use the two-character state
designation (e.g., CA-101). For county roads, use
the appropriate desi gnation (e.g., G-2).
Using Voice Command (English only)
Say d “Street ” on the Find address by screen,
and the following screen is displayed:
•Say the name of your destination street, and
say the street number as a string of individual
numbers.
•Set the route to your destination.
2 Calculating the Route P. 106
•The Say street name screen is not displayed
when your vehicle is in Puerto Rico or Mexico.
Continued
Page 91 of 325
90
Entering a DestinationAddress
Navigation
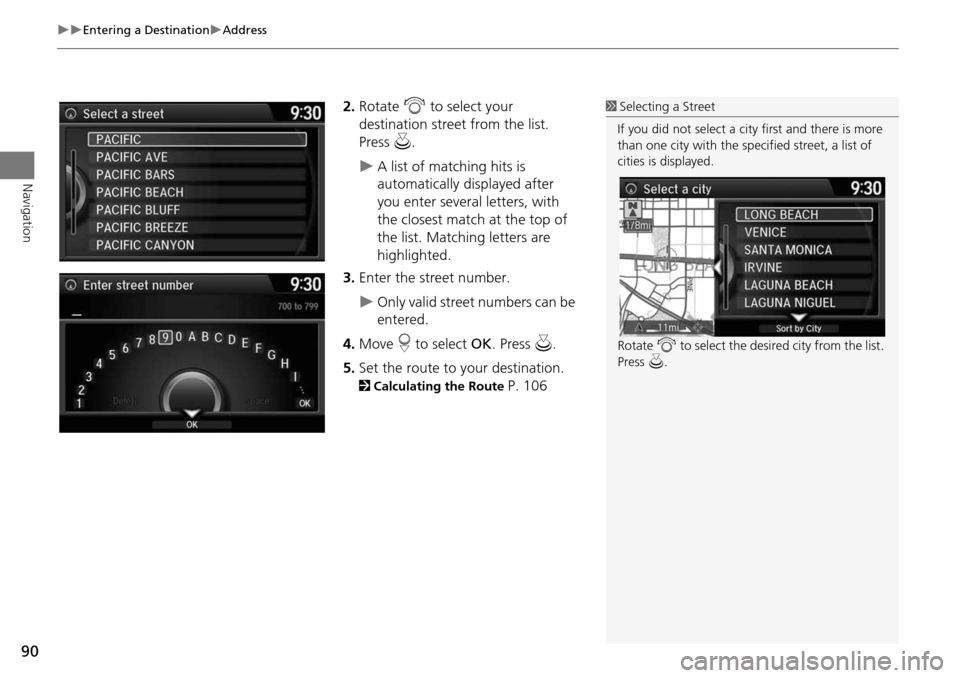
2.Rotate i to select your
destination street from the list.
Press u.
A list of matching hits is
automatically displayed after
you enter several letters, with
the closest match at the top of
the list. Matching letters are
highlighted.
3. Enter the street number.
Only valid street numbers can be
entered.
4. Move r to select OK. Press u.
5. Set the route to your destination.
2 Calculating the Route P. 106
1Selecting a Street
If you did not select a city first and there is more
than one city with the specified street, a list of
cities is displayed.
Rotate i to select the desired city from the list.
Press u.
Page 96 of 325
95
Entering a DestinationPlace Category
Navigation
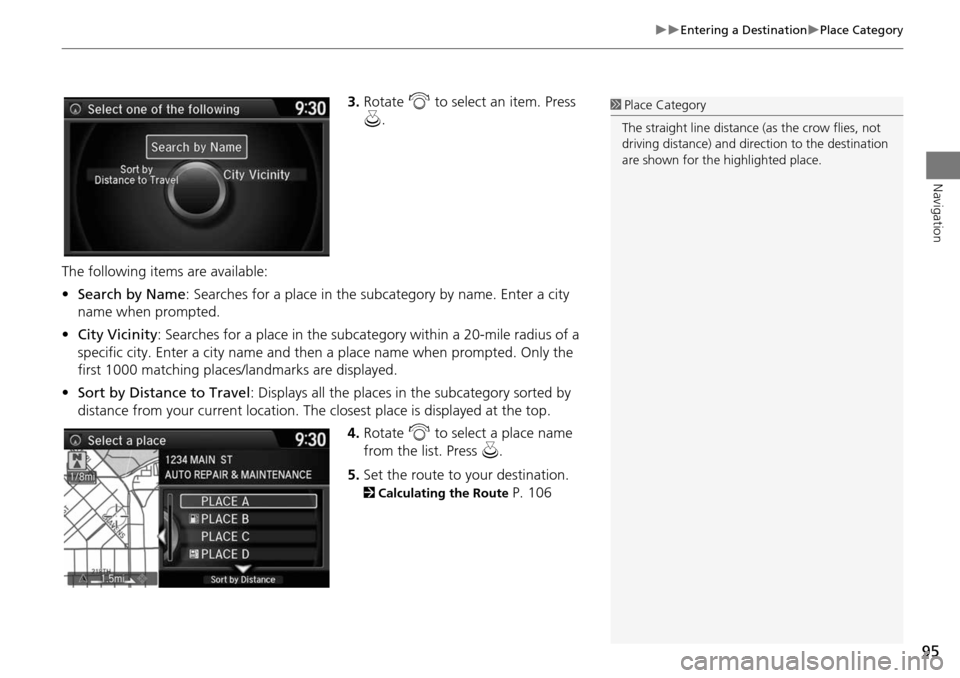
3.Rotate i to select an item. Press
u .
The following items are available:
• Search by Name : Searches for a place in the subcategory by name. Enter a city
name when prompted.
• City Vicinity : Searches for a place in the subcate gory within a 20-mile radius of a
specific city. Enter a city name and then a place name when prompted. Only the
first 1000 matching places/landmarks are displayed.
• Sort by Distance to Travel : Displays all the places in the subcategory sorted by
distance from your current location. The closest place is displayed at the top.
4.Rotate i to select a place name
from the list. Press u .
5. Set the route to your destination.
2 Calculating the Route P. 106
1Place Category
The straight line distance (as the crow flies, not
driving distance) and dire ction to the destination
are shown for the highlighted place.
Page 97 of 325
96
Entering a DestinationPlace Name
Navigation
Place Name
HMENU button Place Name
Enter the name of a place (e.g., business, hotel, restaurant) stored in the map
database to use as the destination.
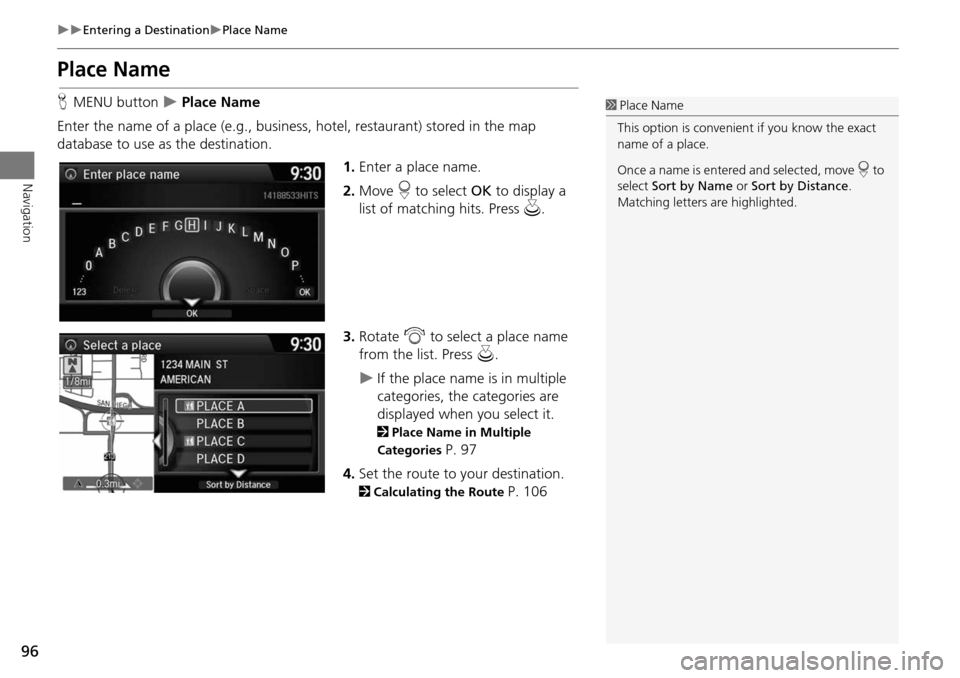
1.Enter a place name.
2. Move r to select OK to display a
list of matching hits. Press u.
3. Rotate i to select a place name
from the list. Press u.
If the place name is in multiple
categories, the categories are
displayed when you select it.
2Place Name in Multiple
Categories
P. 97
4. Set the route to your destination.
2 Calculating the Route P. 106
1Place Name
This option is convenient if you know the exact
name of a place.
Once a name is entered and selected, move r to
select Sort by Name or Sort by Distance .
Matching letters are highlighted.
Page 98 of 325
97
Entering a DestinationPlace Name
Navigation
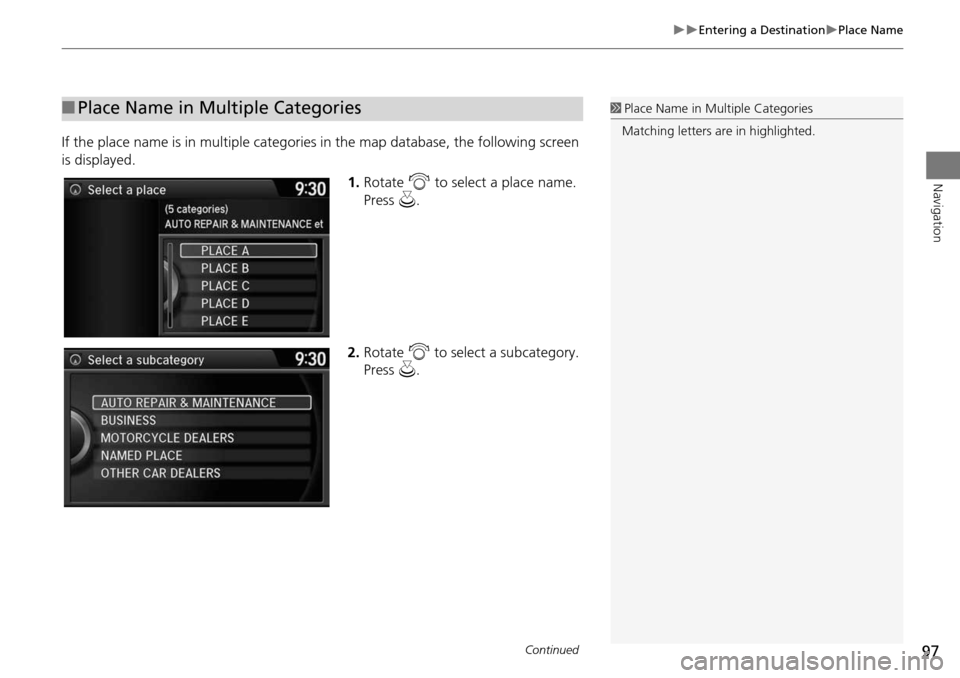
If the place name is in multiple categories in the map database, the following screen
is displayed.
1.Rotate i to select a place name.
Press u.
2. Rotate i to select a subcategory.
Press u.
■Place Name in Multiple Categories1 Place Name in Multiple Categories
Matching letters are in highlighted.
Continued
Page 111 of 325
110
Driving to Your DestinationViewing the Route
Navigation
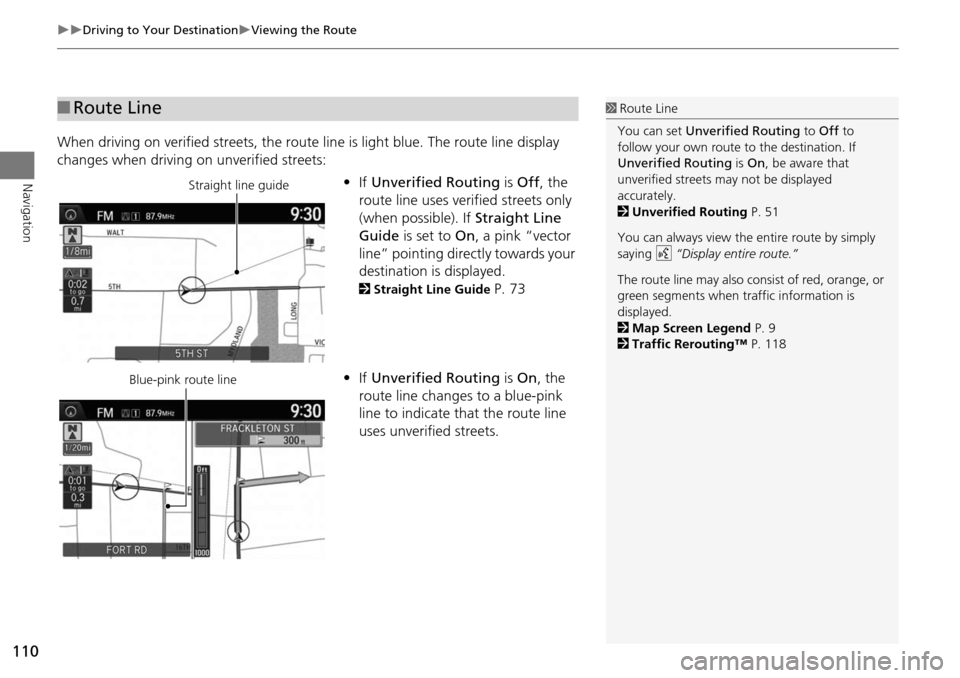
When driving on verified streets, the route line is light blue. The route line display
changes when driving on unverified streets:
•If Unverified Routing is Off , the
route line uses verified streets only
(when possible). If Straight Line
Guide is set to On, a pink “vector
line” pointing directly towards your
destination is displayed.
2 Straight Line Guide P. 73
• If Unverified Routing is On , the
route line changes to a blue-pink
line to indicate that the route line
uses unverified streets.
■ Route Line1 Route Line
You can set Unverified Routing to Off to
follow your own route to the destination. If
Unverified Routing is On, be aware that
unverified streets ma y not be displayed
accurately.
2 Unverified Routing P. 51
You can always view the entire route by simply
saying d “Display entire route.”
The route line may also c onsist of red, orange, or
green segments when traffic information is
displayed.
2 Map Screen Legend P. 9
2 Traffic Rerouting™ P. 118
Straight line guide
Blue-pink route line
Page 136 of 325
135
Audio SystemUSB Port
Audio
USB Port
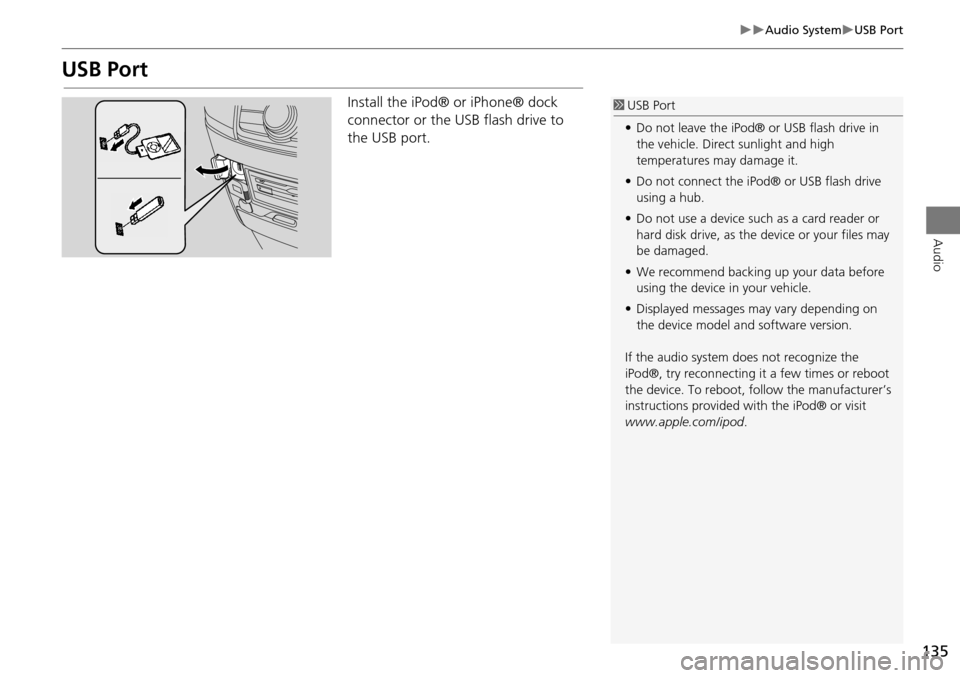
Install the iPod® or iPhone® dock
connector or the USB flash drive to
the USB port.1 USB Port
• Do not leave the iPod® or USB flash drive in
the vehicle. Direct sunlight and high
temperatures may damage it.
• Do not connect the iPod® or USB flash drive
using a hub.
• Do not use a device such as a card reader or
hard disk drive, as the device or your files may
be damaged.
• We recommend backing up your data before
using the device in your vehicle.
• Displayed messages may vary depending on
the device model a nd software version.
If the audio system does not recognize the
iPod®, try reconnecting it a few times or reboot
the device. To reboot, fo llow the manufacturer’s
instructions provided wi th the iPod® or visit
www.apple.com/ipod.
Page 163 of 325
162
Playing a DiscRecommended CDs
Audio
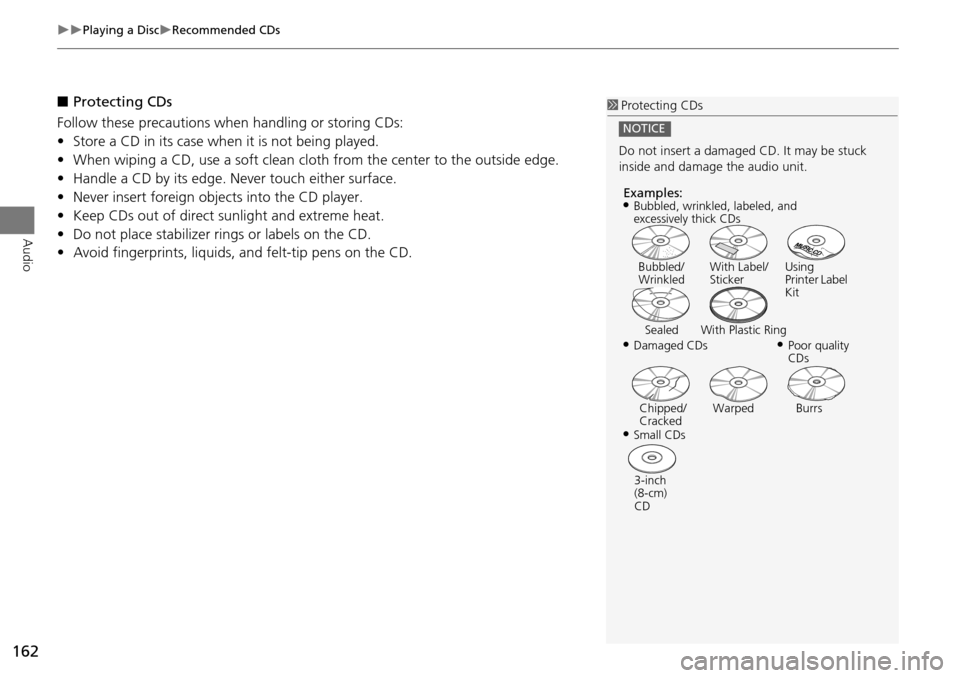
■Protecting CDs
Follow these precautions when handling or storing CDs:
• Store a CD in its case when it is not being played.
• When wiping a CD, use a soft clean clot h from the center to the outside edge.
• Handle a CD by its edge. Never touch either surface.
• Never insert foreign obje cts into the CD player.
• Keep CDs out of direct sunlight and extreme heat.
• Do not place stabilizer rings or labels on the CD.
• Avoid fingerprints, liquids, and felt-tip pens on the CD.1Protecting CDs
Do not insert a damaged CD. It may be stuck
inside and damage the audio unit.
NOTICE
Examples:
•Damaged CDs Bubbled/
Wrinkled
With Label/
Sticker Using
Printer Label
Kit
Sealed With Plastic Ring•Poor quality
CDs
Chipped/
Cracked Warped Burrs
•Small CDs
3-inch
(8-cm)
CD
•Bubbled, wrinkled, labeled, and
excessively thick CDs
Page 164 of 325
163
Audio
Playing Hard Disc Drive (HDD) Audio
The Hard Disc Drive (HDD) Audio function plays tracks from music CDs that have
been recorded onto the built-in HDD. You ca n arrange the tracks in playlists or play
the tracks using various search methods.
Selecting HDD Mode
1. Press the MENU button. (in AUDIO mode)
2. Rotate i to select Change Source. Press u.
3. Rotate to select HDD. Press to play tracks stored on the HDD.
Title information is displayed if found in the Gracenote® Album Info
(Gracenote® Media Database) stored on the HDD.
The HDD has two types of playlists: original playlists and user playlists. An
original playlist is automatically created for each album when a music CD is
recorded. You can customize up to six us er playlists provided on the HDD by
adding tracks from your original playlists.
1. Select Audio Source .
2. Select the HDD icon to play tracks stored on the HDD.
1Playing Hard Disc Drive (HDD) Audio
You can control the HDD audio using voice
commands.
2 Voice Control Operation P. 5
2 Song By Voice
TM (SBV) P. 182
Music tracks recorded on HDD cannot be
recorded onto CDs or other devices.
Tracks are recorded at four times the playback
speed using ultra-efficient compression
technology; therefore, sound quality may vary
slightly from the original.
If the HDD is ever replaced, all music data is lost
and cannot be recovered.
If there is a problem, you may see an error
message on the display.
2 Hard Disc Drive (HDD) Audio P. 284
Interface Dial
Touchscreen