oil HONDA ODYSSEY 2018 (in English) Owner's Guide
[x] Cancel search | Manufacturer: HONDA, Model Year: 2018, Model line: ODYSSEY, Model: HONDA ODYSSEY 2018Pages: 763, PDF Size: 47.02 MB
Page 651 of 763
649
uuMaintenance Under the Hood uOil Check
Maintenance
Oil Check
We recommend that you check the engi ne oil level every time you refuel.
Park the vehicle on level ground.
Wait approximately three minutes after turn ing the engine off before you check the
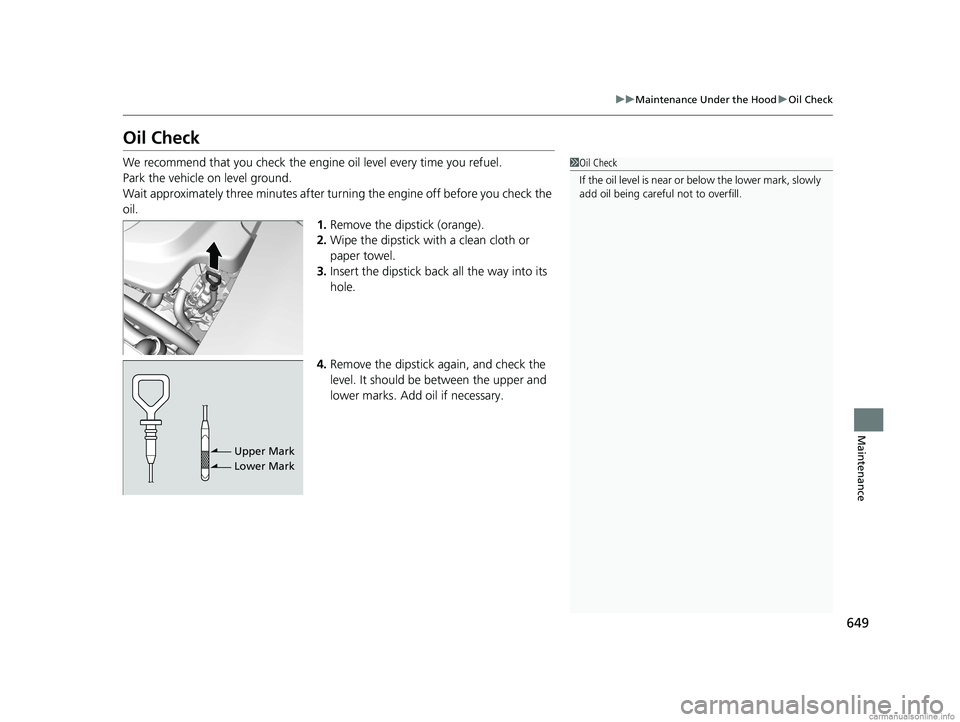
oil. 1.Remove the dipstick (orange).
2. Wipe the dipstick with a clean cloth or
paper towel.
3. Insert the dipstick back all the way into its
hole.
4. Remove the dipstick again, and check the
level. It should be between the upper and
lower marks. Add oil if necessary.1Oil Check
If the oil level is near or below the lower mark, slowly
add oil being careful not to overfill.
Upper Mark
Lower Mark
18 US ODYSSEY-31THR6010.book 649 ページ 2018年12月6日 木曜日 午後4時18分
Page 652 of 763
650
uuMaintenance Under the Hood uAdding Engine Oil
Maintenance
Adding Engine Oil
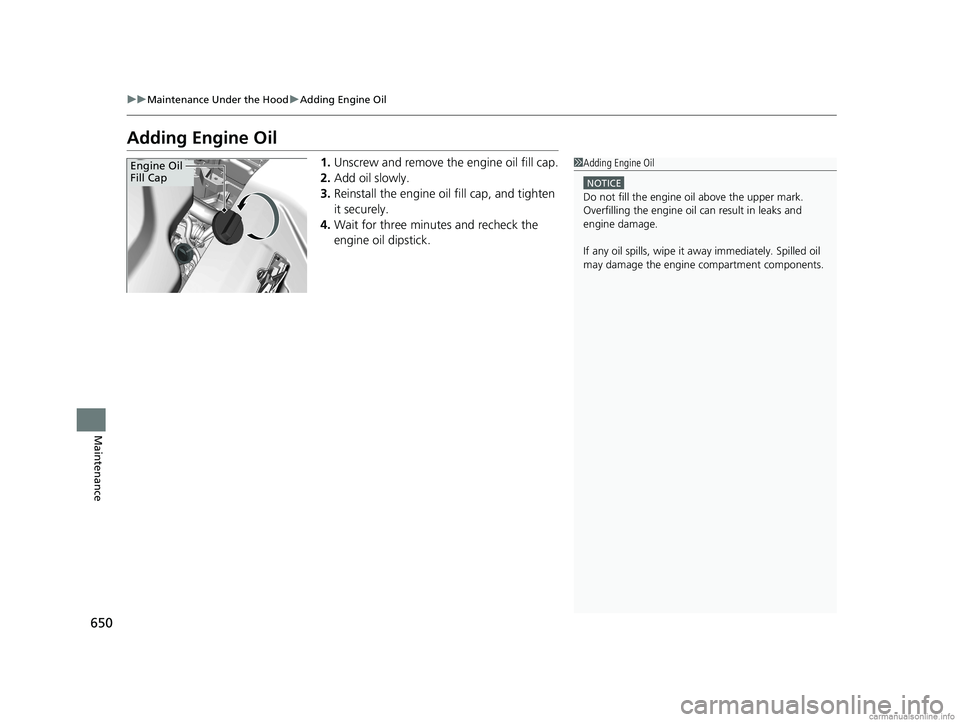
1. Unscrew and remove the engine oil fill cap.
2. Add oil slowly.
3. Reinstall the engine oil fill cap, and tighten
it securely.
4. Wait for three minutes and recheck the
engine oil dipstick.1Adding Engine Oil
NOTICE
Do not fill the engine oil above the upper mark.
Overfilling the engine oil can result in leaks and
engine damage.
If any oil spills, wipe it away immediately. Spilled oil
may damage the engine compartment components.
Engine Oil
Fill Cap
18 US ODYSSEY-31THR6010.book 650 ページ 2018年12月6日 木曜日 午後4時18分
Page 653 of 763
651
uuMaintenance Under the Hood uChanging the Engine Oil and Oil Filter
Continued
Maintenance
Changing the Engine Oil and Oil Filter
You must change the engine oil and oil fi lter regularly in order to maintain the
engine’s lubrication. The engine may be damaged if they are not changed regularly.
Change the oil and filter in accordance with the maintenance message on the driver
information interface. 1.Run the engine until it reaches normal
operating temperature, and then turn the
engine off.
2. Open the hood and remove the engine oil
fill cap.
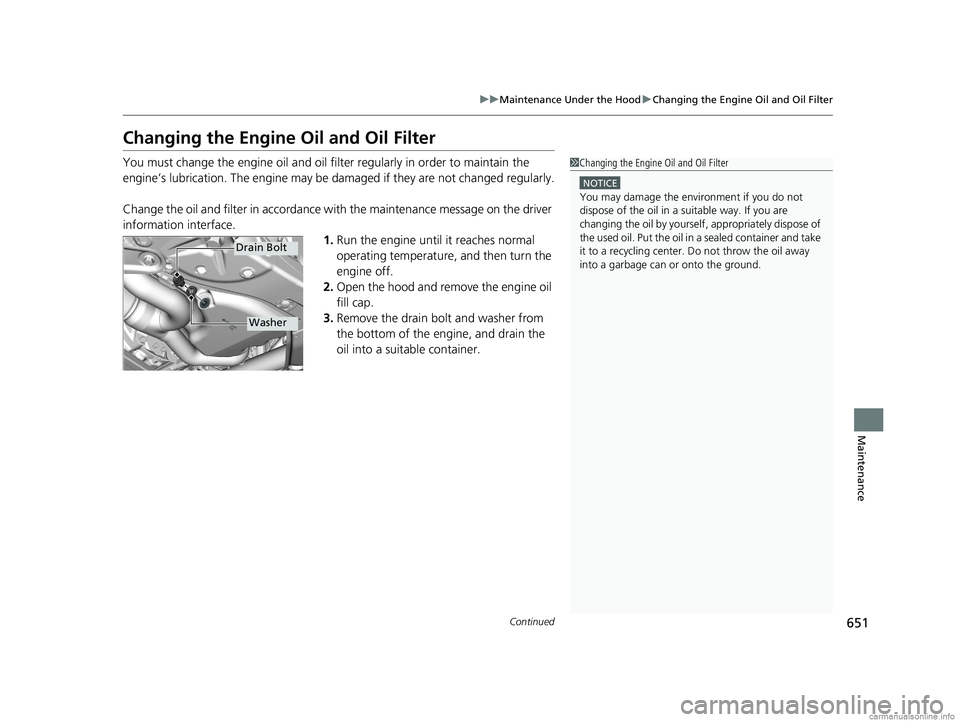
3. Remove the drain bolt and washer from
the bottom of the engine, and drain the
oil into a suitable container.1Changing the Engine Oil and Oil Filter
NOTICE
You may damage the environment if you do not
dispose of the oil in a suitable way. If you are
changing the oil by yourself , appropriately dispose of
the used oil. Put the oil in a sealed container and take
it to a recycling center. Do not throw the oil away
into a garbage can or onto the ground.
Washer
Drain Bolt
18 US ODYSSEY-31THR6010.book 651 ページ 2018年12月6日 木曜日 午後4時18分
Page 654 of 763
uuMaintenance Under the Hood uChanging the Engine Oil and Oil Filter
652
Maintenance
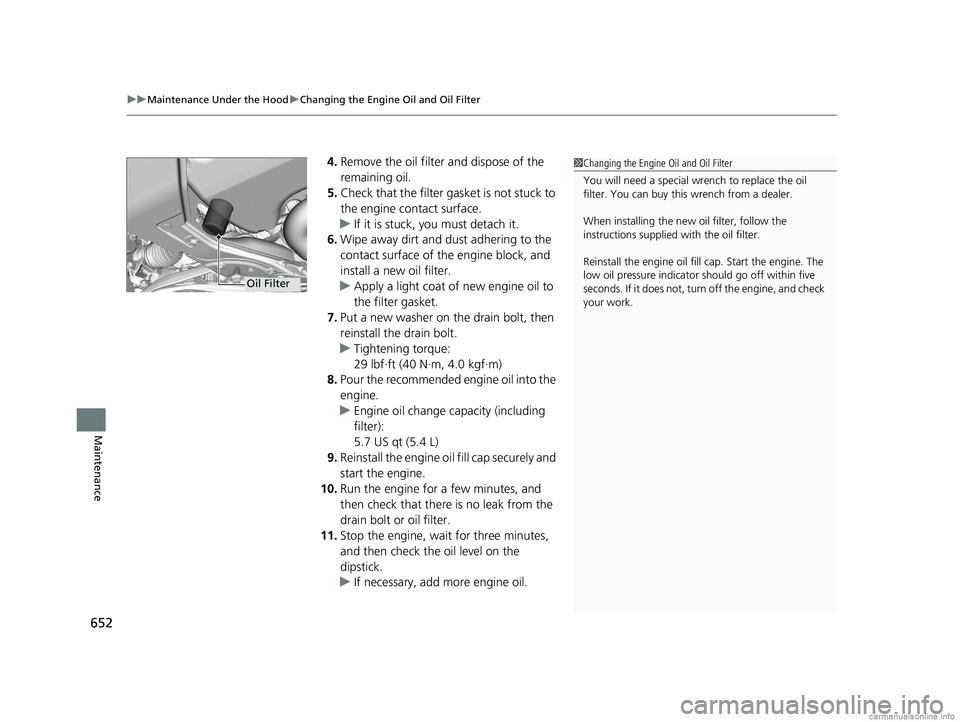
4. Remove the oil filter and dispose of the
remaining oil.
5. Check that the filter ga sket is not stuck to
the engine contact surface.
u If it is stuck, you must detach it.
6. Wipe away dirt and dust adhering to the
contact surface of the engine block, and
install a new oil filter.
u Apply a light coat of new engine oil to
the filter gasket.
7. Put a new washer on the drain bolt, then
reinstall the drain bolt.
u Tightening torque:
29 lbf∙ft (40 N∙m, 4.0 kgf∙m)
8. Pour the recommended engine oil into the
engine.
u Engine oil change capacity (including
filter):
5.7 US qt (5.4 L)
9. Reinstall the engine oil fill cap securely and
start the engine.
10. Run the engine for a few minutes, and
then check that ther e is no leak from the
drain bolt or oil filter.
11. Stop the engine, wait for three minutes,
and then check the oil level on the
dipstick.
u If necessary, add more engine oil.1Changing the Engine Oil and Oil Filter
You will need a special wrench to replace the oil
filter. You can buy this wrench from a dealer.
When installing the new oil filter, follow the
instructions supplied with the oil filter.
Reinstall the engine oil fill cap. Start the engine. The
low oil pressure indicator should go off within five
seconds. If it does not, turn off the engine, and check
your work.
Oil Filter
18 US ODYSSEY-31THR6010.book 652 ページ 2018年12月6日 木曜日 午後4時18分
Page 660 of 763
658
Maintenance
Replacing Light Bulbs
Headlight Bulbs
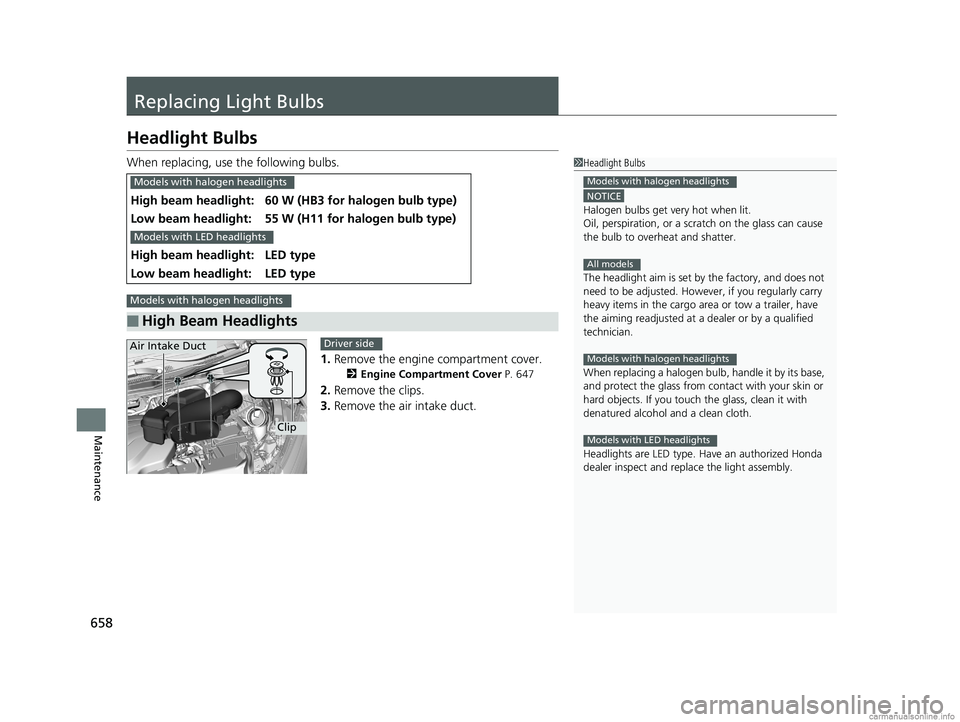
When replacing, use the following bulbs.1.Remove the engine compartment cover.
2 Engine Compartment Cover P. 647
2.Remove the clips.
3. Remove the air intake duct.
High beam headlight:60 W (HB3 for halogen bulb type)
Low beam headlight:55 W (H11 for halogen bulb type)
High beam headlight:LED type
Low beam headlight:LED type
■High Beam Headlights
1Headlight Bulbs
NOTICE
Halogen bulbs get very hot when lit.
Oil, perspiration, or a scratch on the glass can cause
the bulb to overhe at and shatter.
The headlight aim is set by the factory, and does not
need to be adjusted. Howeve r, if you regularly carry
heavy items in the cargo area or tow a trailer, have
the aiming readjusted at a dealer or by a qualified
technician.
When replacing a halogen bulb, handle it by its base,
and protect the glass from c ontact with your skin or
hard objects. If you touch the glass, clean it with
denatured alcohol and a clean cloth.
Headlights are LED type. Ha ve an authorized Honda
dealer inspect and replace the light assembly.
Models with halogen headlights
All models
Models with halogen headlights
Models with LED headlights
Models with halogen headlights
Models with LED headlights
Models with halogen headlights
Clip
Air Intake DuctDriver side
18 US ODYSSEY-31THR6010.book 658 ページ 2018年12月6日 木曜日 午後4時18分
Page 663 of 763
661
uuReplacing Light Bulbs uFog Light Bulbs*
Maintenance
Fog Light Bulbs*
When replacing, use the following bulbs.
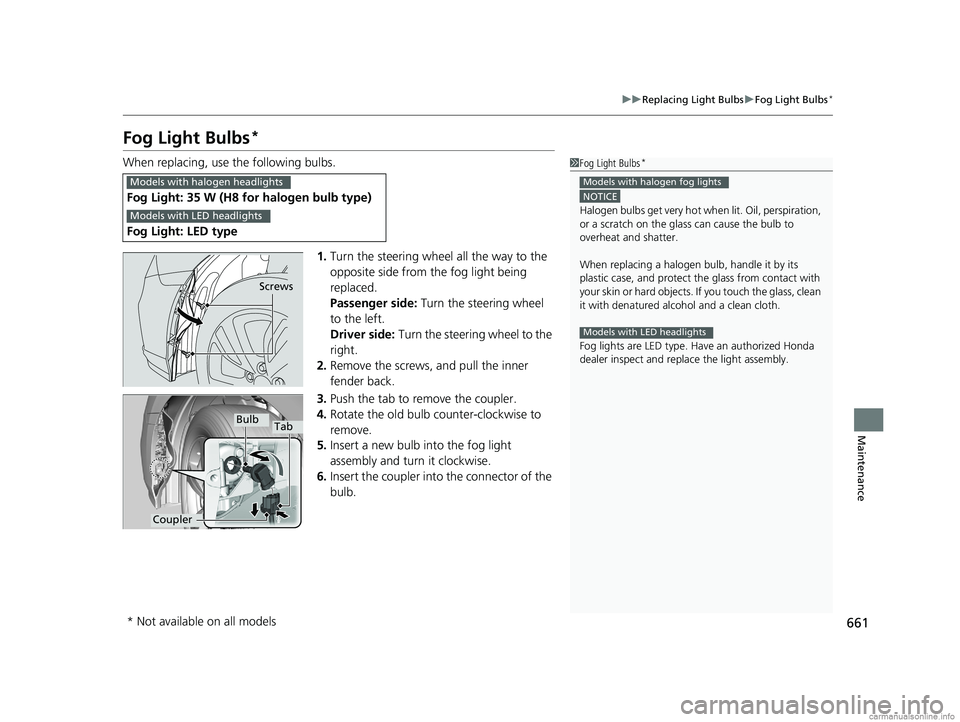
1.Turn the steering wheel all the way to the
opposite side from the fog light being
replaced.
Passenger side: Turn the steering wheel
to the left.
Driver side: Turn the steering wheel to the
right.
2. Remove the screws, and pull the inner
fender back.
3. Push the tab to remove the coupler.
4. Rotate the old bulb counter-clockwise to
remove.
5. Insert a new bulb into the fog light
assembly and turn it clockwise.
6. Insert the coupler into the connector of the
bulb.
Fog Light: 35 W (H8 for halogen bulb type)
Fog Light: LED type
1 Fog Light Bulbs*
NOTICE
Halogen bulbs get very hot wh en lit. Oil, perspiration,
or a scratch on the glass can cause the bulb to
overheat and shatter.
When replacing a halogen bulb, handle it by its
plastic case, and protect th e glass from contact with
your skin or hard objects. If you touch the glass, clean
it with denatured alc ohol and a clean cloth.
Fog lights are LED type. Ha ve an authorized Honda
dealer inspect and replace the light assembly.
Models with halogen fog lights
Models with LED headlights
Models with halogen headlights
Models with LED headlights
Screws
Bulb
Coupler
Tab
* Not available on all models
18 US ODYSSEY-31THR6010.book 661 ページ 2018年12月6日 木曜日 午後4時18分
Page 689 of 763
687
Maintenance
Climate Control System Maintenance
Air Conditioning
To ensure proper and safe operation, the Society of Automotive Engineers (SAE
J2845) recommends that the refrigerant system only be serviced by trained and
certified technicians.
Never repair or replace the air conditio ning evaporator (cooling coil) with one
removed from a used or salvaged vehicle.
New replacement mobile air conditioning evaporators must be certified (and
labeled) as meeting SAE Standard J2842.
Dust and Pollen Filter
The climate control system is equipped with a dust and pollen filter that collects
pollen, dust, and other debris in the air. The Maintenance MinderTM messages will let
you know when to replace the filter.
We recommend that you replace the dust an d pollen filter sooner when using your
vehicle in areas with high concentrations of dust.
1 Air Conditioning
NOTICE
Vented refrigerant is harmful to the environment.
To avoid refrigerant from venting, never replace the
evaporator with one re moved from a used or
salvaged vehicle.
Refrigerant in your vehicle’s air conditioning system is
flammable and can be igni ted during servicing if
proper procedures are not followed.
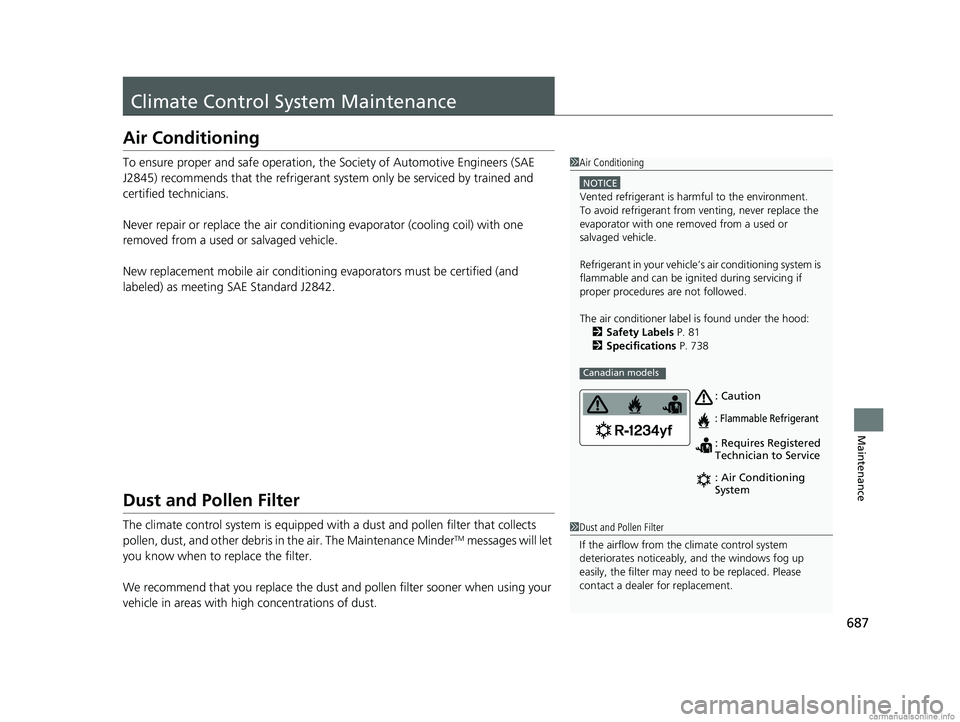
The air conditioner labe l is found under the hood:
2 Safety Labels P. 81
2 Specifications P. 738
Canadian models
: Caution
: Flammable Refrigerant
: Requires Registered
Technician to Service
: Air Conditioning
System
1Dust and Pollen Filter
If the airflow from the climate control system
deteriorates noticeably, and the windows fog up
easily, the filter may need to be replaced. Please
contact a dealer for replacement.
18 US ODYSSEY-31THR6010.book 687 ページ 2018年12月6日 木曜日 午後4時18分
Page 694 of 763
uuCleaning uExterior Care
692
Maintenance
A good coat of automotive body wax helps protect your vehicle’s paint from the
elements. Wax will wear off over time and expose your vehicle’s paint to the
elements, so reapply as necessary.
If you get gasoline, oil, engine coolant, or battery fluid on resin coated parts, they
may be stained or the coating may peel. Prom ptly wipe it away using a soft cloth and
clean water.
Wipe using a glass cleaner.
Aluminum is susceptible to deterioration caused by salt and other road
contaminants. When necessary, as early as possible use a sponge and mild detergent
to wipe away these contaminants. Do no t use a stiff brush or harsh chemicals
(including some commercial wheel cleaners). These can damage the protective finish
on aluminum alloy wheels, resulting in corrosion. Depending on the type of finish,
the wheels also may lose their luster or appear burnished. To avoid water stains,
wipe the wheels dry with a cloth while they are still wet.
■Applying Wax
■Maintaining the Bumpers and Other Resin Coated Parts
■Cleaning the Window
■Maintaining Aluminum Wheels
1 Applying Wax
NOTICE
Chemical solvents and st rong cleaners can damage
the paint, metal, and plasti c on your vehicle. Wipe
away spills immediately.
1 Maintaining the Bumpers an d Other Resin Coated Parts
Ask a dealer about the corr ect coating material when
you want to repair the pa inted surface of the parts
made of resin.
18 US ODYSSEY-31THR6010.book 692 ページ 2018年12月6日 木曜日 午後4時18分
Page 699 of 763
697
Handling the Unexpected
This chapter explains how to handle unexpected troubles.
ToolsTypes of Tools .................................. 698
If a Tire Goes Flat Changing a Flat Tire ......................... 699
Engine Does Not Start Checking the Engine ........................ 708
If the Remote Battery is Weak .......... 709
Emergency Engine Stop ................... 710
Jump Starting .................................... 711
Overheating How to Handle Overheating ............. 713
Indicator, Coming On/Blinking
If the Low Oil Pressure Symbol Appears... 716
If the Charging System Indicator Comes On ................................................. 716
If the Malfunction Indicator Lamp Comes
On or Blinks ................................... 717
If the Brake System Indicator (Red) Comes On or Blinks ................................... 718
If the Brake System Indicator (Red) Comes On or Blinks at the Same Time When the Brake
System Indicator (Amber) Comes On ..... 719
If the Electric Power Steering (EPS) System Indicator Comes On ....................... 720
If the Low Tire Pressure/TPMS Indicator
Comes On or Blinks........................ 720 If the Transmission System Indicator Blinks
along with the Warning Message... 721
Fuses
Fuse Locations ................................. 722
Inspecting and Changing Fuses ........ 728
Emergency Towing ........................... 729
When You Cannot Unlock the Fuel Fill Door ................................................. 730When You Cannot Open the Tailgate..... 731When You Cannot Close the Power
Sliding Doors*................................. 733
Refueling
Refueling From a Portable Fuel Container .... 734
* Not available on all models
18 US ODYSSEY-31THR6010.book 697 ページ 2018年12月6日 木曜日 午後4時18分
Page 718 of 763
716
Handling the Unexpected
Indicator, Coming On/Blinking
If the Low Oil Pressure Symbol Appears
■Reasons for the symbol to appear
Appears when the engine oil pressure is low.
■What to do as soon as the symbol appears
1. Immediately park the vehicle on level ground in a safe place.
2. If necessary, turn the ha zard warning lights on.
■What to do after parking the vehicle
1. Stop the engine and let it sit for about three minutes.
2. Open the hood and check the oil level.
u Add oil as necessary.
2 Oil Check P. 649
3.Start the engine and check the low oil pressure symbol.
u The symbol disappears: Start driving again.
u The symbol does not disappear within 10 seconds: Stop the engine
and contact a dealer for repairs immediately.
If the Charging System Indicator Comes On
■Reasons for the indicator to come on
Comes on when the battery is not being charged.
■What to do when the indicator comes on
Turn off the climate con trol system, rear defogger, and other electrical
systems, and immediately contact a dealer for repairs.
1 If the Low Oil Pressure Symbol Appears
NOTICE
Running the engine with low oil pressure can cause
serious mechanical damage almost immediately.
1If the Charging System Indicator Comes On
If you need to stop temporarily, do not turn off the
engine. Restarting the engi ne may rapidly discharge
the battery.
18 US ODYSSEY-31THR6010.book 716 ページ 2018年12月6日 木曜日 午後4時18分