check oil HONDA ODYSSEY 2018 Owner's Manual (in English)
[x] Cancel search | Manufacturer: HONDA, Model Year: 2018, Model line: ODYSSEY, Model: HONDA ODYSSEY 2018Pages: 763, PDF Size: 47.02 MB
Page 30 of 763
28
Quick Reference Guide
Maintenance (P635)
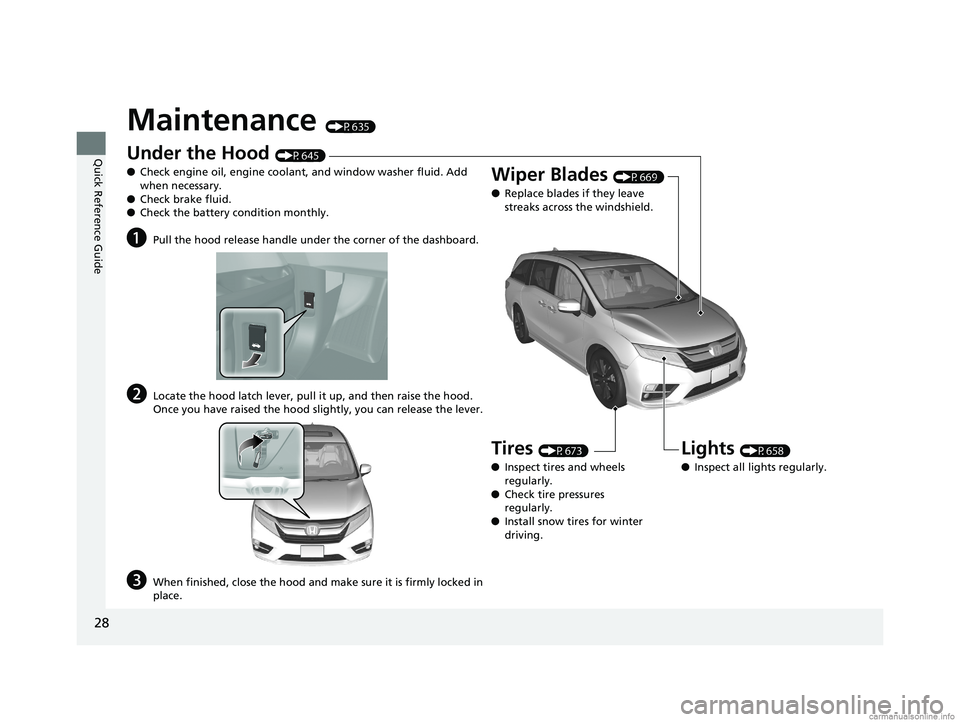
Under the Hood (P645)
● Check engine oil, engine coolant, and window washer fluid. Add
when necessary.
● Check brake fluid.
● Check the battery condition monthly.
aPull the hood release handle under the corner of the dashboard.
bLocate the hood latch lever, pull it up, and then raise the hood.
Once you have raised the hood slightly, you can release the lever.
cWhen finished, close the hood and make sure it is firmly locked in
place.
Lights (P658)
● Inspect all lights regularly.
Wiper Blades (P669)
● Replace blades if they leave
streaks across the windshield.
Tires (P673)
● Inspect tires and wheels
regularly.
● Check tire pressures
regularly.
● Install snow tires for winter
driving.
18 US ODYSSEY-31THR6010.book 28 ページ 2018年12月6日 木曜日 午後4時18分
Page 104 of 763
102
uuIndicators uDriver Information Interface Wa rning and Information Messages
Instrument Panel
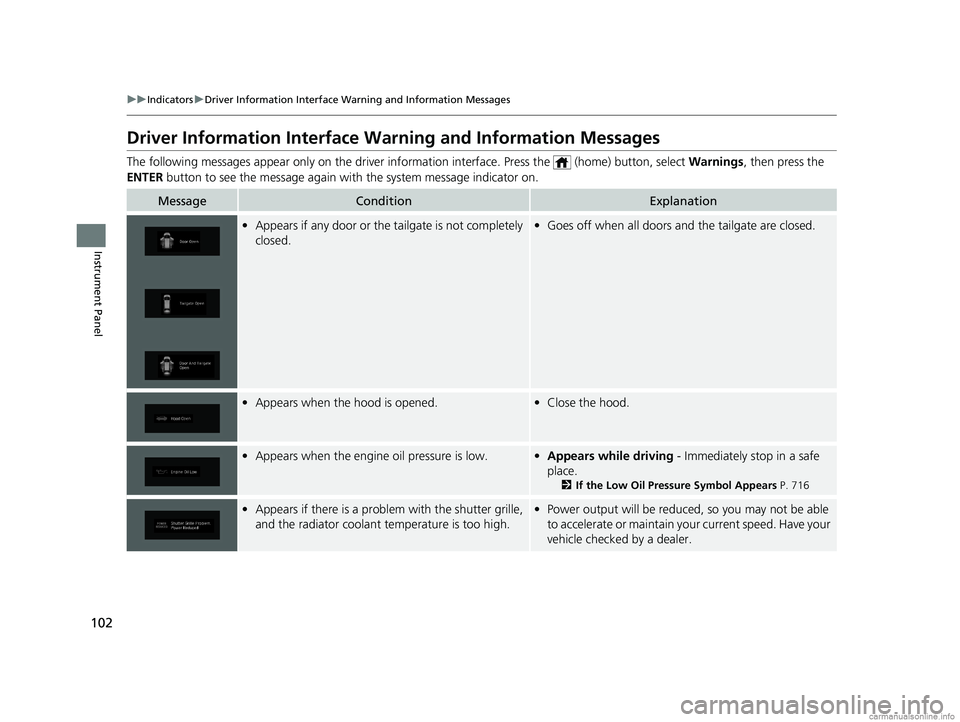
Driver Information Interface Warning and Information Messages
The following messages appear only on the driver information inte rface. Press the (home) button, select Warnings, then press the
ENTER button to see the message again with the system message indicator on.
MessageConditionExplanation
•Appears if any door or the tailgate is not completely
closed.•Goes off when all doors and the tailgate are closed.
•Appears when the hood is opened.•Close the hood.
•Appears when the engine oil pressure is low.•Appears while driving - Immediately stop in a safe
place.
2 If the Low Oil Pressure Symbol Appears P. 716
•Appears if there is a problem with the shutter grille,
and the radiator coolant temperature is too high.•Power output will be reduced, so you may not be able
to accelerate or maintain your current speed. Have your
vehicle checked by a dealer.
18 US ODYSSEY-31THR6010.book 102 ページ 2018年12月6日 木曜日 午後4時18分
Page 238 of 763
uuInterior Lights/Interior Convenience Items uInterior Convenience Items
236
Controls
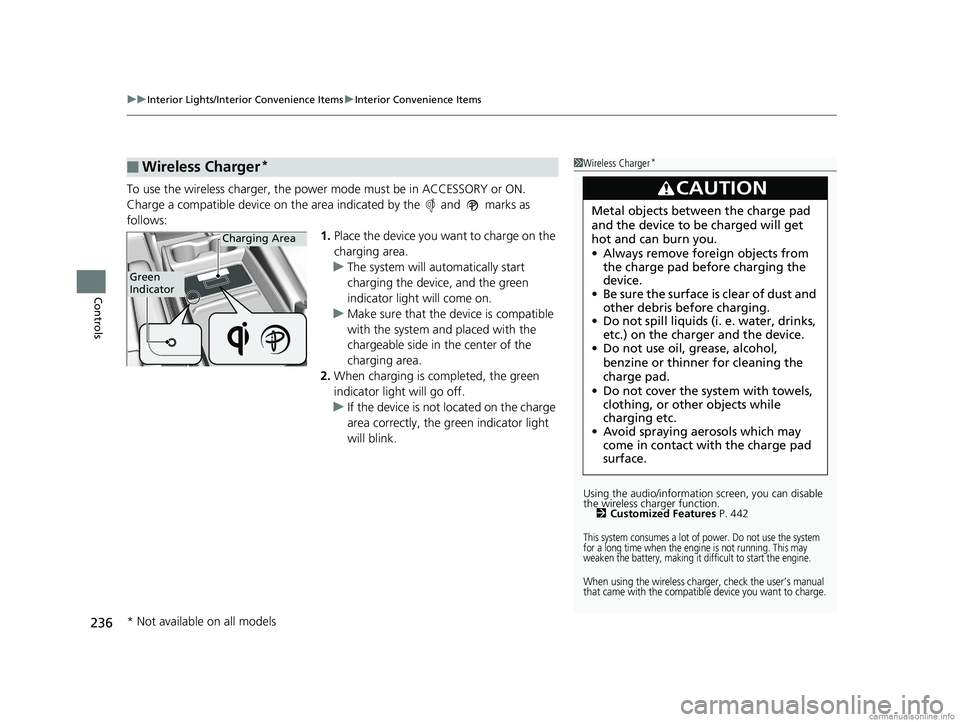
To use the wireless charger, the power mode must be in ACCESSORY or ON.
Charge a compatible device on the ar ea indicated by the and marks as
follows: 1.Place the device you want to charge on the
charging area.
u The system will automatically start
charging the device, and the green
indicator light will come on.
u Make sure that the device is compatible
with the system and placed with the
chargeable side in the center of the
charging area.
2. When charging is completed, the green
indicator light will go off.
u If the device is not located on the charge
area correctly, the green indicator light
will blink.
■Wireless Charger*1Wireless Charger*
Using the audio/informati on screen, you can disable
the wireless ch arger function.
2 Customized Features P. 442
This system consumes a lot of power. Do not use the system
for a long time when the engine is not running. This may
weaken the battery, making it difficult to start the engine.
When using the wireless charger, check the user’s manual
that came with the compatible device you want to charge.
3CAUTION
Metal objects between the charge pad
and the device to be charged will get
hot and can burn you.
•Always remove foreign objects from
the charge pad before charging the
device.
• Be sure the surface is clear of dust and
other debris before charging.
• Do not spill liquids (i. e. water, drinks,
etc.) on the charger and the device.
• Do not use oil, grease, alcohol,
benzine or thinner for cleaning the
charge pad.
• Do not cover the system with towels,
clothing, or other objects while
charging etc.
• Avoid spraying aerosols which may
come in contact with the charge pad
surface.
Green
Indicator
Charging Area
* Not available on all models
18 US ODYSSEY-31THR6010.book 236 ページ 2018年12月6日 木曜日 午後4時18分
Page 637 of 763
635
Maintenance
This chapter discusses basic maintenance.
Before Performing MaintenanceInspection and Maintenance ............ 636
Safety When Performing Maintenance .... 637
Parts and Fluids Used in Maintenance Service ........................................... 638
Maintenance Minder
TM..................... 639
Maintenance Under the Hood
Maintenance Items Un der the Hood .... 645
Opening the Hood ........................... 646
Recommended Engine Oil ................ 648
Oil Check ......................................... 649
Adding Engine Oil ............................ 650
Changing the Engine Oil and Oil Filter ..... 651Engine Coolant ................................ 653
Transmission Fluid ............................ 655
Brake Fluid ....................................... 656
Refilling Window Washer Fluid......... 657
Replacing Light Bulbs ....................... 658
Checking and Maintaining Wiper Blades.... 669Checking and Maintaining Tires
Checking Tires ................................. 673
Tire and Loading Information Label ..... 674Tire Labeling .................................... 674DOT Tire Quality Grading (U.S. Vehicles) ...... 676Wear Indicators................................ 678 Tire Service Life ................................ 678
Tire and Wheel Replacement ........... 679
Tire Rotation .................................... 680
Winter Tires ..................................... 681
Battery ............................................... 682
Remote Transmitter Care ................. 684
Remote Control and Wireless Headphone Care
*........................... 685Climate Control System Maintenance.... 687Cleaning Interior Care .................................... 688
Exterior Care.................................... 691
Accessories and Modifications ........ 694
* Not available on all models
18 US ODYSSEY-31THR6010.book 635 ページ 2018年12月6日 木曜日 午後4時18分
Page 638 of 763
636
Maintenance
Before Performing Maintenance
Inspection and Maintenance
For your safety, perform all listed inspections and maintenance to keep your vehicle
in good condition. If you become aware of any abnormality (noise, smell, insufficient
brake fluid, oil residue on the ground, etc.), have your vehicle inspected by a dealer.
(Note, however, that service at a dealer is not mandatory to keep your warranties in
effect.)
■Daily inspections
Perform inspections before long distance trips, when washing the vehicle, or when
refueling.
■Periodic inspections
• Check the brake fluid level monthly.
2 Brake Fluid P. 656
•Check the tire pressure monthly. Examin e the tread for wear and foreign objects.
2Checking and Maintaining Tires P. 673
•Check the operation of the exterior lights monthly.
2 Replacing Light Bulbs P. 658
•Check the condition of the wiper bl ades at least every six months.
2Checking and Maintaining Wiper Blades P. 669
■Types of Inspection and Maintenance
1Inspection and Maintenance
Maintenance, replacement, or repair of
emissions control devices and systems may be
done by any automotive repair establishment or
individuals using parts that are “certified” to
EPA standards.
According to state and fede ral regulations, failure to
perform maintenance on the maintenance main
items marked with # will not void your emissions
warranties. However, all ma intenance services should
be performed in accordan ce with the intervals
indicated by the driver information interface.
2 Maintenance Service Items P. 642
If you want to perform complex maintenance tasks
that require more skills a nd tools, you can purchase a
subscription to the Service Express website at
www.techinfo.honda.com .
2 Authorized Manuals P. 748
If you want to perform ma intenance yourself, make
sure that you have the necessary tools and skills first.
After performing ma intenance, update the records in
the separate maintenance booklet.
U.S. models
18 US ODYSSEY-31THR6010.book 636 ページ 2018年12月6日 木曜日 午後4時18分
Page 651 of 763
649
uuMaintenance Under the Hood uOil Check
Maintenance
Oil Check
We recommend that you check the engi ne oil level every time you refuel.
Park the vehicle on level ground.
Wait approximately three minutes after turn ing the engine off before you check the
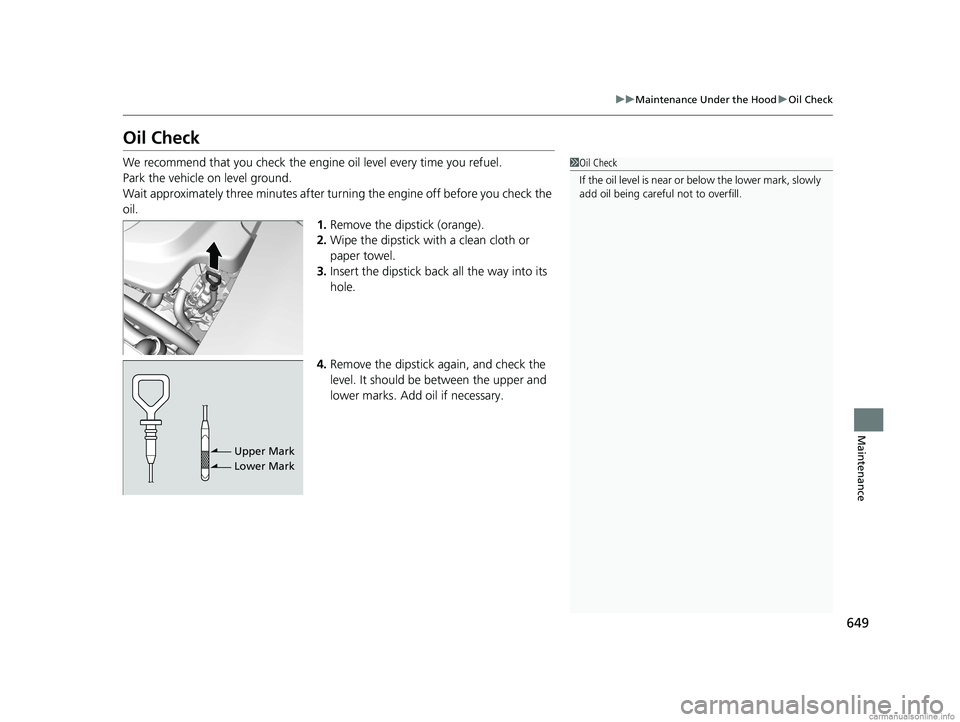
oil. 1.Remove the dipstick (orange).
2. Wipe the dipstick with a clean cloth or
paper towel.
3. Insert the dipstick back all the way into its
hole.
4. Remove the dipstick again, and check the
level. It should be between the upper and
lower marks. Add oil if necessary.1Oil Check
If the oil level is near or below the lower mark, slowly
add oil being careful not to overfill.
Upper Mark
Lower Mark
18 US ODYSSEY-31THR6010.book 649 ページ 2018年12月6日 木曜日 午後4時18分
Page 652 of 763
650
uuMaintenance Under the Hood uAdding Engine Oil
Maintenance
Adding Engine Oil
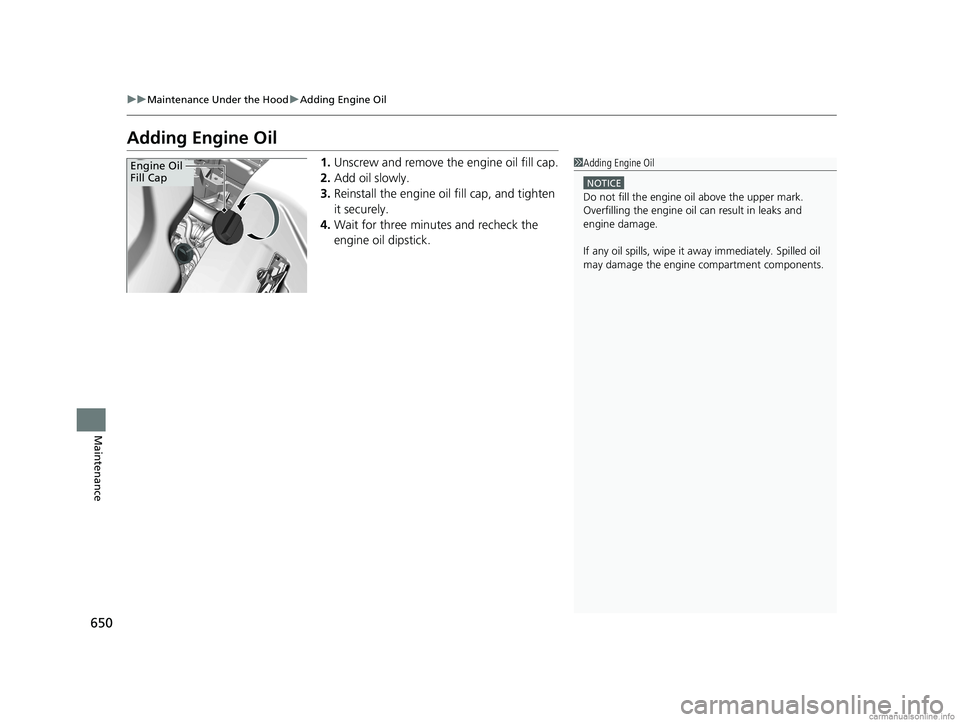
1. Unscrew and remove the engine oil fill cap.
2. Add oil slowly.
3. Reinstall the engine oil fill cap, and tighten
it securely.
4. Wait for three minutes and recheck the
engine oil dipstick.1Adding Engine Oil
NOTICE
Do not fill the engine oil above the upper mark.
Overfilling the engine oil can result in leaks and
engine damage.
If any oil spills, wipe it away immediately. Spilled oil
may damage the engine compartment components.
Engine Oil
Fill Cap
18 US ODYSSEY-31THR6010.book 650 ページ 2018年12月6日 木曜日 午後4時18分
Page 654 of 763
uuMaintenance Under the Hood uChanging the Engine Oil and Oil Filter
652
Maintenance
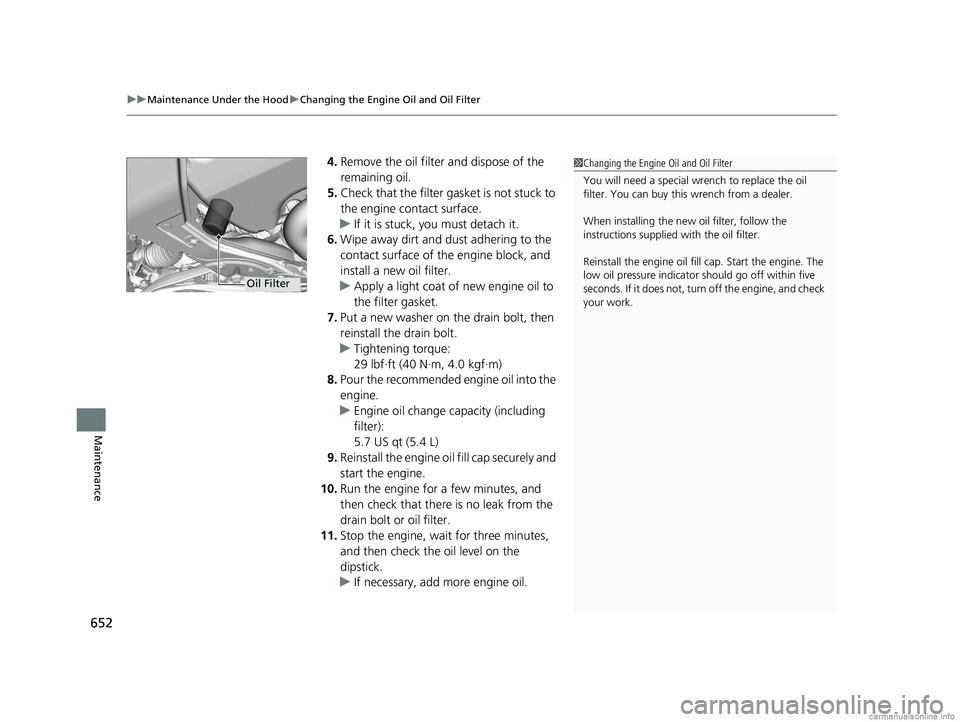
4. Remove the oil filter and dispose of the
remaining oil.
5. Check that the filter ga sket is not stuck to
the engine contact surface.
u If it is stuck, you must detach it.
6. Wipe away dirt and dust adhering to the
contact surface of the engine block, and
install a new oil filter.
u Apply a light coat of new engine oil to
the filter gasket.
7. Put a new washer on the drain bolt, then
reinstall the drain bolt.
u Tightening torque:
29 lbf∙ft (40 N∙m, 4.0 kgf∙m)
8. Pour the recommended engine oil into the
engine.
u Engine oil change capacity (including
filter):
5.7 US qt (5.4 L)
9. Reinstall the engine oil fill cap securely and
start the engine.
10. Run the engine for a few minutes, and
then check that ther e is no leak from the
drain bolt or oil filter.
11. Stop the engine, wait for three minutes,
and then check the oil level on the
dipstick.
u If necessary, add more engine oil.1Changing the Engine Oil and Oil Filter
You will need a special wrench to replace the oil
filter. You can buy this wrench from a dealer.
When installing the new oil filter, follow the
instructions supplied with the oil filter.
Reinstall the engine oil fill cap. Start the engine. The
low oil pressure indicator should go off within five
seconds. If it does not, turn off the engine, and check
your work.
Oil Filter
18 US ODYSSEY-31THR6010.book 652 ページ 2018年12月6日 木曜日 午後4時18分
Page 699 of 763
697
Handling the Unexpected
This chapter explains how to handle unexpected troubles.
ToolsTypes of Tools .................................. 698
If a Tire Goes Flat Changing a Flat Tire ......................... 699
Engine Does Not Start Checking the Engine ........................ 708
If the Remote Battery is Weak .......... 709
Emergency Engine Stop ................... 710
Jump Starting .................................... 711
Overheating How to Handle Overheating ............. 713
Indicator, Coming On/Blinking
If the Low Oil Pressure Symbol Appears... 716
If the Charging System Indicator Comes On ................................................. 716
If the Malfunction Indicator Lamp Comes
On or Blinks ................................... 717
If the Brake System Indicator (Red) Comes On or Blinks ................................... 718
If the Brake System Indicator (Red) Comes On or Blinks at the Same Time When the Brake
System Indicator (Amber) Comes On ..... 719
If the Electric Power Steering (EPS) System Indicator Comes On ....................... 720
If the Low Tire Pressure/TPMS Indicator
Comes On or Blinks........................ 720 If the Transmission System Indicator Blinks
along with the Warning Message... 721
Fuses
Fuse Locations ................................. 722
Inspecting and Changing Fuses ........ 728
Emergency Towing ........................... 729
When You Cannot Unlock the Fuel Fill Door ................................................. 730When You Cannot Open the Tailgate..... 731When You Cannot Close the Power
Sliding Doors*................................. 733
Refueling
Refueling From a Portable Fuel Container .... 734
* Not available on all models
18 US ODYSSEY-31THR6010.book 697 ページ 2018年12月6日 木曜日 午後4時18分
Page 718 of 763
716
Handling the Unexpected
Indicator, Coming On/Blinking
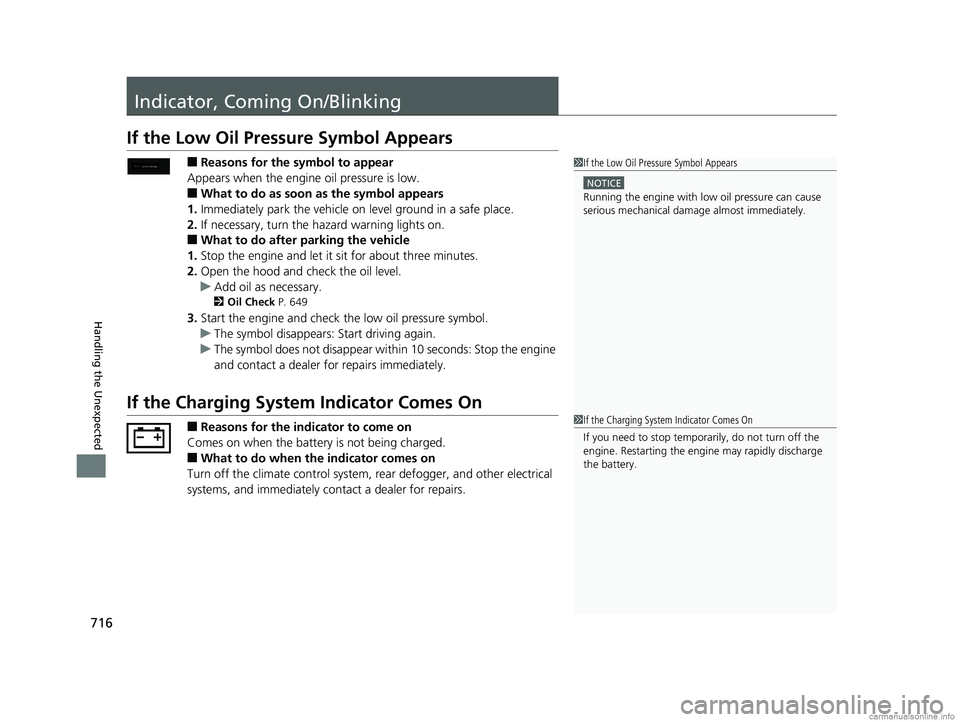
If the Low Oil Pressure Symbol Appears
■Reasons for the symbol to appear
Appears when the engine oil pressure is low.
■What to do as soon as the symbol appears
1. Immediately park the vehicle on level ground in a safe place.
2. If necessary, turn the ha zard warning lights on.
■What to do after parking the vehicle
1. Stop the engine and let it sit for about three minutes.
2. Open the hood and check the oil level.
u Add oil as necessary.
2 Oil Check P. 649
3.Start the engine and check the low oil pressure symbol.
u The symbol disappears: Start driving again.
u The symbol does not disappear within 10 seconds: Stop the engine
and contact a dealer for repairs immediately.
If the Charging System Indicator Comes On
■Reasons for the indicator to come on
Comes on when the battery is not being charged.
■What to do when the indicator comes on
Turn off the climate con trol system, rear defogger, and other electrical
systems, and immediately contact a dealer for repairs.
1 If the Low Oil Pressure Symbol Appears
NOTICE
Running the engine with low oil pressure can cause
serious mechanical damage almost immediately.
1If the Charging System Indicator Comes On
If you need to stop temporarily, do not turn off the
engine. Restarting the engi ne may rapidly discharge
the battery.
18 US ODYSSEY-31THR6010.book 716 ページ 2018年12月6日 木曜日 午後4時18分