hood release HONDA PASSPORT 2000 2.G Owners Manual
[x] Cancel search | Manufacturer: HONDA, Model Year: 2000, Model line: PASSPORT, Model: HONDA PASSPORT 2000 2.GPages: 267, PDF Size: 3.03 MB
Page 98 of 267
Interio
r Feature s
Keys and Ignition .......... 97
Steering Column Lock/
Ignition Switch ........ 97 LOCK .............. 97
ACC ................ 97
ON ................. 97START .............. 97
Key Removal ........... 98
Key Reminder .......... 98
Guard Against Theft ..... 98
Locks ................... 99 Power Door Locks ...... 100
Child-Safe Door Locks .. 101
Mirrors ................. 101 Interior Mirror ......... 101Power Mirrors ......... 101Vanity Mirror .......... 102 Power Windows .......... 103
Checking the CircuitBreaker ............. 104
Tailgate ................ 104 Operation ............. 104
Hood Release ............ 105
Interior Lights ........... 107 Luggage Light ......... 107Dome Light ........... 107
Courtesy Lights ........ 108
Map Lights............ 108
Moonroof ............... 108 Conveniences ............ 109
Beverage Holder ....... 109
Sun Visor ............. 110Glove Box ............ 110
Assist Grip ............ 111
Horn Button ........... 11
Tilt Steering Wheel ..... 1
11
1
Cigarette Lighte
r ....... 112
Ashtrays .............. 112
Accessory Power Outlets . 113
Interio r Feature s
Page 108 of 267
Make sure the rear window wiper
is off and in its parked position.
Turn the key clockwise and push
the outside lock to unlock the
glass. Raise the glass, then pull
the door handle to unlock the door.
Hoo
d Releas e
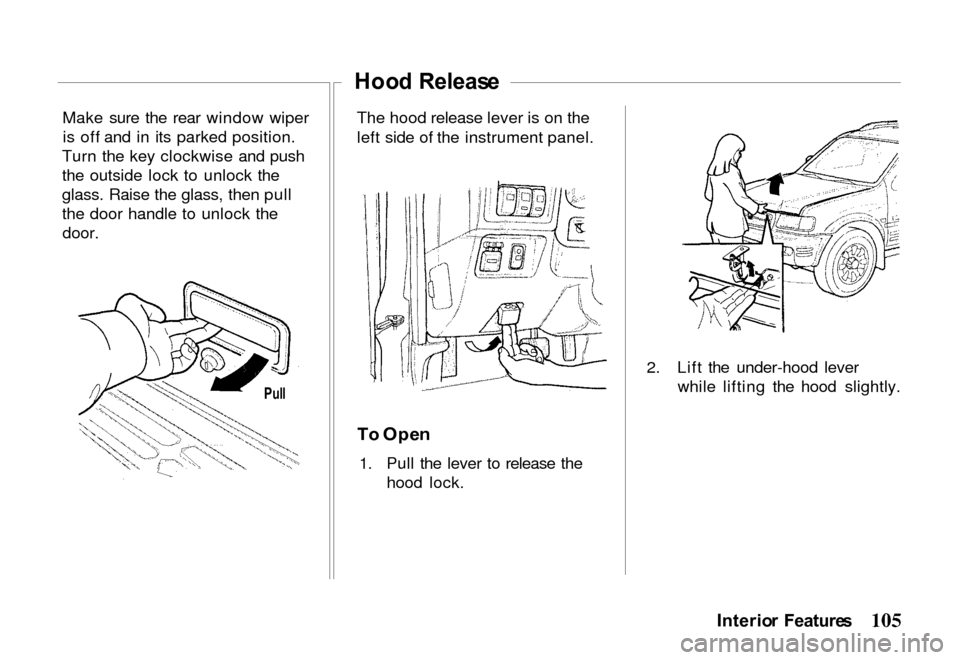
The hood release lever is on the
left side of the instrument panel.
T o Ope n
1. Pull the lever to release the hood lock. 2. Lift the under-hood lever
while lifting the hood slightly.
Interior Feature s
Pul l
Page 194 of 267
Car
e an d Maintenanc e
This section explains why it is important to keep your vehicle
well maintained and to follow
basic maintenance safety
precautions.
This section also includes Maintenance Schedules for
normal driving and severe driving
conditions, a Maintenance
Record, and instructions for simple maintenance tasks you
may want to take care of yourself.
If you have the skills and tools
required to perform more complex
maintenance tasks on your Honda,
you may want to purchase the Service Manual. See page 249 for
information on how to obtain a
copy, or see your Honda dealer. Service Station Information . 193
Fuel Fill Cap .......... 193Fuel Recommendation ... 194
Fuel Tank Capacity ..... 194
Engine Oil Recommendation ...... 194
Windshield Washer ..... 194
Tire Inflation Pressures .. 194 Battery ............... 194
Hood Release .......... 195
Engine Oil Dipstick ..... 196
Fuel Requirements ........ 196 Oxygenated Fuels ...... 196
Maintenance Safety ....... 197 Important Safety
Precautions .......... 198
Maintenance Schedule ..... 199
Required Maintenance Record 202
Owner Safety Checks ...... 204
Engine Oil and Filter ...... 207 Proper Quality Oil ...... 207 Change Interval ........ 207
Oil
Change ........... 208
Oil Filter Installation . 208
Oil Viscosity .......... 209
Oil Level Check ....... 209
Engine Oil Additives ... 210
Air Cleaner Filter ........ 210
Manual Transmission Fluid 211
Automatic Transmission Fluid .................. 212
Front (4WD) and Rear Axles ............. 212
Engine Cooling System ... 213
Other Required Maintenance 215 Brake Master Cylinder . . 215
Shift-on-the-Fly System
. 216
Front Whee
l Bearings ... 216
Hood Latch and Hinges . 217
Air Conditioning ....... 217 Body Lubrication ...... 217
Car e an d Maintenanc e
Page 198 of 267
Hoo
d Releas e
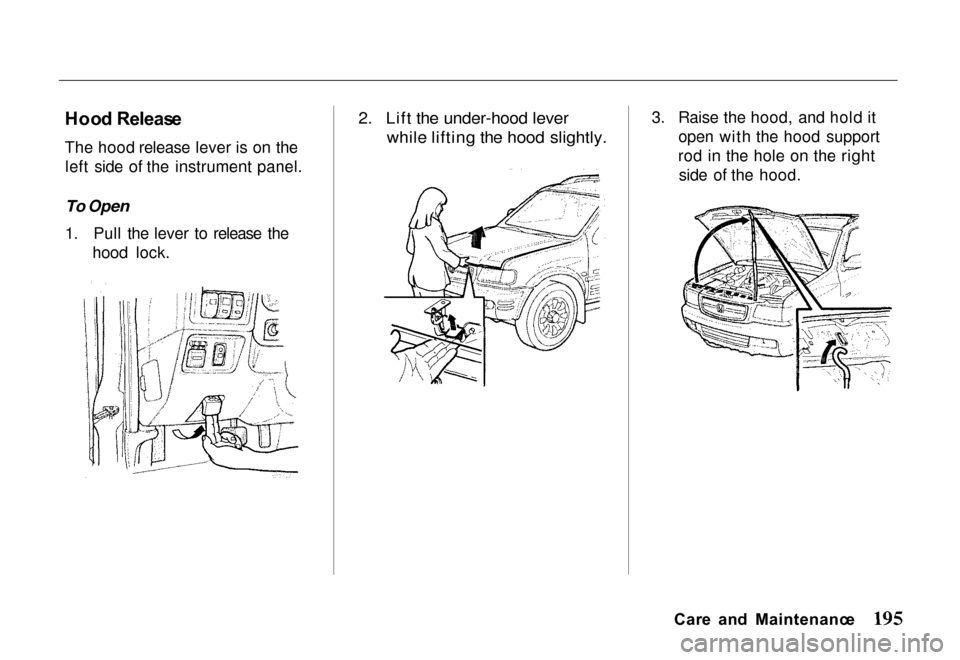
The hood release lever is on the left side of the instrument panel.
To Open
1. Pull the lever to release the hood lock.
2. Lift the under-hood lever
while lifting the hood slightly.
3. Raise the hood, and hold it
open with the hood support
rod in the hole on the right side of the hood.
Car e an d Maintenanc e
Page 209 of 267
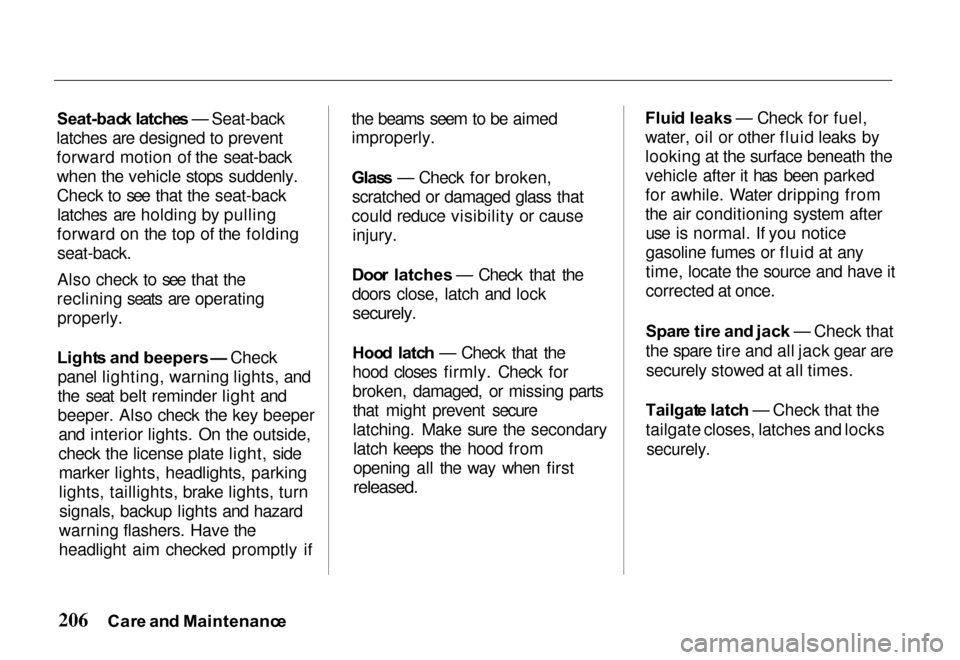
Seat-bac
k latche s — Seat-back
latches are designed to prevent
forward motion of the seat-back when the vehicle stops suddenly.
Check to see that the seat-backlatches are holding by pulling
forward on the top of the folding
seat-back.
Also check to see that the
reclining seats are operating properly.
Light s an d beepers — Check
panel lighting, warning lights, and
the seat belt reminder light and
beeper. Also check the key beeper and interior lights. On the outside,
check the license plate light, sidemarker lights, headlights, parking
lights, taillights, brake lights, turnsignals, backup lights and hazard
warning flashers. Have the
headlight aim checked promptly if the beams seem to be aimed
improperly.
Glas
s — Check for broken,
scratched or damaged glass that
could reduce visibility or cause injury.
Doo r latches — Check that the
doors close, latch and lock
securely.
Hoo d latc h — Check that the
hood closes firmly. Check for
broken, damaged, or missing parts that might prevent secure
latching. Make sure the secondarylatch keeps the hood from
opening all the way when first
released.
Flui
d leaks — Check for fuel,
water, oil or other fluid leaks by
looking at the surface beneath the
vehicle after it has been parked
for awhile. Water dripping from
the air conditioning system after use is normal. If you notice
gasoline fumes or fluid at any
time, locate the source and have it
corrected at once.
Spar e tir e an d jac k — Check that
the spare tire and all jack gear are securely stowed at all times.
Tailgat e latc h — Check that the
tailgate closes, latches and locks
securely.
Car e an d Maintenanc e
Page 220 of 267

Hoo
d Latc h an d Hinge s
Lubricate the hood latch assembly
and hood hinge assembly as
follows:
1. Wipe off any accumulatio n of
dirt o
r contamination on the
latch parts.
2. Apply multipurpose-type grease (NLGI No. 1 or 2) to
the hood latch pin cam.
3. Apply light engine oil to all pivot points in the release
mechanism.
4. Lubricate hood hinges with multipurpose-type grease
(NLGI No. 1 or 2).
5. Check the hood hinges and
latch mechanism to assure
they are working correctly.
Ai
r Conditionin g
Periodically have your Honda dealer check your air conditioning
system to be sure there has been
no loss in cooling output. See
your Honda dealer if you suspect
that the system is not performing
as it should.
Bod y Lubricatio n
Normal use of a vehicle causes
metal-to-metal movement at certain
points in the body. Noise, wear and improper operation at these points
will result when a protective film of lubricant is not provided.
For exposed surfaces such as door
checks, door lock bolts, lock striker plates, etc., apply a thin
film of light engine oil.
Any lubricant should be used
sparingly. After application, all excess lubricant should be
carefully wiped off.
The seat adjusters and seat track should be lubricated with water-
resistant EP chassis lubricant.
There are other points on the
vehicle body which may occasionally require lubrication.
Window regulators and controls are confined in the space between
the upholstery and the outside
door panel. Easy access to the
working parts may be made by
removing the trim. Door weatherstrips and rubber hood
bumpers should be lightly coatedwith a rubber lubricant.
Car e an d Maintenanc e
Page 259 of 267
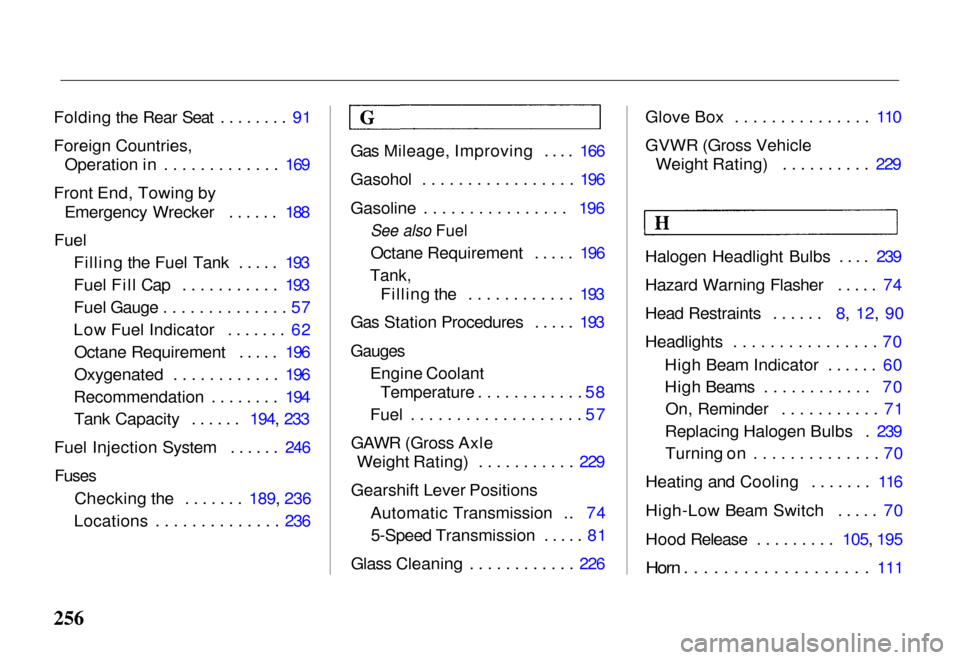
Folding the Rear Seat ........ 91
Foreign Countries,
Operation in ............. 169
Front End, Towing by Emergency Wrecker ...... 188
Fuel Filling the Fuel Tank ..... 193
Fuel Fill Cap ........... 193
Fuel Gauge .............. 57
Low Fuel Indicator ....... 62Octane Requirement ..... 196
Oxygenated ............ 196
Recommendation ........ 194 Tank Capacity ...... 194, 233
Fuel Injectio
n System ...... 246
Fuses
Checking the .......
189, 236
Locations .............
. 236Gas Mileage, Improving .... 166
Gasohol ................. 196
Gasoline ................ 196
See also Fuel
Octane Requirement ..... 196
Tank,
Filling the ............ 193
Gas Station Procedures ..... 193
Gauges
Engine CoolantTemperature ............ 58
Fuel ................... 57
GAWR (Gross Axle Weight Rating) ........... 229
Gearshift Lever Positions Automatic Transmission .. 745-Speed Transmission ..... 81
Glass Cleaning ............ 226 Glove Box ............... 110
GVWR (Gross Vehicle
Weight Rating) .......... 229
Halogen Headlight Bulbs .... 239
Hazard Warning Flasher ..... 74
Head Restraints ...... 8, 12, 90
Headlights ................ 70 High Beam Indicator ...... 60
High Beams ............ 70On, Reminder ........... 71
Replacing Halogen Bulbs . 239 Turning on .............. 70
Heating and Cooling ....... 116
High-Low Beam Switch ..... 70
Hood Release ......... 105, 195
Horn ...................
111