remote control HONDA PILOT 2011 2.G Technology Reference Guide
[x] Cancel search | Manufacturer: HONDA, Model Year: 2011, Model line: PILOT, Model: HONDA PILOT 2011 2.GPages: 17, PDF Size: 8.21 MB
Page 8 of 17

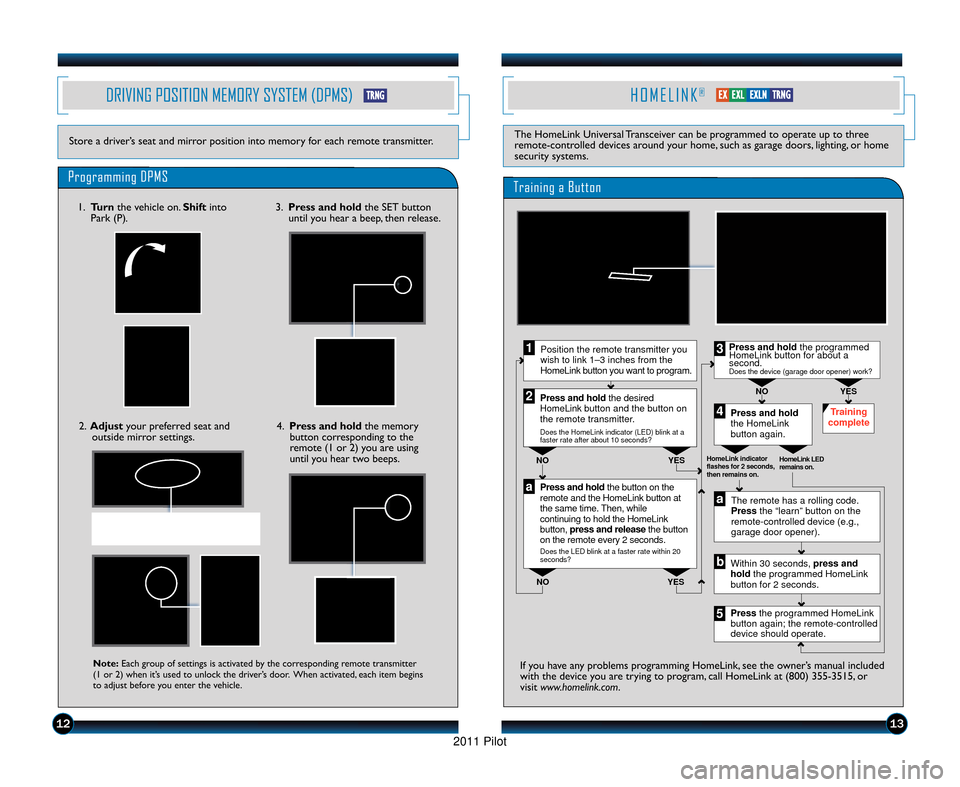
DRIVING POSITION MEMORY SYSTEM (DPMS)
Store a driver’s seat and mirror position into memory for each remote transmitter.
Programming DPMS
H O M E L I N K®
The HomeLink Universal Transceiver can be programmed to operate up to three
remote\bcontrolled devices around your home, such as garage doors, lighting, or home
security systems.
Press and hold the button on the
remote and the HomeLink button at
the same time. Then, while
continuing to hold the HomeLink
button, press and release the button
on the remote every 2 seconds.
Does the LED blink at a faster rate within 20
seconds?
Press and hold
the HomeLink
button again. Training
complete
YES
NO
HomeLink indicator
flashes for 2 seconds,
then remains on. HomeLink LED
remains on.YES
NO YES
NO
Position the remote transmitter you
wish to link 1–3 inches from the
HomeLink button you want to program.1
Press and hold the desired
HomeLink button and the button on
the remote transmitter.
Does the HomeLink indicator (LED) blink at a
faster rate after about 10 seconds?
2
a
The remote has a rolling code.
Press the “learn” button on the
remote-controlled device (e.g.,
garage door opener).
Press the programmed HomeLink
button again; the remote-controlled
device should operate. Within 30 seconds, press and
hold the programmed HomeLink
button for 2 seconds.a
Press and hold the programmed
HomeLink button for about a
second.
Does the device (garage door opener) work?
3
b
4
5
Training a Button
If you have any problems programming HomeLink, see the owner’s manual included
with the device you are trying to program, call HomeLink at (800) 355\b3\25\f5, or
visit www.homelink.com .Note:Each group of settings is activated by the corresponding remote transmitter
(\f or 2) when it’s used to unlock the driver’s door. When activated, each item begins
to adjust before you enter the vehicle.
\f. Turn the vehicle on. Shift into
Park (P).
2. Adjust your preferred seat and
outside mirror settings. 3. Press and hold
the SET button
until you hear a beep, then release.
4. Press and hold the memory
button corresponding to the
remote (\f or 2) you are using
until you hear two beeps.
1213
T T R
R N
N G
GE
EX
XE
EX
XL
LE
EX
XL
LN
NT
TR
R N
N G
G
11 PilotTRG\fATG_NEW STYLE 1/2\b/2010 12\f37 PM Page 8
2011 Pilot
Page 16 of 17

2829
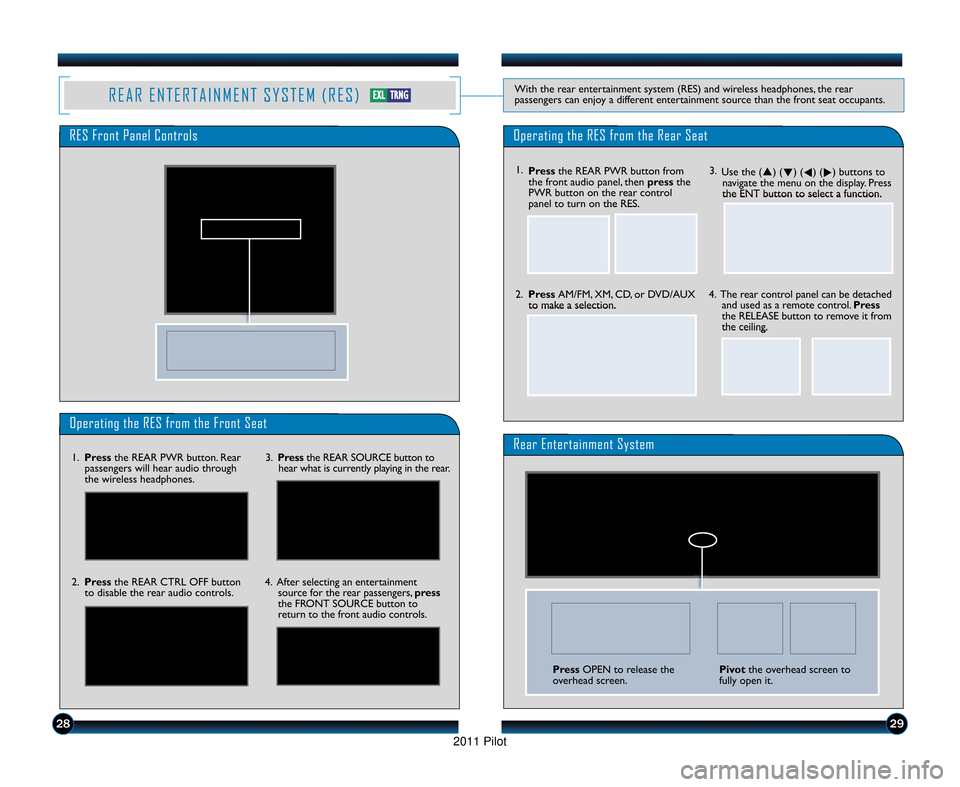
R E A R E N T E R T A I N M E N T S Y S T E M ( R E S )With the rear entertainment system (RES) and wireless headphones, the rear
passengers can enjoy a different entertainment source than the front seat occupants.
Operating the RES from the Front Seat
Rear Entertainment System\f.Press the REAR PWR button. Rear
passengers will hear audio through
the wireless headphones. 3.
Press the REAR SOURCE button to
hear what is currently playing in the rear.
2. Press the REAR CTRL OFF button
to disable the rear audio controls. 4. After selecting an entertainment
source for the rear passengers, press
the FRONT SOURCE button to
return to the front audio controls.
Operating the RES from the Rear SeatRES Front Panel Controls
3. Use the (�) ( �) (
�) (
�) buttons to
navigate the menu on the display. Press
the ENT button to select a function.
2. Press AM/FM, XM, CD, or DVD/AUX
to make a selection. 4. The rear control panel can be detached
and used as a remote control. Press
the RELEASE button to remove it from
the ceiling. \f. Press the REAR PWR button from
the front audio panel, then press the
PWR button on the rear control
panel to turn on the RES.
Press OPEN to release the
overhead screen.Pivot the overhead screen to
fully open it.
E E X
XL
LT
TR
R N
N G
G
11 PilotTRG\fATG_NEW STYLE 1/2\b/2010 12\f40 PM Page 1\b
2011 Pilot