display HONDA PILOT 2015 2.G Navigation Manual
[x] Cancel search | Manufacturer: HONDA, Model Year: 2015, Model line: PILOT, Model: HONDA PILOT 2015 2.GPages: 175, PDF Size: 5.87 MB
Page 67 of 175
Navigation System67
Driving to Your Destination
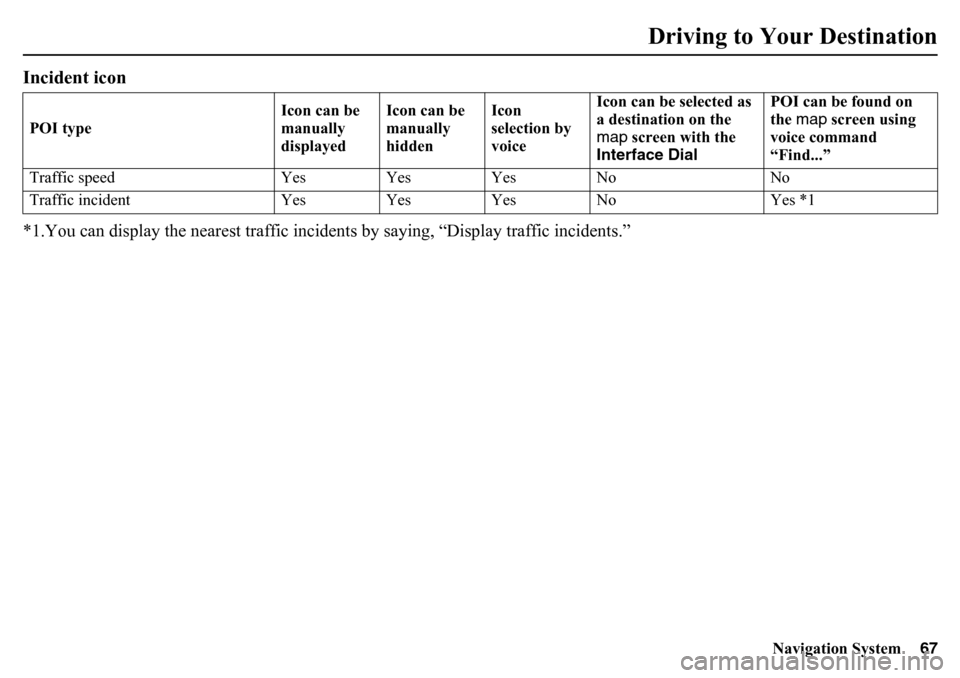
Incident icon*1.You can display the nearest traffic incide nts by saying, “Display traffic incidents.”POI typeIcon can be
manually
displayedIcon can be
manually
hiddenIcon
selection by
voice Icon can be selected as
a destination on the
map
screen with the
Interface Dial POI can be found on
the
map screen using
voice command
“Find...”
Traffic speed Yes Yes Yes No No
Traffic incident Yes Yes Yes No Yes *1
Page 68 of 175
68
Navigation System
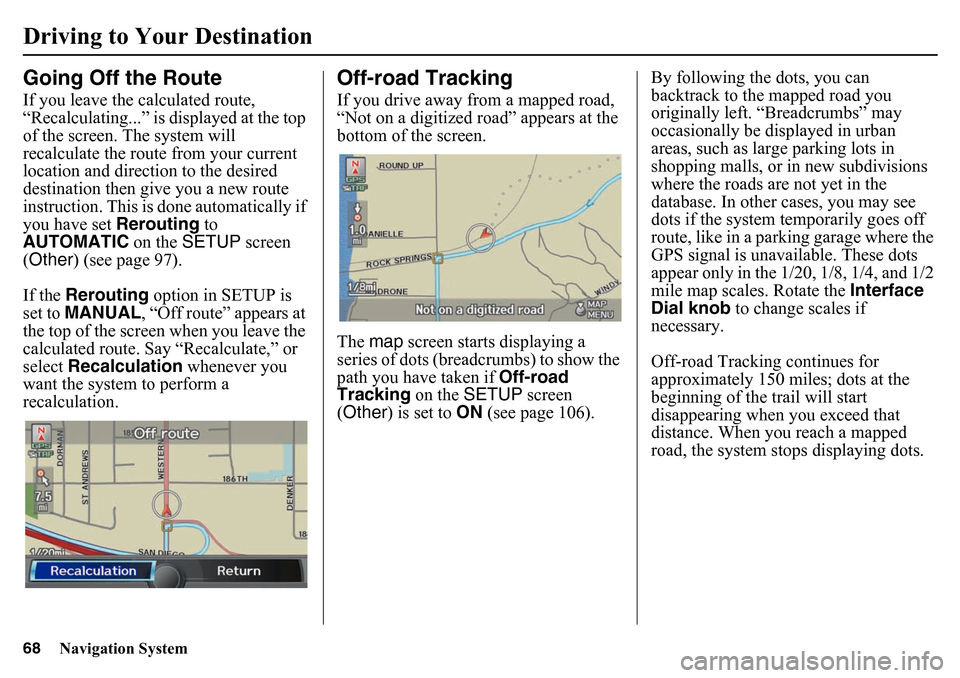
Driving to Your DestinationGoing Off the RouteIf you leave the calculated route,
“Recalculating...” is displayed at the top
of the screen. The system will
recalculate the route from your current
location and direction to the desired
destination then give you a new route
instruction. This is done automatically if
you have set Rerouting to
AUTOMATIC on the SETUP screen
(Other ) (see page 97).
If the Rerouting option in SETUP is
set to MANUAL , “Off route” appears at
the top of the screen when you leave the
calculated route. Say “Recalculate,” or
select Recalculation whenever you
want the system to perform a
recalculation.
Off-road TrackingIf you drive away from a mapped road,
“Not on a digitized road” appears at the
bottom of the screen.
The map screen starts displaying a
series of dots (breadcrumbs) to show the
path you have taken if Off-road
Tracking on the SETUP screen
(Other ) is set to ON (see page 106). By following the dots, you can
backtrack to the mapped road you
originally left. “Breadcrumbs” may
occasionally be displayed in urban
areas, such as larg
e parking lots in
shopping malls, or in new subdivisions
where the roads are not yet in the
database. In other cases, you may see
dots if the system temporarily goes off
route, like in a parking garage where the
GPS signal is unavailable. These dots
appear only in the 1/20, 1/8, 1/4, and 1/2
mile map scales. Rotate the Interface
Dial knob to change scales if
necessary.
Off-road Tracking continues for
approximately 150 miles; dots at the
beginning of the trail will start
disappearing when you exceed that
distance. When you reach a mapped
road, the system stops displaying dots.
Page 70 of 175
70
Navigation System
Driving to Your Destination• You actually entered an unverified area (see Unverified Area Routing on
page 98).
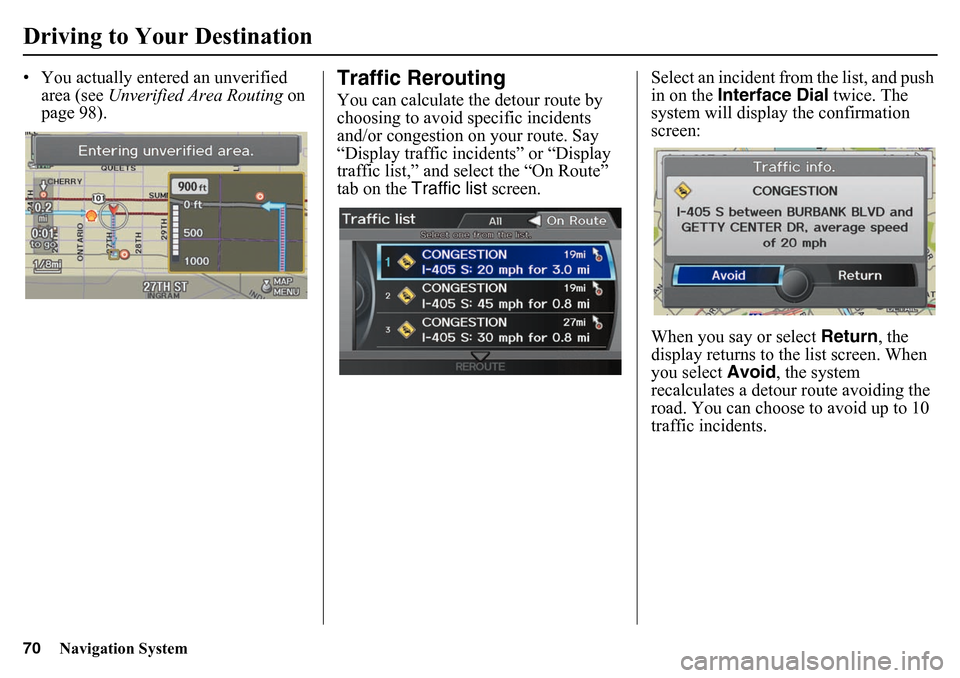
Traffic ReroutingYou can calculate the detour route by
choosing to avoid specific incidents
and/or congestion on your route. Say
“Display traffic incidents” or “Display
traffic list,” and select the “On Route”
tab on the Traffic list screen. Select an incident from the list, and push
in on the
Interface Dial twice. The
system will display the confirmation
screen:
When you say or select Return, the
display returns to the list screen. When
you select Avoid, the system
recalculates a detour route avoiding the
road. You can choose to avoid up to 10
traffic incidents.
Page 71 of 175
Navigation System71
Driving to Your Destination
NOTE:
• When you select the “All” tab,
Avoid is not displayed.
• Because the criterion for whether the
traffic event is to be detoured or not is
included in the traffic event data
itself, the traffic rerouting is not
performed for all the traffic incidents
ahead on the route.
• Even when the rout e recalculation is
performed for a traffic event, if the
system cannot find any detour route
or a quicker detour route, the event
location is not always avoided.
Changing the RouteWhile en route, you may wish to alter
your route, add an interim “Waypoint”
(pit stop), choose a different destination,
or cancel your current destination. To
change your present route, you can do
any of the following:
Say “Menu,” or press the DEST/
ROUTE button to view the DEST
screen ( Route):
• Cancel Route (page 72)
• Detour (page 72)
• Avoid Streets (page 72)
• Change Route Preference (page 72)
• Waypoint (page 73)
• Destination List (page 74) Choose a different destination (other
methods) by:
• Saying, “Find nearest...” to find a POI
(page 75).
• Saying, “Go home” (page 75).
•Using the Interface Dial to select a
different POI or address on the map
(page 75).
• Pressing the DEST/ROUTE button
and selecting the “Dest. MENU 1 or
2” tab on the DEST screen (page 76).
Page 72 of 175
72
Navigation System
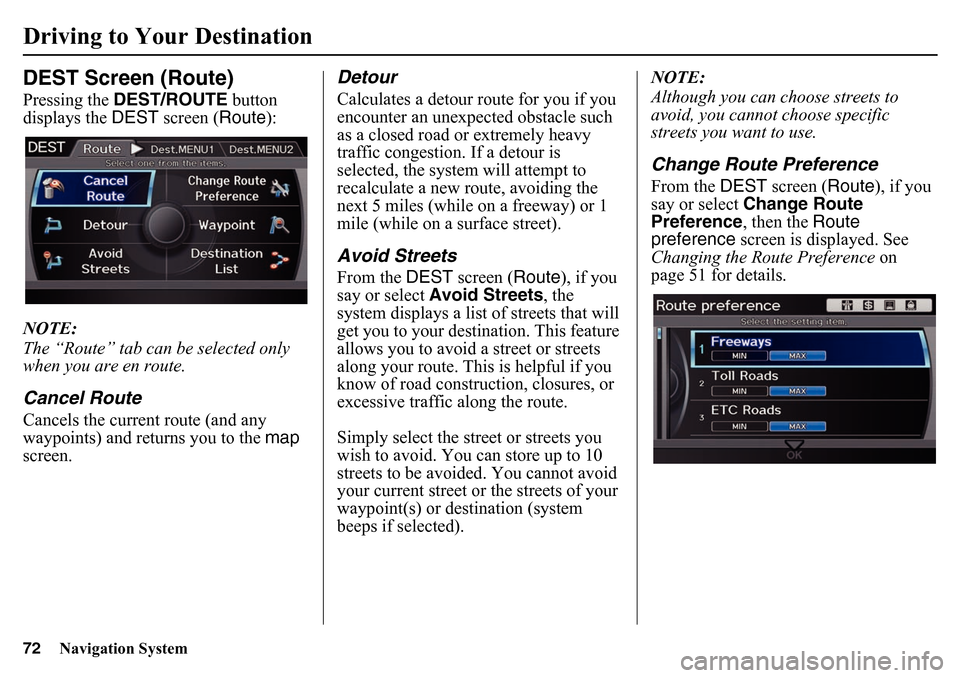
Driving to Your DestinationDEST Screen (Route)Pressing the DEST/ROUTE button
displays the DEST screen ( Route):
NOTE:
The “Route” tab can be selected only
when you are en route.Cancel RouteCancels the current route (and any
waypoints) and returns you to the map
screen.
DetourCalculates a detour route for you if you
encounter an unexpected obstacle such
as a closed road or extremely heavy
traffic congestion. If a detour is
selected, the system will attempt to
recalculate a new route, avoiding the
next 5 miles (while on a freeway) or 1
mile (while on a surface street).Avoid StreetsFrom the DEST screen (Route ), if you
say or select Avoid Streets , the
system displays a list of streets that will
get you to your destination. This feature
allows you to avoid a street or streets
along your route. This is helpful if you
know of road construction, closures, or
excessive traffic along the route.
Simply select the street or streets you
wish to avoid. You can store up to 10
streets to be avoided. You cannot avoid
your current street or the streets of your
waypoint(s) or destination (system
beeps if selected). NOTE:
Although you can choose streets to
avoid, you cannot choose specific
streets you want to use.
Change Route PreferenceFrom the
DEST screen ( Route), if you
say or select Change Route
Preference , then the Route
preference screen is displayed. See
Changing the Route Preference on
page 51 for details.
Page 73 of 175
Navigation System73
Driving to Your Destination
WaypointWaypoints allow you to add an interim
“pit stop” while traveling to a
destination. For instance, you may want
to stop for gas or food, and then
continue on to your destination.
Although you can enter up to five places
including the destination at a time,
typically you may never use more than
one at a time.
Waypoints are routed to in the order
they were entered (number 1 first, etc.),
with your final destination routed to last.
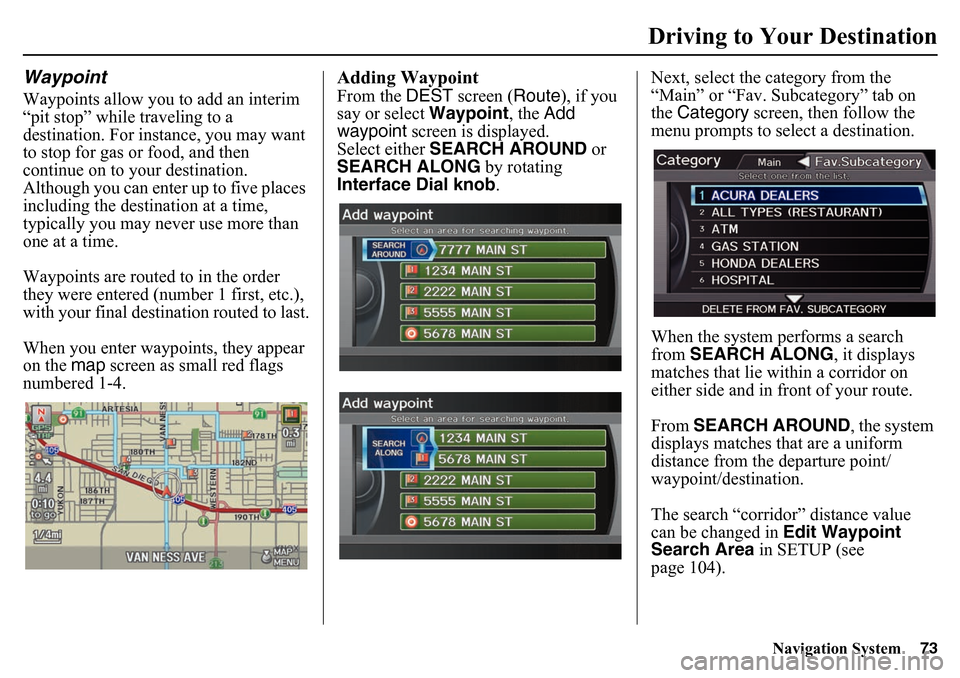
When you enter waypoints, they appear
on the map screen as small red flags
numbered 1-4.
Adding WaypointFrom the DEST screen (Route ), if you
say or select Waypoint, the Add
waypoint screen is displayed.
Select either SEARCH AROUND or
SEARCH ALONG by rotating
Interface Dial knob .Next, select the category from the
“Main” or “Fav. Subcategory” tab on
the
Category screen, then follow the
menu prompts to select a destination.
When the system performs a search
from SEARCH ALONG , it displays
matches that lie within a corridor on
either side and in front of your route.
From SEARCH AROUND, the system
displays matches that are a uniform
distance from the departure point/
waypoint/destination.
The search “corridor” distance value
can be changed in Edit Waypoint
Search Area in SETUP (see
page 104).
Page 74 of 175
74
Navigation System
Driving to Your DestinationIf you add a waypoint, the Add to dest.
list screen will be displayed. If you push
in on the Interface Dial and select OK,
the addition is comp leted and rerouting
begins. Press the MAP/GUIDE button
to return to the map screen without
adding the waypoint.
To add another waypoint, press the
DEST/ROUTE button and repeat the
procedure.
To delete waypoints or edit the order of
waypoints, select Edit on the Dest. list
screen. See Editing Destination Lists on
page 74.
NOTE:
• The maximum of five places (including the destination) can be
entered.
• The system does not allow you to select the roads you want to use to get
to a destination. However, after you
enter a destination, you can select
intersections or POI waypoints that
the system will use to tailor your
route.
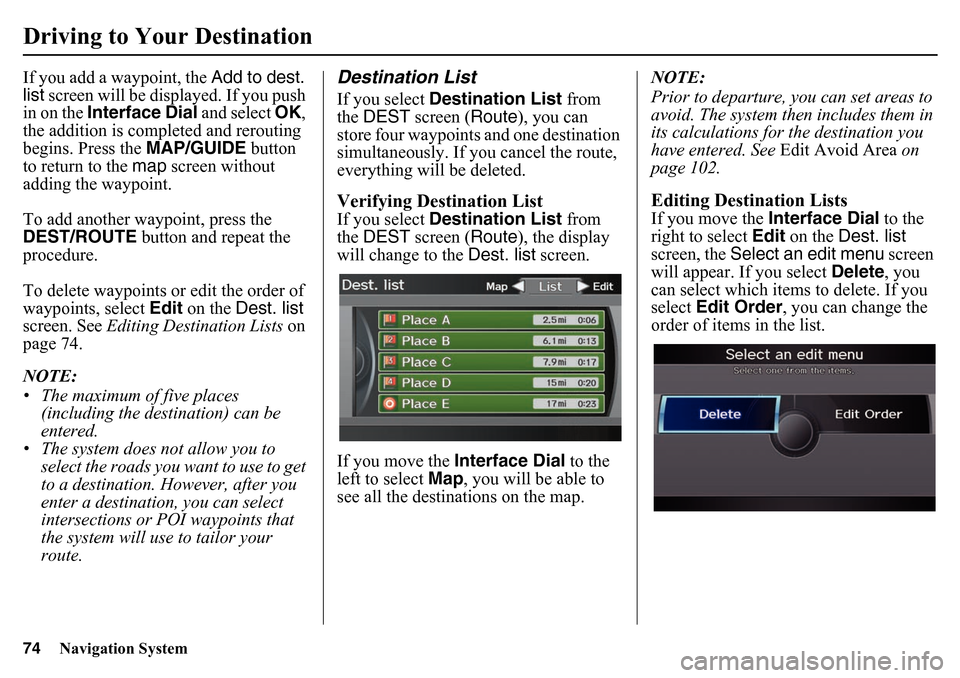
Destination ListIf you select Destination List from
the DEST screen ( Route), you can
store four waypoints and one destination
simultaneously. If you cancel the route,
everything will be deleted.Verifying Destination ListIf you select Destination List from
the DEST screen ( Route), the display
will change to the Dest. list screen.
If you move the Interface Dial to the
left to select Map, you will be able to
see all the destinations on the map. NOTE:
Prior to departure, you can set areas to
avoid. The system then includes them in
its calculations for the destination you
have entered. See Edit Avoid Area
on
page 102.
Editing Destination ListsIf you move the Interface Dial to the
right to select Edit on the Dest. list
screen, the Select an edit menu screen
will appear. If you select Delete, you
can select which items to delete. If you
select Edit Order , you can change the
order of items in the list.
Page 75 of 175
Navigation System75
Driving to Your Destination
Changing Your DestinationThere are four methods by which you
can change or add a waypoint to your
route. These are:Find Nearest (Voice command)From the map screen, say one of the
“Find Nearest...” vo ice commands to
locate the nearest gas station, ATM,
restaurant or other point of interest. See
the “Find Nearest” voice commands
listing on page 156.Go Home (Voice command)From the map screen, say “Go Home 1”
or “Go Home 2.” If an address has been
entered in both Home Address 1 and
Home Address 2, say “Go Home”
and the system will give preference to
Home Address 1 and display the
confirmation screen.
Using Interface Dial to Change
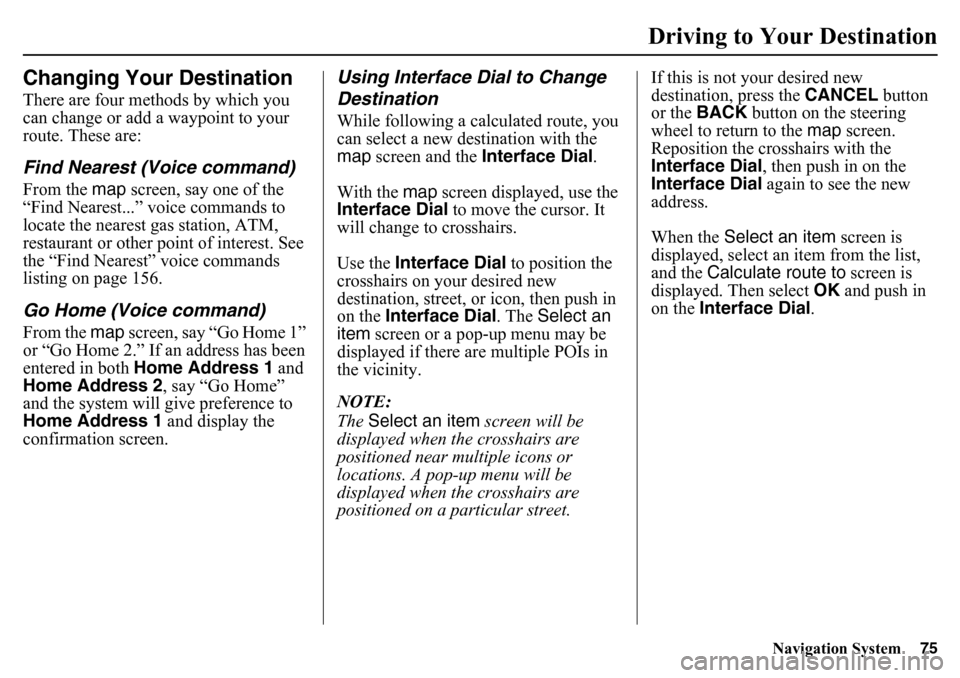
DestinationWhile following a calculated route, you
can select a new destination with the
map screen and the Interface Dial .
With the map screen displayed, use the
Interface Dial to move the cursor. It
will change to crosshairs.
Use the Interface Dial to position the
crosshairs on your desired new
destination, street, or icon, then push in
on the Interface Dial. The Select an
item screen or a pop-up menu may be
displayed if there are multiple POIs in
the vicinity.
NOTE:
The Select an item screen will be
displayed when th e crosshairs are
positioned near multiple icons or
locations. A pop-up menu will be
displayed when th e crosshairs are
positioned on a particular street. If this is not your desired new
destination, press the
CANCEL button
or the BACK button on the steering
wheel to return to the map screen.
Reposition the crosshairs with the
Interface Dial , then push in on the
Interface Dial again to see the new
address.
When the Select an item screen is
displayed, select an item from the list,
and the Calculate route to screen is
displayed. Then select OK and push in
on the Interface Dial .
Page 76 of 175
76
Navigation System
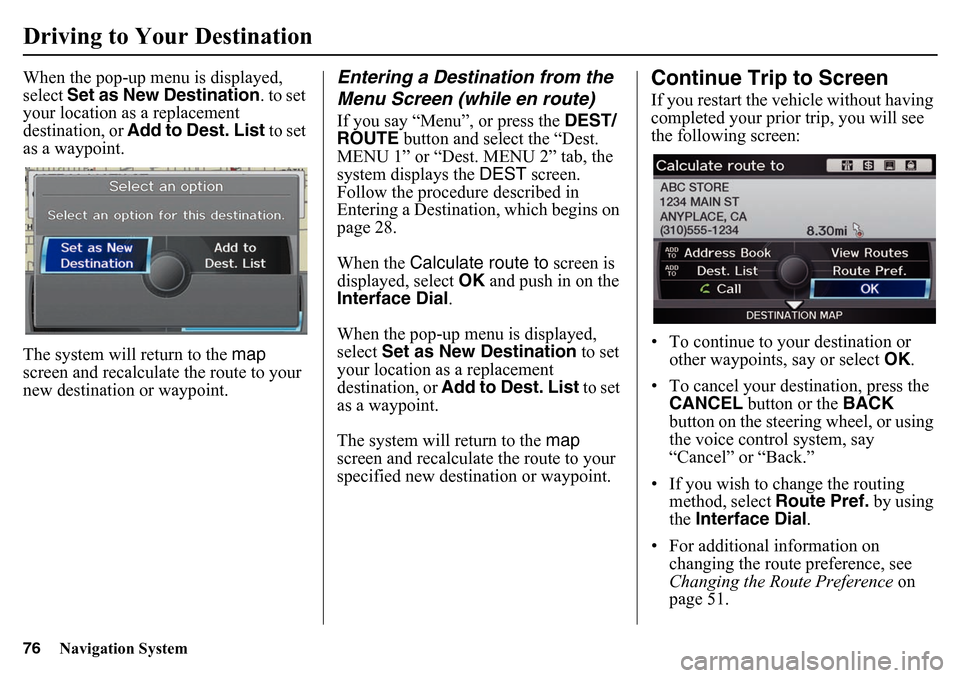
Driving to Your DestinationWhen the pop-up menu is displayed,
select Set as New Destination . to set
your location as a replacement
destination, or Add to Dest. List to set
as a waypoint.
The system will return to the map
screen and recalculate the route to your
new destination or waypoint.
Entering a Destination from the
Menu Screen (while en route)If you say “Menu”, or press the DEST/
ROUTE button and select the “Dest.
MENU 1” or “Dest. MENU 2” tab, the
system displays the DEST screen.
Follow the procedure described in
Entering a Destination, which begins on
page 28.
When the Calculate route to screen is
displayed, select OK and push in on the
Interface Dial .
When the pop-up menu is displayed,
select Set as New Destination to set
your location as a replacement
destination, or Add to Dest. List to set
as a waypoint.
The system will return to the map
screen and recalculate the route to your
specified new destination or waypoint.
Continue Trip to ScreenIf you restart the vehicle without having
completed your prior trip, you will see
the following screen:
• To continue to your destination or other waypoints, say or select OK.
• To cancel your destination, press the CANCEL button or the BACK
button on the steering wheel, or using
the voice control system, say
“Cancel” or “Back.”
• If you wish to change the routing method, select Route Pref. by using
the Interface Dial .
• For additional information on changing the route preference, see
Changing the Route Preference on
page 51.
Page 77 of 175
Navigation System77
The INFO function consists of two main
screens. To display the INFO screen
(Main Info.), say “Information” or press
the INFO button. To change it to the
INFO screen ( Other), select the “Other”
tab. You can switch screens by selecting
the tab.
You can use the voice control system to
select any item on the INFO screen.
NOTE:
For information on the available voice
commands, see Voice Command Index
on page 154.
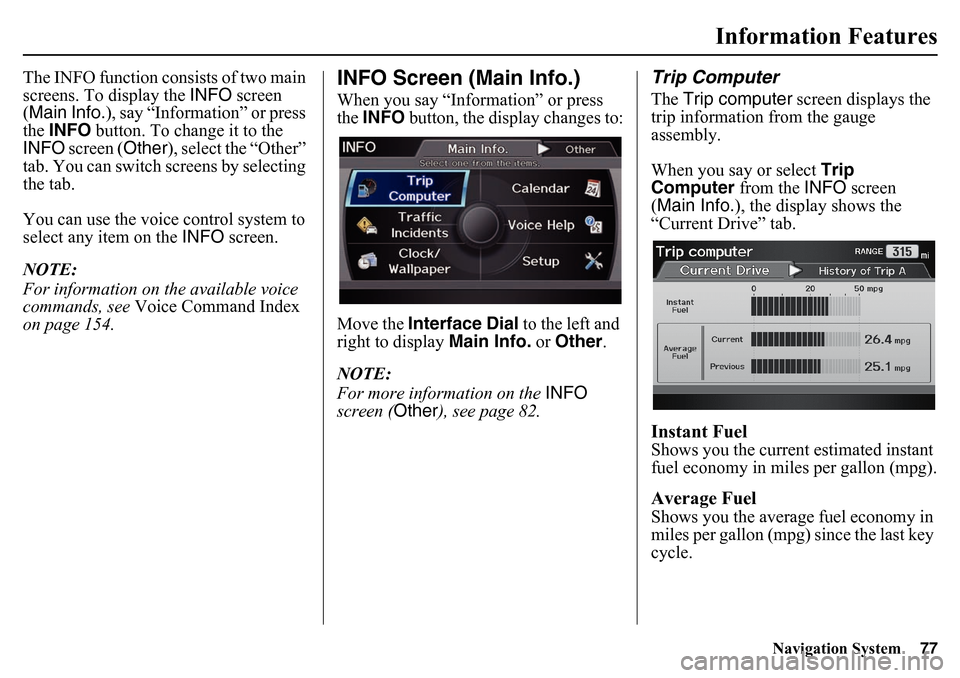
INFO Screen (Main Info.)When you say “Information” or press
the INFO button, the display changes to:
Move the Interface Dial to the left and
right to display Main Info. or Other .
NOTE:
For more information on the INFO
screen ( Other), see page 82.
Trip ComputerThe Trip computer screen displays the
trip information from the gauge
assembly.
When you say or select Trip
Computer from the INFO screen
(Main Info.), the display shows the
“Current Drive” tab.Instant FuelShows you the current estimated instant
fuel economy in miles per gallon (mpg).Average FuelShows you the averag e fuel economy in
miles per gallon (mpg) since the last key
cycle.
Information Features