HONDA PILOT 2019 Owner's Manual (in English)
Manufacturer: HONDA, Model Year: 2019, Model line: PILOT, Model: HONDA PILOT 2019Pages: 747, PDF Size: 45.81 MB
Page 221 of 747
Continued219
uuInterior Lights/Interior Convenience Items uInterior Convenience Items
Controls
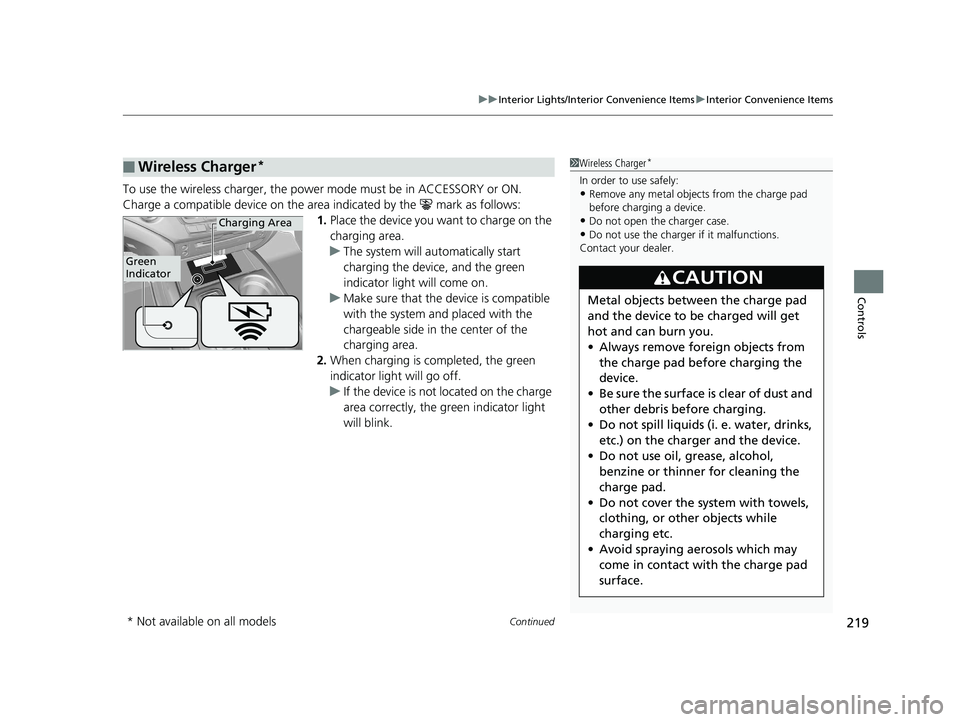
To use the wireless charger, the powe r mode must be in ACCESSORY or ON.
Charge a compatible device on the ar ea indicated by the mark as follows:
1. Place the device you want to charge on the
charging area.
u The system will au tomatically start
charging the device, and the green
indicator light will come on.
u Make sure that the device is compatible
with the system and placed with the
chargeable side in the center of the
charging area.
2. When charging is co mpleted, the green
indicator light will go off.
u If the device is not located on the charge
area correctly, the green indicator light
will blink.
■Wireless Charger*1Wireless Charger*
In order to use safely:•Remove any metal objects from the charge pad
before charging a device.
•Do not open the charger case.•Do not use the charger if it malfunctions.
Contact your dealer.
3CAUTION
Metal objects between the charge pad
and the device to be charged will get
hot and can burn you.
• Always remove foreign objects from
the charge pad before charging the
device.
• Be sure the surface is clear of dust and
other debris before charging.
• Do not spill liquids (i. e. water, drinks,
etc.) on the charger and the device.
• Do not use oil, grease, alcohol,
benzine or thinner for cleaning the
charge pad.
• Do not cover the system with towels,
clothing, or other objects while
charging etc.
• Avoid spraying ae rosols which may
come in contact with the charge pad
surface.
Green
Indicator
Charging Area
* Not available on all models
19 PILOT HMA ELP-31TG76310.book 219 ページ 2019年3月15日 金曜日 午後6時8分
Page 222 of 747
uuInterior Lights/Interior Convenience Items uInterior Convenience Items
220
Controls
■When charging does not start
Perform one of the solution s in the following table.
IndicatorCauseSolution
Slow Blink
There is an obstacle(s) between
the charging area and the
device.Remove the
obstacle(s).
The device is not within the
charging area. Move the device to the
center of the charging
area where is
located.
Fast BlinkThe wireless charger is faulty.
Turn the vehicle off
and back on. If the
indicator still blinks,
contact a dealer.
1
Wireless Charger*
Using the audio/informati on screen, you can disable
the wireless ch arger function.
2 Customized Features P. 432
This system consumes a lot of power. Do not use the
system for a long time when the engine is not
running. This may weaken the battery, making it
difficult to start the engine.
When using the wireless charger, check the user’s
manual that came with th e compatible device you
want to charge.
NOTICE
Do not place any magneti c recording media or
precision machines within the charging area while
charging.
The data on your cards such as credit cards can be
lost because of the magneti c effect. Also precision
machines such as watches can go wrong.
“Qi” and marks are the registered trademarks
owned by Wire less Power Consortium (WPC).
In the following cases, ch arging may stop or not start:
•The device is already fully charged.•The temperature of the device is extremely high
while charging.
•You are at a place that emits strong
electromagnetic waves or noises, such as a TV
station, electric power plant, or gas station.
* Not available on all models
19 PILOT HMA ELP-31TG76310.book 220 ページ 2019年3月15日 金曜日 午後6時8分
Page 223 of 747
Continued221
uuInterior Lights/Interior Convenience Items uInterior Convenience Items
Controls
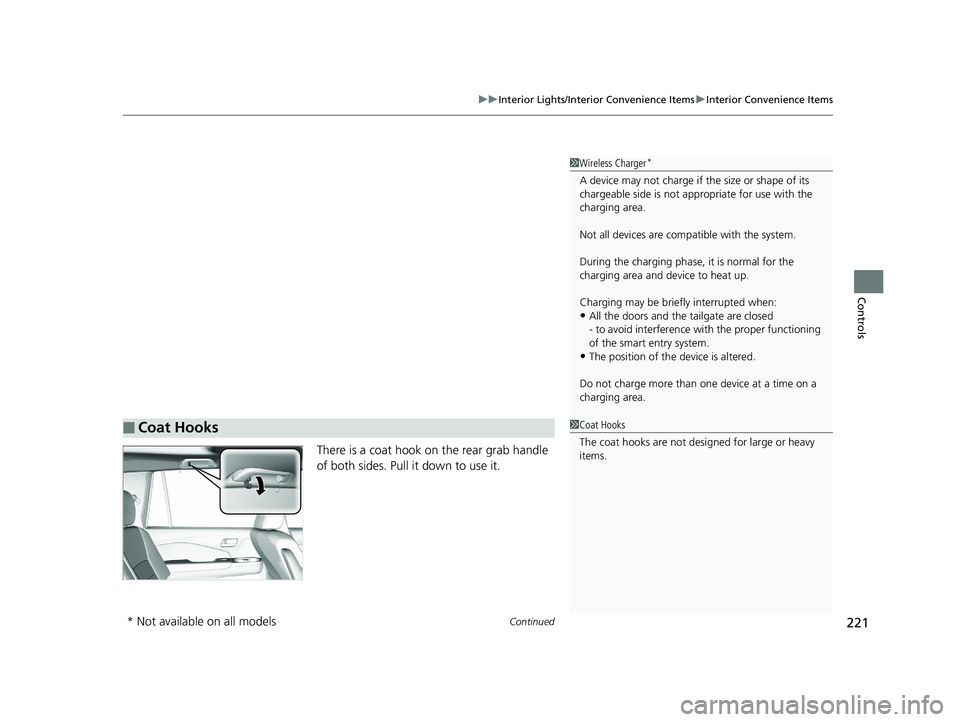
There is a coat hook on the rear grab handle
of both sides. Pull it down to use it.
■Coat Hooks
1Wireless Charger*
A device may not charge if the size or shape of its
chargeable side is not a ppropriate for use with the
charging area.
Not all devices are compatible with the system.
During the charging phase, it is normal for the
charging area and de vice to heat up.
Charging may be briefl y interrupted when:
•All the doors and the tailgate are closed
- to avoid interference with the proper functioning
of the smart entry system.
•The position of the device is altered.
Do not charge more than one device at a time on a
charging area.
1 Coat Hooks
The coat hooks are not desi gned for large or heavy
items.
* Not available on all models
19 PILOT HMA ELP-31TG76310.book 221 ページ 2019年3月15日 金曜日 午後6時8分
Page 224 of 747
uuInterior Lights/Interior Convenience Items uInterior Convenience Items
222
Controls
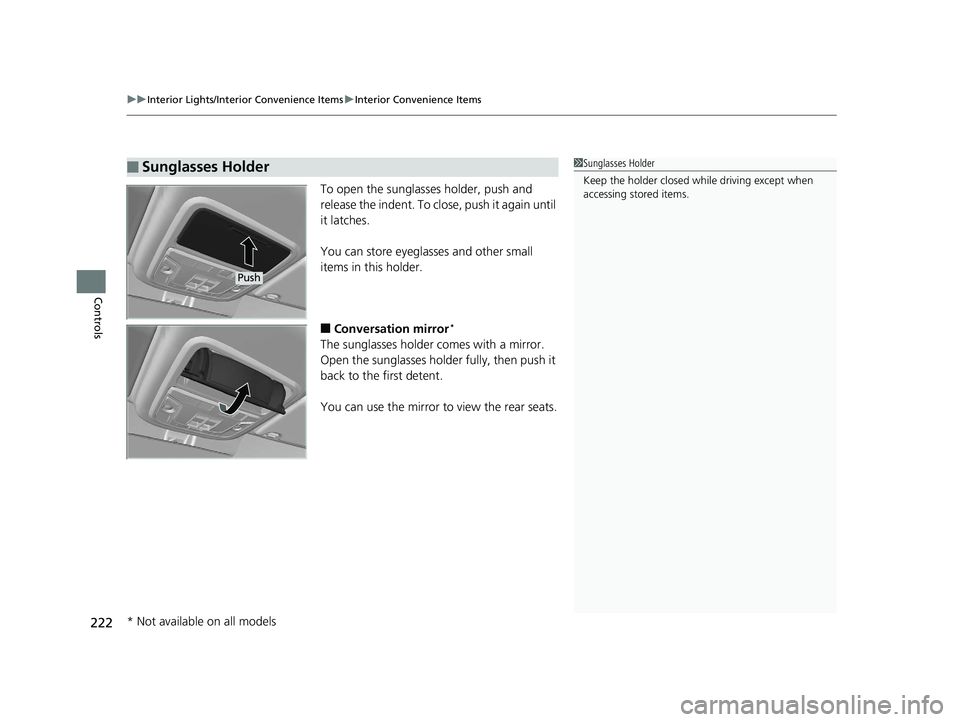
To open the sunglasses holder, push and
release the indent. To clos e, push it again until
it latches.
You can store eyeglasses and other small
items in this holder.
■Conversation mirror*
The sunglasses holder comes with a mirror.
Open the sunglasses holder fully, then push it
back to the first detent.
You can use the mirror to view the rear seats.
■Sunglasses Holder1 Sunglasses Holder
Keep the holder closed wh ile driving except when
accessing stored items.
Push
* Not available on all models
19 PILOT HMA ELP-31TG76310.book 222 ページ 2019年3月15日 金曜日 午後6時8分
Page 225 of 747
Continued223
uuInterior Lights/Interior Convenience Items uInterior Convenience Items
Controls
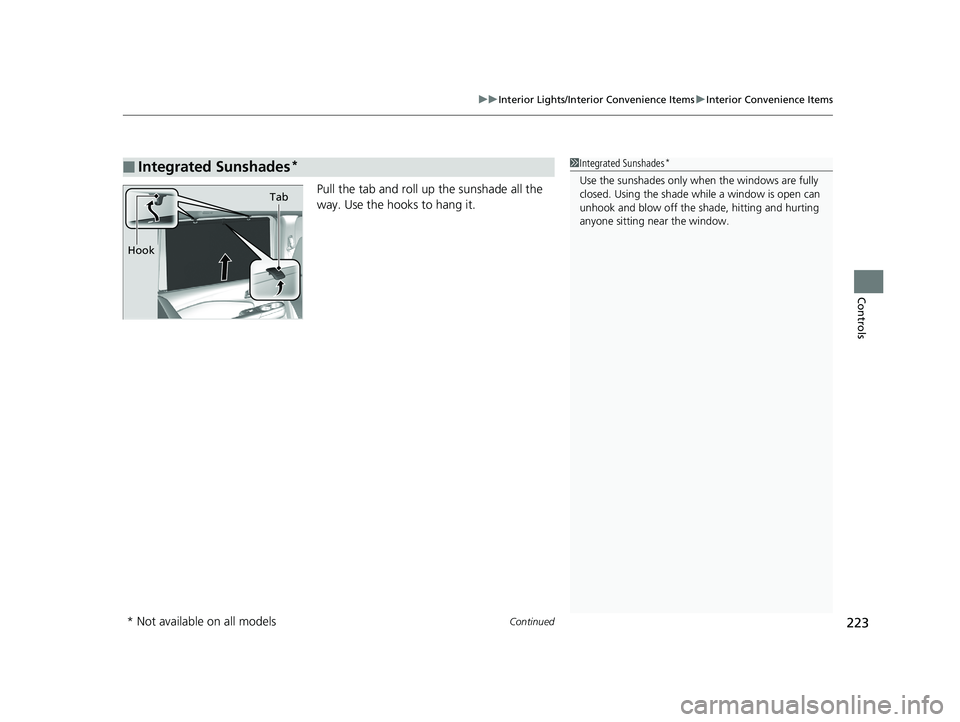
Pull the tab and roll up the sunshade all the
way. Use the hooks to hang it.
■Integrated Sunshades*1Integrated Sunshades*
Use the sunshades only when the windows are fully
closed. Using the shade while a window is open can
unhook and blow off the sh ade, hitting and hurting
anyone sitting near the window.
Tab
Hook
* Not available on all models
19 PILOT HMA ELP-31TG76310.book 223 ページ 2019年3月15日 金曜日 午後6時8分
Page 226 of 747
uuInterior Lights/Interior Convenience Items uInterior Convenience Items
224
Controls
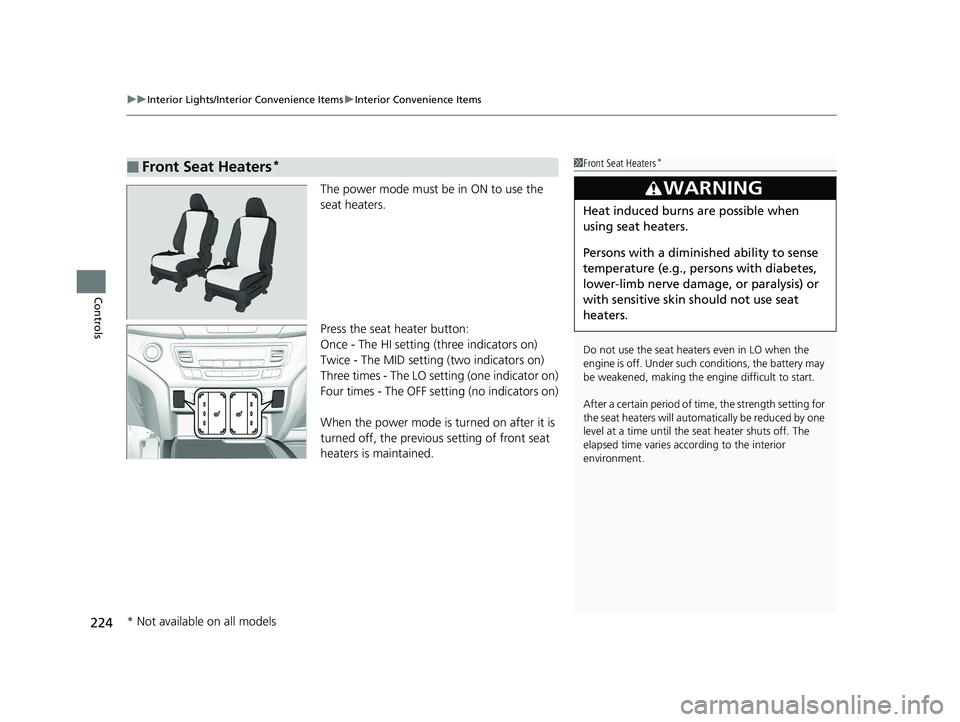
The power mode must be in ON to use the
seat heaters.
Press the seat heater button:
Once - The HI setting (three indicators on)
Twice - The MID setting (two indicators on)
Three times - The LO setting (one indicator on)
Four times - The OFF se tting (no indicators on)
When the power mode is turned on after it is
turned off, the previous setting of front seat
heaters is maintained.
■Front Seat Heaters*1 Front Seat Heaters*
Do not use the seat heaters even in LO when the
engine is off. Under such conditions, the battery may
be weakened, making the engine difficult to start.
After a certain period of time, the strength setting for
the seat heaters will automatically be reduced by one
level at a time until the seat heater shuts off. The
elapsed time varies according to the interior
environment.
3WARNING
Heat induced burns are possible when
using seat heaters.
Persons with a diminished ability to sense
temperature (e.g., persons with diabetes,
lower-limb nerve damage, or paralysis) or
with sensitive skin should not use seat
heaters.
* Not available on all models
19 PILOT HMA ELP-31TG76310.book 224 ページ 2019年3月15日 金曜日 午後6時8分
Page 227 of 747
Continued225
uuInterior Lights/Interior Convenience Items uInterior Convenience Items
Controls
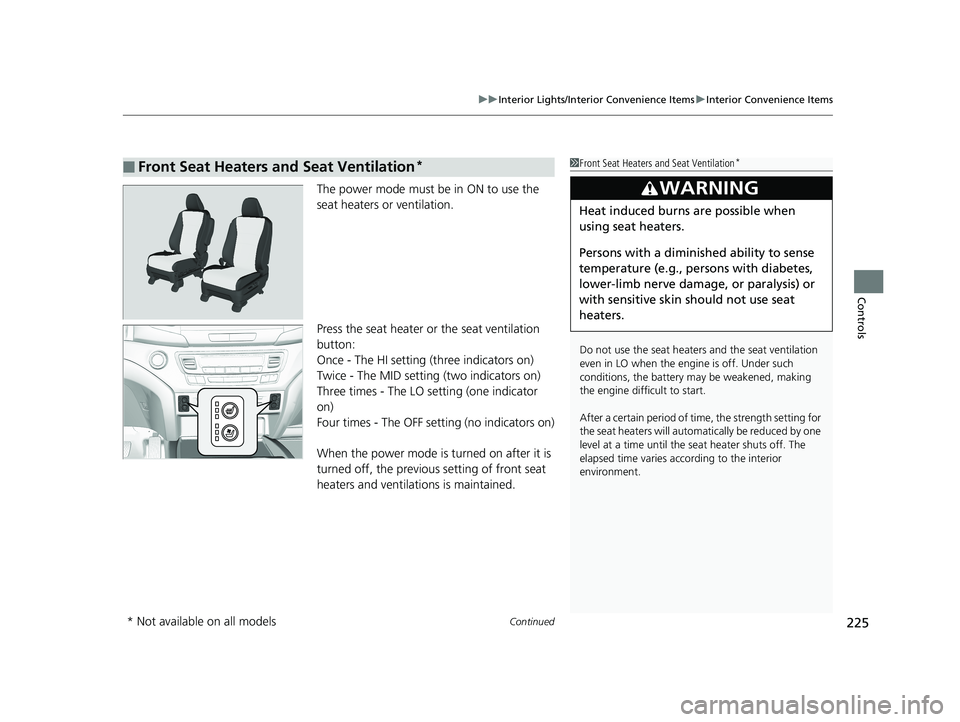
The power mode must be in ON to use the
seat heaters or ventilation.
Press the seat heater or the seat ventilation
button:
Once - The HI setting (three indicators on)
Twice - The MID setting (two indicators on)
Three times - The LO setting (one indicator
on)
Four times - The OFF setting (no indicators on)
When the power mode is turned on after it is
turned off, the previous setting of front seat
heaters and ventilations is maintained.
■Front Seat Heaters and Seat Ventilation*1Front Seat Heaters and Seat Ventilation*
Do not use the seat heater s and the seat ventilation
even in LO when the engine is off. Under such
conditions, the battery ma y be weakened, making
the engine difficult to start.
After a certain period of time, the strength setting for
the seat heaters will automatically be reduced by one
level at a time until the seat heater shuts off. The
elapsed time varies according to the interior
environment.
3WARNING
Heat induced burns are possible when
using seat heaters.
Persons with a diminished ability to sense
temperature (e.g., persons with diabetes,
lower-limb nerve damage, or paralysis) or
with sensitive skin should not use seat
heaters.
* Not available on all models
19 PILOT HMA ELP-31TG76310.book 225 ページ 2019年3月15日 金曜日 午後6時8分
Page 228 of 747
uuInterior Lights/Interior Convenience Items uInterior Convenience Items
226
Controls
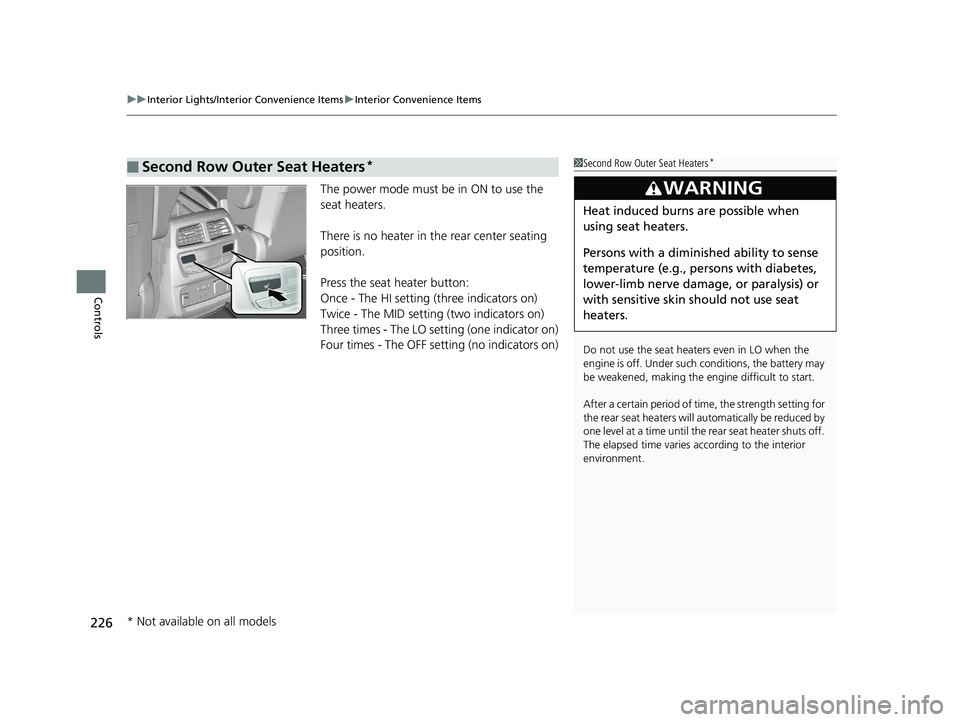
The power mode must be in ON to use the
seat heaters.
There is no heater in the rear center seating
position.
Press the seat heater button:
Once - The HI setting (three indicators on)
Twice - The MID setting (two indicators on)
Three times - The LO setting (one indicator on)
Four times - The OFF se tting (no indicators on)
■Second Row Outer Seat Heaters*1Second Row Outer Seat Heaters*
Do not use the seat heaters even in LO when the
engine is off. Under such conditions, the battery may
be weakened, making the engine difficult to start.
After a certain period of time, the strength setting for
the rear seat heaters will automatically be reduced by
one level at a time until the rear seat heat er shuts off.
The elapsed time varies according to the interior
environment.
3WARNING
Heat induced burns are possible when
using seat heaters.
Persons with a diminished ability to sense
temperature (e.g., persons with diabetes,
lower-limb nerve damage, or paralysis) or
with sensitive skin should not use seat
heaters.
* Not available on all models
19 PILOT HMA ELP-31TG76310.book 226 ページ 2019年3月15日 金曜日 午後6時8分
Page 229 of 747
Continued227
uuInterior Lights/Interior Convenience Items uInterior Convenience Items
Controls
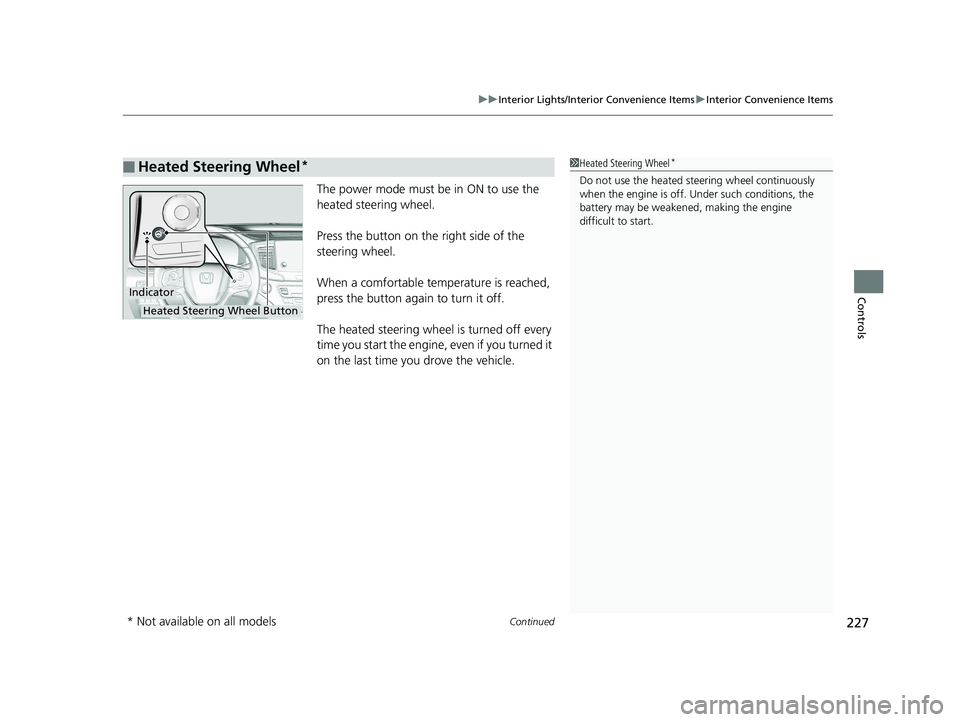
The power mode must be in ON to use the
heated steering wheel.
Press the button on the right side of the
steering wheel.
When a comfortable temperature is reached,
press the button again to turn it off.
The heated steering wheel is turned off every
time you start the engine, even if you turned it
on the last time yo u drove the vehicle.
■Heated Steering Wheel*1Heated Steering Wheel*
Do not use the heated st eering wheel continuously
when the engine is off. Under such conditions, the
battery may be weaken ed, making the engine
difficult to start.
Indicator
Heated Steering Wheel Button
* Not available on all models
19 PILOT HMA ELP-31TG76310.book 227 ページ 2019年3月15日 金曜日 午後6時8分
Page 230 of 747
uuInterior Lights/Interior Convenience Items uInterior Convenience Items
228
Controls
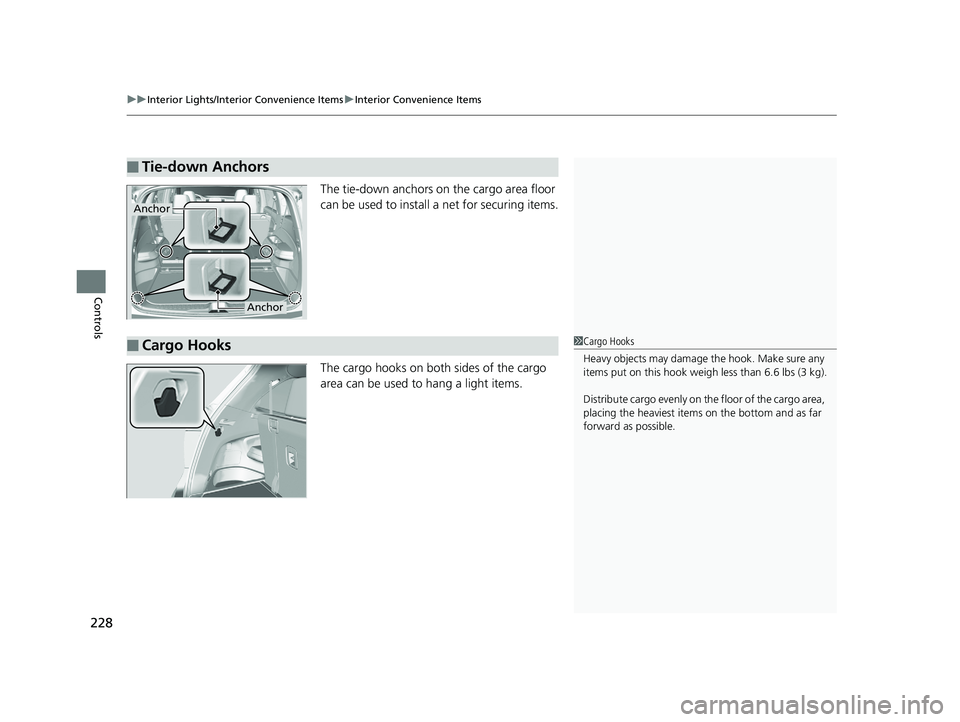
The tie-down anchors on the cargo area floor
can be used to install a net for securing items.
The cargo hooks on both sides of the cargo
area can be used to hang a light items.
■Tie-down Anchors
Anchor
Anchor
■Cargo Hooks1Cargo Hooks
Heavy objects may damage the hook. Make sure any
items put on this hook weigh less than 6.6 lbs (3 kg).
Distribute cargo evenly on the floor of the cargo area,
placing the heaviest item s on the bottom and as far
forward as possible.
19 PILOT HMA ELP-31TG76310.book 228 ページ 2019年3月15日 金曜日 午後6時8分