display HONDA PILOT 2023 Repair Manual
[x] Cancel search | Manufacturer: HONDA, Model Year: 2023, Model line: PILOT, Model: HONDA PILOT 2023Pages: 814, PDF Size: 29.02 MB
Page 167 of 814
uuGauges and Displays uDriver Information Interface Ri ght Side Area (B-type-Meter)
166
Instrument Panel
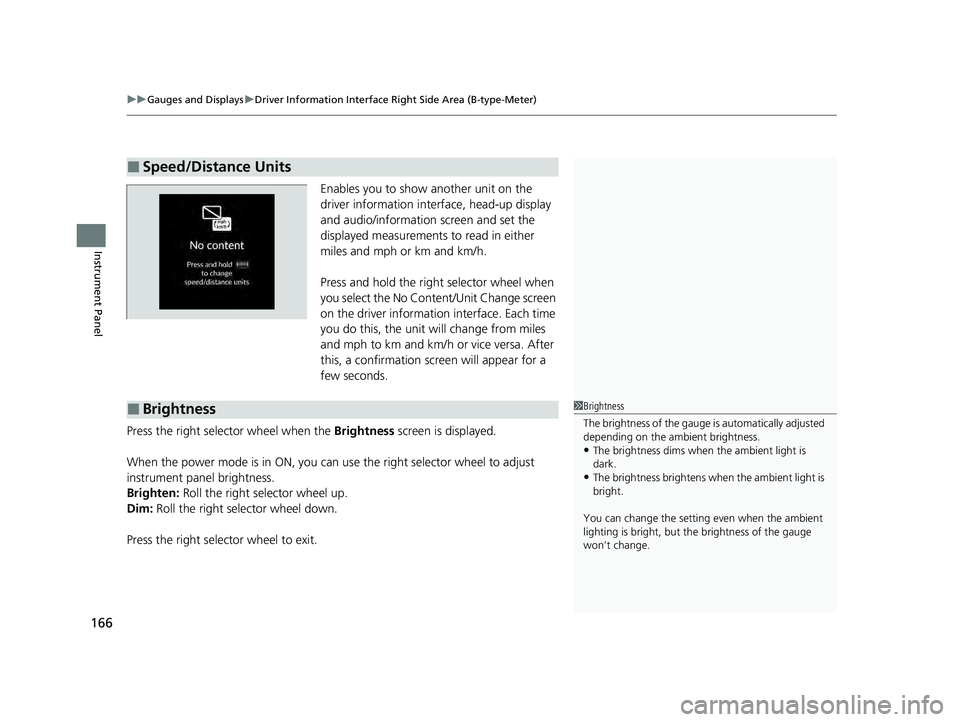
Enables you to show another unit on the
driver information interface, head-up display
and audio/information screen and set the
displayed measurements to read in either
miles and mph or km and km/h.
Press and hold the right selector wheel when
you select the No Content/Unit Change screen
on the driver information interface. Each time
you do this, the unit will change from miles
and mph to km and km/h or vice versa. After
this, a confirmation screen will appear for a
few seconds.
Press the right selector wheel when the Brightness screen is displayed.
When the power mode is in ON, you can use the right selector wheel to adjust
instrument panel brightness.
Brighten: Roll the right selector wheel up.
Dim: Roll the right selector wheel down.
Press the right selector wheel to exit.
■Speed/Distance Units
■Brightness1 Brightness
The brightness of the gauge is automatically adjusted
depending on the ambient brightness.
•The brightness dims when the ambient light is
dark.
•The brightness brightens when the ambient light is
bright.
You can change the setting even when the ambient
lighting is bright, but the brightness of the gauge
won’t change.
23 PILOT-31T906000_03.book 166 ページ 2022年10月31日 月曜日 午前10時26分
Page 168 of 814
Continued167
uuGauges and Displays uDriver Information Interface Right Side Area (B-type-Meter)
Instrument Panel
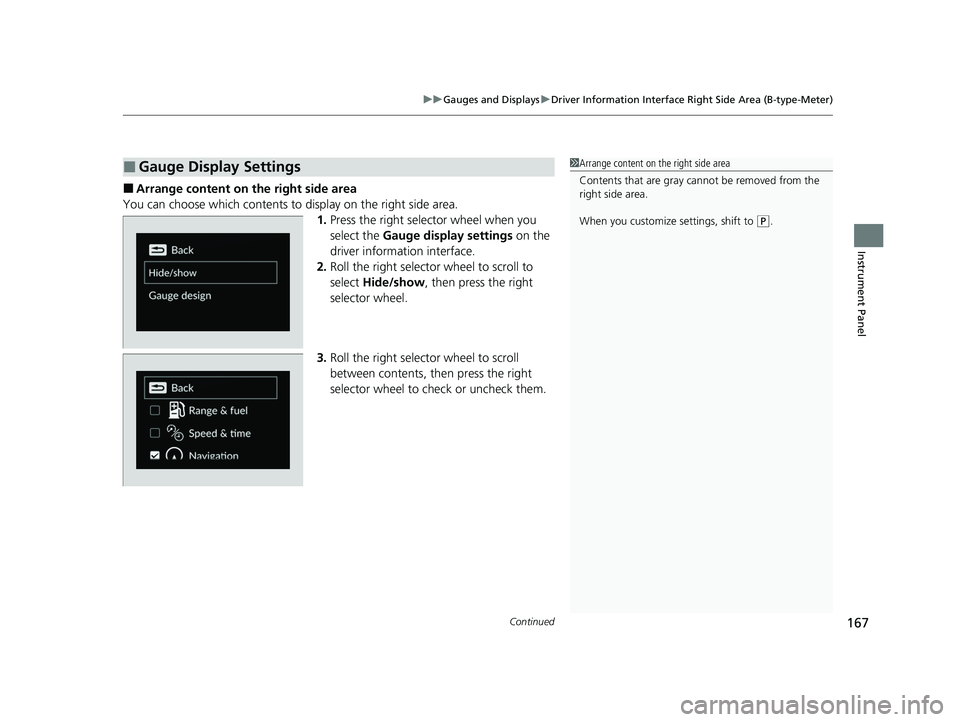
■Arrange content on the right side area
You can choose which contents to display on the right side area. 1.Press the right selector wheel when you
select the Gauge display settings on the
driver information interface.
2. Roll the right selector wheel to scroll to
select Hide/show , then press the right
selector wheel.
3. Roll the right selector wheel to scroll
between contents, then press the right
selector wheel to check or uncheck them.
■Gauge Display Settings1Arrange content on the right side area
Contents that are gray ca nnot be removed from the
right side area.
When you customize settings, shift to
( P.
23 PILOT-31T906000_03.book 167 ページ 2022年10月31日 月曜日 午前10時26分
Page 169 of 814
uuGauges and Displays uDriver Information Interface Ri ght Side Area (B-type-Meter)
168
Instrument Panel
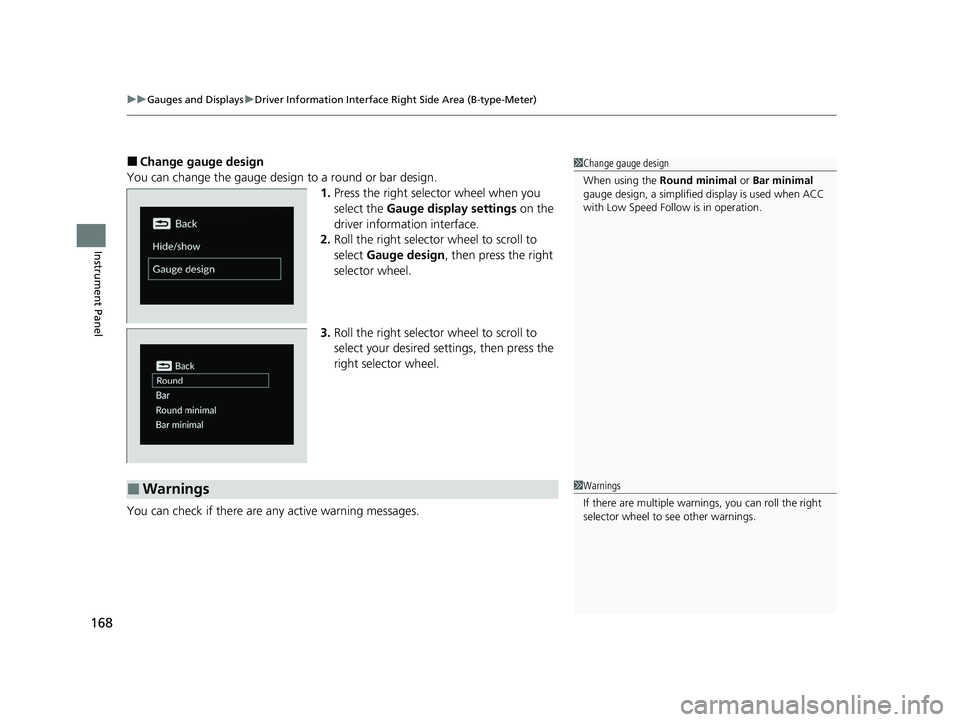
■Change gauge design
You can change the gauge design to a round or bar design. 1.Press the right selector wheel when you
select the Gauge display settings on the
driver information interface.
2. Roll the right selector wheel to scroll to
select Gauge design , then press the right
selector wheel.
3. Roll the right selector wheel to scroll to
select your desired settings, then press the
right selector wheel.
You can check if there are any active warning messages.1 Change gauge design
When using the Round minimal or Bar minimal
gauge design, a simplified display is used when ACC
with Low Speed Follow is in operation.
■Warnings1 Warnings
If there are multiple warnings, you can roll the right
selector wheel to see other warnings.
23 PILOT-31T906000_03.book 168 ページ 2022年10月31日 月曜日 午前10時26分
Page 170 of 814
169
uuGauges and Displays uHead-Up Display*
Continued
Instrument Panel
Head-Up Display*
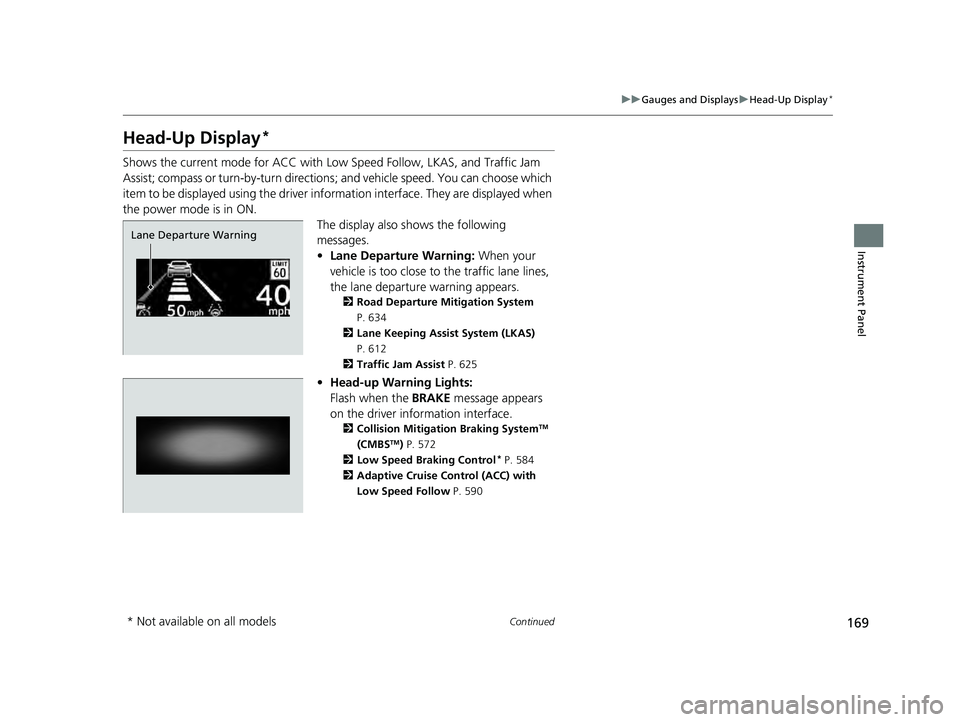
Shows the current mode for ACC with Low Speed Follow, LKAS, and Traffic Jam
Assist; compass or turn-by-turn directions ; and vehicle speed. You can choose which
item to be displayed using the driver in formation interface. They are displayed when
the power mode is in ON. The display also shows the following
messages.
•Lane Departure Warning: When your
vehicle is too close to the traffic lane lines,
the lane departure warning appears.
2 Road Departure Mitigation System
P. 634
2 Lane Keeping Assist System (LKAS)
P. 612
2 Traffic Jam Assist P. 625
•Head-up Warning Lights:
Flash when the BRAKE message appears
on the driver information interface.
2 Collision Mitigation Braking SystemTM
(CMBSTM) P. 572
2 Low Speed Braking Control* P. 584
2 Adaptive Cruise Control (ACC) with
Low Speed Follow P. 590
Lane Departure Warning
* Not available on all models
23 PILOT-31T906000_03.book 169 ページ 2022年10月31日 月曜日 午前10時26分
Page 171 of 814
uuGauges and Displays uHead-Up Display*
170
Instrument Panel
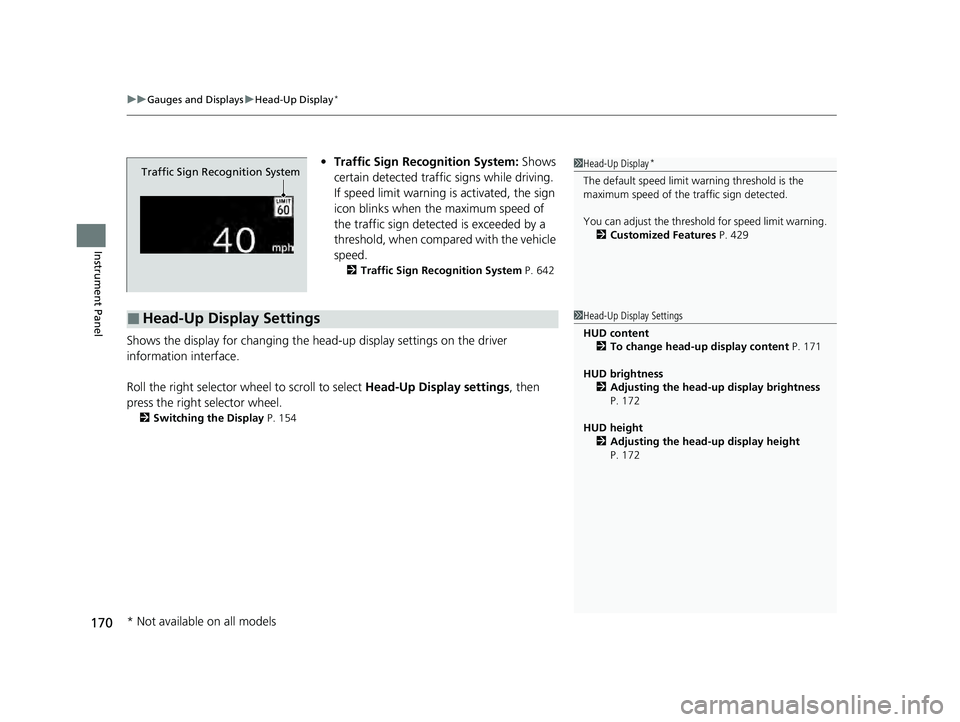
• Traffic Sign Recognition System: Shows
certain detected traffic signs while driving.
If speed limit warning is activated, the sign
icon blinks when th e maximum speed of
the traffic sign detect ed is exceeded by a
threshold, when compar ed with the vehicle
speed.
2 Traffic Sign Recognition System P. 642
Shows the display for changing the head-up display settings on the driver
information interface.
Roll the right selector wheel to scroll to select Head-Up Display settings, then
press the right selector wheel.
2 Switching the Display P. 154
Traffic Sign Recognition System
■Head-Up Display Settings
1Head-Up Display*
The default speed limit wa rning threshold is the
maximum speed of the traffic sign detected.
You can adjust the threshol d for speed limit warning.
2 Customized Features P. 429
1Head-Up Display Settings
HUD content
2 To change head-up display content P. 171
HUD brightness 2 Adjusting the head-up display brightness
P. 172
HUD height 2 Adjusting the head-up display height
P. 172
* Not available on all models
23 PILOT-31T906000_03.book 170 ページ 2022年10月31日 月曜日 午前10時26分
Page 172 of 814
171
uuGauges and Displays uHead-Up Display*
Continued
Instrument Panel
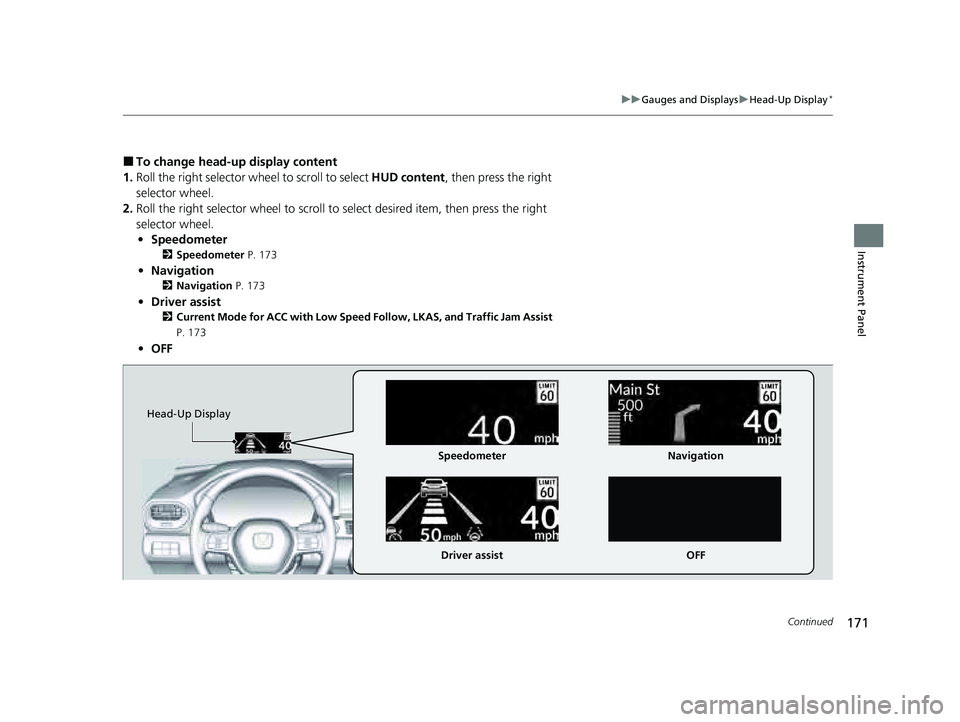
■To change head-up display content
1. Roll the right selector wheel to scroll to select HUD content, then press the right
selector wheel.
2. Roll the right selector wheel to scroll to select desired item, then press the right
selector wheel. • Speedometer
2 Speedometer P. 173
•Navigation
2 Navigation P. 173
•Driver assist
2 Current Mode for ACC with Low Speed Follow, LKAS, and Traffic Jam Assist
P. 173
• OFF
Head-Up Display
Speedometer
Driver assist Navigation
OFF
23 PILOT-31T906000_03.book 171 ページ 2022年10月31日 月曜日 午前10時26分
Page 173 of 814
uuGauges and Displays uHead-Up Display*
172
Instrument Panel
■Adjusting the head-up display brightness
Roll the right selector wheel to scroll to select HUD brightness, then press the right
selector wheel.
Brighten: Roll the right selector wheel up.
Dim : Roll the right selector wheel down.
Press the right selector wheel to exit.
■Adjusting the head-up display height
Roll the right selector wheel to scroll to select HUD height, then press the right
selector wheel.
Raise the head-up display : Roll the right selector wheel up.
Lower the head-up display : Roll the right selector wheel down.
Press the right selector wheel to exit.1 Adjusting the head-up display height
When you unlock and open the driver’s door with a
remote transmitter or keyless access system, the
head-up display adjusts auto matically to one of the
two preset positions.
23 PILOT-31T906000_03.book 172 ページ 2022年10月31日 月曜日 午前10時26分
Page 174 of 814
173
uuGauges and Displays uHead-Up Display*
Instrument Panel
Shows your driving speed in mph or km/h.
Shows the current mode for ACC with Low Speed Follow, LKAS, and Traffic Jam
Assist.
2 Adaptive Cruise Control (ACC) with Low Speed Follow P. 590
2 Lane Keeping Assist System (LKAS) P. 612
2 Traffic Jam Assist P. 625
■Compass
Shows the compass screen.
■Turn-by-Turn Directions
When driving guidance is provided by the navigation system, Android Auto or Apple
CarPlay, turn-by-turn directions to your destination appear.
2Refer to the Navigation System Manual
2 Android AutoTM P. 392
2 Apple CarPlay P. 385
■Speedometer
■Current Mode for ACC with Low Speed Follow, LKAS, and
Traffic Jam Assist
■Navigation
1 Speedometer
Switch between mph and km/h by using the driver
information interface or the customized features on
the audio/information screen.
2 Speed/Distance Units P. 166
2 Customized Features P. 429
1Navigation
You can select whether th e turn-by-turn display
comes on during the route guidance. 2 Customized Features P. 429
Turn-by-turn directions may not be available for all
apps.
23 PILOT-31T906000_03.book 173 ページ 2022年10月31日 月曜日 午前10時26分
Page 177 of 814
176
Controls
Clock
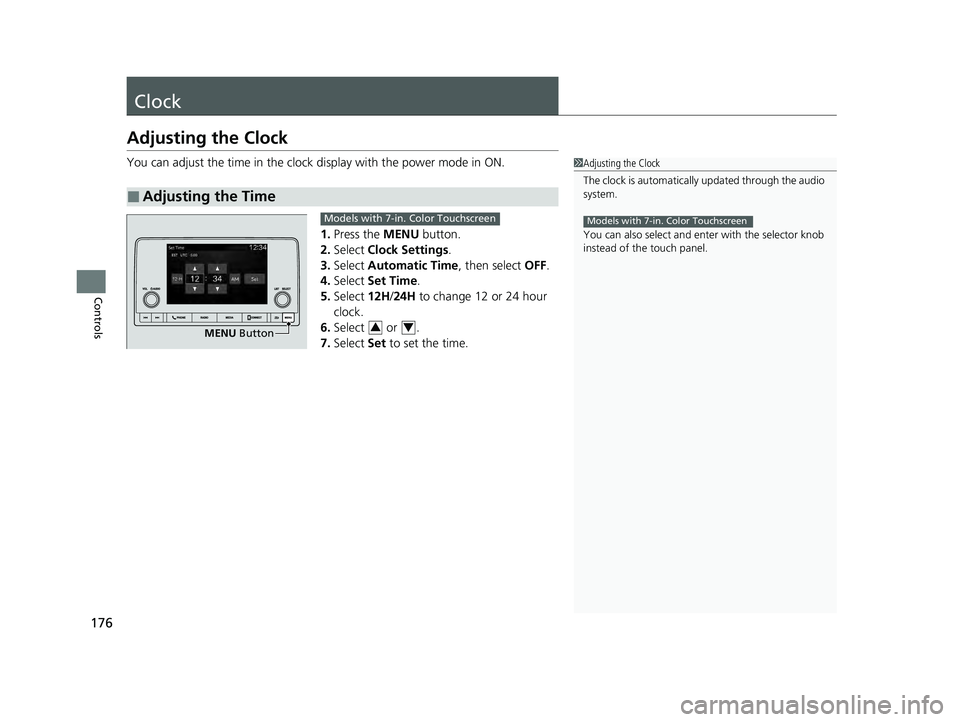
Adjusting the Clock
You can adjust the time in the clock display with the power mode in ON.
1. Press the MENU button.
2. Select Clock Settings .
3. Select Automatic Time , then select OFF.
4. Select Set Time.
5. Select 12H/24H to change 12 or 24 hour
clock.
6. Select or .
7. Select Set to set the time.
■Adjusting the Time
1Adjusting the Clock
The clock is automatically updated through the audio
system.
You can also select and en ter with the selector knob
instead of the touch panel.
Models with 7-in. Color Touchscreen
MENU Button
Models with 7-in. Color Touchscreen
34
23 PILOT-31T906000_03.book 176 ページ 2022年10月31日 月曜日 午前10時26分
Page 178 of 814
177
uuClock uAdjusting the Clock
Controls
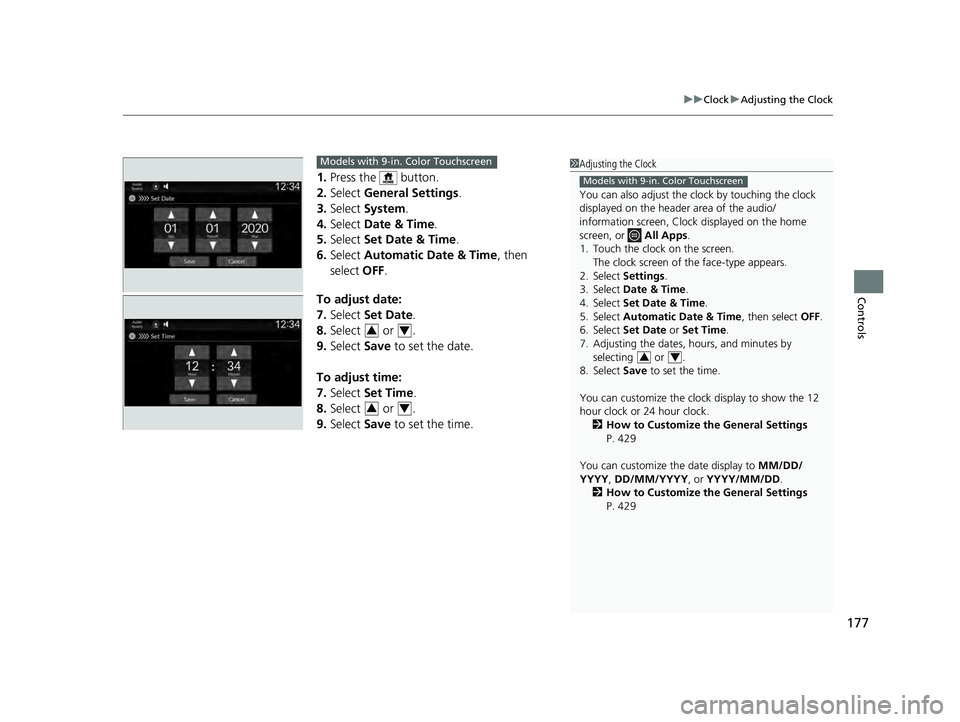
1. Press the button.
2. Select General Settings .
3. Select System.
4. Select Date & Time .
5. Select Set Date & Time .
6. Select Automatic Date & Time , then
select OFF.
To adjust date:
7. Select Set Date.
8. Select or .
9. Select Save to set the date.
To adjust time:
7. Select Set Time.
8. Select or .
9. Select Save to set the time.
1Adjusting the Clock
You can also adjust the clock by touching the clock
displayed on the header area of the audio/
information screen, Clock displayed on the home
screen, or All Apps.
1. Touch the clock on the screen. The clock screen of the face-type appears.
2. Select Settings .
3. Select Date & Time .
4. Select Set Date & Time .
5. Select Automatic Date & Time , then select OFF.
6. Select Set Date or Set Time.
7. Adjusting the dates, hours, and minutes by selecting or .
8. Select Save to set the time.
You can customize the clock display to show the 12
hour clock or 24 hour clock. 2 How to Customize the General Settings
P. 429
You can customize the date display to MM/DD/
YYYY , DD/MM/YYYY , or YYYY/MM/DD .
2 How to Customize the General Settings
P. 429
Models with 9-in. Color Touchscreen
34
Models with 9-in. Color Touchscreen
34
34
23 PILOT-31T906000_03.book 177 ページ 2022年10月31日 月曜日 午前10時26分