HONDA PRELUDE 1992 Owners Manual
Manufacturer: HONDA, Model Year: 1992, Model line: PRELUDE, Model: HONDA PRELUDE 1992Pages: 225, PDF Size: 2.1 MB
Page 151 of 225
Battery
Emergency Procedures
Eyes — Flush with water from a
cup or other container for at least
fifteen minutes. (Water under
pressure can damage the eye.)
Immediately call a physician or 911.
Skin — Remove contaminated
clothing. Flush the skin with large quantities of water. Call a physi-
cian immediately.
Swallowing — Drink water or
milk. Call your local Poison Control
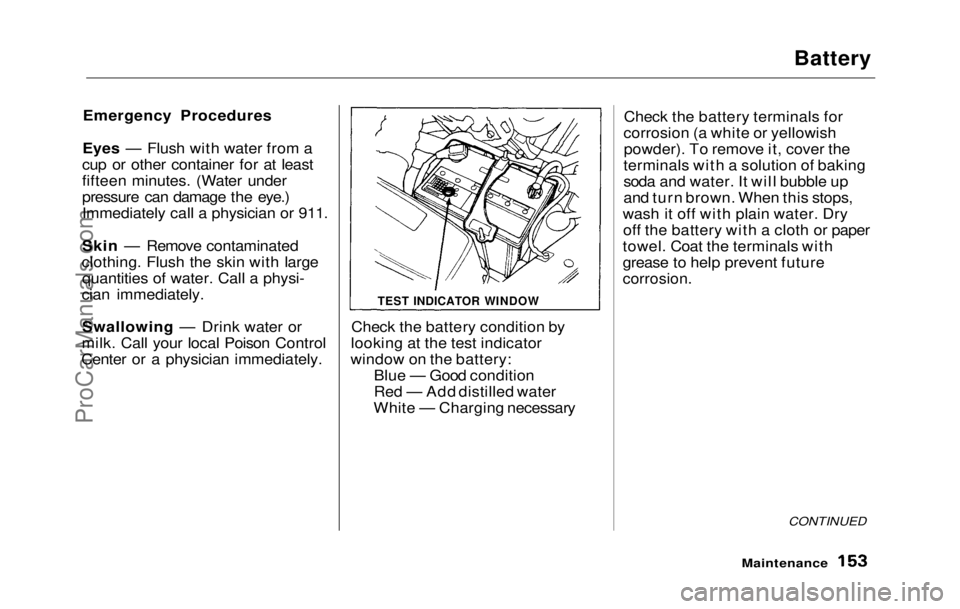
Center or a physician immediately. Check the battery condition by
looking at the test indicator
window on the battery: Blue — Good condition
Red — Add distilled water
White — Charging necessary Check the battery terminals for
corrosion (a white or yellowish powder). To remove it, cover the
terminals with a solution of baking
soda and water. It will bubble up
and turn brown. When this stops,
wash it off with plain water. Dry off the battery with a cloth or paper
towel. Coat the terminals with
grease to help prevent future
corrosion.
CONTINUED
Maintenance
TEST INDICATOR WINDOWProCarManuals.comMain Menu Table of Contents s t
Page 152 of 225
Battery
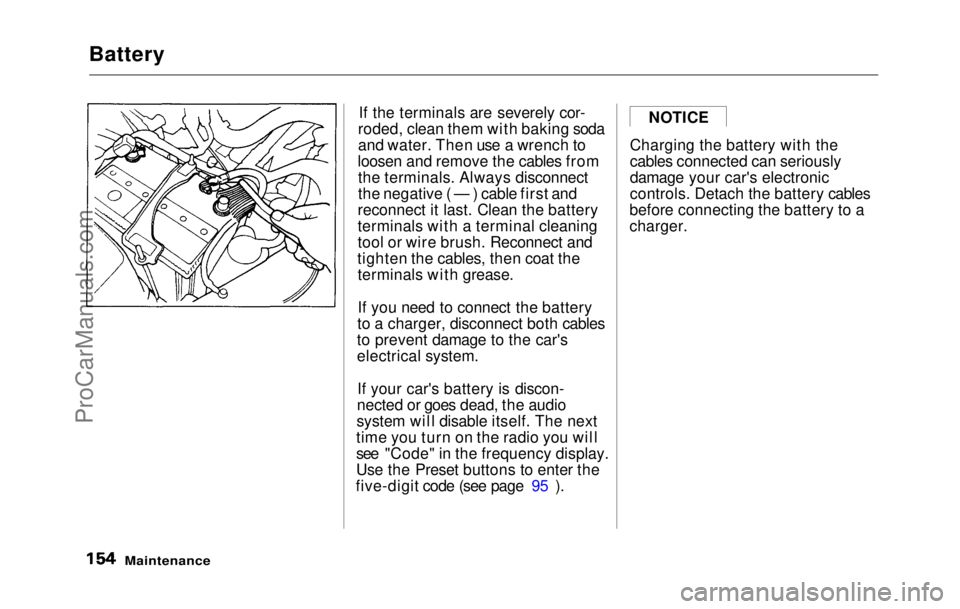
If the terminals are severely cor-
roded, clean them with baking soda
and water. Then use a wrench to
loosen and remove the cables from the terminals. Always disconnect
the negative ( — ) cable first and
reconnect it last. Clean the battery
terminals with a terminal cleaning
tool or wire brush. Reconnect and
tighten the cables, then coat the terminals with grease.
If you need to connect the battery
to a charger, disconnect both cables
to prevent damage to the car's
electrical system.
If your car's battery is discon-
nected or goes dead, the audio
system will disable itself. The next
time you turn on the radio you will
see "Code" in the frequency display.
Use the Preset buttons to enter the
five-digit code (see page 95 ). Charging the battery with the
cables connected can seriously
damage your car's electronic
controls. Detach the battery cables
before connecting the battery to a
charger.
Maintenance
NOTICEProCarManuals.comMain Menu Table of Contents s t
Page 153 of 225
Windshield Wipers
Check the condition of the wind-
shield wiper blades at least every
six months. Look for signs of crack- ing in the rubber, or areas that are
getting hard. Replace the blades if
you find these signs, or they leavestreaks and unwiped areas when
used.
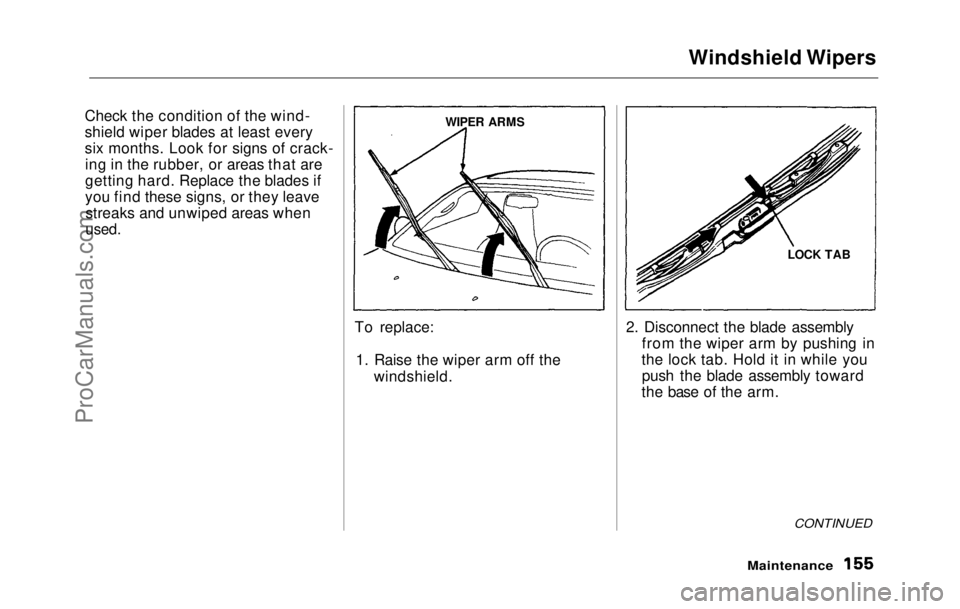
To replace:1. Raise the wiper arm off the windshield. 2. Disconnect the blade assembly
from the wiper arm by pushing in
the lock tab. Hold it in while you push the blade assembly toward
the base of the arm.
CONTINUED
Maintenance
WIPER ARMS
LOCK TABProCarManuals.comMain Menu Table of Contents s t
Page 154 of 225
Windshield Wipers
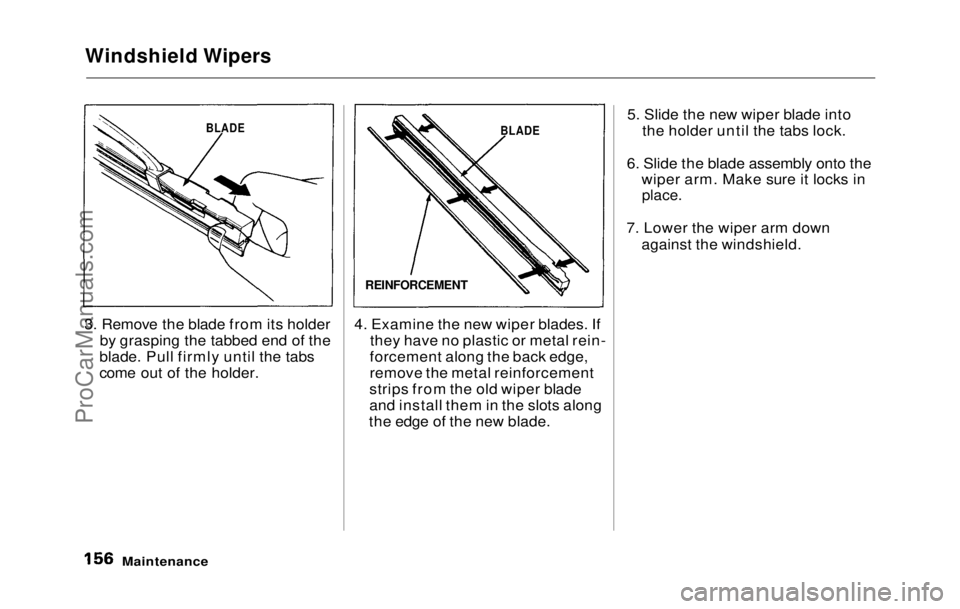
3. Remove the blade from its holder by grasping the tabbed end of the
blade. Pull firmly until the tabs
come out of the holder. 4. Examine the new wiper blades. If
they have no plastic or metal rein-
forcement along the back edge,
remove the metal reinforcement
strips from the old wiper blade
and install them in the slots along
the edge of the new blade. 5. Slide the new wiper blade into
the holder until the tabs lock.
6. Slide the blade assembly onto the wiper arm. Make sure it locks in
place.
7. Lower the wiper arm down against the windshield.
Maintenance
BLADE
REINFORCEMENT
BLADEProCarManuals.comMain Menu Table of Contents s t
Page 155 of 225
Air Conditioner
Optional for S model
Your car's air conditioner is a
sealed system. Any major mainte-
nance, such as recharging, should
be done by a qualified technician. There are a couple of things you
can do to make sure the air condi-
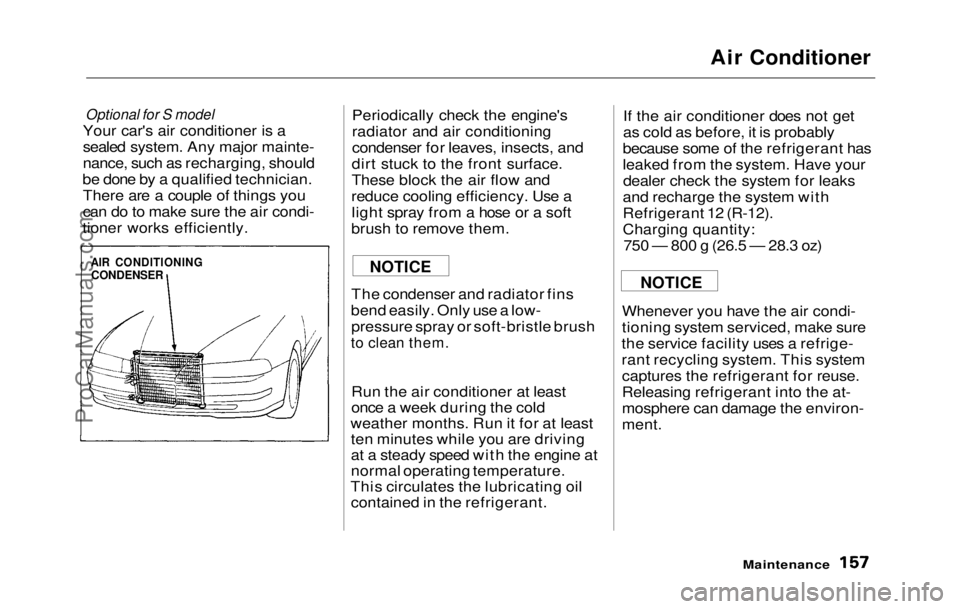
tioner works efficiently. Periodically check the engine's
radiator and air conditioning
condenser for leaves, insects, and
dirt stuck to the front surface.
These block the air flow and
reduce cooling efficiency. Use a light spray from a hose or a soft
brush to remove them.
The condenser and radiator fins
bend easily. Only use a low- pressure spray or soft-bristle brush
to clean them.
Run the air conditioner at least
once a week during the cold
weather months. Run it for at least ten minutes while you are driving
at a steady speed with the engine at
normal operating temperature.
This circulates the lubricating oil contained in the refrigerant. If the air conditioner does not get
as cold as before, it is probably
because some of the refrigerant has
leaked from the system. Have your dealer check the system for leaks
and recharge the system with
Refrigerant 12 (R-12).
Charging quantity: 750 — 800 g (26.5 — 28.3 oz)
Whenever you have the air condi-
tioning system serviced, make sure
the service facility uses a refrige-
rant recycling system. This system captures the refrigerant for reuse.
Releasing refrigerant into the at-
mosphere can damage the environ-
ment.
Maintenance
AIR CONDITIONING
CONDENSER
NOTICE
NOTICEProCarManuals.comMain Menu Table of Contents s t
Page 156 of 225
Engine Belts, Tires
Engine Belts
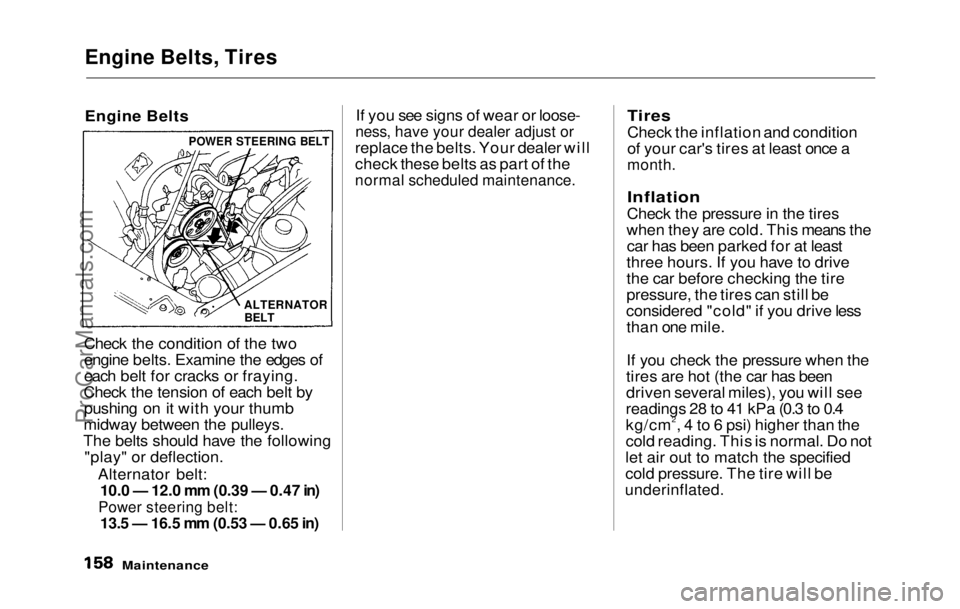
Check the condition of the two
engine belts. Examine the edges of
each belt for cracks or fraying.
Check the tension of each belt by pushing on it with your thumb
midway between the pulleys.
The belts should have the following "play" or deflection.
Alternator belt:
10.0 — 12.0 mm (0.39 — 0.47 in)
Power steering belt:
13.5 — 16.5
mm
(0.53
—
0.65 in)
If you see signs of wear or loose-
ness, have your dealer adjust or
replace the belts. Your dealer will
check these belts as part of the
normal scheduled maintenance.
Tires
Check the inflation and condition
of your car's tires at least once a
month.
Inflation
Check the pressure in the tires
when they are cold. This means the car has been parked for at least
three hours. If you have to drive
the car before checking the tire
pressure, the tires can still be
considered "cold" if you drive less than one mile.
If you check the pressure when the
tires are hot (the car has been
driven several miles), you will see
readings 28 to 41 kPa (0.3 to 0.4
kg/cm2, 4 to 6 psi) higher than the
cold reading. This is normal. Do not
let air out to match the specified
cold pressure. The tire will be
underinflated.
Maintenance
POWER STEERING BELT
ALTERNATOR
BELTProCarManuals.comMain Menu Table of Contents s t
Page 157 of 225
Tires
The correct cold tire pressures are:
(US: S, Canada: S)
205 kPa (2.1 kg/cm2, 30 psi)
(US: Si, Si 4WS, Canada: SR, SR 4WS)
220 kPa (2.2 kg/cm2, 32 psi)
Compact spare:
415 kPa(4.15 kg/cm2, 60 psi)
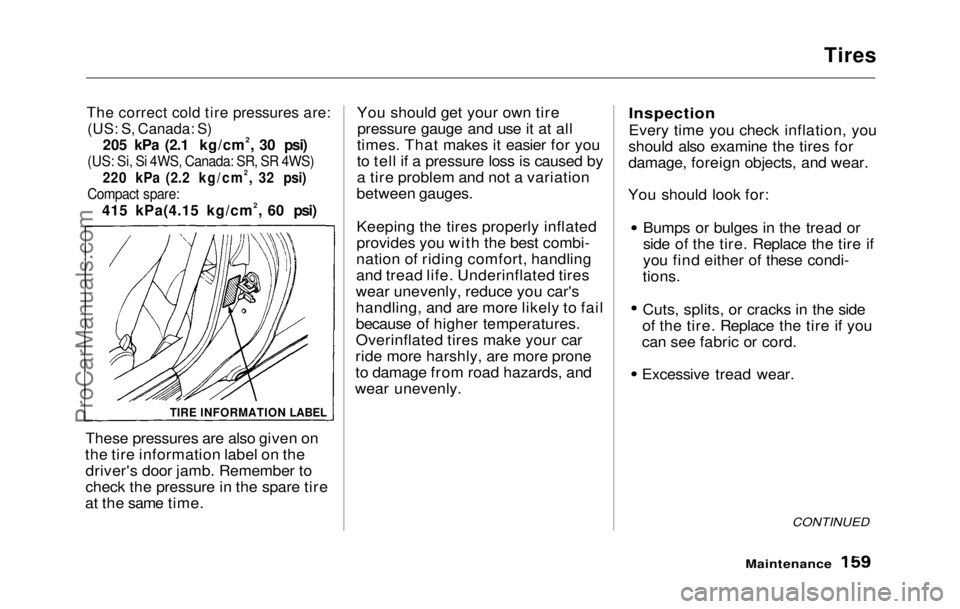
These pressures are also given on
the tire information label on the driver's door jamb. Remember to
check the pressure in the spare tire
at the same time. You should get your own tire
pressure gauge and use it at all
times. That makes it easier for you
to tell if a pressure loss is caused by
a tire problem and not a variation
between gauges.
Keeping the tires properly inflated
provides you with the best combi-
nation of riding comfort, handling
and tread life. Underinflated tires
wear unevenly, reduce you car's
handling, and are more likely to fail
because of higher temperatures.
Overinflated tires make your car
ride more harshly, are more prone
to damage from road hazards, and
wear unevenly.
Inspection
Every time you check inflation, you
should also examine the tires for
damage, foreign objects, and wear.
You should look for:
Bumps or bulges in the tread or
side of the tire. Replace the tire if
you find either of these condi-
tions. Cuts, splits, or cracks in the side
of the tire. Replace the tire if you
can see fabric or cord.
Excessive tread wear.
CONTINUED
Maintenance
TIRE INFORMATION LABELProCarManuals.comMain Menu Table of Contents s t
Page 158 of 225
Tires
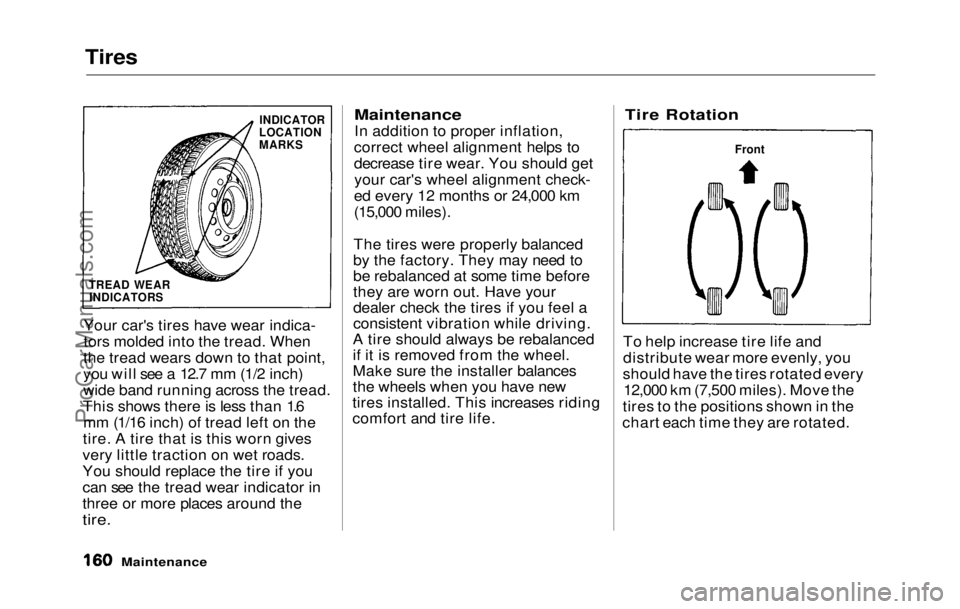
Your car's tires have wear indica-
tors molded into the tread. When
the tread wears down to that point,
you will see a 12.7 mm (1/2 inch)
wide band running across the tread.
This shows there is less than 1.6 mm (1/16 inch) of tread left on the
tire. A tire that is this worn gives
very little traction on wet roads.
You should replace the tire if you
can see the tread wear indicator in
three or more places around the
tire.
Maintenance
In additio n
to proper inflation,
correct wheel alignment helps to
decrease tire wear. You should get your car's wheel alignment check-
ed every 12 months or 24,000 km
(15,000 miles).
The tires were properly balanced
by the factory. They may need to
be rebalanced at some time before
they are worn out. Have your
dealer check the tires if you feel a
consistent vibration while driving.
A tire should always be rebalanced
if it is removed from the wheel.
Make sure the installer balances
the wheels when you have new
tires installed. This increases riding
comfort and tire life.
Tire Rotation
To help increase tire life and
distribute wear more evenly, you
should have the tires rotated every 12,000 km (7,500 miles). Move the
tires to the positions shown in the
chart each time they are rotated.
Maintenance
INDICATOR
LOCATION
MARKS
TREAD WEAR INDICATORS FrontProCarManuals.comMain Menu Table of Contents s t
Page 159 of 225
Tires
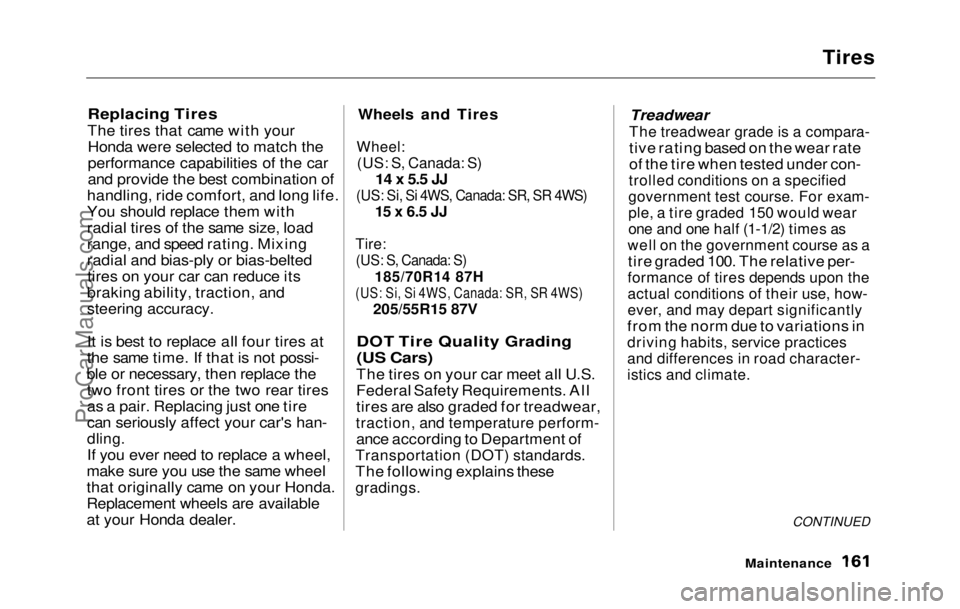
Replacing Tires
The tires that came with your Honda were selected to match the
performance capabilities of the car
and provide the best combination of
handling, ride comfort, and long life.
You should replace them with
radial tires of the same size, load
range, and speed rating. Mixing
radial and bias-ply or bias-belted tires on your car can reduce its
braking ability, traction, and
steering accuracy.
It is best to replace all four tires at
the same time. If that is not possi-
ble or necessary, then replace the two front tires or the two rear tires
as a pair. Replacing just one tire
can seriously affect your car's han-
dling.
If you ever need to replace a wheel,
make sure you use the same wheel
that originally came on your Honda.
Replacement wheels are available
at your Honda dealer. Wheels and Tires
Wheel:
(US: S, Canada: S)
14 x 5.5 JJ
(US: Si, Si 4WS, Canada: SR, SR 4WS)
15
x
6.5 JJ
Tire:
(US: S, Canada: S)
185/70R14 87H
(US: Si, Si 4WS, Canada: SR, SR 4WS)
205/55R15 87V
DOT Tire Quality Grading
(US Cars)
The tires on your car meet all U.S.
Federal Safety Requirements. All
tires are also graded for treadwear,
traction, and temperature perform-
ance according to Department of
Transportation (DOT) standards.
The following explains these
gradings.
Treadwear
The treadwear grade is a compara-
tive rating based on the wear rate
of the tire when tested under con-
trolled conditions on a specified
government test course. For exam-
ple, a tire graded 150 would wear
one and one half (1-1/2) times as
well on the government course as a
tire graded 100. The relative per-
formance of tires depends upon the
actual conditions of their use, how-
ever, and may depart significantly
from the norm due to variations in
driving habits, service practices
and differences in road character-
istics and climate.
CONTINUED
MaintenanceProCarManuals.comMain Menu Table of Contents s t
Page 160 of 225
Tires
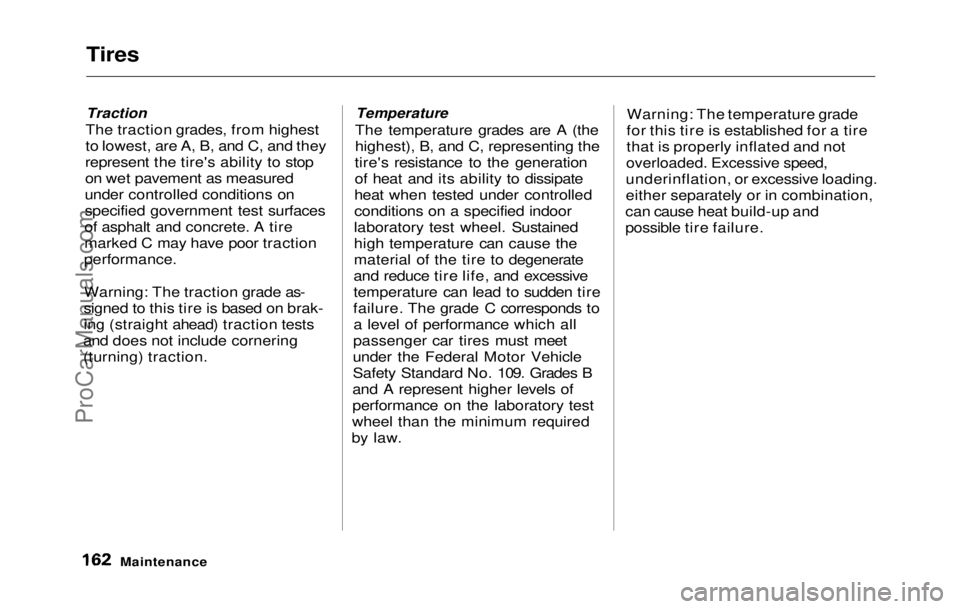
Traction
The traction grades, from highest
to lowest, are A, B, and C, and they
represent the tire's ability to stop
on wet pavement as measured
under controlled conditions on
specified government test surfaces
of asphalt and concrete. A tire
marked C may have poor traction
performance.
Warning: The traction grade as-
signed to this tire is based on brak-
ing (straight ahead) traction tests
and does not include cornering
(turning) traction.
Temperature
The temperature grades are A (the
highest), B, and C, representing the
tire's resistance to the generation
of heat and its ability to dissipate
heat when tested under controlled
conditions on a specified indoor
laboratory test wheel. Sustained
high temperature can cause the
material of the tire to degenerate
and reduce tire life, and excessive
temperature can lead to sudden tire
failure. The grade C corresponds to a level of performance which all
passenger car tires must meet
under the Federal Motor Vehicle
Safety Standard No. 109. Grades B
and A represent higher levels of
performance on the laboratory test
wheel than the minimum required
by law. Warning: The temperature grade
for this tire is established for a tire
that is properly inflated and not
overloaded. Excessive speed,
underinflation, or excessive loading.
either separately or in combination,
can cause heat build-up and
possible tire failure.
MaintenanceProCarManuals.comMain Menu Table of Contents s t