dashboard HONDA PRELUDE 1998 User Guide
[x] Cancel search | Manufacturer: HONDA, Model Year: 1998, Model line: PRELUDE, Model: HONDA PRELUDE 1998Pages: 278, PDF Size: 2.61 MB
Page 44 of 278
Additional Information About Your SRS
SRS Components
Your Supplemental Restraint System (SRS) includes:
Two frontal airbags. The driver'sairbag is stored in the center of
the steering wheel; the front
passenger's airbag is stored in the dashboard. Both are marked
"SRS".
Sensors that can detect a severe
frontal collision. A sophisticated electronic system
that continually monitors thesensors, control unit, the airbag
activators, and all related wiring
when the ignition is ON (II). An indicator light on the
instrument panel to alert you to a
possible problem with the system (see page 45). Emergency backup power in case
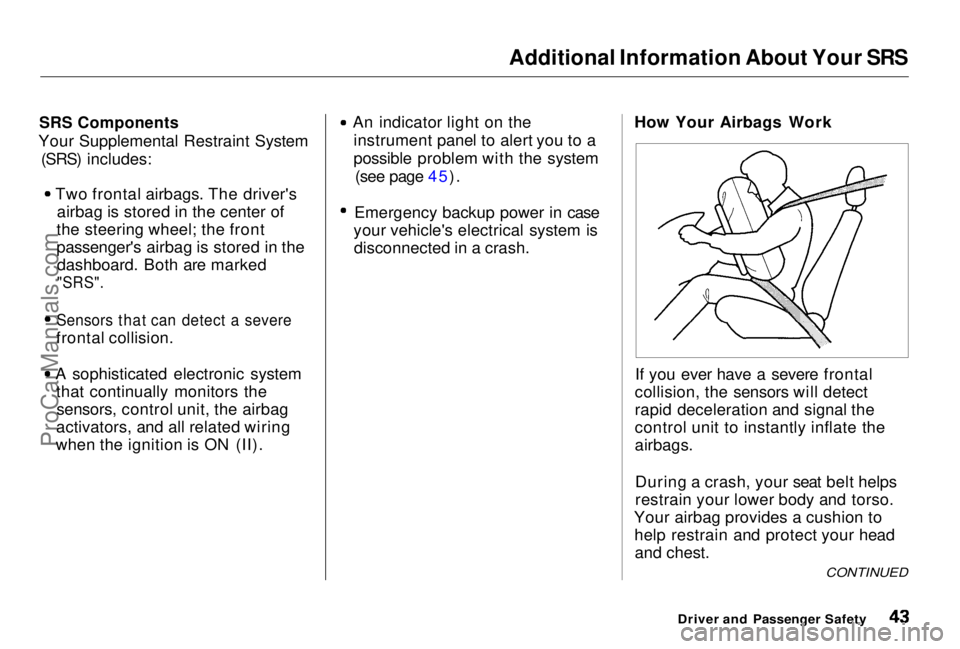
your vehicle's electrical system is disconnected in a crash. How Your Airbags Work
If you ever have a severe frontal
collision, the sensors will detect
rapid deceleration and signal the
control unit to instantly inflate the
airbags.
During a crash, your seat belt helps
restrain your lower body and torso.
Your airbag provides a cushion to help restrain and protect your headand chest.
Driver and Passenger Safety
CONTINUEDProCarManuals.comMain Menu Table of Contents s t
Page 62 of 278
Controls Near the Steering Wheel
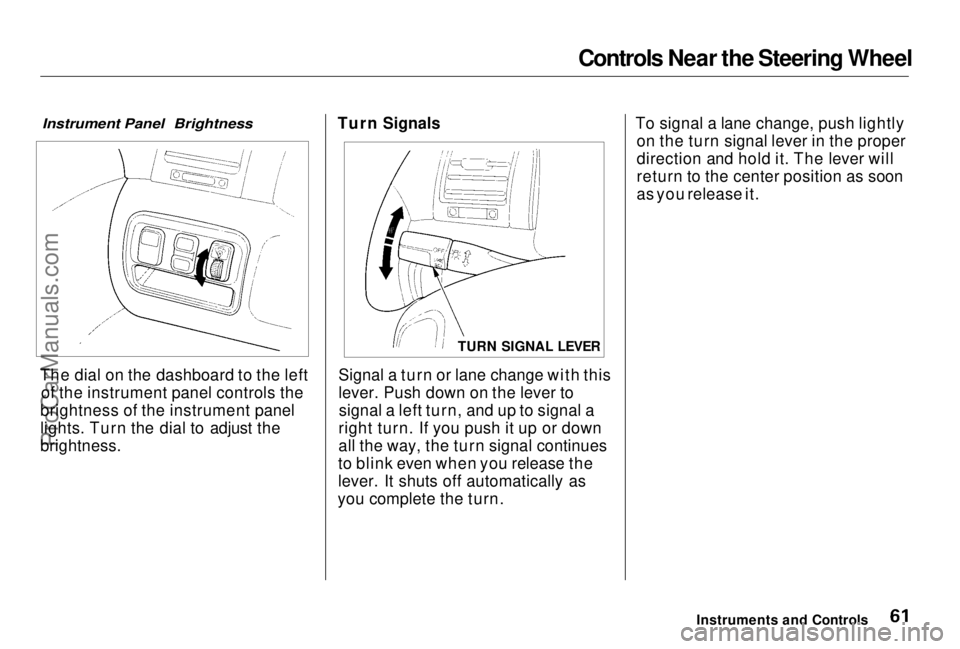
Instrument Panel Brightness
The dial on the dashboard to the left of the instrument panel controls the
brightness of the instrument panel
lights. Turn the dial to adjust the
brightness. Turn Signals
Signal a turn or lane change with this
lever. Push down on the lever tosignal a left turn, and up to signal a
right turn. If you push it up or down
all the way, the turn signal continues
to blink even when you release the
lever. It shuts off automatically as
you complete the turn. To signal a lane change, push lightly
on the turn signal lever in the proper
direction and hold it. The lever will
return to the center position as soon
as you release it.
Instruments and Controls
TURN SIGNAL LEVERProCarManuals.comMain Menu Table of Contents s t
Page 83 of 278
Moonroof
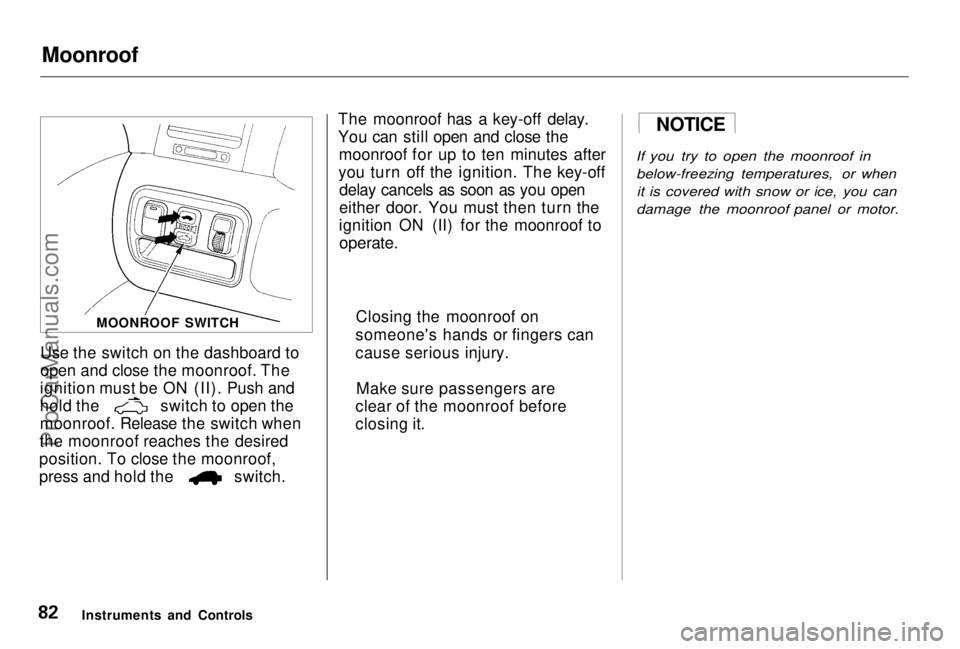
Use the switch on the dashboard to
open and close the moonroof. The
ignition must be ON (II). Push and hold the switch to open the
moonroof. Release the switch when
the moonroof reaches the desired
position. To close the moonroof, press and hold the switch. The moonroof has a key-off delay.
You can still open and close the
moonroof for up to ten minutes after
you turn off the ignition. The key-off delay cancels as soon as you open
either door. You must then turn the
ignition ON (II) for the moonroof to
operate.
If you try to open the moonroof in
below-freezing temperatures, or whenit is covered with snow or ice, you can
damage the moonroof panel or motor.
Instruments and Controls MOONROOF SWITCH
NOTICE
Closing the moonroof on
someone's hands or fingers can
cause serious injury.
Make sure passengers are
clear of the moonroof before
closing it.ProCarManuals.comMain Menu Table of Contents s t
Page 94 of 278
Heating and Cooling
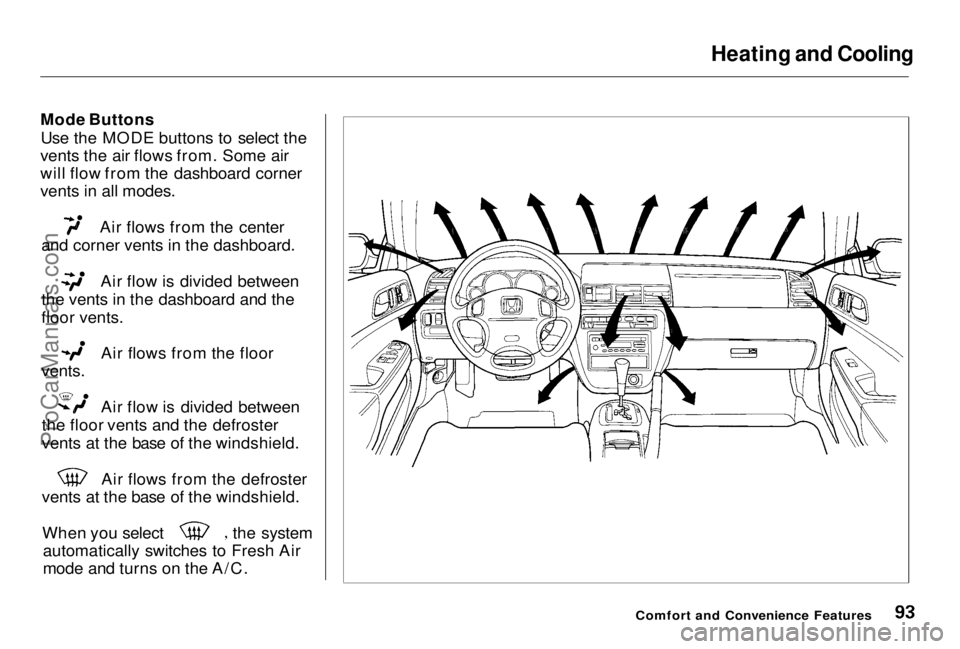
Mode Buttons Use the MODE buttons to select the
vents the air flows from. Some air
will flow from the dashboard corner
vents in all modes. Air flows from the center
and corner vents in the dashboard. Air flow is divided between
the vents in the dashboard and the
floor vents. Air flows from the floor
vents.
Air flow is divided between
the floor vents and the defroster
vents at the base of the windshield. Air flows from the defroster
vents at the base of the windshield. When you select the system
automatically switches to Fresh Air
mode and turns on the A/C.
Comfort and Convenience FeaturesProCarManuals.comMain Menu Table of Contents s t
Page 95 of 278
Heating and Cooling
Vent Controls
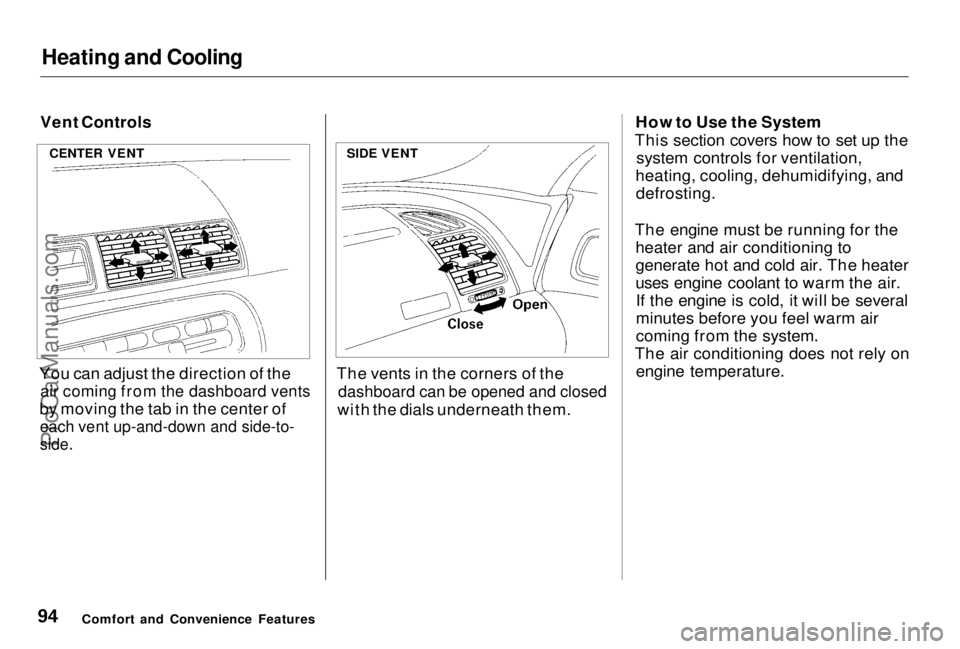
You can adjust the direction of the
air coming from the dashboard vents
by moving the tab in the center of
each vent up-and-down and side-to-
side.
The vents in the corners of the
dashboard can be opened and closed
with the dials underneath them. How to Use the System
This section covers how to set up the system controls for ventilation,
heating, cooling, dehumidifying, and defrosting.
The engine must be running for the heater and air conditioning to
generate hot and cold air. The heater
uses engine coolant to warm the air.If the engine is cold, it will be several
minutes before you feel warm air
coming from the system.
The air conditioning does not rely on engine temperature.
Comfort and Convenience Features
CENTER VENT
SIDE VENTProCarManuals.comMain Menu Table of Contents s t
Page 122 of 278
Service Station Procedures
Opening the Hood
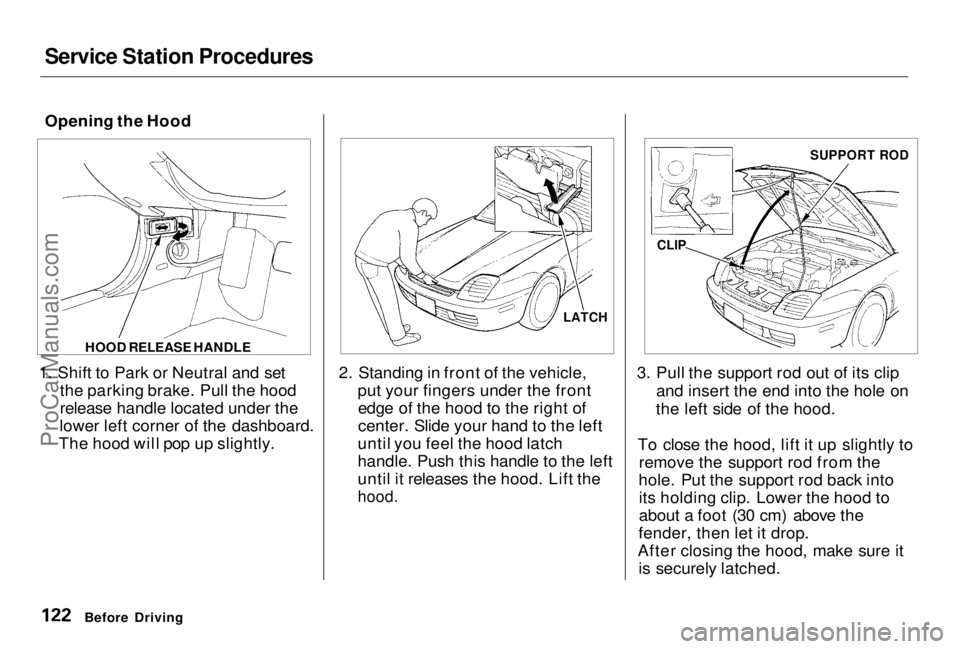
1. Shift to Park or Neutral and set the parking brake. Pull the hood
release handle located under the
lower left corner of the dashboard.
The hood will pop up slightly. 2. Standing in front of the vehicle,
put your fingers under the frontedge of the hood to the right of
center. Slide your hand to the left
until you feel the hood latch
handle. Push this handle to the left
until it releases the hood. Lift the
hood.
3. Pull the support rod out of its clip
and insert the end into the hole on
the left side of the hood.
To close the hood, lift it up slightly to remove the support rod from the
hole. Put the support rod back into its holding clip. Lower the hood to
about a foot (30 cm) above the
fender, then let it drop.
After closing the hood, make sure it is securely latched.
Before Driving HOOD RELEASE HANDLE
LATCHCLIP SUPPORT RODProCarManuals.comMain Menu Table of Contents s t
Page 127 of 278

Accessories and Modifications
Modifications Do not remove any original
equipment or modify your vehicle in
any way that would alter its design oroperation. This could make your
vehicle unsafe and illegal to drive.
For example, do not make any
modifications that would change the
ride height of your vehicle, or install
wheels and tires with a different overall diameter.
Such modifications can adversely
affect handling, and interfere with
the operation of the vehicle's anti-
lock brakes and other systems. In addition, any modifications that
decrease ground clearance increase
the chance of undercarriage parts striking a curb, speed bump, or other
raised object, which could cause
your airbags to deploy.
Do not modify your steering wheelor any other part of your
Supplemental Restraint System. Modifications could make the
system ineffective. Additional Safety Precaution
Do not attach or place objects on the
airbag covers. Any object attached toor placed on the covers marked "SRS,
in the center of the steering wheel and on top of the dashboard, could
interfere with the proper operation of the airbags. Or, if the airbags
inflate, the objects could be
propelled inside the vehicle and hurt
someone.
Before DrivingProCarManuals.comMain Menu Table of Contents s t
Page 242 of 278
Fuses
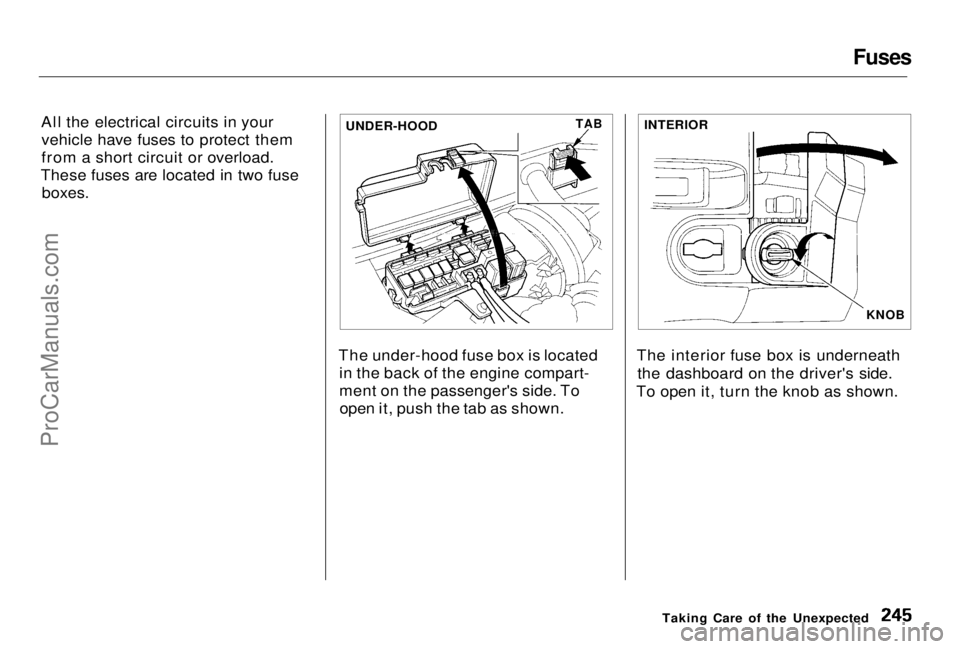
All the electrical circuits in your vehicle have fuses to protect them
from a short circuit or overload.
These fuses are located in two fuse boxes.
The under-hood fuse box is locatedin the back of the engine compart-
ment on the passenger's side. Toopen it, push the tab as shown. The interior fuse box is underneath
the dashboard on the driver's side.
To open it, turn the knob as shown.
Taking Care of the Unexpected
UNDER-HOOD
TAB
INTERIOR
KNOBProCarManuals.comMain Menu Table of Contents s t
Page 249 of 278
Identification Numbers
Your vehicle has several identifying numbers located in various places.
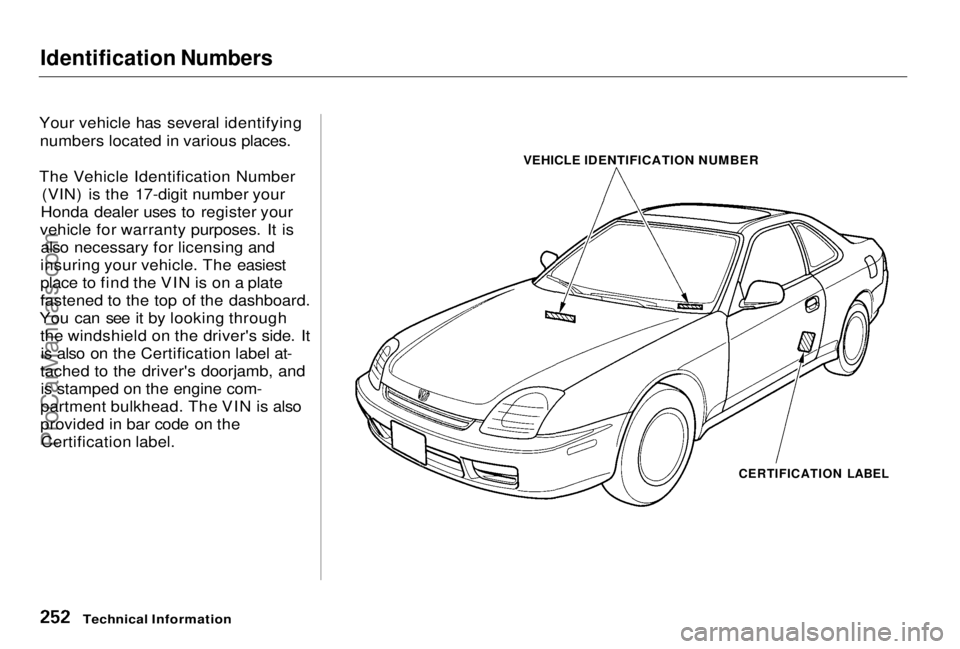
The Vehicle Identification Number (VIN) is the 17-digit number your
Honda dealer uses to register your
vehicle for warranty purposes. It is also necessary for licensing and
insuring your vehicle. The easiest
place to find the VIN is on a plate
fastened to the top of the dashboard.
You can see it by looking through the windshield on the driver's side. Itis also on the Certification label at-
tached to the driver's doorjamb, and is stamped on the engine com-
partment bulkhead. The VIN is also
provided in bar code on the Certification label.
Technical Information
VEHICLE IDENTIFICATION NUMBER
CERTIFICATION LABELProCarManuals.comMain Menu Table of Contents s t
Page 271 of 278
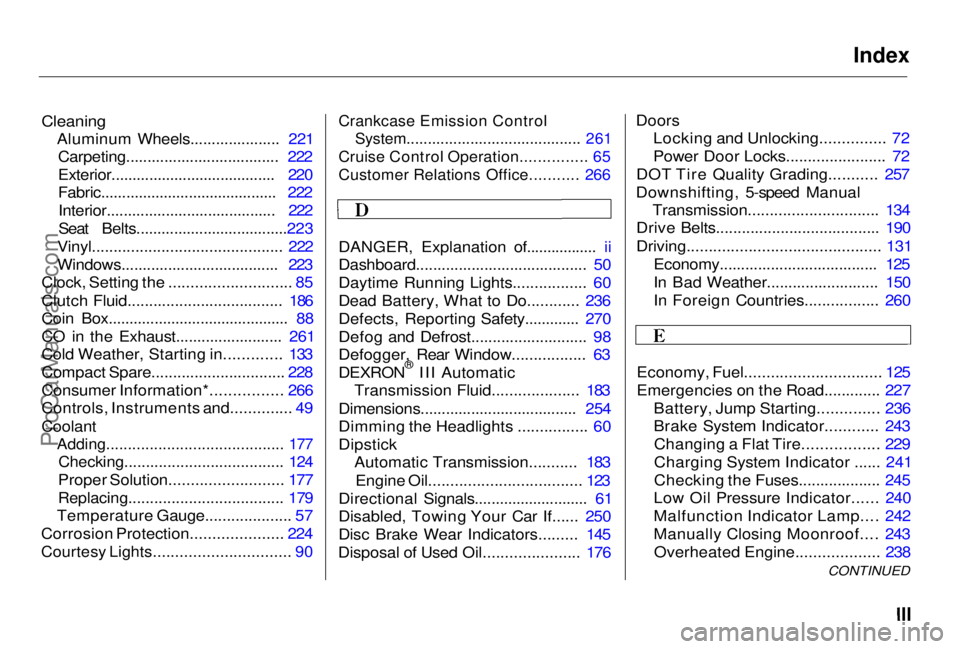
Index
Cleaning
Aluminum Wheels..................... 221Carpeting.................................... 222
Exterior....................................... 220
Fabric.......................................... 222
Interior........................................ 222
Seat Belts....................................223
Vinyl............................................ 222
Windows..................................... 223
Clock, Setting the ............................ 85
Clutch Fluid.................................... 186
Coin Box........................................... 88
CO in the Exhaust......................... 261
Cold Weather, Starting in............. 133
Compact Spare............................... 228
Consumer Information*................ 266
Controls, Instruments and.............. 49
Coolant
Adding......................................... 177
Checking..................................... 124
Proper Solution.......................... 177
Replacing.................................... 179
Temperature Gauge.................... 57
Corrosion Protection..................... 224
Courtesy Lights............................... 90
Crankcase Emission Control
System......................................... 261
Cruise Control Operation............... 65
Customer Relations Office........... 266
DANGER, Explanation of................. ii
Dashboard........................................ 50
Daytime Running Lights................. 60
Dead Battery, What to Do............ 236
Defects, Reporting Safety............. 270
Defog and Defrost........................... 98
Defogger, Rear Window................. 63
DEXRON ®
III Automatic
Transmission Fluid.................... 183
Dimensions..................................... 254
Dimming the Headlights ................ 60
Dipstick Automatic Transmission........... 183
Engine Oil................................... 123
Directional Signals........................... 61
Disabled, Towing Your Car If...... 250
Disc Brake Wear Indicators......... 145
Disposal of Used Oil...................... 176 Doors
Locking and Unlocking............... 72
Power Door Locks....................... 72
DOT Tire Quality Grading........... 257
Downshifting, 5-speed Manual Transmission.............................. 134
Drive Belts...................................... 190
Driving............................................ 131
Economy..................................... 125
In Bad Weather.......................... 150
In Foreign Countries................. 260
Economy, Fuel............................... 125
Emergencies on the Road............. 227 Battery, Jump Starting.............. 236
Brake System Indicator............ 243Changing a Flat Tire................. 229
Charging System Indicator ...... 241
Checking the Fuses................... 245
Low Oil Pressure Indicator...... 240
Malfunction Indicator Lamp.... 242
Manually Closing Moonroof.... 243
Overheated Engine................... 238 CONTINUEDProCarManuals.comMain Menu s t