check engine HONDA PRELUDE 1998 Owner's Manual
[x] Cancel search | Manufacturer: HONDA, Model Year: 1998, Model line: PRELUDE, Model: HONDA PRELUDE 1998Pages: 278, PDF Size: 2.61 MB
Page 224 of 278
Taking Care of the Unexpected
This section covers the more-
common problems that motorists
experience with their vehicles. It
gives you information about how to safely evaluate the problem and what
to do to correct it. If the problem has stranded you on the side of the road,
you may be able to get going again. If not, you will also find instructions
on getting your vehicle towed.
Compact Spare Tire....................... 228
Changing a Flat Tire ..................... 229
If Your Engine Won't Start........... 234
Nothing Happens or theStarter Motor OperatesVery Slowly.............................235
The Starter Operates Normally................................. 236
Jump Starting................................. 236 If Your Engine Overheats............. 238
Low Oil Pressure Indicator.......... 240Charging System Indicator........... 241
Malfunction Indicator Lamp ........ 242
Brake System Indicator................ 243
Closing the Moonroof................... 244
Fuses............................................... 245
Checking and Replacing........... 246
Towing............................................ 250
Taking Care of the UnexpectedProCarManuals.comMain Menu s t
Page 232 of 278
If Your Engine Won't Start
Nothing Happens or the Starter
Motor Operates Very Slowly
When you turn the ignition switch to START (III), you do not hear the
normal noise of the engine trying tostart. You may hear a clicking sound
or series of clicks, or nothing at all. Check these things: Your vehicle has the Immobilizer
System. You should use a
properly-coded master or valet key
to start the engine (see page 69).
A key that is not properly coded will cause the immobilizer systemindicator in the dash panel to blinkrapidly. Check the transmission interlock.
If you have a manual transmission,
the clutch pedal must be pushed all the way to the floor or the
starter will not operate. With an
automatic transmission, it must be
in Park or Neutral. Turn the ignition switch to ON (II).
Turn on the headlights and check
their brightness. If the headlightsare very dim or don't light at all,
the battery is discharged. See
Jump Starting on page 236.
Turn the ignition switch to START
(III). If the headlights do not dim,
check the condition of the fuses. If
the fuses are OK, there is proba-
bly something wrong with the electrical circuit for the ignitionswitch or starter motor. You will
need a qualified technician to
determine the problem. (See
Towing on page 250.) If the headlights dim noticeably or
go out when you try to start the
engine, either the battery is dis-
charged or the connections are
corroded. Check the condition of
the battery and terminal connec- tions (see page 190). You can
then try jump starting the vehicle
from a booster battery (see page
236).
Taking Care of the UnexpectedProCarManuals.comMain Menu Table of Contents s t
Page 233 of 278
If Your Engine Won't Start, Jump Starting
The Starter Operates Normally In this case, the starter motor'sspeed sounds normal, or even faster
than normal, when you turn the
ignition switch to START (III), but
the engine does not run. Are you using the proper starting
procedure? Refer to Starting the
Engine on page 133.
Do you have fuel? Turn the
ignition switch to ON (II) for a
minute and watch the fuel gauge.
The low fuel level warning light
may not be working, so you were
not reminded to fill the tank.
There may be an electrical
problem, such as no power to the
fuel pump. Check all the fuses
(see page 245).
If you find nothing wrong, you will
need a qualified technician to find
the problem. See Towing on page
250. Jump Starting
If your vehicle's battery has rundown, you may be able to start the
engine by using a booster battery.
Although this seems like a simple procedure, you should take several
precautions.
You cannot start a Honda with an automatic transmission by pushing
or pulling it. To jump start your vehicle, follow
these directions closely:
1. Open the hood and check the physical condition of the battery(see page 190). In very cold
weather, check the condition of
the electrolyte. If it seems slushy or like ice, do not try jump starting
until it thaws.
If a battery sits in extreme cold, the
electrolyte inside can freeze.
Attempting to jump start with a frozen
battery can cause it to rupture.
2. Turn off all the electrical acces- sories: heater, A/C, stereo system,
lights, etc.
Put the transmission in Neutral or
Park and set the parking brake.
Taking Care of the Unexpected
NOTICE
A battery can explode if you do
not follow the correct procedure,
seriously injuring anyone nearby.
Keep all sparks, open flames,
and smoking materials away
from the battery.ProCarManuals.comMain Menu Table of Contents s t
Page 234 of 278
Jump Starting
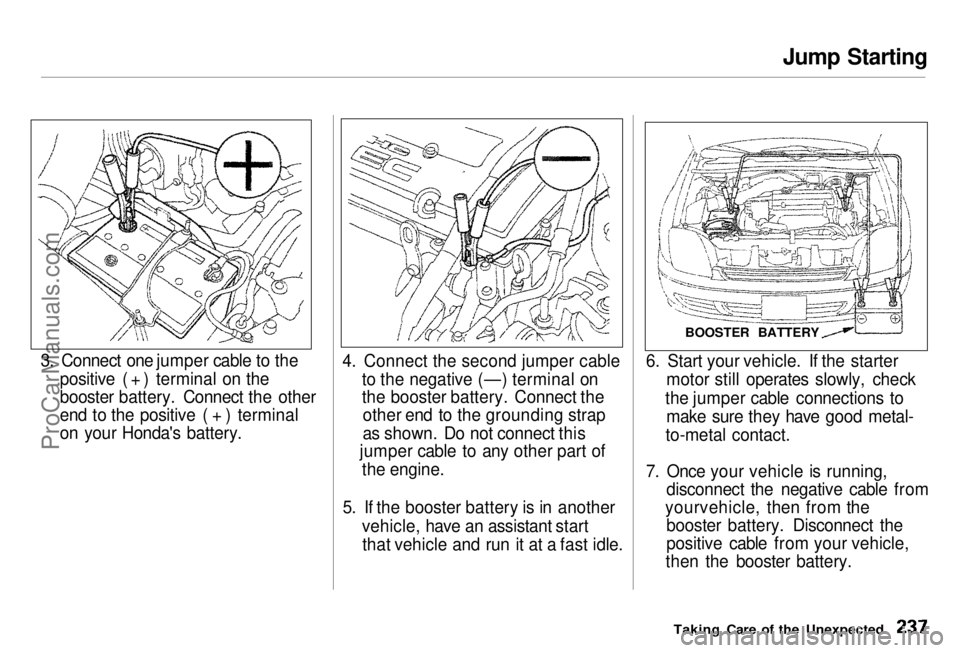
3. Connect one jumper cable to the positive ( + ) terminal on the
booster battery. Connect the other
end to the positive ( + ) terminal
on your Honda's battery. 4. Connect the second jumper cable
to the negative (—) terminal on
the booster battery. Connect theother end to the grounding strap
as shown. Do not connect this
jumper cable to any other part of
the engine.
5. If the booster battery is in another vehicle, have an assistant startthat vehicle and run it at a fast idle.
BOOSTER BATTERY
6. Start your vehicle. If the starter motor still operates slowly, check
the jumper cable connections to make sure they have good metal-
to-metal contact.
7. Once your vehicle is running, disconnect the negative cable from
yourvehicle, then from the booster battery. Disconnect the
positive cable from your vehicle,
then the booster battery.
Taking Care of the UnexpectedProCarManuals.comMain Menu Table of Contents s t
Page 236 of 278
If Your Engine Overheats
6. Look for any obvious coolant leaks, such as a split radiator hose.
Everything is still extremely hot, so use caution. If you find a leak, it
must be repaired before you continue driving (see Towing on
page 250).
7. If you don't find an obvious leak, check the coolant level in the
radiator reserve tank (see page 124). If the level is below the
MIN mark, add coolant to halfway
between the MIN and MAX marks.
8. If there was no coolant in the reserve tank, you may also have to
add coolant to the radiator. Let the
engine cool down until the pointer
reaches the middle of the tempera-
ture gauge, or lower, before check-
ing the radiator. 9. Using gloves or a large heavy
cloth, turn the radiator cap
counterclockwise, without pushingdown, to the first stop. This
releases any remaining pressure in
the cooling system. After the pressure releases, push down on
the cap and turn it until it comesoff. 10. Start the engine and set the
temperature control lever to
maximum. Add coolant to the
radiator up to the base of the filler
neck. If you do not have the
proper coolant mixture available,
you can add plain water.
Remember to have the cooling
system drained and refilled with
the proper mixture as soon as you
can.
11. Put the radiator cap back on tightly. Run the engine and watch
the temperature gauge. If it goes
back to the red mark, the engine
needs repair. (See Towing on
page 250.)
12. If the temperature stays normal, check the coolant level in the
radiator reserve tank. If it has
gone down, add coolant to the
MAX mark. Put the cap back on
tightly.
Taking Care of the Unexpected
Removing the radiator cap
while the engine is hot can
cause the coolant to spray out,
seriously scalding you.
Always let the engine and radiator cool down before
removing the radiator cap.ProCarManuals.comMain Menu Table of Contents s t
Page 237 of 278
Low Oil Pressure Indicator
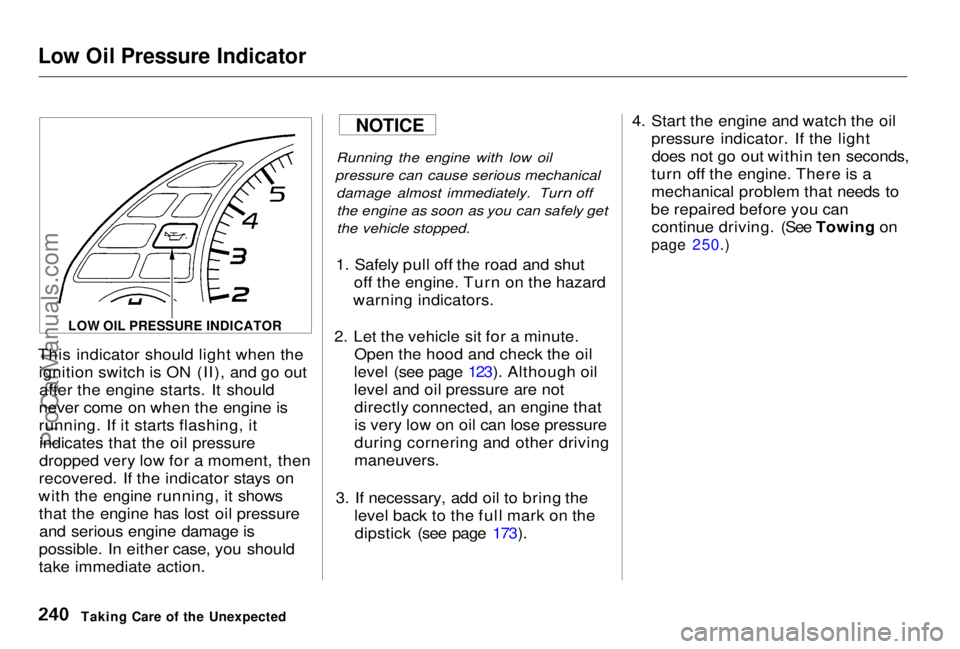
This indicator should light when the
ignition switch is ON (II), and go outafter the engine starts. It should
never come on when the engine is
running. If it starts flashing, it indicates that the oil pressure
dropped very low for a moment, then
recovered. If the indicator stays on
with the engine running, it shows that the engine has lost oil pressureand serious engine damage is
possible. In either case, you should
take immediate action.
Running the engine with low oil
pressure can cause serious mechanical damage almost immediately. Turn off
the engine as soon as you can safely get
the vehicle stopped.
1. Safely pull off the road and shut off the engine. Turn on the hazard
warning indicators.
2. Let the vehicle sit for a minute. Open the hood and check the oil
level (see page 123). Although oil
level and oil pressure are not directly connected, an engine that
is very low on oil can lose pressure
during cornering and other driving
maneuvers.
3. If necessary, add oil to bring the level back to the full mark on thedipstick (see page 173). 4. Start the engine and watch the oil
pressure indicator. If the lightdoes not go out within ten seconds,
turn off the engine. There is a
mechanical problem that needs to
be repaired before you can continue driving. (See Towing on
page 250.)
Taking Care of the Unexpected
NOTICE
LOW OIL PRESSURE INDICATOR
ProCarManuals.comMain Menu Table of Contents s t
Page 239 of 278
Malfunction Indicator Lamp
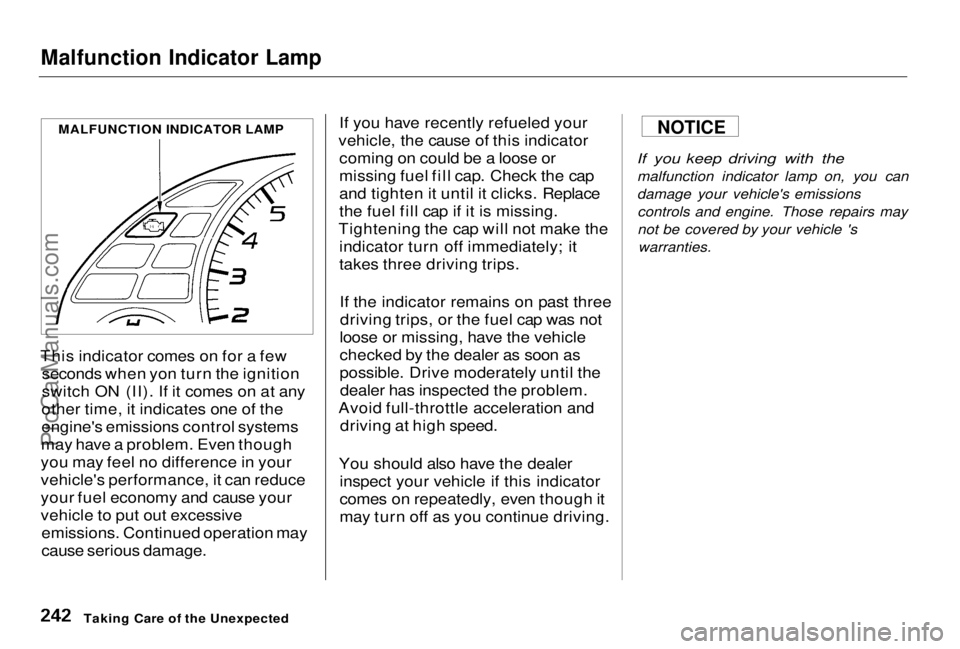
This indicator comes on for a few seconds when yon turn the ignition
switch ON (II). If it comes on at any
other time, it indicates one of the
engine's emissions control systems
may have a problem. Even though
you may feel no difference in your
vehicle's performance, it can reduce
your fuel economy and cause your
vehicle to put out excessive emissions. Continued operation may
cause serious damage. If you have recently refueled your
vehicle, the cause of this indicator coming on could be a loose or
missing fuel fill cap. Check the cap
and tighten it until it clicks. Replace
the fuel fill cap if it is missing.
Tightening the cap will not make the indicator turn off immediately; it
takes three driving trips.
If the indicator remains on past threedriving trips, or the fuel cap was not
loose or missing, have the vehicle
checked by the dealer as soon as
possible. Drive moderately until the dealer has inspected the problem.
Avoid full-throttle acceleration and driving at high speed.
You should also have the dealer inspect your vehicle if this indicator
comes on repeatedly, even though it
may turn off as you continue driving.If you keep driving with the
malfunction indicator lamp on, you can
damage your vehicle's emissionscontrols and engine. Those repairs may
not be covered by your vehicle 's warranties.
Taking Care of the Unexpected
MALFUNCTION INDICATOR LAMP
NOTICE
ProCarManuals.comMain Menu Table of Contents s t
Page 240 of 278
Brake System Indicator
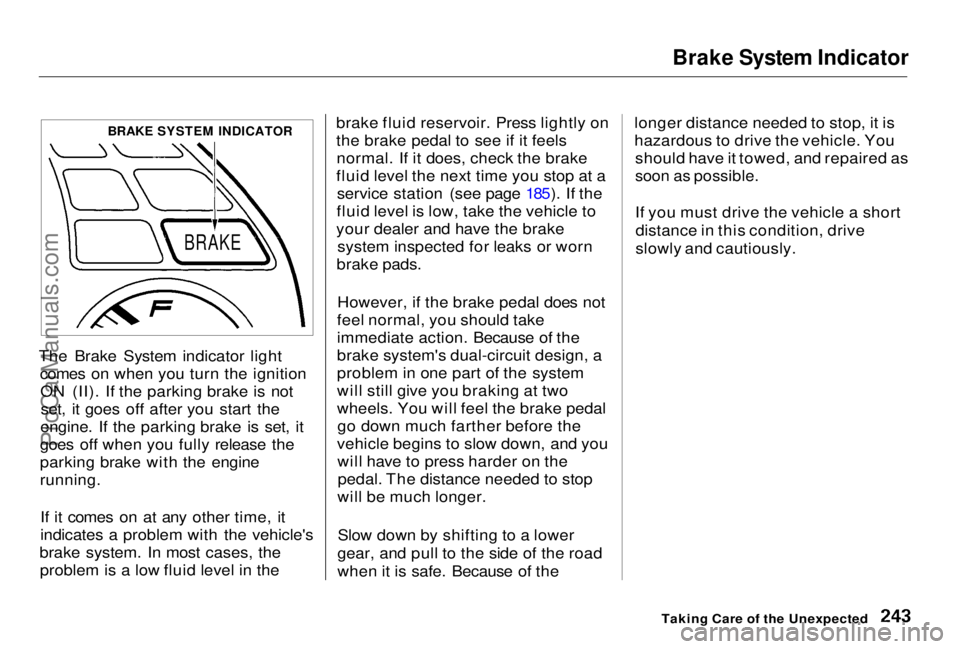
The Brake System indicator light comes on when you turn the ignitionON (II). If the parking brake is notset, it goes off after you start the
engine. If the parking brake is set, it
goes off when you fully release the
parking brake with the engine
running.
If it comes on at any other time, it
indicates a problem with the vehicle's
brake system. In most cases, the problem is a low fluid level in the brake fluid reservoir. Press lightly on
the brake pedal to see if it feels
normal. If it does, check the brake
fluid level the next time you stop at a service station (see page 185). If the
fluid level is low, take the vehicle to
your dealer and have the brake system inspected for leaks or worn
brake pads.
However, if the brake pedal does not
feel normal, you should take
immediate action. Because of the
brake system's dual-circuit design, a
problem in one part of the system
will still give you braking at two
wheels. You will feel the brake pedal go down much farther before the
vehicle begins to slow down, and you will have to press harder on thepedal. The distance needed to stop
will be much longer.
Slow down by shifting to a lower
gear, and pull to the side of the road
when it is safe. Because of the longer distance needed to stop, it is
hazardous to drive the vehicle. You
should have it towed, and repaired as
soon as possible.
If you must drive the vehicle a short
distance in this condition, drive
slowly and cautiously.
Taking Care of the Unexpected
BRAKE SYSTEM INDICATOR
BRAKEProCarManuals.comMain Menu Table of Contents s t
Page 269 of 278
Index
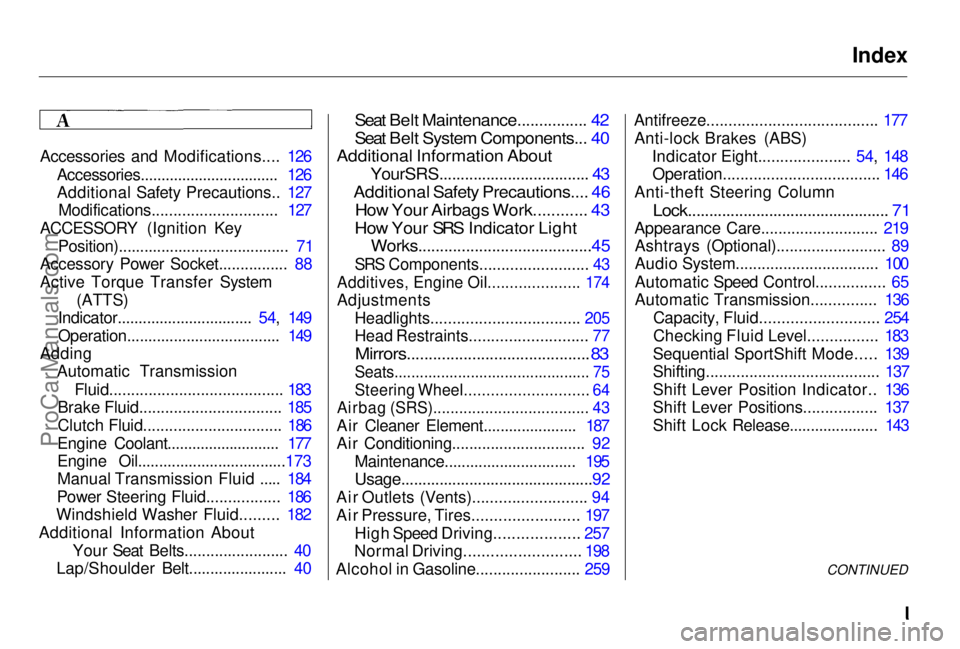
Accessories and Modifications.... 126 Accessories................................. 126
Additional Safety Precautions.. 127Modifications............................. 127
ACCESSORY (Ignition Key Position)........................................ 71
Accessory Power Socket................ 88
Active Torque Transfer System
(ATTS)
Indicator................................ 54, 149
Operation.................................... 149
Adding Automatic Transmission
Fluid........................................ 183
Brake Fluid................................. 185
Clutch Fluid................................ 186
Engine Coolant........................... 177
Engine Oil...................................173
Manual Transmission Fluid ..... 184
Power Steering Fluid................. 186
Windshield Washer Fluid......... 182
Additional Information About Your Seat Belts........................ 40
Lap/Shoulder Belt....................... 40
Seat Belt Maintenance................ 42
Seat Belt System Components... 40
Additional Information About
YourSRS................................... 43
Additional Safety Precautions.... 46
How Your Airbags Work............ 43
How Your SRS Indicator Light
Works........................................45
SRS Components......................... 43
Additives, Engine Oil..................... 174
Adjustments
Headlights.................................. 205
Head Restraints........................... 77
Mirrors..........................................
83
Seats.............................................. 7 5
Steerin
g Wheel............................ 64
Airbag (SRS).................................... 43
Air Cleaner Element...................... 187
Air Conditioning............................... 92 Maintenance............................... 195
Usage.............................................92
Air Outlets (Vents).......................... 94
Air Pressure, Tires........................ 197 High Speed Driving................... 257
Normal Driving.......................... 198
Alcohol in Gasoline........................ 259 Antifreeze....................................... 177
Anti-lock Brakes (ABS) Indicator Eight..................... 54, 148Operation.................................... 146
Anti-theft Steering Column
Lock............................................... 71
Appearance Care........................... 219 Ashtrays (Optional)......................... 89
Audio System................................. 100
Automatic Speed Control................ 65
Automatic Transmission............... 136
Capacity, Fluid........................... 254
Checking Fluid Level................ 183
Sequential SportShift Mode..... 139
Shifting........................................ 137
Shift Lever Position Indicator.. 136
Shift Lever Positions................. 137
Shift Lock Release..................... 143
CONTINUEDProCarManuals.comMain Menu s t
Page 270 of 278
Index
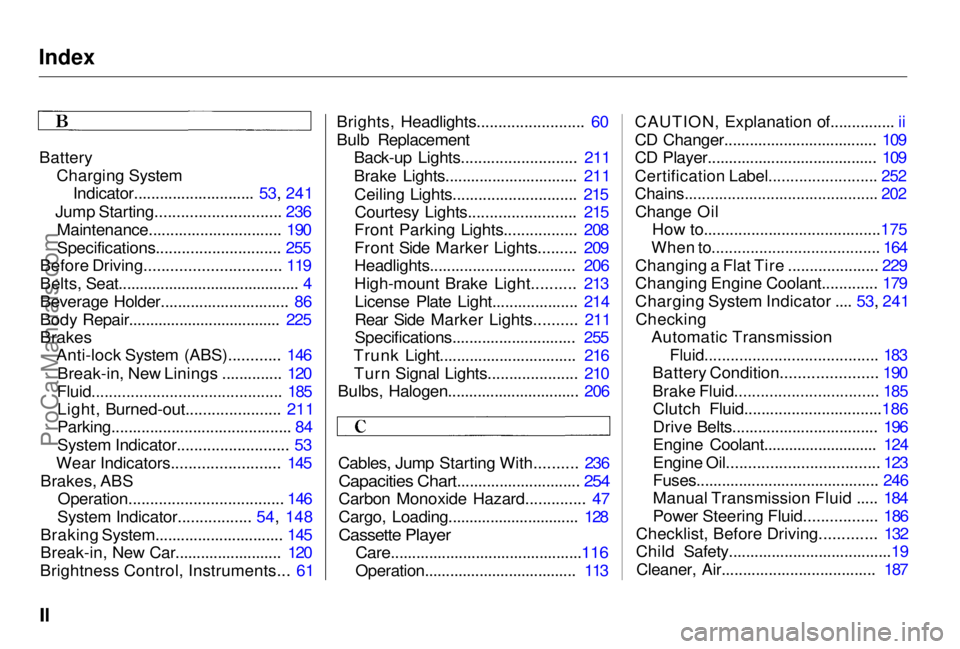
Battery Charging SystemIndicator............................ 53, 241
Jump Starting............................. 236 Maintenance............................... 190
Specifications............................. 255
Before Driving............................... 119
Belts, Seat........................................... 4
Beverage Holder.............................. 86
Body Repair.................................... 225
Brakes
Anti-lock System (ABS)............ 146
Break-in, New Linings .............. 120
Fluid............................................ 185
Light, Burned-out...................... 211
Parking.......................................... 84
System Indicator.......................... 53
Wear Indicators......................... 145
Brakes, ABS Operation.................................... 146
System Indicator................. 54, 148
Braking System.............................. 145
Break-in, New Car......................... 120
Brightness Control, Instruments... 61 Brights, Headlights......................... 60
Bulb Replacement
Back-up Lights........................... 211
Brake Lights............................... 211
Ceiling Lights............................. 215Courtesy Lights......................... 215
Front Parking Lights................. 208
Front Side Marker Lights......... 209
Headlights.................................. 206
High-mount Brake Light.......... 213
License Plate Light.................... 214
Rear Side Marker Lights.......... 211
Specifications............................. 255
Trunk Light................................ 216 Turn Signal Lights..................... 210
Bulbs, Halogen............................... 206
Cables, Jump Starting With.......... 236
Capacities Chart............................. 254
Carbon Monoxide Hazard.............. 47
Cargo, Loading...............................
128
Cassette Playe r
Care.............................................
116
Operation....................................
113
CAUTION, Explanatio n
of...............
ii
CD Changer...................................
.
109
CD Player........................................ 109
Certification Label......................... 252
Chains............................................. 202
Change Oil How to.........................................175
When to....................................... 164
Changing a Flat Tire ..................... 229
Changing Engine Coolant............. 179
Charging System Indicator .... 53, 241 Checking Automatic Transmission
Fluid........................................ 183
Battery Condition...................... 190
Brake Fluid................................. 185
Clutch Fluid................................186
Drive Belts.................................. 196
Engine Coolant........................... 124
Engine Oil................................... 123
Fuses........................................... 246
Manual Transmission Fluid ..... 184
Power Steering Fluid................. 186
Checklist, Before Driving............. 132
Child Safety......................................19
Cleaner, Air.................................... 187ProCarManuals.comMain Menu s t