ad blue HONDA PRELUDE 1998 Owners Manual
[x] Cancel search | Manufacturer: HONDA, Model Year: 1998, Model line: PRELUDE, Model: HONDA PRELUDE 1998Pages: 278, PDF Size: 2.61 MB
Page 61 of 278

Controls Near the Steering Wheel
Headlights
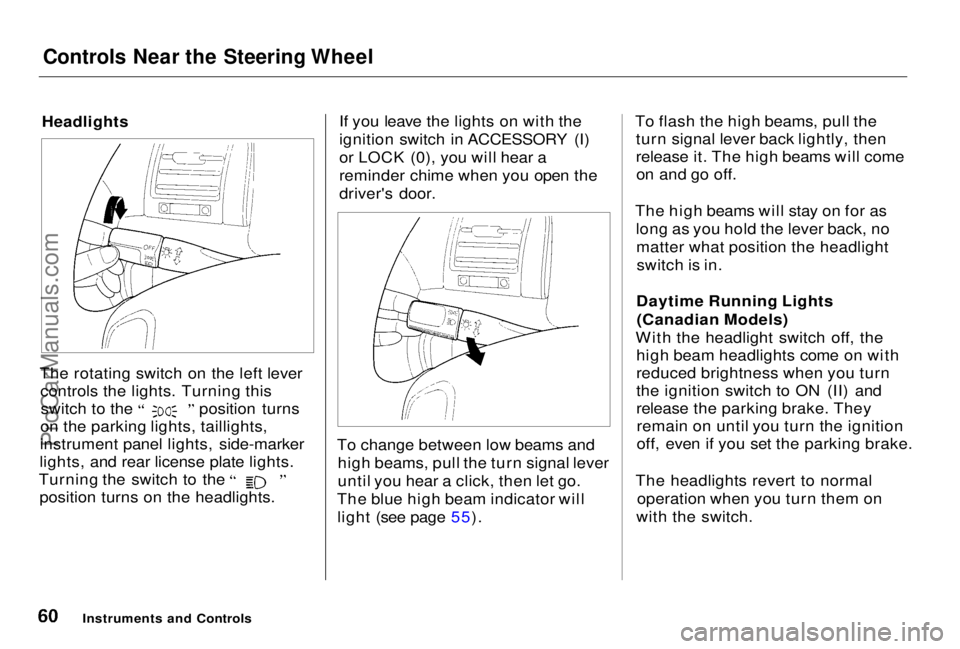
The rotating switch on the left lever controls the lights. Turning this switch to the position turns
on the parking lights, taillights,
instrument panel lights, side-marker
lights, and rear license plate lights. Turning the switch to the
position turns on the headlights. If you leave the lights on with the
ignition switch in ACCESSORY (I)
or LOCK (0), you will hear a
reminder chime when you open the
driver's door.
To change between low beams and high beams, pull the turn signal lever
until you hear a click, then let go.
The blue high beam indicator will light (see page 55). To flash the high beams, pull the
turn signal lever back lightly, then
release it. The high beams will comeon and go off.
The high beams will stay on for as long as you hold the lever back, nomatter what position the headlightswitch is in.
Daytime Running Lights (Canadian Models)
With the headlight switch off, the high beam headlights come on with
reduced brightness when you turn
the ignition switch to ON (II) and
release the parking brake. Theyremain on until you turn the ignition
off, even if you set the parking brake.
The headlights revert to normal operation when you turn them on
with the switch.
Instruments and ControlsProCarManuals.comMain Menu Table of Contents s t
Page 155 of 278

Towing a Trailer
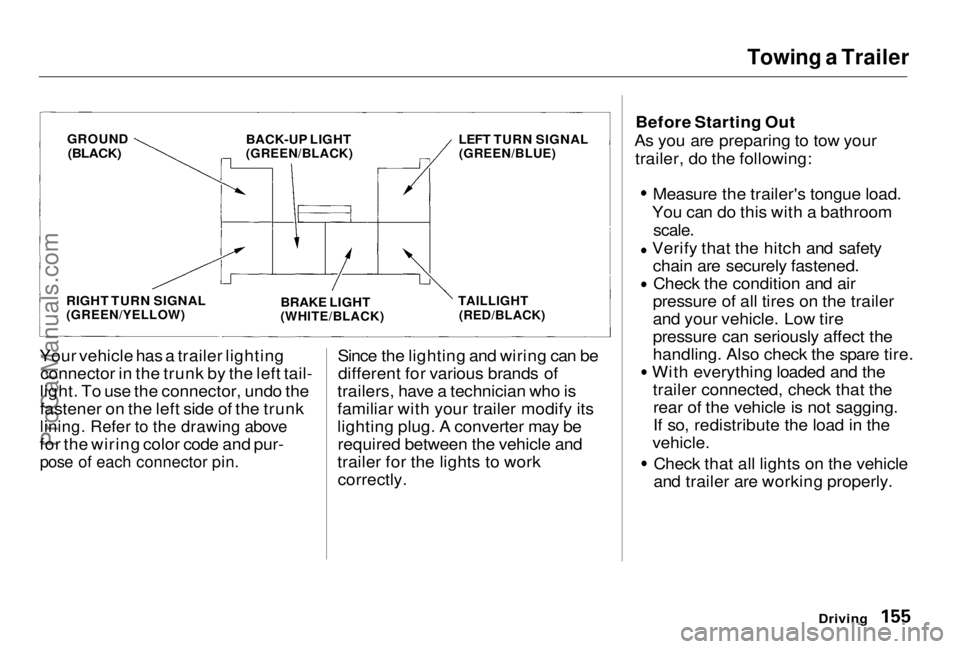
Your vehicle has a trailer lighting connector in the trunk by the left tail-
light. To use the connector, undo the
fastener on the left side of the trunk
lining. Refer to the drawing above
for the wiring color code and pur-
pose of each connector pin.
Since the lighting and wiring can be
different for various brands of
trailers, have a technician who is
familiar with your trailer modify its
lighting plug. A converter may be required between the vehicle and
trailer for the lights to work correctly. Before Starting Out
As you are preparing to tow your trailer, do the following: Measure the trailer's tongue load.
You can do this with a bathroom
scale.
Verify that the hitch and safety
chain are securely fastened. Check the condition and air
pressure of all tires on the trailer
and your vehicle. Low tire
pressure can seriously affect the
handling. Also check the spare tire. With everything loaded and the
trailer connected, check that therear of the vehicle is not sagging.
If so, redistribute the load in the
vehicle. Check that all lights on the vehicle
and trailer are working properly.
Driving
GROUND
(BLACK)
BACK-UP LIGHT
(GREEN/BLACK)
RIGHT TURN SIGNAL
(GREEN/YELLOW)
LEFT TURN SIGNAL
(GREEN/BLUE)
BRAKE LIGHT
(WHITE/BLACK) TAILLIGHT
(RED/BLACK)ProCarManuals.comMain Menu Table of Contents s t
Page 171 of 278

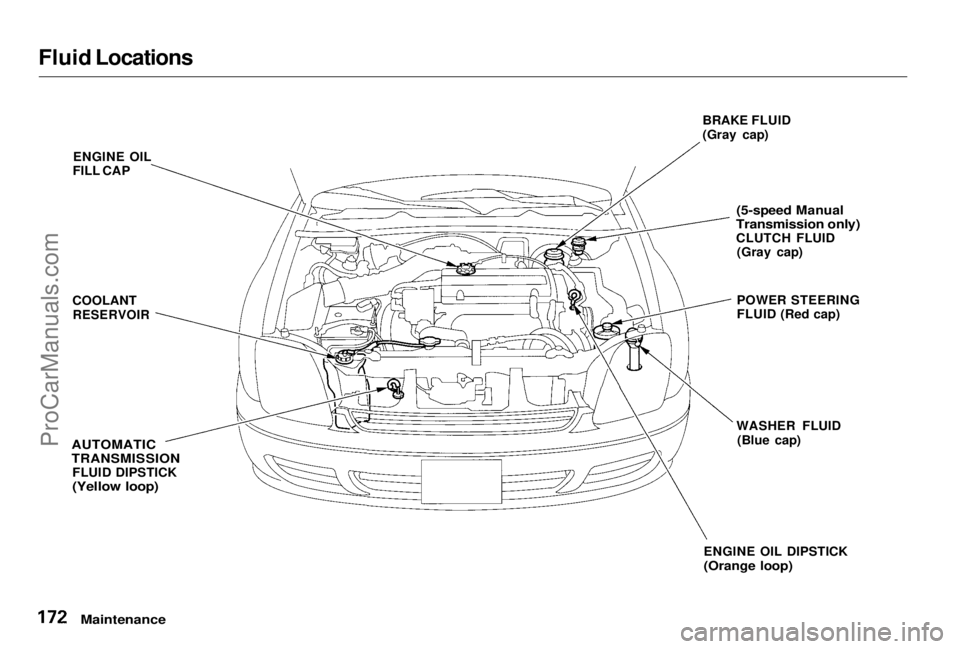
Fluid Locations
ENGINE OIL
FILL CAP
COOLANT
RESERVOIR
AUTOMATIC
TRANSMISSION
FLUID DIPSTICK
(Yellow loop)
BRAKE FLUID
(Gray cap)
(5-speed Manual
Transmission only)
CLUTCH FLUID (Gray cap)
POWER STEERING
FLUID (Red cap)
WASHER FLUID (Blue cap)
ENGINE OIL DIPSTICK
(Orange loop)
MaintenanceProCarManuals.comMain Menu Table of Contents s t