change wheel HONDA PRELUDE 1998 Owners Manual
[x] Cancel search | Manufacturer: HONDA, Model Year: 1998, Model line: PRELUDE, Model: HONDA PRELUDE 1998Pages: 278, PDF Size: 2.61 MB
Page 61 of 278
Controls Near the Steering Wheel
Headlights
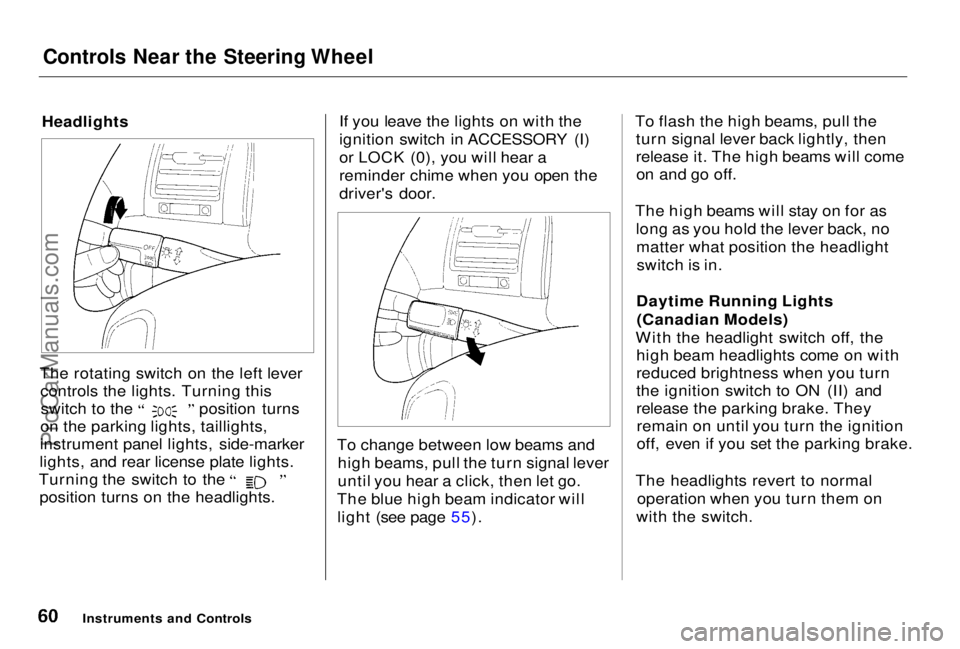
The rotating switch on the left lever controls the lights. Turning this switch to the position turns
on the parking lights, taillights,
instrument panel lights, side-marker
lights, and rear license plate lights. Turning the switch to the
position turns on the headlights. If you leave the lights on with the
ignition switch in ACCESSORY (I)
or LOCK (0), you will hear a
reminder chime when you open the
driver's door.
To change between low beams and high beams, pull the turn signal lever
until you hear a click, then let go.
The blue high beam indicator will light (see page 55). To flash the high beams, pull the
turn signal lever back lightly, then
release it. The high beams will comeon and go off.
The high beams will stay on for as long as you hold the lever back, nomatter what position the headlightswitch is in.
Daytime Running Lights (Canadian Models)
With the headlight switch off, the high beam headlights come on with
reduced brightness when you turn
the ignition switch to ON (II) and
release the parking brake. Theyremain on until you turn the ignition
off, even if you set the parking brake.
The headlights revert to normal operation when you turn them on
with the switch.
Instruments and ControlsProCarManuals.comMain Menu Table of Contents s t
Page 62 of 278
Controls Near the Steering Wheel
Instrument Panel Brightness
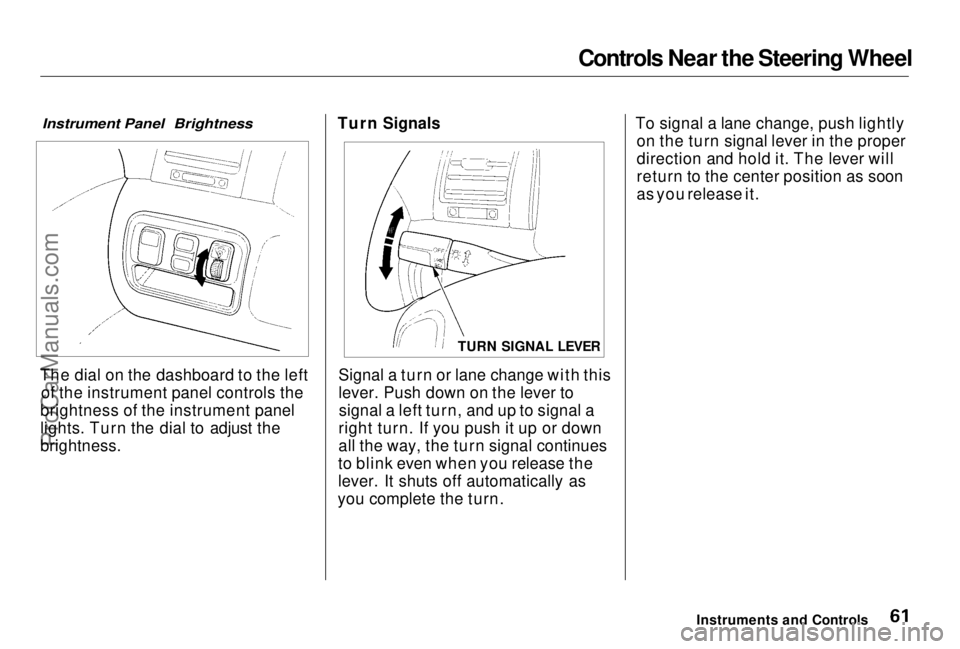
The dial on the dashboard to the left of the instrument panel controls the
brightness of the instrument panel
lights. Turn the dial to adjust the
brightness. Turn Signals
Signal a turn or lane change with this
lever. Push down on the lever tosignal a left turn, and up to signal a
right turn. If you push it up or down
all the way, the turn signal continues
to blink even when you release the
lever. It shuts off automatically as
you complete the turn. To signal a lane change, push lightly
on the turn signal lever in the proper
direction and hold it. The lever will
return to the center position as soon
as you release it.
Instruments and Controls
TURN SIGNAL LEVERProCarManuals.comMain Menu Table of Contents s t
Page 127 of 278

Accessories and Modifications
Modifications Do not remove any original
equipment or modify your vehicle in
any way that would alter its design oroperation. This could make your
vehicle unsafe and illegal to drive.
For example, do not make any
modifications that would change the
ride height of your vehicle, or install
wheels and tires with a different overall diameter.
Such modifications can adversely
affect handling, and interfere with
the operation of the vehicle's anti-
lock brakes and other systems. In addition, any modifications that
decrease ground clearance increase
the chance of undercarriage parts striking a curb, speed bump, or other
raised object, which could cause
your airbags to deploy.
Do not modify your steering wheelor any other part of your
Supplemental Restraint System. Modifications could make the
system ineffective. Additional Safety Precaution
Do not attach or place objects on the
airbag covers. Any object attached toor placed on the covers marked "SRS,
in the center of the steering wheel and on top of the dashboard, could
interfere with the proper operation of the airbags. Or, if the airbags
inflate, the objects could be
propelled inside the vehicle and hurt
someone.
Before DrivingProCarManuals.comMain Menu Table of Contents s t
Page 147 of 278

The Braking System
Important Safety Reminders
ABS does not reduce the time or distance it takes to stop the
vehicle, it only helps with steering control during braking. You should
always maintain a safe followingdistance from other vehicles. ABS will not prevent a skid that
results from changing direction
abruptly, such as trying to take a corner too fast or making a sudden
lane change. Always drive at a safe,
prudent speed for the road and
weather conditions.
ABS cannot prevent a loss of stability. Always steer moderately
when you are braking hard. Severe or sharp steering wheel movement
can still cause your vehicle to veer
into oncoming traffic or off the road. A vehicle with ABS may require a
longer distance to stop on loose or
uneven surfaces, such as gravel orsnow, than a vehicle without anti-
lock. Slow down and allow a greater distance between vehicles under
those conditions.
Driving
CONTINUEDProCarManuals.comMain Menu Table of Contents s t
Page 150 of 278
Driving in Bad Weather
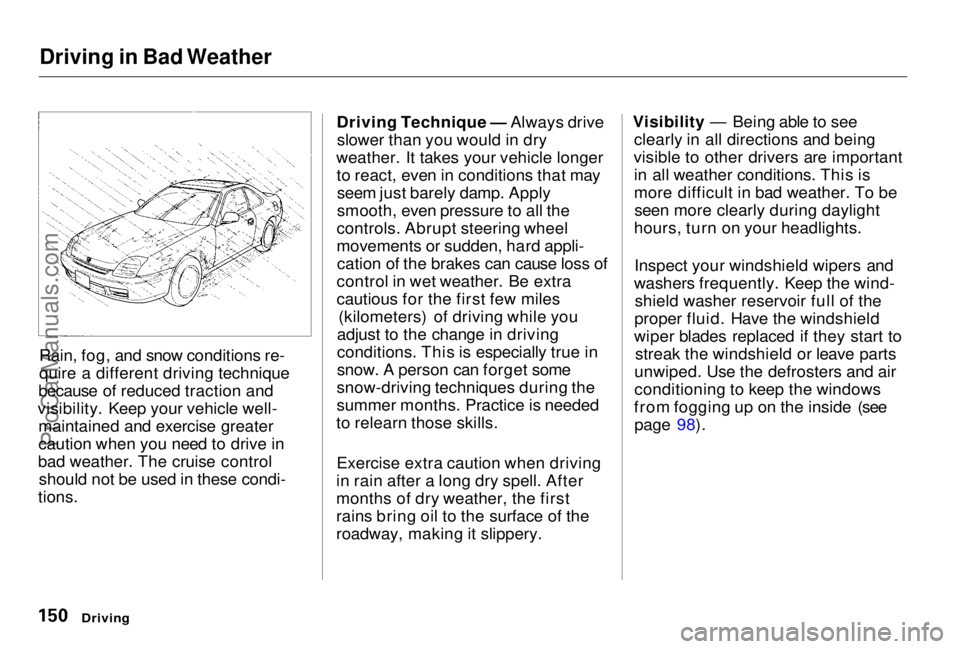
Rain, fog, and snow conditions re-
quire a different driving technique
because of reduced traction and
visibility. Keep your vehicle well- maintained and exercise greater
caution when you need to drive in
bad weather. The cruise control should not be used in these condi-
tions. Driving Technique — Always drive
slower than you would in dry
weather. It takes your vehicle longer to react, even in conditions that mayseem just barely damp. Apply
smooth, even pressure to all the
controls. Abrupt steering wheel
movements or sudden, hard appli- cation of the brakes can cause loss of
control in wet weather. Be extra
cautious for the first few miles (kilometers) of driving while you
adjust to the change in driving
conditions. This is especially true in
snow. A person can forget some
snow-driving techniques during the
summer months. Practice is needed
to relearn those skills.
Exercise extra caution when driving
in rain after a long dry spell. After
months of dry weather, the first
rains bring oil to the surface of the
roadway, making it slippery. Visibility — Being able to see
clearly in all directions and being
visible to other drivers are important in all weather conditions. This is
more difficult in bad weather. To beseen more clearly during daylight
hours, turn on your headlights.
Inspect your windshield wipers and
washers frequently. Keep the wind- shield washer reservoir full of the
proper fluid. Have the windshield
wiper blades replaced if they start to streak the windshield or leave parts
unwiped. Use the defrosters and air
conditioning to keep the windows
from fogging up on the inside (see page 98).
DrivingProCarManuals.comMain Menu Table of Contents s t
Page 151 of 278
Driving in Bad Weather
Traction — Check your tires frequently for wear and proper
pressure. Both are important in
preventing "hydroplaning" (loss of
traction on a wet surface). In the
winter, mount snow tires on all four
wheels for the best handling.
Watch road conditions carefully,they can change from moment tomoment. Wet leaves can be as slip-
pery as ice. "Clear" roads can have
patches of ice. Driving conditions can be very hazardous when the
outside temperature is near freezing.
The road surface can become covered with areas of water puddles
mixed with areas of ice, so your
traction can change without warning.
Be careful when downshifting. If
traction is low, you can lock up the drive wheels for a moment and cause
a skid.
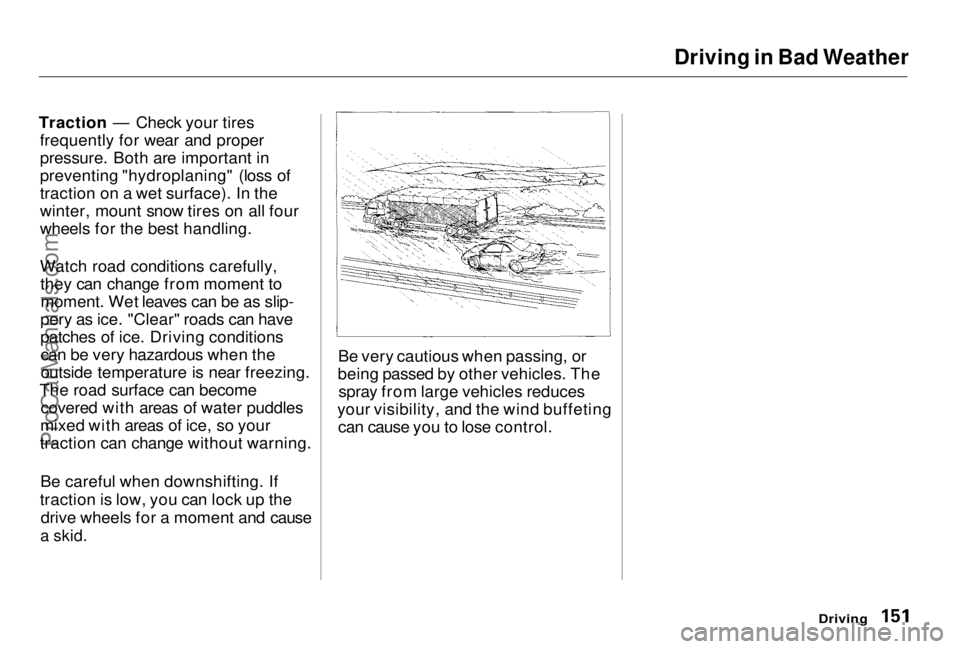
Be very cautious when passing, or
being passed by other vehicles. The spray from large vehicles reduces
your visibility, and the wind buffeting can cause you to lose control.
DrivingProCarManuals.comMain Menu Table of Contents s t
Page 216 of 278

Storing Your Vehicle
If you need to park your vehicle for
an extended period (more than one
month), there are several things you should do to prepare it for storage.
Proper preparation helps prevent
deterioration and makes it easier to
get your vehicle back on the road. If
possible, store your vehicle indoors. Fill the fuel tank.
Change the engine oil and filter
(see page 175). Wash and dry the exterior
completely.
Clean the interior. Make sure the
carpeting, floor mats, etc. are
completely dry.
Leave the parking brake off. Put
the transmission in Reverse (5- speed manual) or Park (automatic). Block the rear wheels. If the vehicle is to be stored for a
longer period, it should be supported on jackstands so the
tires are off the ground. Leave one window open slightly (if
the vehicle is being stored
indoors).
Disconnect the battery.
Support the front wiper blade
arms with a folded towel or rag so
they do not touch the windshield.
To minimize sticking, apply a silicone spray lubricant to all door
and trunk seals. Also, apply a
vehicle body wax to the painted surfaces that mate with the door
and trunk seals. Cover the vehicle with a
"breathable" vehicle cover, one
made from a porous material such as cotton. Nonporous materials,such as plastic sheeting, trap
moisture, which can damage the
paint. If possible, run the engine for a
while periodically (preferably once a month).
If you store your vehicle for 12
months or longer, have your Honda dealer perform the inspections called
for in the 24 months/30,000 miles (48,000 km) maintenance schedule
(Normal Conditions) as soon as you
take it out of storage (see page 164).
The replacements called for in the maintenance schedule are not
needed unless the vehicle hasactually reached that time or mileage.
MaintenanceProCarManuals.comMain Menu Table of Contents s t
Page 228 of 278
Changing a Flat Tire
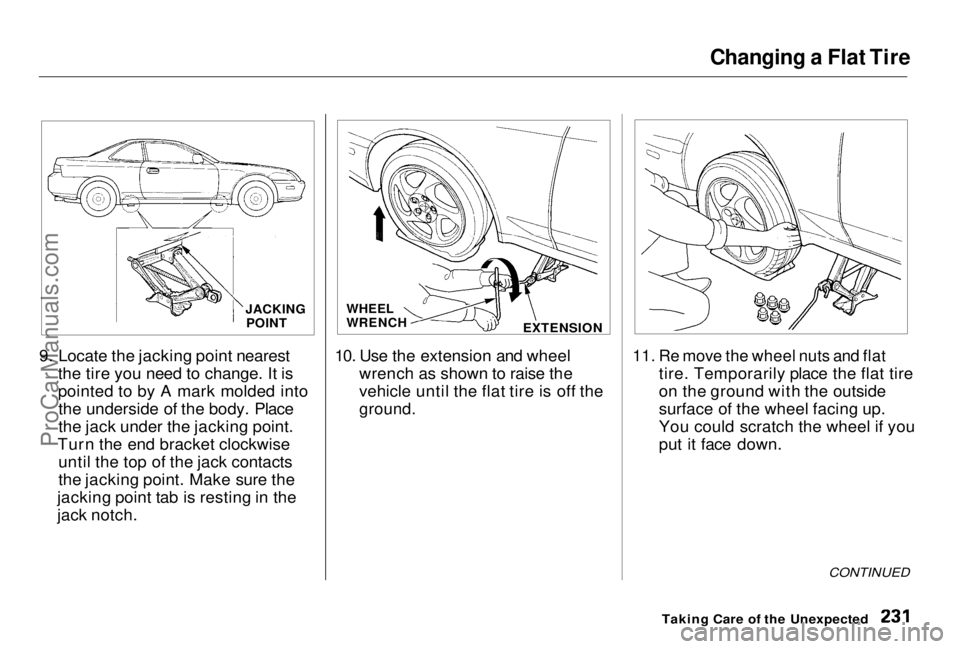
9. Locate the jacking point nearest the tire you need to change. It is
pointed to by A mark molded intothe underside of the body. Place
the jack under the jacking point.
Turn the end bracket clockwise until the top of the jack contacts
the jacking point. Make sure the
jacking point tab is resting in the
jack notch. 10. Use the extension and wheel
wrench as shown to raise the
vehicle until the flat tire is off the
ground.
11. Re move the wheel nuts and flat
tire. Temporarily place the flat tire
on the ground with the outside
surface of the wheel facing up.
You could scratch the wheel if you
put it face down.
CONTINUED
Taking Care of the Unexpected
JACKING
POINT WHEEL
WRENCH
EXTENSIONProCarManuals.comMain Menu Table of Contents s t
Page 276 of 278
Index
Shift Lock Release......................... 143
Side Marker Lights, Bulb
Replacement in.......................... 209
Signaling Turns................................ 61
Snow Tires...................................... 202
Solvent-type Cleaners.................... 220
Sound System................................. 100
Spare Tire
Inflating.......................................228
Specifications............................. 255
Spark Plugs, Replacing................. 188
Specifications Charts ............ 254, 255
Speed Control................................... 65
Speedometer.................................... 56
SRS, Additional Information........... 43 Additional Safety Precautions.... 46How Your Airbags Work............ 43How Your SRS Indicator Light
Works........................................ 45
SRS Components......................... 43
SRS Service................................... 45
SRS Indicator.............................. 45, 53
START (Ignition Key Position) ..... 71
Starting the Engine........................ 133 In Cold Weather at HighAltitude................................... 133 With a Dead Battery ................. 236
Steam Coming from Engine......... 238
Steering Wheel Adjustment................................... 64
Anti-theft Column Lock.............. 71
Stereo Sound System.................... 100
Storing Your Car............................ 217
Supplemental Restraint System..... 43
Servicing....................................... 45
SRS Indicator.......................... 45, 53
Synthetic Oil................................... 174
Tachometer...................................... 56 Taillights, Changing Bulbs in....... 211
Taking Care of the Unexpected................................ 227
Tape Player..................................... 113
Technical Descriptions Emission Control Systems........ 261
Three Way Catalytic Converter................................ 263
Tire Information........................ 256
Temperature Gauge........................ 57
Tether Attachment Points.............. 38 Three Way Catalytic Converter... 263
Time, Setting the ............................. 85
Timing Belt..................................... 196
Tire Chains..................................... 202
Tire, How to Change a Flat.......... 229
Tires................................................ 197
Air Pressure............................... 197Checking Wear.......................... 198
Compact Spare........................... 228
DOT Tire Quality Grading....... 257
Inflation....................................... 197
Inspection................................... 198
Maintenance............................... 199
Replacing.................................... 200 Rotating....................................... 200
Snow............................................202
Specifications............................. 255
Tire Chains................................. 202 Technical Information.............. 256
Winter Driving........................... 201
Tools, Tire Changing.................... 229
Towing A Trailer...................................... 152Emergency................................. 250ProCarManuals.comMain Menu s t