ignition HONDA PRELUDE 2000 (in English) Owner's Guide
[x] Cancel search | Manufacturer: HONDA, Model Year: 2000, Model line: PRELUDE, Model: HONDA PRELUDE 2000Pages: 293, PDF Size: 3.43 MB
Page 116 of 293
Audi
o Syste m
If you turn the system off while a CD
is playing, either with the PWR/VOL
knob or by turning off the ignition,
the disc will stay in the drive. When
you turn the system back on, the CD
will begin playing where it left off.
Press the eject button to remove the
disc from the drive.
If you eject the disc, but do not
remove it from the slot, the system
will automatically reload the disc
after 15 seconds and put the CD
player in pause mode. To begin
playing the disc, press the CD button. You can use the TUNE and SEEK/
SKIP bars while a disc is playing toselect passages and change tracks.
To move rapidly within a track, press and hold the TUNE bar. Press the side to move forward. You will
see CUE in the display. Press the side to move backward. You
will see REW displayed. Release the bar when the system reaches the
point you want. Each time you press the side of
the SEEK/SKIP bar, the system skips forward to the beginning of the next track. Press the side to
skip backward to the beginning of
the current track. Press it again to skip to the beginning of the previous
track.
REPEA T — To activate the Repeat
feature, press and release the RPT button. You will see RPT in thedisplay. The system continuously replays the current track. Press the
RPT button again to turn it off.
RANDO
M PLA Y — This feature,
when activated, plays the tracks on the CD in random order, rather thanin the order they are recorded on the.CD. To activate Random Play, press
and release the A. SEL/RDM button.
You will see RDM in the display. The system will then select and play
tracks randomly. This continues until you deactivate Random Play by
pressing A. SEL/RDM again.
If the system is in Repeat mode, you
must turn it off by pressing the RPT
button before selecting Random Play.
Comfor t an d Convenienc e Feature s
Page 123 of 293
Audi
o Syste m
The tape direction indicator will light to show you which side of the cassette is playing. The indicates
the side you inserted facing upward
is now playing. If you want to play
the other side, press the PROG
button.
Dolby B noise reduction turns on
when you insert a cassette. If the tape was not recorded with Dolby B
noise reduction, turn it off by
pressing the NR button.
Dolby remains off until you turn it on
by pressing the button again.
When the system reaches the end of the tape, it will automatically reverse direction and play the other side. If
you want to remove the cassette
from the drive, press the EJECT
button on the cassette player. If you turn the system off while a
tape is playing, either with the PWR/
VOL knob or by turning off the ignition, the cassette will remain in
the drive. When you turn the system
back on, the cassette player will be in pause mode. To begin playing, press
the PLAY button.
To switch to the radio or CD player while a tape is playing, press the
AM/FM, or CD button. To change back to the cassette player, push theCD button.
Tap
e Searc h Function s
With a cassette playing, you can use the FF, REW, SKIP, or REPEAT
function to find a desired program.
FF/RE W — Fast Forward and
Rewind move the tape rapidly. Press and release the side of the
TUNE bar to fast forward the tape, or the side to rewind. You will
see FF or REW flashing in the
display. To stop fast forward or
rewind, press either side of the
TUNE bar or the PLAY button. If the system reaches the end of the tape
while in fast forward or rewind, it automatically stops that function,
reverses direction, and begins to play.
Comfor t an d Convenienc e Feature s
Page 143 of 293
Preparing to Driv e
You should do the following checks
and adjustments every day before
you drive your car.
1. Make sure all windows, mirrors, and outside lights are clean and
unobstructed. Remove frost, snow,
or ice.
2. Check that the hood and trunk are fully closed.
3. Visually check the tires. If a tire looks low, use a gauge to check its
pressure.
4. Check that any items you may becarrying with you inside are stored
properly or fastened down
securely.
5. Check the adjustment of the seat (see page 80).
6. Check the adjustment of the inside and outside mirrors (see
page 88).
7. Check the adjustment of the steering wheel (see page 66 ).
8. Make sure the doors are securely closed and locked.
9. Fasten your seat belt. Check that your passengers have fastenedtheir seat belts (see page 16 ).10. Turn the ignition switch ON (II). Check the indicator lights in the
instrument panel.
11. Start the engine (see page 141).
12. Check the gauges and indicator lights in the instrument panel (see
page 53).
Drivin g
Page 144 of 293

Startin
g th e Engin e
1. Apply the parking brake.
2. In cold weather, turn off all electrical accessories to reduce
the drain on the battery.
3. Manual Transmission:
Push the clutch pedal down all the
way. START (III) does not function unless the clutch pedal is
depressed.
Automatic Transmission:
Make sure the shift lever is in
Park. Press on the brake pedal.
4. Without touching the accelerator pedal, turn the ignition key to theSTART (III) position. If the engine
does not start right away, do not
hold the key in START (III) for
more than 15 seconds at a time.
Pause for at least 10 seconds
before trying again. 5. If the engine does not start within
15 seconds, or starts but stalls
right away, repeat step 4 with the
accelerator pedal pressed half-way down. If the engine starts, release
pressure on the accelerator pedal so the engine does not race.
6. If the engine still does not start, press the accelerator pedal all the
way down and hold it there while starting in order to clear flooding.
As before, keep the ignition key in the START (III) position for nomore than 15 seconds. Return to step 5 if the engine does not start.
If it starts, lift your foot off the
accelerator pedal so the engine
does not race.
Startin g in Col d Weathe r a t Hig h
Altitude (Above 8,000 feet/
2,40 0 meters )
An engine is harder to start in cold weather. The thinner air found athigh altitude above 8,000 feet (2,400 meters) adds to the problem.
Use the following procedure:
1. Turn off all electrical accessories to reduce the drain on the battery.
2. Push the accelerator pedal half-
way to the floor and hold it there
while starting the engine. Do not hold the ignition key in START
(III) for more than 15 seconds. When the engine starts, release the accelerator pedal gradually as
the engine speeds up and smooths
out.
3. If the engine fails to start in step 2, push the accelerator pedal to the
floor and hold it there while you
try to start the engine for no more
than 15 seconds. If the engine does not start, return to step 2.
Driving
Page 147 of 293
Automati
c Transmissio n
Your Honda's transmission has four forward speeds, and is electronicallycontrolled for smoother shifting. It
also has a "lock-up" torque converter
for better fuel economy. You may
feel what seems like another shift
when the converter locks. Shif
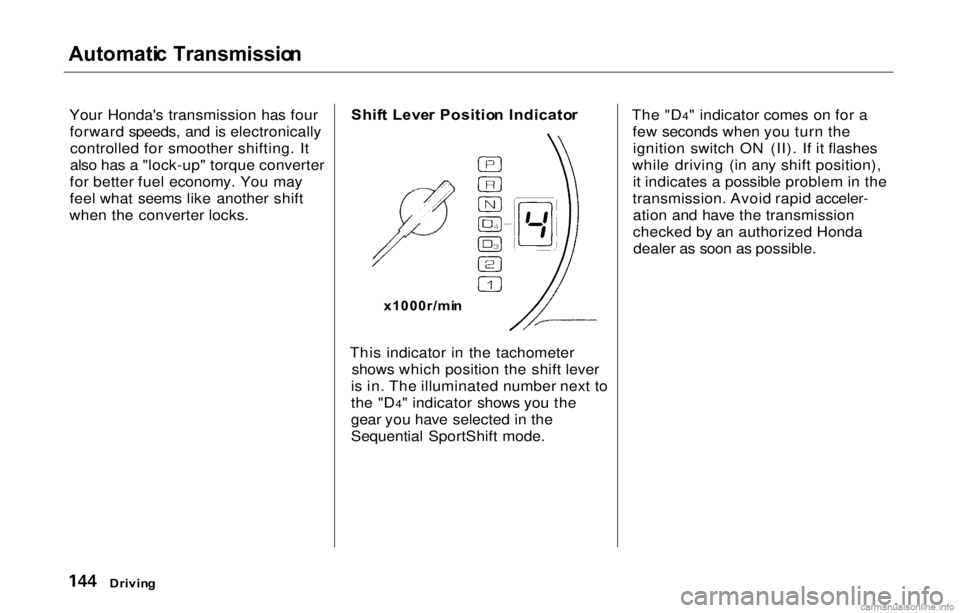
t Leve r Positio n Indicato r
x1000r/mi n
This indicator in the tachometer shows which position the shift lever
is in. The illuminated number next to
the "D4" indicator shows you the
gear you have selected in the
Sequential SportShift mode. The "D4" indicator comes on for a
few seconds when you turn theignition switch ON (II). If it flashes
while driving (in any shift position), it indicates a possible problem in the
transmission. Avoid rapid acceler- ation and have the transmission
checked by an authorized Hondadealer as soon as possible.
Drivin g
Page 148 of 293
Automati
c Transmissio n
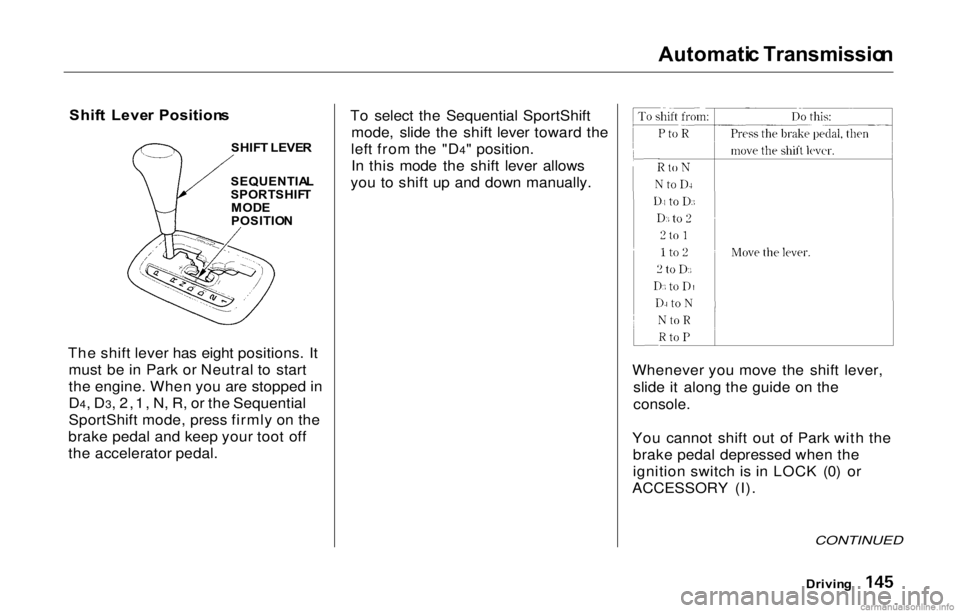
Shif t Leve r Position s
SHIF T LEVE R
The shift lever has eight positions. It must be in Park or Neutral to start
the engine. When you are stopped in
D4, D3, 2,1, N, R, or the Sequential
SportShift mode, press firmly on the
brake pedal and keep your toot off
the accelerator pedal. To select the Sequential SportShift
mode, slide the shift lever toward the
left from the "D4" position. In this mode the shift lever allows
you to shift up and down manually.
Whenever you move the shift lever,slide it along the guide on the
console.
You cannot shift out of Park with the brake pedal depressed when the
ignition switch is in LOCK (0) or
ACCESSORY (I).
CONTINUED
SEQUENTIA L
SPORTSHIF T
MOD E
POSITIO N
Driving
Page 149 of 293
Automati
c Transmissio n
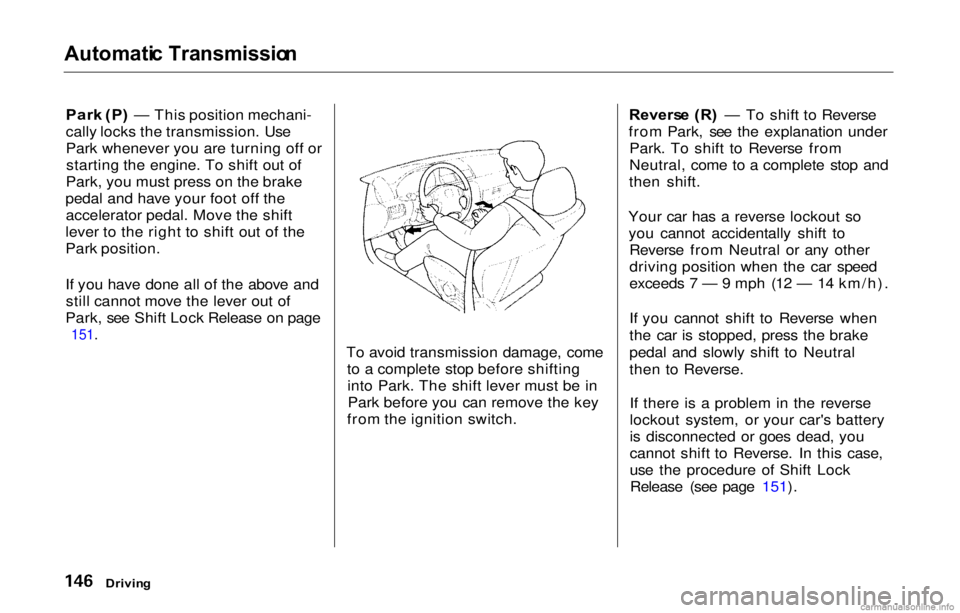
Par k (P ) — This position mechani-
cally locks the transmission. Use
Park whenever you are turning off or starting the engine. To shift out of
Park, you must press on the brake
pedal and have your foot off the accelerator pedal. Move the shift
lever to the right to shift out of the
Park position.
If you have done all of the above and still cannot move the lever out of
Park, see Shift Lock Release on page
151.
To avoid transmission damage, cometo a complete stop before shiftinginto Park. The shift lever must be inPark before you can remove the key
from the ignition switch. Revers
e (R ) — To shift to Reverse
from Park, see the explanation under Park. To shift to Reverse from
Neutral, come to a complete stop and
then shift.
Your car has a reverse lockout so you cannot accidentally shift to Reverse from Neutral or any other
driving position when the car speed
exceeds 7 — 9 mph (12 — 14 km/h).
If you cannot shift to Reverse when
the car is stopped, press the brake
pedal and slowly shift to Neutral
then to Reverse.
If there is a problem in the reverse
lockout system, or your car's battery
is disconnected or goes dead, you
cannot shift to Reverse. In this case,
use the procedure of Shift LockRelease (see page 151).
Drivin g
Page 154 of 293
Automati
c Transmissio n
Shif t Loc k Releas e
This allows you to move the shift lever out of Park if the normal
method of pushing on the brake
pedal does not work. This procedure
also releases the Reverse Lockout.
1. Set the Parking brake.
2. Make sure the key is in the
ignition switch OFF (0) position.
To release the Reverse Lockout,
make sure the key is in the
ACCESSORY (I) position.
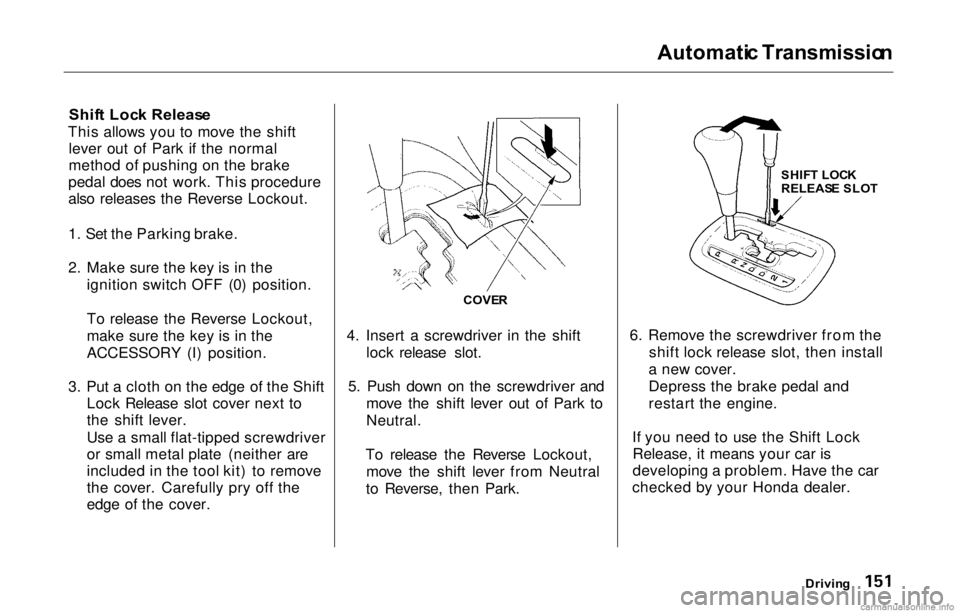
3. Put a cloth on the edge of the Shift Lock Release slot cover next to
the shift lever.
Use a small flat-tipped screwdriver
or small metal plate (neither are
included in the tool kit) to remove
the cover. Carefully pry off the
edge of the cover. 4. Insert a screwdriver in the shift
lock release slot.
5. Push down on the screwdriver and move the shift lever out of Park to
Neutral.
To release the Reverse Lockout, move the shift lever from Neutral
to Reverse, then Park. 6. Remove the screwdriver from the
shift lock release slot, then install
a new cover.
Depress the brake pedal and
restart the engine.
If you need to use the Shift Lock Release, it means your car is
developing a problem. Have the car
checked by your Honda dealer.
Driving
SHIF
T LOC K
RELEAS E SLO T
COVE R
Page 190 of 293
Coolin
g Syste m
Do not add any rust inhibitors or other additives to your car's coolingsystem. They may not be compatible
with the coolant or engine compo-
nents.
Replacin g Engin e Coolan t
The cooling system should be completely drained and refilled with
new coolant according to the time
and distance recommendations in
the maintenance schedule. Only use Genuine Honda Antifreeze/Coolant.
Draining the coolant requires access
to the underside of the car. Unless
you have the tools and knowledge,
you should have this maintenance done by a skilled mechanic. 1. Turn the ignition ON (II). Slide
the heater temperature controllever to maximum heat. Turn offthe ignition. Open the hood. Makesure the engine and radiator are
cool to the touch.
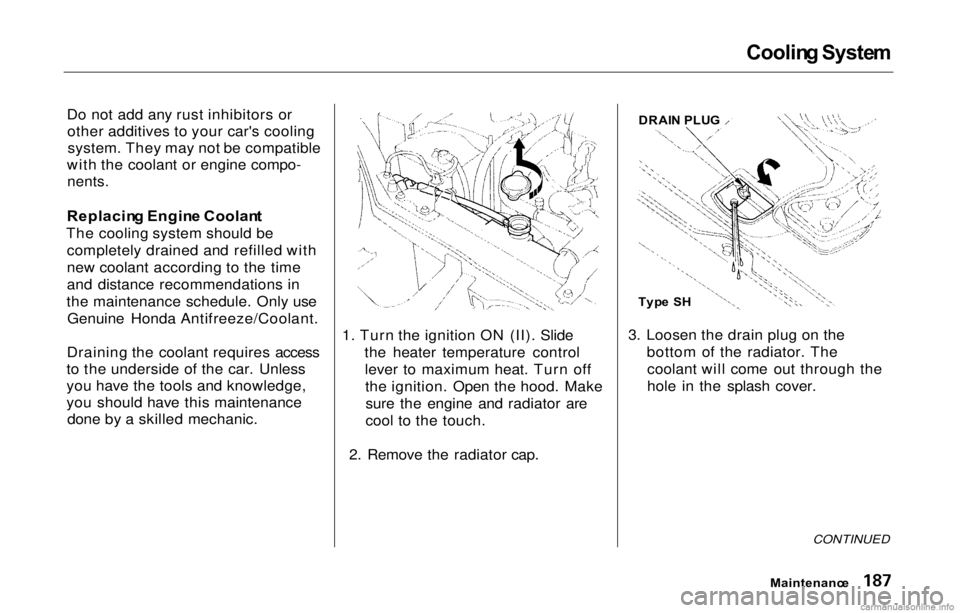
2. Remove the radiator cap. 3. Loosen the drain plug on the
bottom of the radiator. Thecoolant will come out through the
hole in the splash cover.
CONTINUED
Maintenanc e
DRAI
N PLU G
Typ e S H
Page 240 of 293
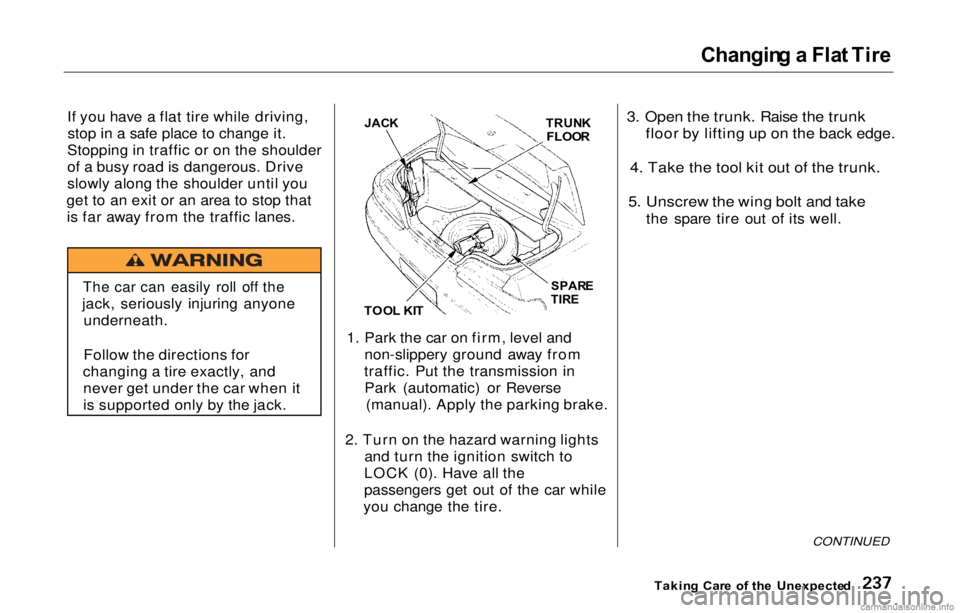
Changin
g a Fla t Tir e
If you have a flat tire while driving, stop in a safe place to change it.
Stopping in traffic or on the shoulder
of a busy road is dangerous. Drive
slowly along the shoulder until you
get to an exit or an area to stop that is far away from the traffic lanes.
1. Park the car on firm, level andnon-slippery ground away from
traffic. Put the transmission in Park (automatic) or Reverse (manual). Apply the parking brake.
2. Turn on the hazard warning lights and turn the ignition switch to
LOCK (0). Have all the
passengers get out of the car while
you change the tire.
3. Open the trunk. Raise the trunk
floor by lifting up on the back edge.
4. Take the tool kit out of the trunk.
5. Unscrew the wing bolt and take
the spare tire out of its well.
CONTINUED
Takin g Car e o f th e Unexpecte d
JAC
K
TOO L KI T TRUN
K
FLOO R
SPAR E
TIR E
The car can easily roll off the
jack, seriously injuring anyone underneath.
Follow the directions for
changing a tire exactly, and never get under the car when it
is supported only by the jack.