stop start HONDA PRELUDE 2000 Owner's Manual (in English)
[x] Cancel search | Manufacturer: HONDA, Model Year: 2000, Model line: PRELUDE, Model: HONDA PRELUDE 2000Pages: 293, PDF Size: 3.43 MB
Page 69 of 293
Controls Nea r th e Steerin g Wheel
Make sure the rear window is clear
and you have good visibility before starting to drive.
The defogger and antenna wires on the inside of the rear window can be accidentally damaged. When
cleaning the glass, always wipe side
to side. Steerin
g Whee l Adjustmen t
See page 17 for important safety
information about how to properly
position the steering wheel.
Make any steering wheel adjustment
before you start driving.
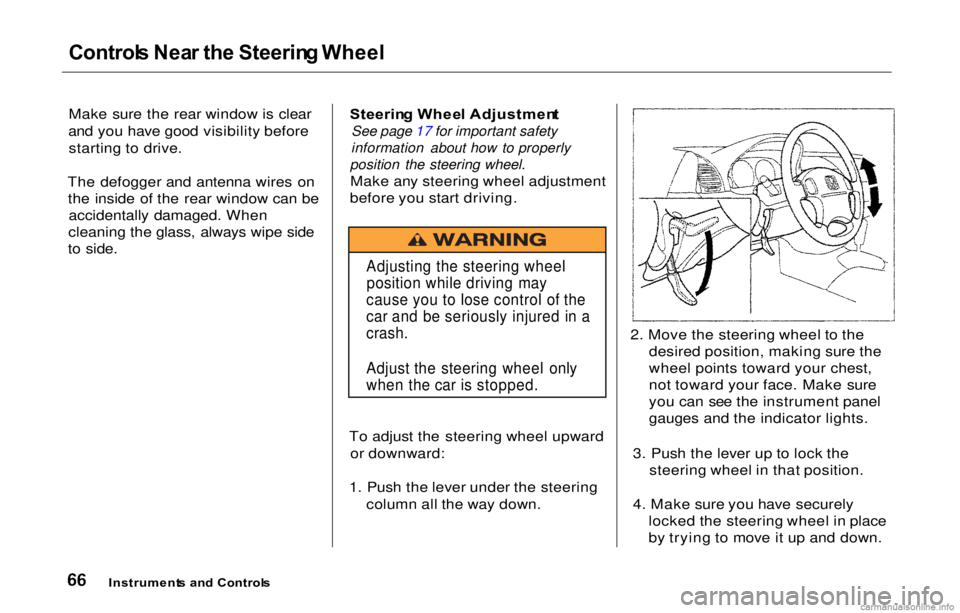
To adjust the steering wheel upward or downward:
1. Push the lever under the steering column all the way down. 2. Move the steering wheel to the
desired position, making sure the
wheel points toward your chest,
not toward your face. Make sure
you can see the instrument panel
gauges and the indicator lights.
3. Push the lever up to lock the steering wheel in that position.
4. Make sure you have securely locked the steering wheel in place
by trying to move it up and down.
Instrument s an d Control s
Adjusting the steering wheel
position while driving may
cause you to lose control of the
car and be seriously injured in a
crash.
Adjust the steering wheel only
when the car is stopped.
Page 106 of 293
Heatin
g an d Coolin g
If the interior is very warm from
being parked in the sun, you can cool it down more rapidly by setting up
the controls this way:
1. Start the engine.
2. Turn on the A/C by pressing the button. Make sure the tempera-
ture control lever is all the way to
the left.
3. Set the fan to maximum speed.
4. Open the windows partially. Select and Fresh Air mode.
When the interior has cooled down to a more comfortable temperature, close the windows and set the
controls as described for normal
cooling.
Air conditioning places an extra load
on the engine. Watch the engine
coolant temperature gauge (see page 59 ) when driving in stop-and-go
traffic or climbing a long, steep hill.
If it moves near the red zone, turn off the A/C until the gauge reads
normally.
To Heat
To warm the interior:
1. Start the engine. 2. Select and Fresh Air mode.
3. Set the fan to the desired speed.
4. Adjust the warmth of the air with the temperature control lever.
To Heat and Dehumidify with Air
Conditioning
Air conditioning, as it cools, removes moisture from the air. When used in
combination with the heater, it
makes the interior warm and dry.
1. Switch the fan on.
2. Turn on the air conditioning. 3. Select and Fresh Air mode.
4. Adjust the temperature control
lever so the mixture of heated andcooled air feels comfortable.
This setting is suitable for all driving conditions whenever the outsidetemperature is above 32°F (0°C).
CONTINUED
Comfor t an d Convenienc e Feature s
Page 110 of 293

Audi
o Syste m
You can use any of four methods to
find radio stations on the selected
band: TUNE, SEEK, SCAN or the Preset buttons.
TUN E — Use the TUNE bar to tune
the radio to a desired frequency. Press the side of the bar to tune
to a higher frequency, and the
side to tune to a lower
frequency. The frequency numbers
will start to change rapidly. Release
the bar when the display reaches the desired frequency. To change the
frequency in small increments, press and release the TUNE bar quickly.
SEE K — The SEEK function
searches the band for a station with
a strong signal. To activate it, press the SEEK bar on either the or
side, then release it.
Depending on which side you press,
the system scans upward or down-
ward from the current frequency. It stops when it finds a station with a strong signal.
SCA N — The SCAN function
samples all the stations with strong
signals on the selected band. To
activate it, press the SCAN button,
then release it. When the system is
in the SCAN mode, SCAN shows in
the display. The system will scan up
the band for a station with a strong signal. When it finds one, it will stop
and play that station for
approximately five seconds. If you do
nothing, the system will then scan
for the next strong station and play
that for five seconds. When it plays a station that you want to continue
listening to, press the SCAN button
again.
Prese t — You can store the
frequencies of your favorite radio stations in the six preset buttons.
Each button will store one frequency
on the AM band, and two
frequencies on the FM band.
To store a frequency:
1. Select the desired band, AM or FM. FM1 and FM2 let you store
two frequencies with each Preset
button.
2. Use the TUNE or SEEK function to tune the radio to a desired
station.
3. Pick the Preset button you want for that station. Press the buttonand hold it until you hear a beep.
4. Repeat steps 1 to 3 to store a total of six stations on AM and twelveon FM.
Once a station's frequency is stored,
simply press and release the proper
preset button to tune to it.
The preset frequencies will be lost if your car's battery goes dead, is
disconnected, or the radio fuse is
removed.
Comfor t an d Convenienc e Feature sCONTINUED
Page 148 of 293
Automati
c Transmissio n
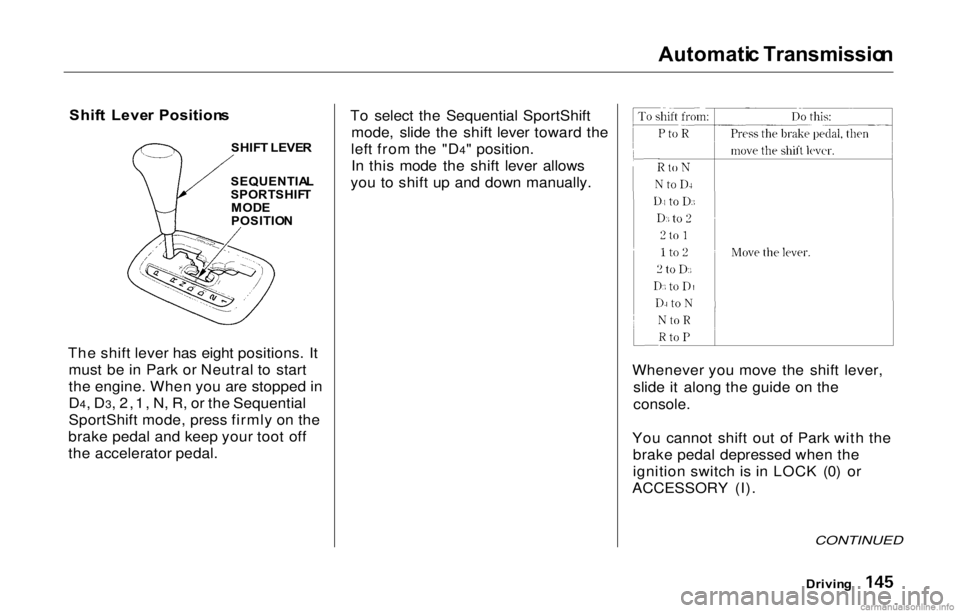
Shif t Leve r Position s
SHIF T LEVE R
The shift lever has eight positions. It must be in Park or Neutral to start
the engine. When you are stopped in
D4, D3, 2,1, N, R, or the Sequential
SportShift mode, press firmly on the
brake pedal and keep your toot off
the accelerator pedal. To select the Sequential SportShift
mode, slide the shift lever toward the
left from the "D4" position. In this mode the shift lever allows
you to shift up and down manually.
Whenever you move the shift lever,slide it along the guide on the
console.
You cannot shift out of Park with the brake pedal depressed when the
ignition switch is in LOCK (0) or
ACCESSORY (I).
CONTINUED
SEQUENTIA L
SPORTSHIF T
MOD E
POSITIO N
Driving
Page 149 of 293
Automati
c Transmissio n
Par k (P ) — This position mechani-
cally locks the transmission. Use
Park whenever you are turning off or starting the engine. To shift out of
Park, you must press on the brake
pedal and have your foot off the accelerator pedal. Move the shift
lever to the right to shift out of the
Park position.
If you have done all of the above and still cannot move the lever out of
Park, see Shift Lock Release on page
151.
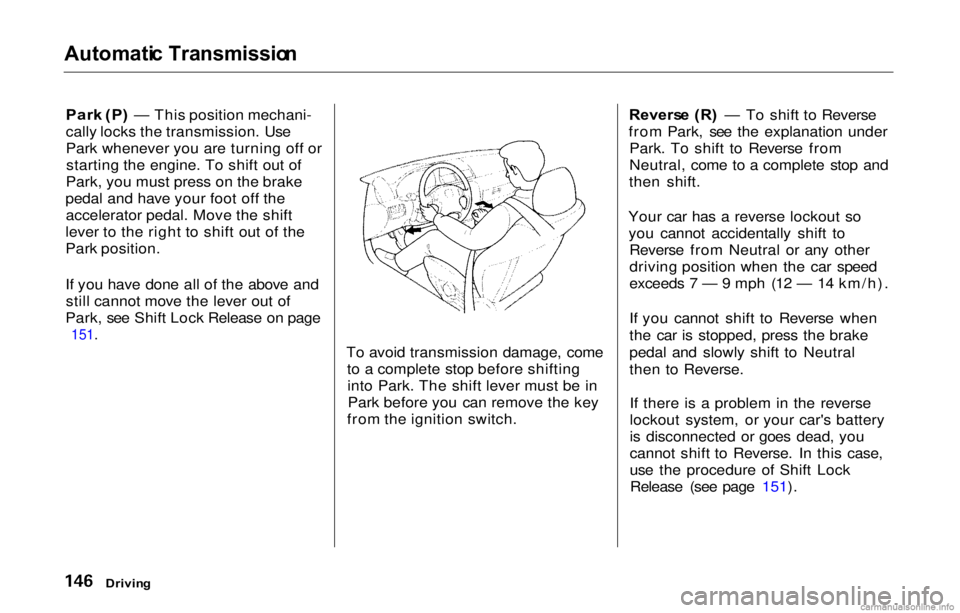
To avoid transmission damage, cometo a complete stop before shiftinginto Park. The shift lever must be inPark before you can remove the key
from the ignition switch. Revers
e (R ) — To shift to Reverse
from Park, see the explanation under Park. To shift to Reverse from
Neutral, come to a complete stop and
then shift.
Your car has a reverse lockout so you cannot accidentally shift to Reverse from Neutral or any other
driving position when the car speed
exceeds 7 — 9 mph (12 — 14 km/h).
If you cannot shift to Reverse when
the car is stopped, press the brake
pedal and slowly shift to Neutral
then to Reverse.
If there is a problem in the reverse
lockout system, or your car's battery
is disconnected or goes dead, you
cannot shift to Reverse. In this case,
use the procedure of Shift LockRelease (see page 151).
Drivin g
Page 150 of 293
Automati
c Transmissio n
Neutra l (N ) — Use Neutral if you
need to restart a stalled engine, or if
it is necessary to stop briefly with
the engine idling. Shift to Park posi-
tion if you need to leave the car for any reason. Press on the brake pedal
when you are moving the shift lever
from Neutral to another gear.
Driv e (D 4) — Use this position for
your normal driving. The transmis- sion automatically selects a suitable
gear for your speed and acceleration.
You may notice the transmission shifting up at higher speeds when
the engine is cold. This helps the engine warm up faster.
Sequential SportShift Mode — With
the shift lever in "D4" position, you can select the Sequential SportShift
mode to shift gears; much like a
manual transmission, but without a clutch pedal.
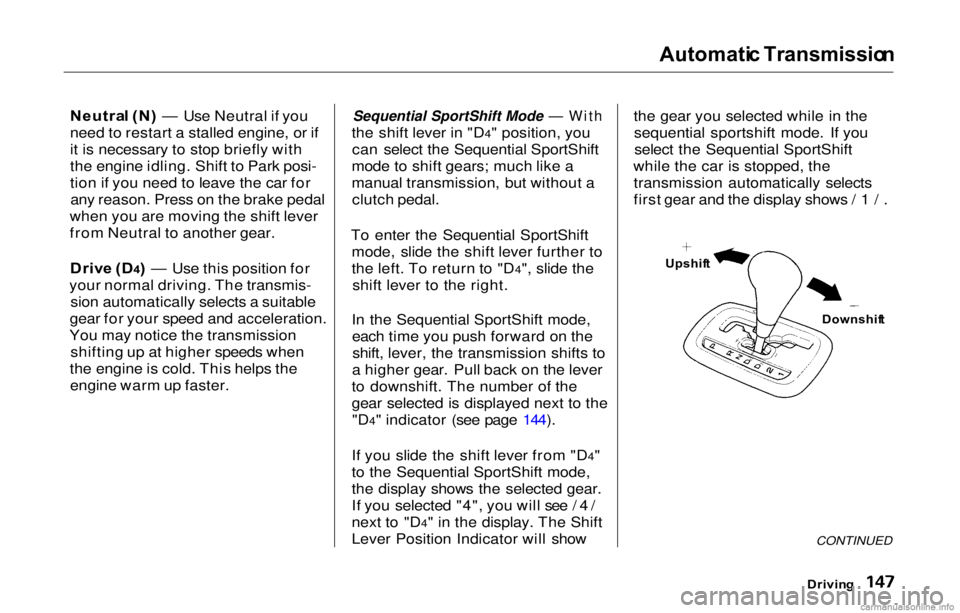
To enter the Sequential SportShift mode, slide the shift lever further to
the left. To return to "D4", slide theshift lever to the right.
In the Sequential SportShift mode, each time you push forward on theshift, lever, the transmission shifts to
a higher gear. Pull back on the lever
to downshift. The number of the
gear selected is displayed next to the "D4" indicator (see page 144).
If you slide the shift lever from "D4"
to the Sequential SportShift mode,
the display shows the selected gear.
If you selected "4", you will see /4/
next to "D4" in the display. The Shift
Lever Position Indicator will show the gear you selected while in the
sequential sportshift mode. If youselect the Sequential SportShift
while the car is stopped, the transmission automatically selects
first gear and the display shows /1/.
CONTINUED
Upshif
t
Downshift
Drivin g
Page 153 of 293

Automati
c Transmissio n
Secon d (2 ) — This position locks
the transmission in second gear. It does not downshift to first gear
when you come to a stop. Second gives you more power when climbing,
and increased engine braking when
going down steep hills, Use second
gear when starting out on a slippery surface or in deep snow. It will help
reduce wheelspin. Firs
t (1 ) — With the lever in this
position, the transmission locks in
First gear.
If you shift into First position when
the car speed exceeds 31 mph (50
km/h), the transmission shifts into Second gear first to avoid the
application of the sudden engine
brake. Engin
e Spee d Limite r
If you exceed the maximum speed
for the gear you are in, the engine speed will enter into the tachometer's
red zone. If this occurs, you may feel
the engine cut in and out. This is caused by a limiter in the engine's
computer controls. The engine will
run normally when you reduce the
RPM below the red zone.
Drivin g
Page 192 of 293
Cooling
System
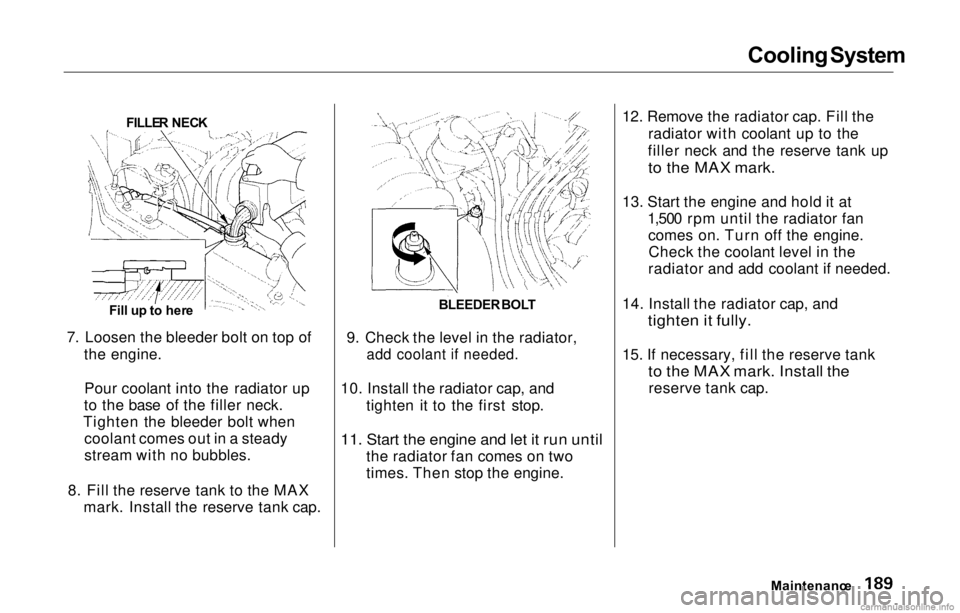
7. Loosen the bleeder bolt on top of the engine.
Pour coolant into the radiator up
to the base of the filler neck.
Tighten the bleeder bolt when coolant comes out in a steady
stream with no bubbles.
8. Fill the reserve tank to the MAX mark. Install the reserve tank cap. 9. Check the level in the radiator,
add coolant if needed.
10. Install the radiator cap, and tighten it to the first stop.
11. Start the engine and let it run until
the radiator fan comes on two
times. Then stop the engine. 12. Remove the radiator cap. Fill the
radiator with coolant up to the
filler neck and the reserve tank up
to the MAX mark.
13. Start the engine and hold it at 1,500 rpm until the radiator fancomes on. Turn off the engine.Check the coolant level in the
radiator and add coolant if needed.
14. Install the radiator cap, and
tighten it fully.
15. If necessary, fill the reserve tank
to the MAX mark. Install the
reserve tank cap.
Maintenance
FILLE
R NEC K
Fill u p to her e BLEEDER
BOL T
Page 213 of 293
Tire
s
Snow Tires
If you mount snow tires on your
Honda, make sure they are radial
tires of the same size and load range as the original tires. Mount snow
tires on all four wheels to balance
your car's handling in all weather conditions. Keep in mind the traction
provided by snow tires on dry roads
may not be as high as your car's
original equipment tires. You shoulddrive cautiously even when the roads
are clear. Check with the tire dealer
for maximum speed recommenda-
tions.
Tire Chains
Mount traction devices (cable-type)
only when required by driving
conditions or local laws. Make sure
they are the correct size for your
tires. Install them only on the front
tires.
When installing traction devices, follow the manufacturer'sinstructions and mount them as
tightly as you can. Drive slowly with
them installed. If you hear them coming in contact with the body or
chassis, stop and investigate. Make sure the traction devices are
installed tightly, and that they are
not contacting the brakes or
suspension.
Remove them as soon as you start
driving on cleared roads.
Traction devices that are the wrong
size or improperly installed can
damage your car's brake lines,
suspension, body, and wheels. Stop
driving if they are hitting any part of
the car.
Maintenanc e
NOTICE
Page 250 of 293
I
f You r Engin e Overheat s
6. Look for any obvious coolant leaks, such as a split radiator hose.
Everything is still extremely hot, so use caution. If you find a leak, it
must be repaired before you
continue driving (see Emergenc y
Towin g on page 258).
7. If you don't find an obvious leak, check the coolant level in the
radiator reserve tank (see page131). If the level is below the
MIN mark, add coolant to halfway
between the MIN and MAX marks.
8. If there was no coolant in the reserve tank, you may also have toadd coolant to the radiator. Let the
engine cool down until the pointer
reaches the middle of the tempera-
ture gauge, or lower, before check- ing the radiator. 9. Using gloves or a large heavy
cloth, turn the radiator cap
counterclockwise, without pushing
down, to the first stop. This
releases any remaining pressure in
the cooling system. After the
pressure releases, push down on
the cap and turn it until it comes off. 10. Start the engine and set the
temperature control lever tomaximum. Add coolant to the
radiator up to the base of the filler
neck. If you do not have the
proper coolant mixture available,
you can add plain water. Remember to have the coolingsystem drained and refilled with
the proper mixture as soon as you
can.
11. Put the radiator cap back on tightly. Run the engine and watchthe temperature gauge. If it goes
back to the red mark, the engine
needs repair. (See Emergenc y
Towin g on page 258.)
12. If the temperature stays normal, check the coolant level in the
radiator reserve tank. If it has
gone down, add coolant to the MAX mark. Put the cap back on
tightly.
Takin g Car e o f th e Unexpecte d
Removing the radiator cap
while the engine is hot can cause the coolant to spray out,
seriously scalding you.
Always let the engine and radiator cool down before
removing the radiator cap.