navigation system HONDA RIDGELINE 2010 1.G Manual PDF
[x] Cancel search | Manufacturer: HONDA, Model Year: 2010, Model line: RIDGELINE, Model: HONDA RIDGELINE 2010 1.GPages: 421, PDF Size: 7.23 MB
Page 309 of 421

For the best picture, always keep the
rearview camera clean, and do not
cover the camera lens. To avoid
scratching the lens when you clean it,
use a moist, sof t cloth.
Since the rearview camera display
area is limited, you should always
back up slowly and caref ully, and
look behind you f or obstacles.
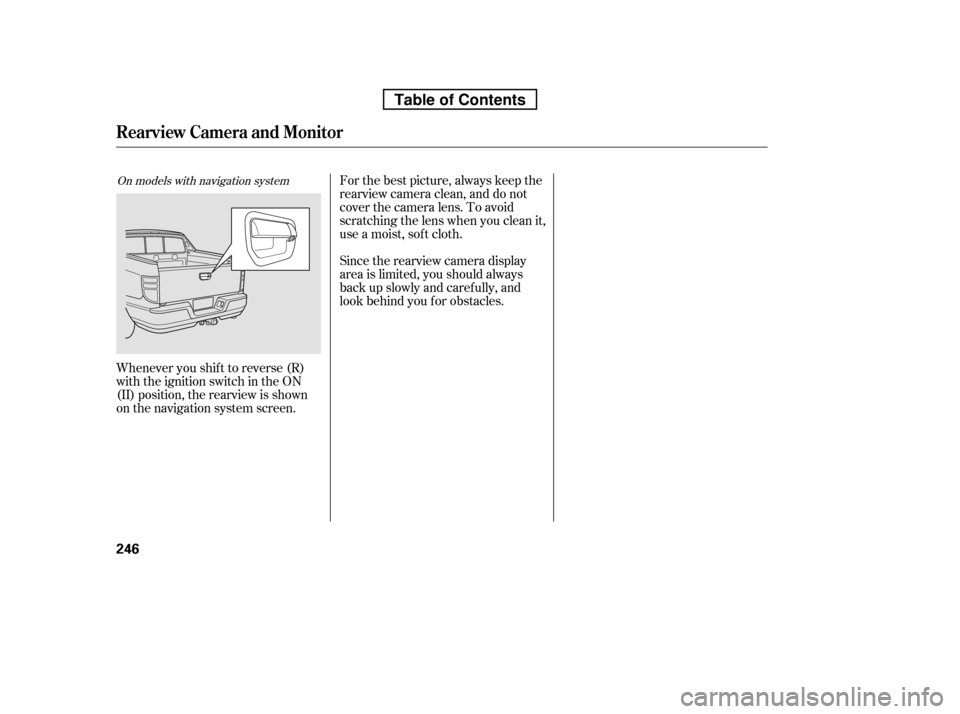
Whenever you shif t to reverse (R)
with the ignition switch in the ON
(II) position, the rearview is shown
on the navigation system screen.On models with navigation system
Rearview Camera and Monitor
246
Table of Contents
Page 313 of 421

Screw the fuel fill cap back on
until it clicks at least once.
If you do not properly tighten the
cap, you will see a ‘‘CHECK FUEL
CAP’’ message on the inf ormation
display (see page ).If the system still detects a leak in
the vehicle’s evaporative emissions
system, the malf unction indicator
lamp (MIL) comes on. If the f uel f ill
cap was not already tightened, turn
the engine of f , and check or
retighten the f uel f ill cap until it
clicks at least once. The MIL should
go off after several days of normal
driving once the cap is tightened or
replaced. If the MIL does not go of f ,
have your vehicle inspected by a
dealer. For more inf ormation, see
page .
Your vehicle’s on board diagnostic
system will detect a loose or missing
f uel f ill cap as an evaporative system
leak. The f irst time a leak is detected
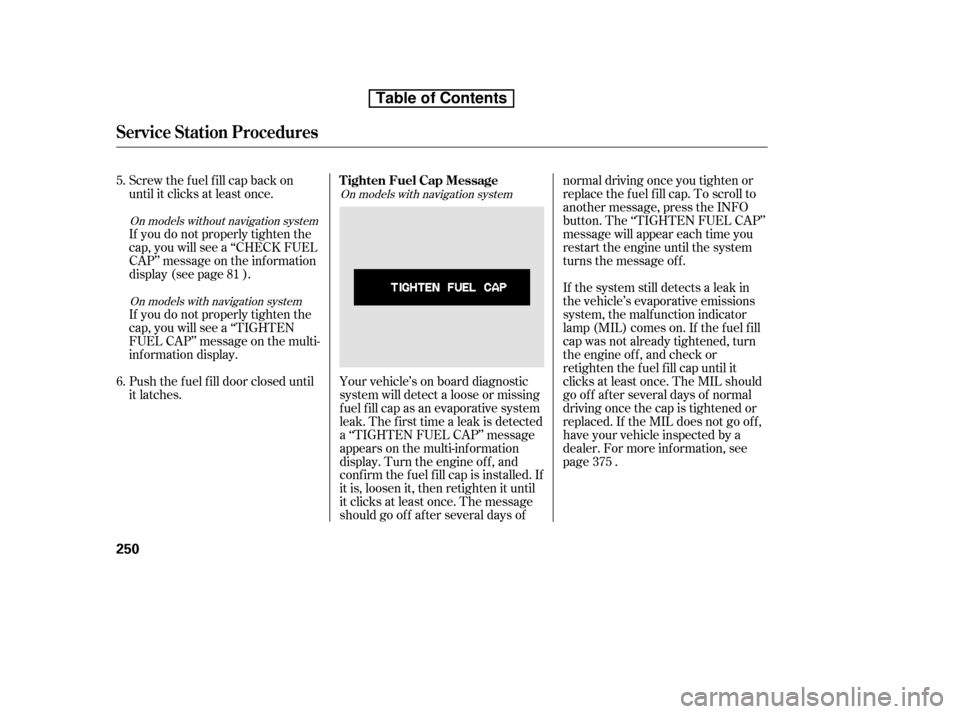
a ‘‘TIGHTEN FUEL CAP’’ message
appears on the multi-inf ormation
display. Turn the engine of f , and
conf irm the f uel f ill cap is installed. If
it is, loosen it, then retighten it until
it clicks at least once. The message
should go of f af ter several days of normal driving once you tighten or
replace the f uel f ill cap. To scroll to
another message, press the INFO
button. The ‘‘TIGHTEN FUEL CAP’’
message will appear each time you
restart the engine until the system
turns the message of f .
If you do not properly tighten the
cap, you will see a ‘‘TIGHTEN
FUEL CAP’’ message on the multi-
inf ormation display.
Push the f uel f ill door closed until
it latches.
5. 6.
81
375
On models without navigation systemOn models with navigation system On models with navigation system
Tighten Fuel Cap Message
Service Station Procedures
250
Table of Contents
Page 333 of 421

These indicators on the instrument
panel show which position the shif t
lever is in.The ‘‘D’’ indicator comes on f or a
f ew seconds when you turn the
ignition switch to the ON (II)
position. If it f lashes while driving (in
any shif t position), it indicates a
possible problem in the transmission.
If the malf unction indicator lamp
comes on along with the ‘‘D’’
indicator, there is a problem with the
automatic transmission control
system. Avoid rapid acceleration, and
have the transmission checked by
your dealer as soon as possible.
To shif t f rom Park to any position,
pressfirmlyonthebrakepedal,and
pull the shif t lever toward you. You
cannot shif t out of Park when the
ignition switch is in the LOCK (0) or
ACCESSORY (I) position.
When the ‘‘D’’ indicator warns of a
possible problem with the
transmission, you will see a ‘‘CHECK
TRANSMISSION’’ message on the
multi-inf ormation display (see page
).
91
CONT INUED
On models with navigation system
Shif t L ever Position Indicators Shif ting
Automatic Transmission
Driving
271
SHIFT LEVER
Table of Contents
Page 340 of 421

When the low tire pressure indicator
is on, one or more of your tires is
signif icantly underinf lated. You
should stop and check your tires as
soon as possible, and inf late them to
the proper pressure as indicated on
the vehicle’s tire inf ormation placard.
If you think you can saf ely drive a
short distance to a service station,
proceed slowly, and inf late the tire to
the recommended pressure shown
on the driver’s doorjamb.
If the tire is f lat, or if the tire
pressure is too low to continue
driving, replace the tire with the
compact spare tire (see page ).
If you cannot make the low tire
pressure indicator go out af ter
inf lating the tires to the specif ied
values, have your dealer check the
system as soon as possible.Driving on a signif icantly under
inf lated tire causes the tire to
overheat and can lead to tire failure.
Underinf lation also reduces f uel
efficiency and tire tread life, and may
af f ect the vehicle’s handling and
stopping ability.
Becausetirepressurevariesby
temperature and other conditions,
the low tire pressure indicator may
come on unexpectedly.
Each tire has its own pressure
sensor (not including the spare tire).
If the air pressure of a tire becomes
signif icantly low, the sensor in that
tire immediately sends a signal that
causes the low tire pressure
indicator and the appropriate tire on
thetirepressuremonitortocomeon.
Your vehicle is equipped with a tire
pressure monitoring system (TPMS)
that turns on every time you start the
engine and monitors the pressure in
your tires while driving.
360
On models without navigation system
Tire Pressure Monitoring System (TPMS)
Low Tire Pressure
Indicator
278
Table of Contents
Page 343 of 421

CONT INUED
If you think you can saf ely drive a
short distance to a service station,
proceed slowly to the station, then
inflate the tire to the recommended
pressure.
If the tire is f lat, or if the tire
pressure is too low to continue
driving, replace the tire with the
compact spare tire (see page ).
Driving on a signif icantly under-
inf lated tire causes the tire to
overheat and can lead to tire failure.
Under-inf lation also reduces f uel
efficiency and tire tread life, and may
af f ect the vehicle’s handling and
stopping ability.
Becausetirepressurevariesby
temperature and other conditions,
the low tire pressure/TPMS
indicator may come on unexpectedly.
When the low tire pressure/TPMS
indicator is on, one or more of your
tires is signif icantly underinf lated.
Youshouldstopandcheckyourtires
as soon as possible, and inflate them
to the proper pressure as indicated
on the vehicle’s tire inf ormation
placard.
It is possible that the pressures
shown on the multi-inf ormation
display and the pressures you
manually measure are slightly
dif f erent.
If the dif f erence is signif icant or you
cannot make the low tire pressure/
TPMS indicator and message on the
multi-inf ormation display go out af ter
inf lating the tires to the specif ied
values, have your dealer check the
system as soon as possible.
Each tire has its own pressure
sensor. If the air pressure of a tire
becomes signif icantly low, the
sensor in that tire immediately sends
a signal that causes the low tire
pressure/TPMS indicator in the
instrument panel to come on. If this
happens, you will see which tire is
losing pressure on the multi-
inf ormation display along with a
‘‘CHECK TIRE PRESSURE’’
message.
Your vehicle is equipped with a tire
pressure monitoring system (TPMS)
that turns on every time you start the
engine and monitors the pressure in
your tires while driving.
361On models with navigation systemLow Tire Pressure/
TPMS Indicator
Tire Pressure Monitoring System (TPMS)
Driving
281
Table of Contents
Page 351 of 421

The anti-lock brake system (ABS)
helpspreventthewheelsfrom
locking up, and helps you retain
steering control by pumping the
brakes rapidly, much f aster than a
person can do it.
The electronic brake distribution
(EBD) system, which is part of the
ABS, also balances the f ront-to-rear
braking distribution according to
vehicle loading.If this indicator comes on, the anti-
lock f unction of the braking system
has shut down. The brakes still work
like a conventional system, but
without anti-lock. You should have
your dealer inspect your vehicle as
soon as possible.
You will f eel a pulsation in the brake
pedal when the ABS activates, and
you may hear some noise. This is
normal: it is the ABS rapidly
pumpingthebrakes.Ondry
pavement, you will need to press on
thebrakepedalveryhardbeforethe
ABS activates. However, you may
feel the ABS activate immediately if
you are trying to stop on snow or ice.
Let the ABS work f or you by always
keeping f irm, steady pressure on the
brake pedal. This is sometimes
ref erred to as ‘‘stomp and steer.’’ If the indicator comes on while
driving, test the brakes as instructed
on page .
You will also see a ‘‘CHECK ABS
SYSTEM’’ message on the multi-
inf ormation display (see page ).
376 91
You should never pump the brake pedal.
On models with navigation system
CONT INUED
ABS Indicator
Anti-lock Brakes (ABS)
Driving
289
Table of Contents
Page 352 of 421

Always steer moderately
when you are braking hard. Severe
or sharp steering wheel movement
can still cause your vehicle to veer
into oncoming traffic or off the road. such as trying to take a
corner too f ast or making a sudden
lane change. Always drive at a safe
speed f or the road and weather
conditions. It only helps with the
steering control during braking.
If the ABS indicator and the brake
system indicator come on together,
and the parking brake is f ully
released, the EBD system may also
be shut down.
The VSA indicator will come on
alongwiththeABSindicator.
Test your brakes as instructed on
page . If the brakes f eel normal,
drive slowly and have your vehicle
repaired by your dealer as soon as
possible. Avoid sudden hard braking
which could cause the rear wheels to
lock up and possibly lead to a loss of
control.
If this happens, you will also see
‘‘CHECK ABS SYSTEM’’ and
‘‘CHECK BRAKE SYSTEM’’
messages on the multi-inf ormation
display.
on loose or
uneven surf aces, such as gravel or
snow, than a vehicle without anti-
lock.
376
On models with navigation system
Important Saf ety Reminders
A BS cannot prevent a loss of
stability.
A BS will not prevent a skid that
results f rom changing direction
abruptly,
A BS does not reduce the time or
distance it takes to stop the
vehicle.
A vehicle with A BS may require a
longer distance to stop
Anti-lock Brakes (ABS)
290
Table of Contents
Page 353 of 421

The vehicle stability assist (VSA)
system helps to stabilize the vehicle
during cornering if the vehicle turns
more or less than desired. It also
assists you in maintaining traction
while accelerating on loose or
slippery road surf aces. It does this
by regulating the engine’s output and
by selectively applying the brakes.
The VSA system cannot enhance the
vehicle’s driving stability in all
situations and does not control your
vehicle’s entire braking system. It is
still your responsibility to drive and
corner at reasonable speeds and to
leave a sufficient margin of safety.
When VSA activates, you may notice
that the engine does not respond to
the accelerator in the same way it
does at other times. There may also
be some noise f rom the VSA
hydraulic system. You will also see
the VSA activation indicator blink.
When VSA activates, you will see the
VSA Activation indicator blink.
If this indicator comes on while
driving, pull to the side of the road
when it is saf e, and turn of f the
engine. Reset the system by
restarting the engine. If the VSA
system indicator stays on or comes
back on while driving, have the VSA
system inspected by your dealer.
If the indicator does not come on
when the ignition switch is turned to
the ON (II) position, there may be a
problem with the VSA system. Have
your dealer inspect your vehicle as
soon as possible.You will also see a ‘‘CHECK VSA
SYSTEM’’ message on the multi-
inf ormation display if there is a
problem with the VSA system.
If the low tire pressure indicator or
TPMS indicator comes on, see
page .
If the low tire pressure/TPMS
indicator comes on, see page .
Or, if the multi-inf ormation display
shows a ‘‘CHECK TPMS
SYSTEM’’ message with the
indicator f lashing, see page .
Without VSA, your vehicle will have
normal braking and cornering ability,
but it will not have VSA traction and
stability enhancement.
In this case, you cannot turn of f the
VSA using the OFF switch again.
91281
278On models with navigation system
On models with navigation system
On models without navigation systemVSA A ctivation Indicator
Vehicle Stability Assist
(VSA ) System Indicator
Vehicle St abilit y A ssist (VSA), aka Electronic Stability Control (ESC), System
Driving
291
Table of Contents
Page 366 of 421

Drive slower than normal in all
driving situations, and obey posted
speed limits f or vehicles with trailers.
When towing a f ixed-sided trailer
(e.g., camper), do not exceed 55 mph
(88 km/h). At higher speeds, the
trailer may sway or affect vehicle
handling.
When towing a trailer on level roads
under normal driving conditions, do
not use D3. This will increase the
automatic transmission fluid
temperature and may cause
overheating.With heavy cargo on the pickup bed,
your vehicle has a higher center of
gravity. Drive slowly and cautiously,
and allow more time and distance f or
braking. Loading heavy cargo could
af f ect your vehicle’s handling and
perf ormance.
Maketurnsmoreslowlyandwider
than normal. The trailer tracks a
smaller arc than your vehicle, and it
canhitorrunoversomethingthe
vehicle misses.
Allow more time and distance f or
braking. Do not brake or turn
suddenly as this could cause the
trailer to jackknif e or turn over.
When driving down hills, reduce
your speed, and use D3. Do not
‘‘ride’’ the brakes.
If youmuststopwhenfacinguphill,
use the f oot brake or parking brake.
Do not try to hold the vehicle in
place by pressing on the accelerator,
as this can cause the automatic
transmission to overheat.
When climbing hills, closely watch
your temperature gauge. If it nears
the red (Hot) mark, turn the air
conditioning of f , reduce speed and, if
necessary, pull to the side of the
road to let the engine cool.
If the automatic transmission f luid
temperature increases and exceeds
the specif ied limit, the A/T
temperature indicator comes on (see
page ).
You will also see an ‘‘A/T TEMP
HIGH’’ message on the multi-
inf ormation display (see page ). 69
91
On models with navigation system
T owing Speeds and Gears
Making T urns and BrakingDriving on Hills
Towing a Trailer
Remember, it
takes longer to slow down and
stop when towing a trailer.
304
Table of Contents
Page 374 of 421

Use the compact spare tire as a
temporary replacement only. Get
your regular tire repaired or replaced,
and put it back on your vehicle as
soon as you can.
Check the air pressure of the
compact spare tire every time you
check the other tires. It should be
inf lated to:
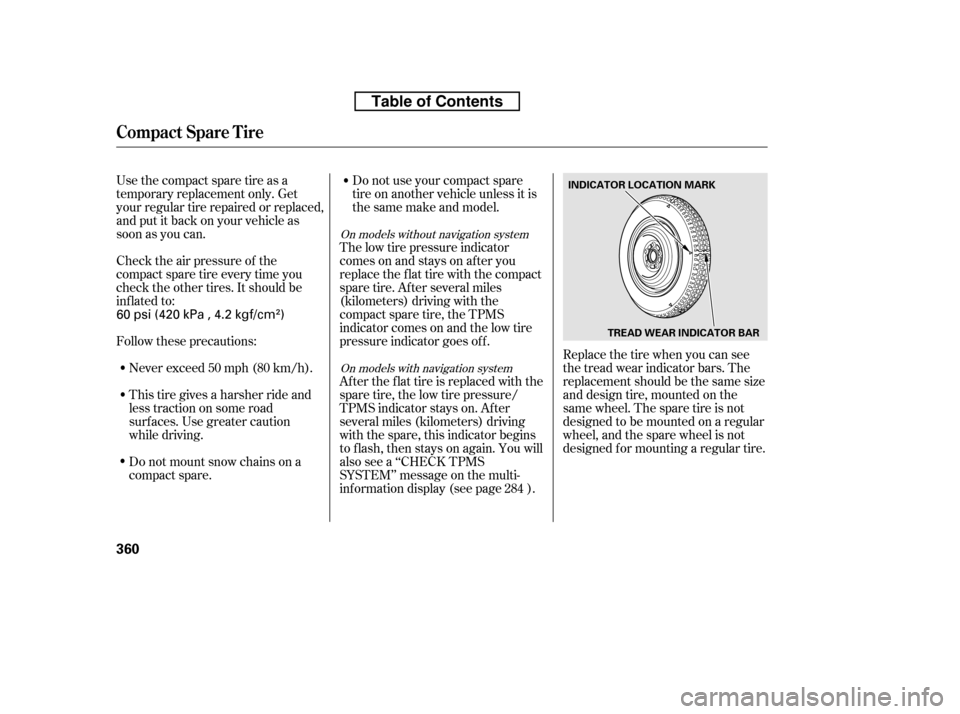
Follow these precautions:Replace the tire when you can see
the tread wear indicator bars. The
replacement should be the same size
and design tire, mounted on the
same wheel. The spare tire is not
designed to be mounted on a regular
wheel, and the spare wheel is not
designed f or mounting a regular tire.
Never exceed 50 mph (80 km/h).
This tire gives a harsher ride and
less traction on some road
surf aces. Use greater caution
while driving.
Do not mount snow chains on a
compact spare. Do not use your compact spare
tire on another vehicle unless it is
thesamemakeandmodel.
The low tire pressure indicator
comes on and stays on af ter you
replace the flat tire with the compact
spare tire. Af ter several miles
(kilometers) driving with the
compact spare tire, the TPMS
indicator comes on and the low tire
pressure indicator goes of f .
After the flat tire is replaced with the
spare tire, the low tire pressure/
TPMS indicator stays on. After
several miles (kilometers) driving
with the spare, this indicator begins
to f lash, then stays on again. You will
also see a ‘‘CHECK TPMS
SYSTEM’’ message on the multi-
inf ormation display (see page ). 284
On models without navigation system
On models with navigation system
Compact Spare Tire
360
INDICATOR LOCATION MARK
TREAD WEAR INDICATOR BAR
60 psi (420 kPa , 4.2 kgf/cm)
Table of Contents