trunk HONDA RIDGELINE 2018 Owner's Manual (in English)
[x] Cancel search | Manufacturer: HONDA, Model Year: 2018, Model line: RIDGELINE, Model: HONDA RIDGELINE 2018Pages: 623, PDF Size: 25.85 MB
Page 5 of 623
Contents
Child Safety P. 55Exhaust Gas Hazard P. 70Safety Labels P. 71
Opening and Closing the Tailgate P. 128 Opening and Closing the Trunk P. 130
Opening and Closing the Moonroof* P. 140 Operating the Switches Around the Steering Wheel P. 142
Interior Lights/Convenience It ems P. 171Climate Control System* P. 188
Audio System Basic Operation P. 206, 224 Audio Error Messages P. 294
Customized Features P. 317
Off-Highway Driving Guidelines P. 430 When Driving P. 432 Braking P. 488
Refueling P. 512 Fuel Economy and CO
2 Emissions P. 515
Maintenance Under the Hood P. 525 Replacing Light Bulbs P. 537
Checking and Maintaining Tires P. 545 Battery P. 554 Remote Transmitter Care P. 555
Cleaning P. 557 Accessories and Modifications P. 563
Engine Does Not Start P. 576Jump Starting P. 579 Shift Lever Does Not Move P. 582
Fuses P. 589 Emergency Towing P. 594
Refueling P. 596
Devices that Emit Radio Waves P. 603 Reporting Safety Defects P. 604
Authorized Manuals P. 609 Customer Service Information P. 610
Quick Reference GuideP. 4
Safe DrivingP. 29
Instrument PanelP. 73
ControlsP. 109
FeaturesP. 199
DrivingP. 409
MaintenanceP. 517
Handling the UnexpectedP. 565
InformationP. 599
IndexP. 611
Page 8 of 623
Visual Index
6
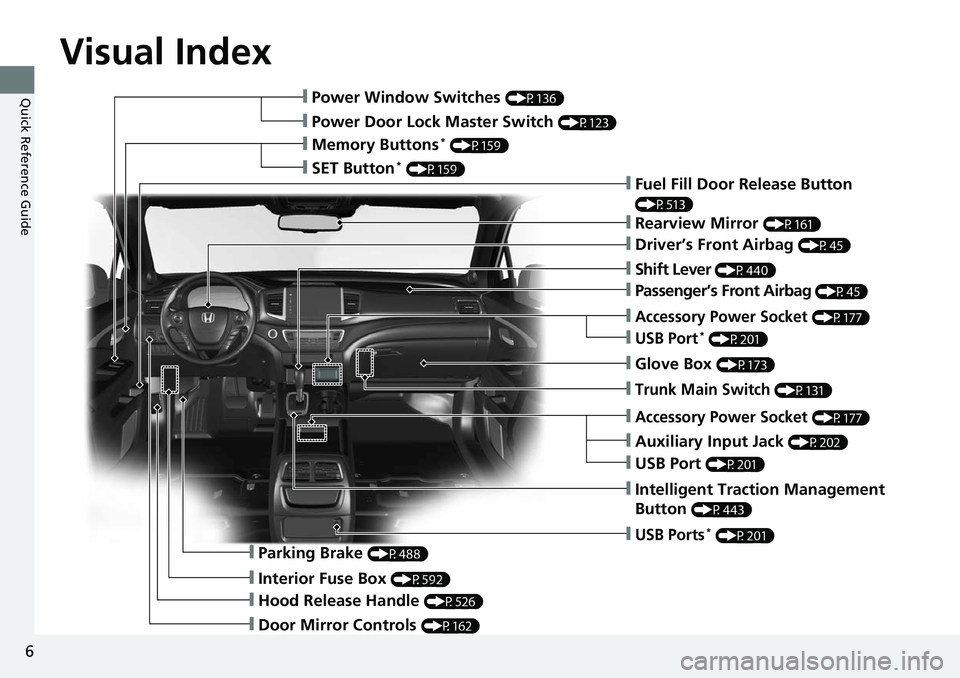
Quick Reference Guide❙Power Window Switches (P136)
❙Power Door Lock Master Switch (P123)
❙Memory Buttons* (P159)
❙SET Button* (P159)❙Fuel Fill Door Release Button
(P513)
❙Rearview Mirror (P161)
❙Driver’s Front Airbag (P45)
❙Shift Lever (P440)
❙Glove Box (P173)
❙Auxiliary Input Jack (P202)
❙Intelligent Traction Management
Button
(P443)
❙Parking Brake (P488)
❙Interior Fuse Box (P592)
❙Hood Release Handle (P526)
❙Door Mirror Controls (P162)
❙USB Ports* (P201)
❙Accessory Power Socket (P177)
❙USB Port (P201)
❙Trunk Main Switch (P131)
❙Accessory Power Socket (P177)
❙USB Port* (P201)
❙Passenger’s Front Airbag (P45)
Page 10 of 623
Visual Index
8
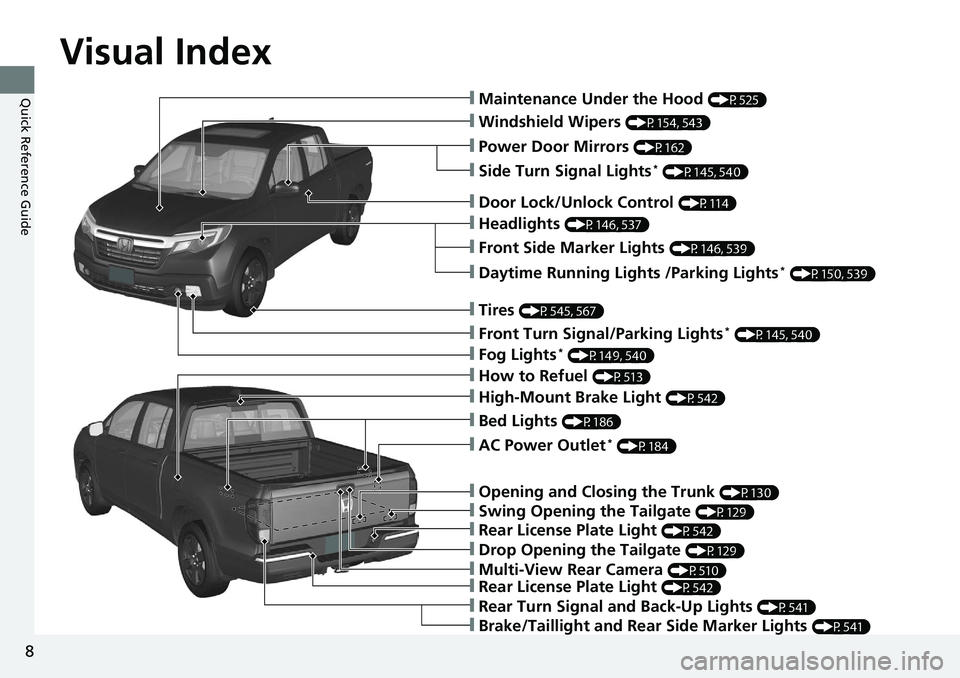
Quick Reference Guide❙Maintenance Under the Hood (P525)
❙Windshield Wipers (P154, 543)
❙Power Door Mirrors (P162)
❙Headlights (P146, 537)
❙Front Side Marker Lights (P146, 539)
❙Fog Lights* (P149, 540)
❙Side Turn Signal Lights* (P145, 540)
❙Daytime Running Lights /Parking Lights* (P150, 539)
❙How to Refuel (P513)
❙Rear Turn Signal and Back-Up Lights (P541)
❙Door Lock/Unlock Control (P114)
❙Tires (P545, 567)
❙Front Turn Signal/Parking Lights* (P145, 540)
❙Brake/Taillight and Rear Side Marker Lights (P541)
❙Rear License Plate Light (P542)
❙Multi-View Rear Camera (P510)
❙Drop Opening the Tailgate (P129)
❙Rear License Plate Light (P542)
❙Swing Opening the Tailgate (P129)
❙Opening and Closing the Trunk (P130)
❙AC Power Outlet* (P184)
❙High-Mount Brake Light (P542)
❙Bed Lights (P186)
Page 16 of 623
14
Quick Reference Guide
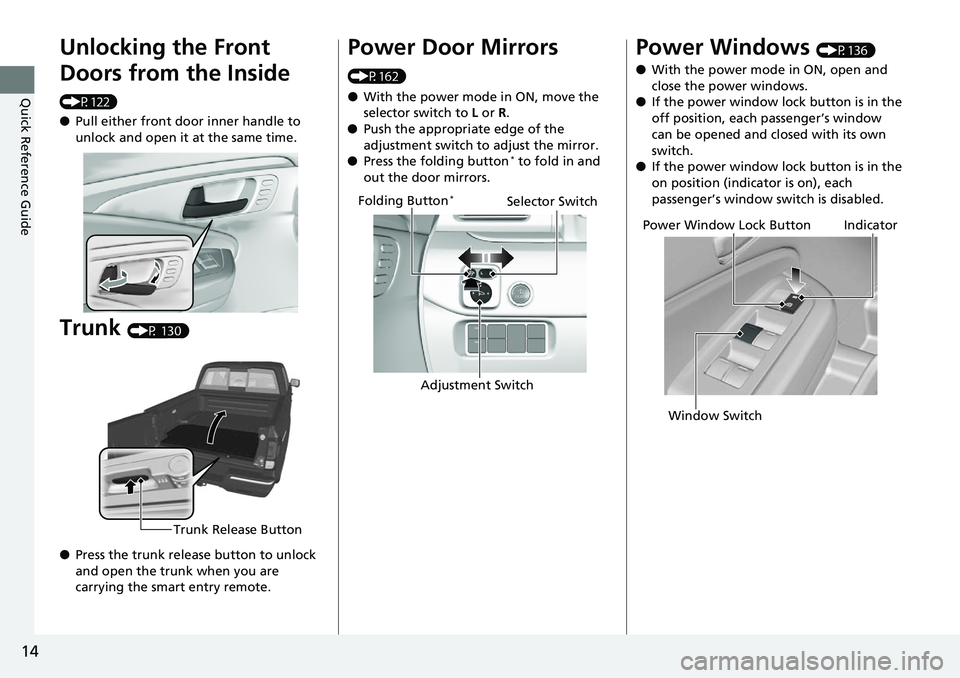
Unlocking the Front
Doors from the Inside
(P122)
●Pull either front door inner handle to
unlock and open it at the same time.
Trunk (P 130)
● Press the trunk release button to unlock
and open the trunk when you are
carrying the smart entry remote.
Trunk Release Button
Power Door Mirrors
(P162)
● With the power mode in ON, move the
selector switch to L or R.
● Push the appropriate edge of the
adjustment switch to adjust the mirror.
● Press the folding button
* to fold in and
out the door mirrors.
Selector Switch
Adjustment Switch
Folding Button*
Power Windows (P136)
● With the power mode in ON, open and
close the power windows.
● If the power window lock button is in the
off position, each passenger’s window
can be opened and closed with its own
switch.
● If the power window lock button is in the
on position (indicator is on), each
passenger’s window switch is disabled.
Power Window Lock Button
Window SwitchIndicator
Page 26 of 623
24
Quick Reference Guide
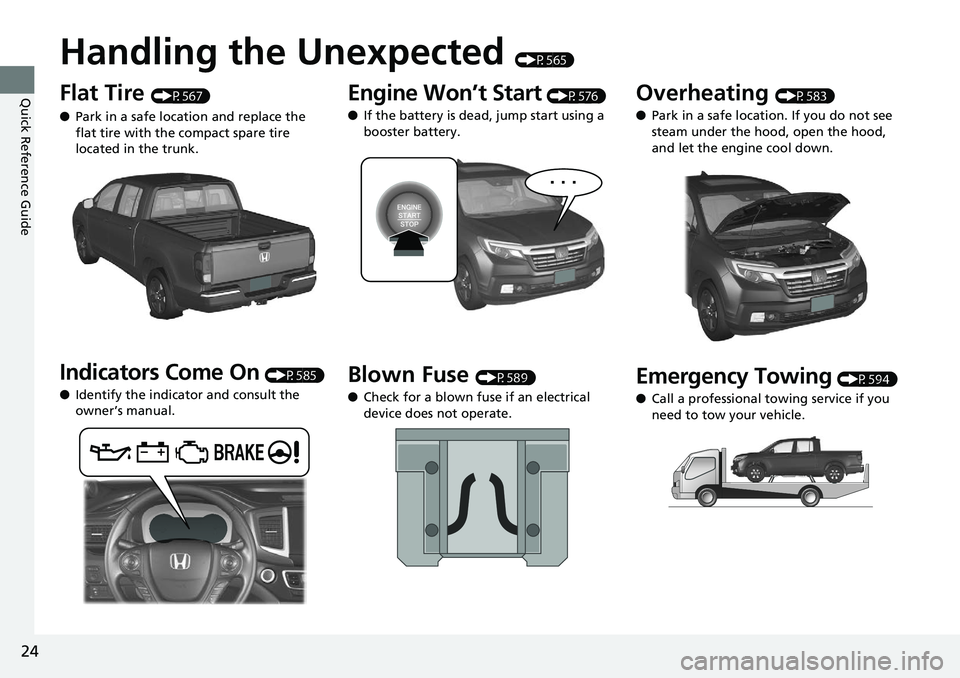
Handling the Unexpected (P565)
Flat Tire (P567)
● Park in a safe location and replace the
flat tire with the compact spare tire
located in the trunk.
Indicators Come On (P585)
● Identify the indicator and consult the
owner’s manual.
Engine Won’t Start (P576)
● If the battery is dead, jump start using a
booster battery.
Blown Fuse (P589)
● Check for a blown fuse if an electrical
device does not operate.
Overheating (P583)
● Park in a safe location. If you do not see
steam under the hood, open the hood,
and let the engine cool down.
Emergency Towing (P594)
● Call a professional towing service if you
need to tow your vehicle.
Page 36 of 623
34
uuFor Safe Driving uSafety Checklist
Safe Driving
Safety Checklist
For the safety of you and your passenge rs, make a habit of checking these items
each time before you drive.
• After everyone has entered the vehicle, be sure all doors are closed and locked.
Locking the doors helps prevent an occupant from being ejected and an outsider
from unexpectedly opening a door.
2 Locking/Unlocking the Doors from the Inside P. 121
•Adjust your seat to a position suitable for driving. Be sure the front seats are
adjusted as far to the rear as possible while allowing the driver to control the
vehicle. Sitting too close to a front airbag can result in serious or fatal injury in a
crash.
2 Adjusting the Seats P. 163
•Adjust head restraints to the proper posi tion. Head restraints are most effective
when the center of the head restraint alig ns with the center of your head. Taller
persons should adjust their head restraint to the highest position.
2 Adjusting the front head restraint positions P. 168
•Always wear your seat belt, and make sure you wear it properly. Confirm that any
passengers are properly belted as well.
2 Fastening a Seat Belt P. 38
•Protect children by using seat belts or chil d seats according to a child’s age, height
and weight.
2 Child Safety P. 55
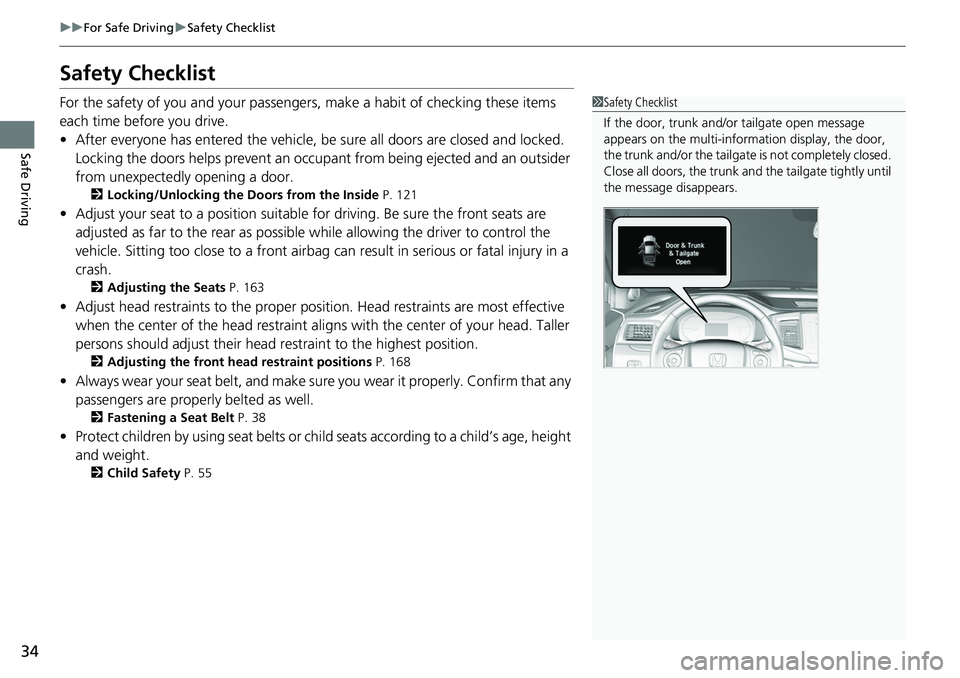
1Safety Checklist
If the door, trunk and/or tailgate open message
appears on the multi-inform ation display, the door,
the trunk and/or the tailgate is not completely closed.
Close all doors, the trunk and the tailgate tightly until
the message disappears.
Page 93 of 623
91
uuIndicators uMulti-Information Display Warning and Information Messages
Continued
Instrument Panel
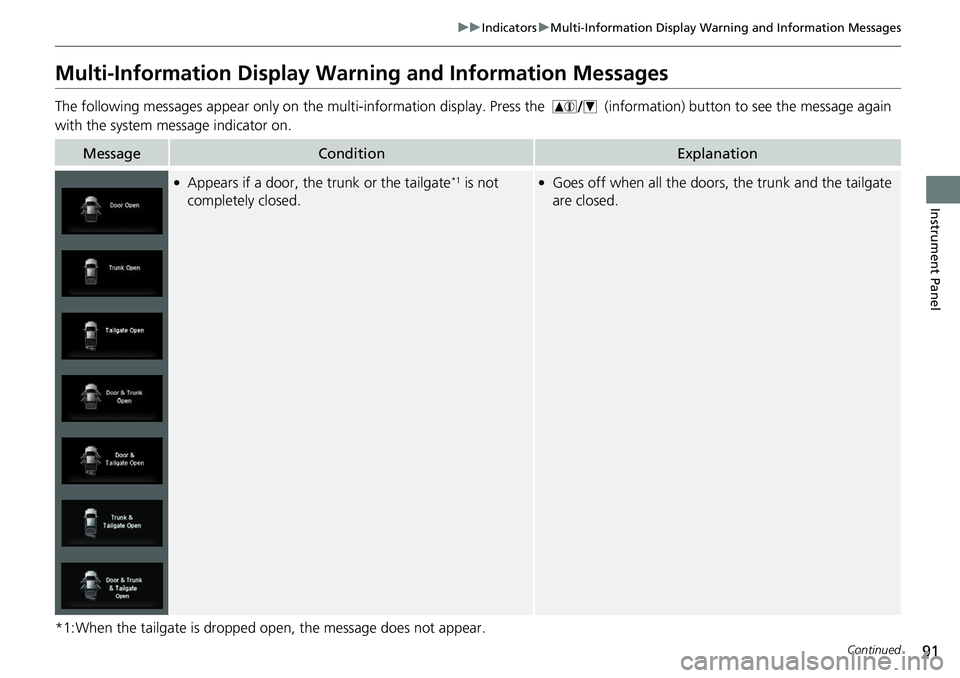
Multi-Information Display Warn ing and Information Messages
The following messages appear only on th e multi-information display. Press the (i nformation) button to see the message again
with the system message indicator on.
*1:When the tailgate is dropped open, the message does not appear.
MessageConditionExplanation
●Appears if a door, the trunk or the tailgate*1 is not
completely closed.●Goes off when all the doors, the trunk and the tailgate
are closed.
Page 111 of 623
109
Controls
This chapter explains how to operate the various controls necessary for driving.
Clock.................................................. 110
Locking and Unlocking the Doors Key Types and Functions .................. 111
Low Smart Entry Remote Signal Strength... 113
Locking/Unlocking the Doors from the Outside .......................................... 114
Locking/Unlocking the Doors from the
Inside ............................................. 121
Childproof Door Locks ..................... 123
Auto Door Locking/Unlocking .......... 124
Opening and Closing the Tailgate ... 128
Opening and Closing the Trunk ....... 130
Security System
Immobilizer System .......................... 133
Security System Alarm ...................... 133
Opening and Closing the Windows .... 136
Opening and Closing the Moonroof*... 140Operating the Switches Around the Steering Wheel ENGINE START/STOP Button............. 142
Turn Signals ..................................... 145
Light Switches.................................. 146
Fog Lights
*...................................... 149
Daytime Running Lights ................... 150
Auto High-Beam (H igh Beam Support
System)
*........................................ 151
Wipers and Washers ........................ 154
Rear Defogger/Heat ed Door Mirror
*
Button ........................................... 156 Heated Windshield Button ............... 156
Brightness Control ........................... 157
Driving Position Memory System
*.... 158
Adjusting the Steering Wheel .......... 160
Adjusting the Mirrors Interior Rearview Mirror ................... 161
Power Door Mirrors ......................... 162
Adjusting the Seats .......................... 163
Interior Lights/Convenience Items
Interior Lights .................................. 171
Interior Convenience Items .............. 173
In-Bed Convenience Items................ 184
Climate Control System
*.................. 188
Heating and Cooling System*......... 195
Canadian models
* Not available on all models
Page 113 of 623
111Continued
Controls
Locking and Unlocking the Doors
Key Types and Functions
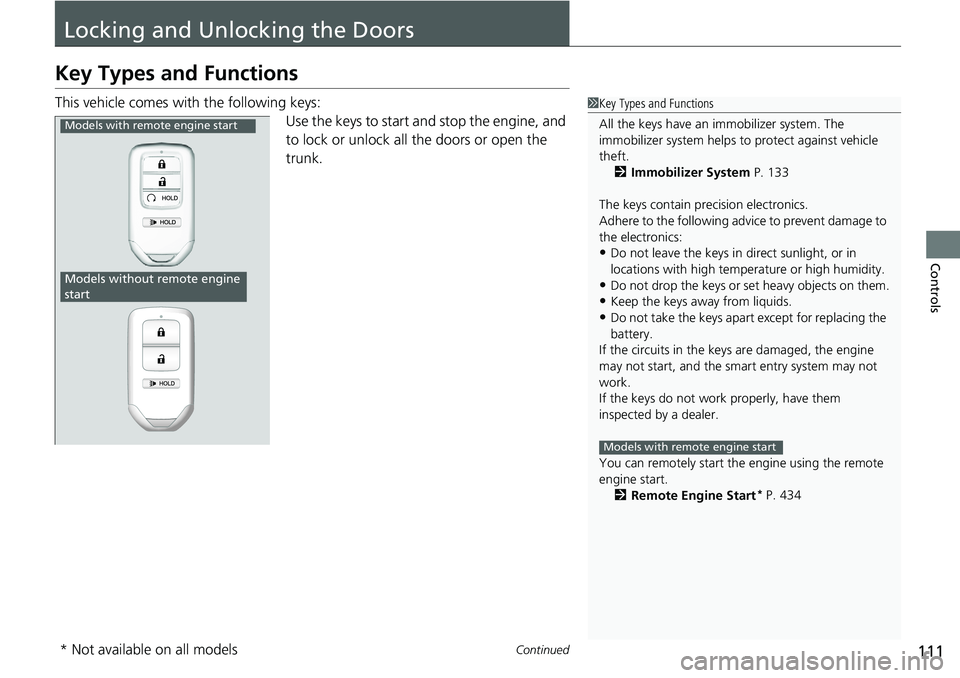
This vehicle comes with the following keys:
Use the keys to start and stop the engine, and
to lock or unlock all the doors or open the
trunk.1Key Types and Functions
All the keys have an immobilizer system. The
immobilizer system helps to protect against vehicle
theft. 2 Immobilizer System P. 133
The keys contain precision electronics.
Adhere to the following advi ce to prevent damage to
the electronics:
•Do not leave the keys in direct sunlight, or in
locations with high temperature or high humidity.
•Do not drop the keys or set heavy objects on them.
•Keep the keys away from liquids.
•Do not take the keys apart except for replacing the
battery.
If the circuits in the keys are damaged, the engine
may not start, and the smart entry system may not
work.
If the keys do not work properly, have them
inspected by a dealer.
You can remotely start the engine using the remote
engine start.
2 Remote Engine Start
* P. 434
Models with remote engine start
Models with remote engine start
Models without remote engine
start
* Not available on all models
Page 114 of 623
uuLocking and Unlocking the Doors uKey Types and Functions
112
Controls
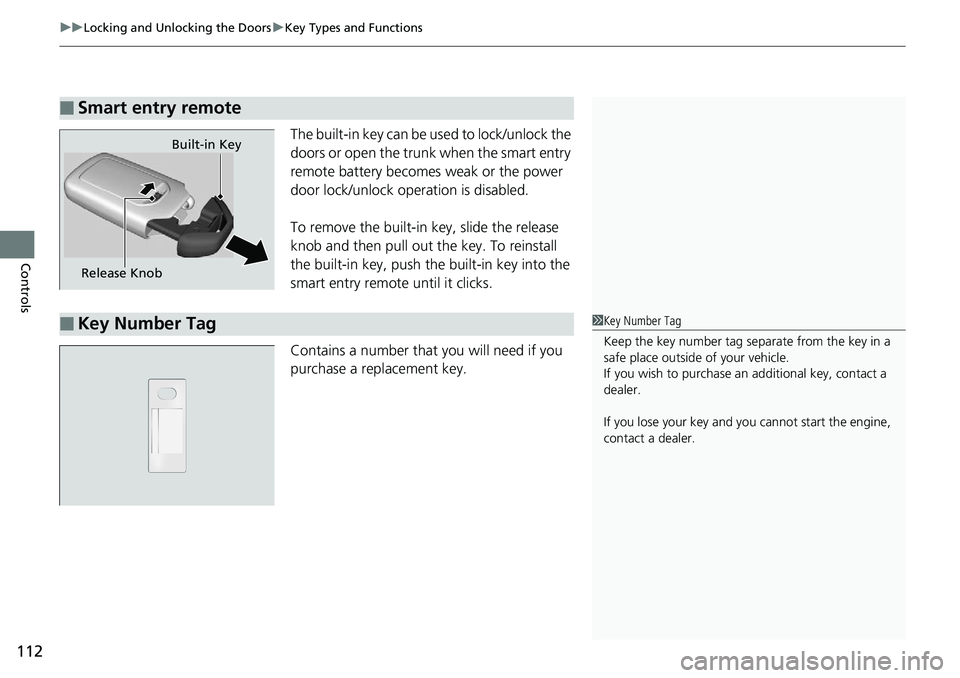
The built-in key can be us ed to lock/unlock the
doors or open the trunk when the smart entry
remote battery becomes weak or the power
door lock/unlock operation is disabled.
To remove the built-in key, slide the release
knob and then pull out the key. To reinstall
the built-in key, push th e built-in key into the
smart entry remote until it clicks.
Contains a number that you will need if you
purchase a replacement key.
■Smart entry remote
Release Knob Built-in Key
■Key Number Tag1
Key Number Tag
Keep the key number tag separate from the key in a
safe place outside of your vehicle.
If you wish to purchase an additional key, contact a
dealer.
If you lose your key and you cannot start the engine,
contact a dealer.