turn off engine HONDA RIDGELINE 2022 Owner's Guide
[x] Cancel search | Manufacturer: HONDA, Model Year: 2022, Model line: RIDGELINE, Model: HONDA RIDGELINE 2022Pages: 598, PDF Size: 12.42 MB
Page 415 of 598
413
uuWhen Driving uVehicle Stability AssistTM (VSA ®), aka Electronic Stability Control (ESC), System
Driving
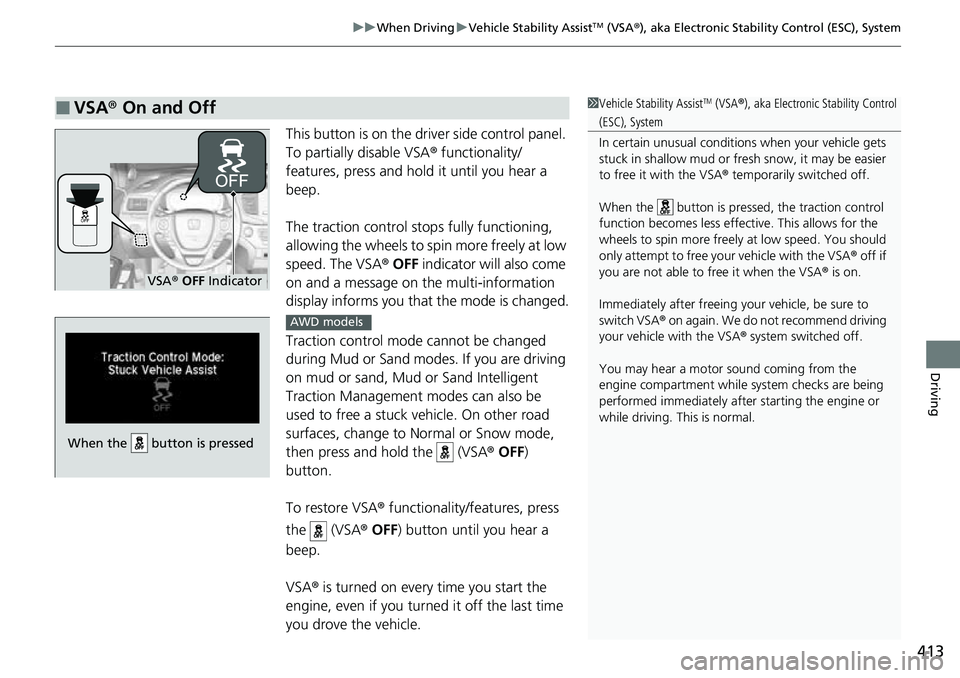
This button is on the driver side control panel.
To partially disable VSA ® functionality/
features, press and hold it until you hear a
beep.
The traction control stop s fully functioning,
allowing the wheels to spin more freely at low
speed. The VSA ® OFF indicator will also come
on and a message on the multi-information
display informs you that the mode is changed.
Traction control mode cannot be changed
during Mud or Sand modes. If you are driving
on mud or sand, Mud or Sand Intelligent
Traction Management modes can also be
used to free a stuck ve hicle. On other road
surfaces, change to Normal or Snow mode,
then press and hold the (VSA ® OFF )
button.
To restore VSA ® functionality/features, press
the (VSA ® OFF ) button until you hear a
beep.
VSA ® is turned on every time you start the
engine, even if you turned it off the last time
you drove the vehicle.
■VSA ® On and Off1 Vehicle Stability AssistTM (VSA® ), aka Electronic Stability Control
(ESC), System
In certain unusual conditions when your vehicle gets
stuck in shallow mud or fr esh snow, it may be easier
to free it with the VSA ® temporarily switched off.
When the button is pressed, the traction control
function becomes less effective. This allows for the
wheels to spin more freely at low speed. You should
only attempt to free your vehicle with the VSA ® off if
you are not able to free it when the VSA ® is on.
Immediately after freeing your vehicle, be sure to
switch VSA ® on again. We do not recommend driving
your vehicle with the VSA ® system switched off.
You may hear a motor sound coming from the
engine compartment while system checks are being
performed immediately after starting the engine or
while driving. This is normal.
VSA ® OFF Indicator
When the button is pressed
AWD models
Page 431 of 598
Continued429
uuHonda Sensing ®u Collision Mitigation Braking SystemTM (CMBSTM)
Driving
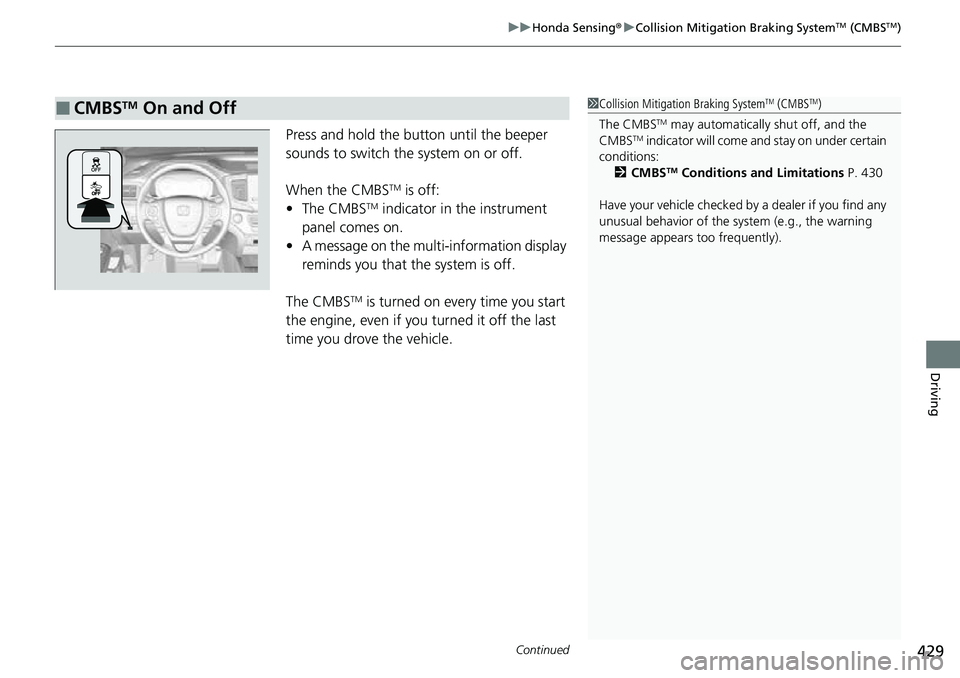
Press and hold the butt on until the beeper
sounds to switch the system on or off.
When the CMBS
TM is off:
• The CMBSTM indicator in the instrument
panel comes on.
• A message on the multi-information display
reminds you that the system is off.
The CMBS
TM is turned on every time you start
the engine, even if you turned it off the last
time you drove the vehicle.
■CMBSTM On and Off1 Collision Mitigation Braking SystemTM (CMBSTM)
The CMBS
TM may automatically shut off, and the
CMBSTM indicator will come and stay on under certain
conditions:
2 CMBS
TM Conditions and Limitations P. 430
Have your vehicle checked by a dealer if you find any
unusual behavior of the system (e.g., the warning
message appears too frequently).
Page 456 of 598
uuHonda Sensing ®u Lane Keeping Assist System (LKAS)
454
Driving
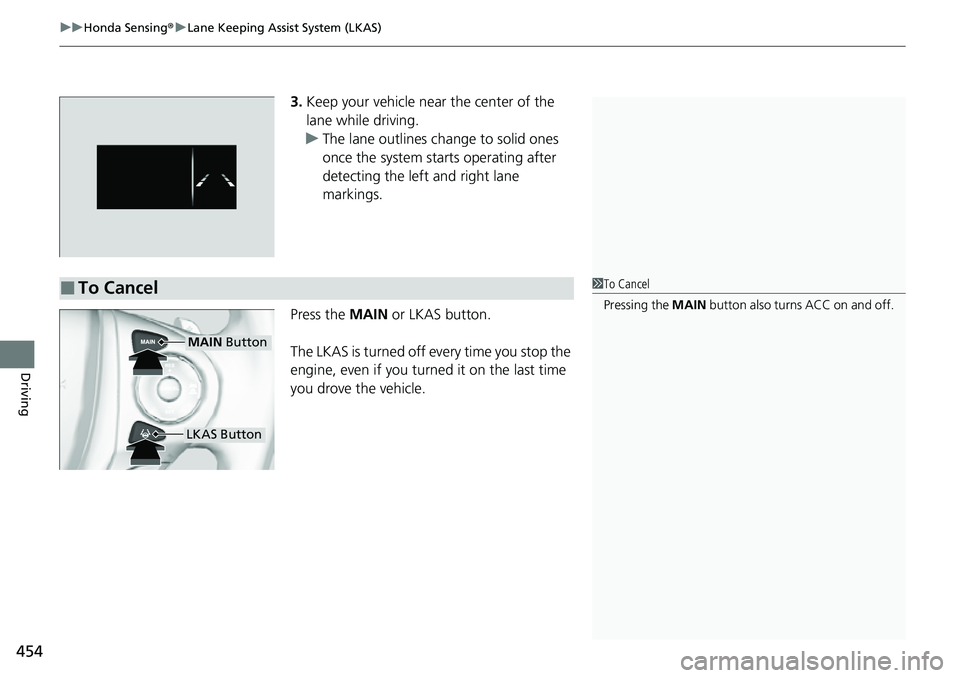
3. Keep your vehicle near the center of the
lane while driving.
u The lane outlines change to solid ones
once the system starts operating after
detecting the left and right lane
markings.
Press the MAIN or LKAS button.
The LKAS is turned off every time you stop the
engine, even if you turned it on the last time
you drove the vehicle.
■To Cancel1 To Cancel
Pressing the MAIN button also turns ACC on and off.
MAIN Button
LKAS Button
Page 474 of 598
472
Driving
Parking Your Vehicle
When Stopped
1.Depress the brake pedal firmly.
2. Apply the parking brake.
3. Put the transmission into
(P.
4. Turn off the engine.
Always set the parking brake, in particular if you are parked on an incline.
1 Parking Your Vehicle
Do not park your vehicle near flammable objects,
such as dry grass, oil, or timber.
Heat from the exhaust can cause a fire.
3WARNING
The vehicle can roll aw ay if left unattended
without confirming that Park is engaged.
A vehicle that rolls away could cause a crash
resulting in seriou s injury or death.
Always keep your foot on the brake pedal
until you have confirmed that
( P is shown
on the shift posi tion Indicator.
1When Stopped
NOTICE
The following can dama ge the transmission:•Depressing the accelerator and brake pedals
simultaneously.
•Holding the vehicle in place when facing uphill by
depressing the accelerator pedal.
•Putting the transmission into ( P before the vehicle
stops completely.
In extremely cold temperatures, the parking brake
may freeze up if applied. If such temperatures are
expected, do not apply the parking brake but, if
parking on a slope, either turn the front wheels so
they will contact the curb if the vehicle rolls down the
slope or block the wheels to keep the vehicle from
moving. If you do not take either precaution, the
vehicle may roll unexpect edly, leading to a crash.
Page 484 of 598
482
uuMulti-View Rear Camera uAbout Your Multi-View Rear Camera
Driving
• If you were last using Wide view mode or Normal view mode, the same view
mode will be activated the next time you put the transmission into
(R.
• If you were using Top down view mode before you turned off the engine, Wide
view mode will be activated the next time you set the power mode to ON and put
the transmission into
(R.
• If you were using Top down view mode and 10 seconds elapsed after you took
the transmission out of
(R, Wide view mode will be activated the next time you
put the transmission into
(R.
• If you were using Top down view mode and put the transmission back into
(R
within 10 seconds after you took it out of
(R, Top down view mode will be
activated.
Page 486 of 598
484
uuRefueling uHow to Refuel
Driving
How to Refuel
Your fuel tank is not equipped with a fuel filler cap. You can insert the filler nozzle
directly into the filler neck. The tank seal s itself again when you pull out the filler
nozzle.
1.Stop your vehicle with the service station
pump on the left side of the vehicle in the
rear.
2. Turn off the engine.
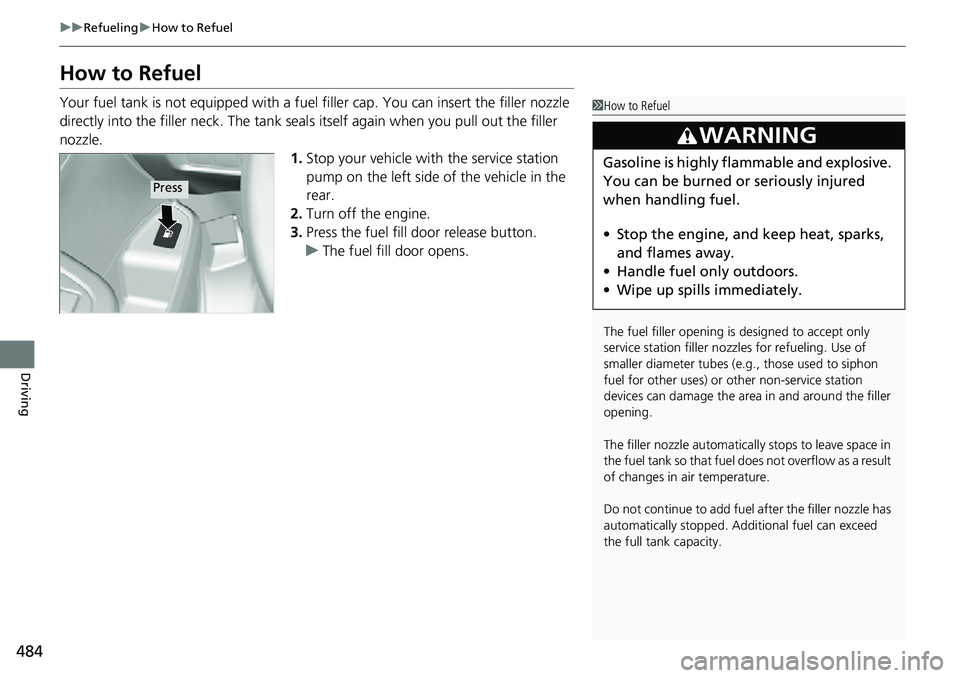
3. Press the fuel fill door release button.
u The fuel fill door opens.1How to Refuel
The fuel filler opening is designed to accept only
service station filler nozzles for refueling. Use of
smaller diamet er tubes (e.g., those used to siphon
fuel for other uses) or other non-service station
devices can damage the area in and around the filler
opening.
The filler nozzle automatically stops to leave space in
the fuel tank so that fuel does not overflow as a result
of changes in air temperature.
Do not continue to add fuel after the filler nozzle has
automatically stopped. Addi tional fuel can exceed
the full tank capacity.
3WARNING
Gasoline is highly flammable and explosive.
You can be burned or seriously injured
when handling fuel.
• Stop the engine, and keep heat, sparks,
and flames away.
• Handle fuel only outdoors.
• Wipe up spills immediately.
Press
Page 502 of 598
500
uuMaintenance Under the Hood uOil Check
Maintenance
Oil Check
We recommend that you check the engi ne oil level every time you refuel.
Park the vehicle on level ground.
Wait approximately three minutes after turn ing the engine off before you check the
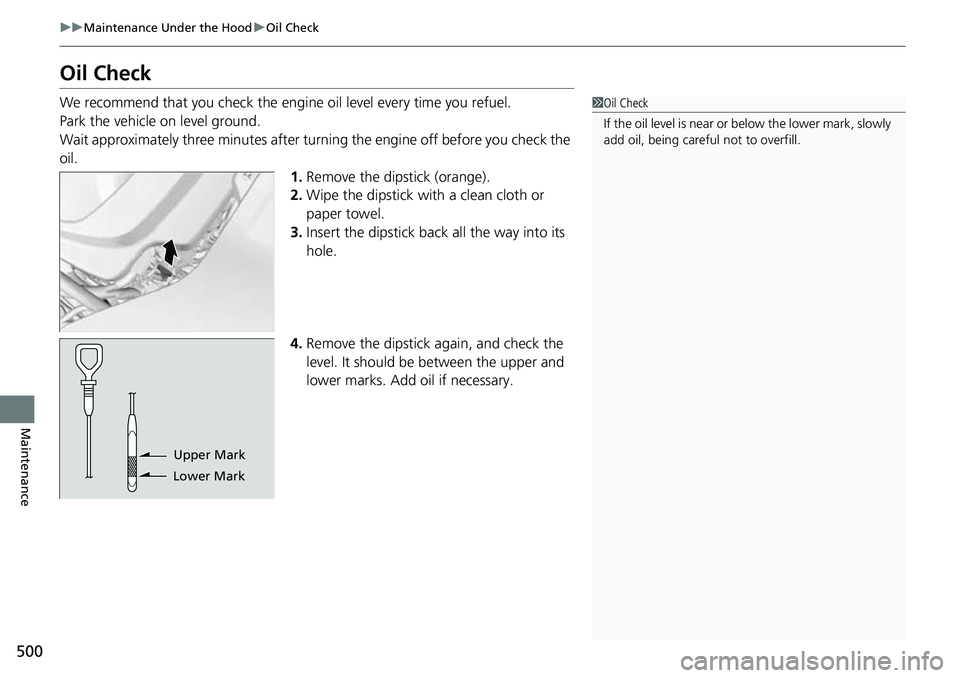
oil. 1.Remove the dipstick (orange).
2. Wipe the dipstick with a clean cloth or
paper towel.
3. Insert the dipstick back all the way into its
hole.
4. Remove the dipstick again, and check the
level. It should be between the upper and
lower marks. Add oil if necessary.1Oil Check
If the oil level is near or below the lower mark, slowly
add oil, being carefu l not to overfill.
Lower MarkUpper Mark
Page 504 of 598
502
uuMaintenance Under the Hood uChanging the Engine Oil and Oil Filter
Maintenance
Changing the Engine Oil and Oil Filter
You must change the engine oil and oil f ilter regularly in order to maintain the
engine’s lubrication. The engine may be damaged if they are not changed regularly.
Change the oil and filter in accordance with the maintenance message on the multi-
information display. 1.Run the engine until it reaches normal
operating temperature, and then turn the
engine off.
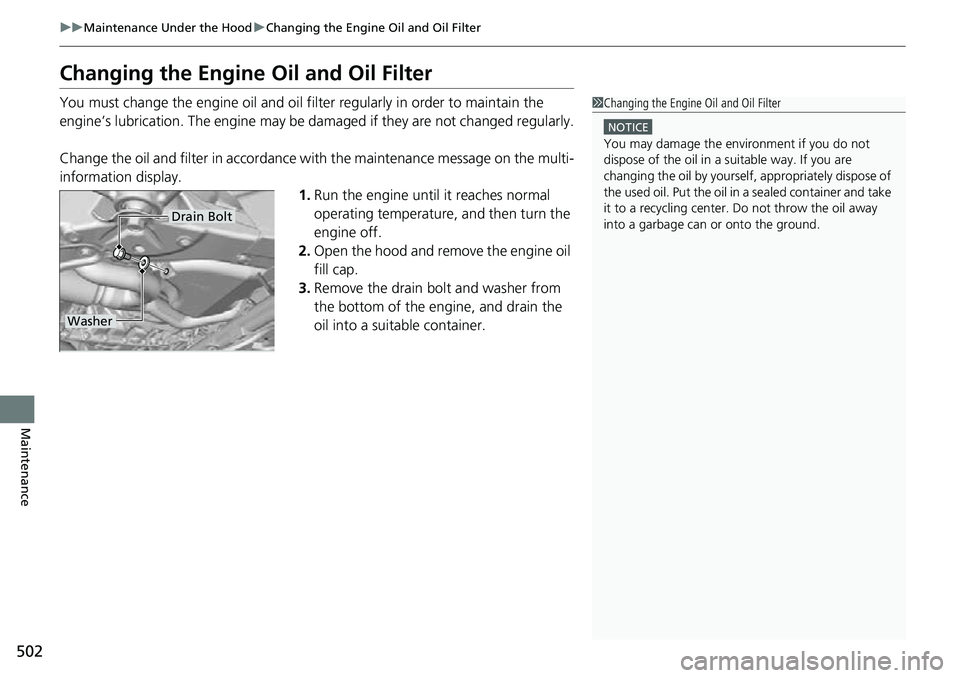
2. Open the hood and remove the engine oil
fill cap.
3. Remove the drain bolt and washer from
the bottom of the engine, and drain the
oil into a suitable container.1Changing the Engine Oil and Oil Filter
NOTICE
You may damage the environment if you do not
dispose of the oil in a suitable way. If you are
changing the oil by yourself , appropriately dispose of
the used oil. Put the oil in a sealed container and take
it to a recycling center. Do not throw the oil away
into a garbage can or onto the ground.
Drain Bolt
Washer
Page 505 of 598
503
uuMaintenance Under the Hood uChanging the Engine Oil and Oil Filter
Maintenance
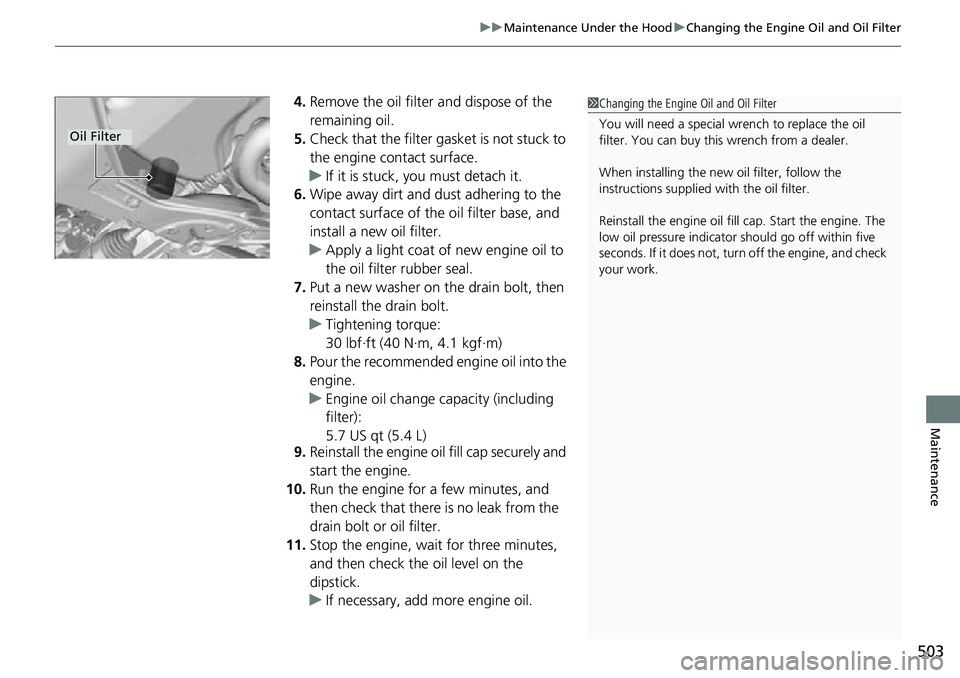
4. Remove the oil filter and dispose of the
remaining oil.
5. Check that the filter gasket is not stuck to
the engine contact surface.
u If it is stuck, you must detach it.
6. Wipe away dirt and dust adhering to the
contact surface of the oil filter base, and
install a new oil filter.
u Apply a light coat of new engine oil to
the oil filter rubber seal.
7. Put a new washer on the drain bolt, then
reinstall the drain bolt.
u Tightening torque:
30 lbf∙ft (40 N∙m, 4.1 kgf∙m)
8. Pour the recommended engine oil into the
engine.
u Engine oil change capacity (including
filter):
5.7 US qt (5.4 L)
9. Reinstall the engine oil fill cap securely and
start the engine.
10. Run the engine for a few minutes, and
then check that there is no leak from the
drain bolt or oil filter.
11. Stop the engine, wait for three minutes,
and then check the oil level on the
dipstick.
u If necessary, add more engine oil.1Changing the Engine Oil and Oil Filter
You will need a special wrench to replace the oil
filter. You can buy this wrench from a dealer.
When installing the new oil filter, follow the
instructions supplied with the oil filter.
Reinstall the engine oil fill cap. Start the engine. The
low oil pressure indicator should go off within five
seconds. If it does not, turn off the engine, and check
your work.
Oil Filter
Page 533 of 598
531
uuCleaning uExterior Care
Continued
Maintenance
Exterior Care
Dust off the vehicle body after you drive.
Regularly inspect your vehicle for scratches on painted surfaces. A scratch on a
painted surface can result in body rust. If you find a scratch, promptly repair it.
Wash the vehicle regularly. Wash more fr equently when driving in the following
conditions:
• If driving on roads with road salt.
• If driving in coastal areas.
• If tar, soot, bird droppings, insects, or tree sap are stuck to painted surfaces.
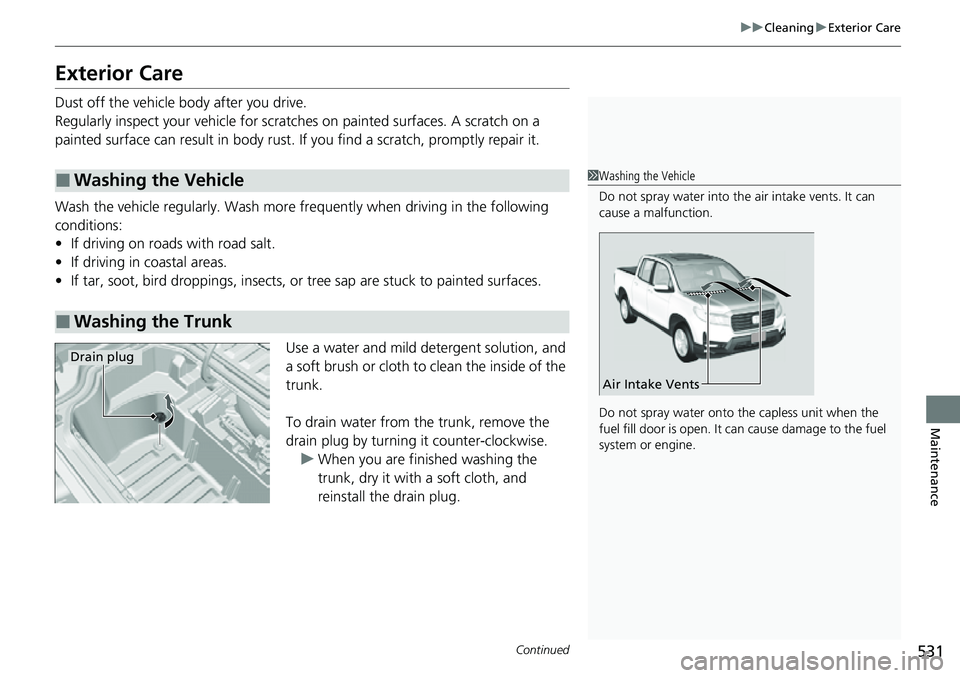
Use a water and mild detergent solution, and
a soft brush or cloth to clean the inside of the
trunk.
To drain water from the trunk, remove the
drain plug by turning it counter-clockwise. u When you are finished washing the
trunk, dry it with a soft cloth, and
reinstall the drain plug.
■Washing the Vehicle
■Washing the Trunk
1Washing the Vehicle
Do not spray water into the air intake vents. It can
cause a malfunction.
Do not spray water onto the capless unit when the
fuel fill door is open. It ca n cause damage to the fuel
system or engine.
Air Intake Vents
Drain plug