turn off engine HONDA RIDGELINE 2022 Service Manual
[x] Cancel search | Manufacturer: HONDA, Model Year: 2022, Model line: RIDGELINE, Model: HONDA RIDGELINE 2022Pages: 598, PDF Size: 12.42 MB
Page 534 of 598
uuCleaning uExterior Care
532
Maintenance
• Make sure to follow the instructions indicated on the automated car wash.
• Fold in the door mirrors.
• For models equipped with automatic inte rmittent wipers, turn the wipers off.
• Keep sufficient distance between the cleaning nozzl e and the vehicle body.
• Take particular care around the windows. St anding too close may cause water to
enter the vehicle interior.
• Do not spray high pressure water directly into the engine compartment. Instead,
use low pressure water and a mild detergent.
A good coat of automotive body wax helps protect your vehicle’s paint from the
elements. Wax will wear off over time and expose your vehicle’s paint to the
elements, so reapply as necessary.
■Using an Automated Car Wash
■Using High Pressure Cleaners
■Applying Wax
1 Using an Automated Car Wash
When using an automated car wash that pulls the
vehicle through with a c onveyor, make sure the
transmission in
( N position.
2 If you want to keep the transmission in
(N
position [car wash mode] P. 399
1Applying Wax
NOTICE
Chemical solvents and st rong cleaners can damage
the paint, metal, and plasti c on your vehicle. Wipe
away spills immediately.
Page 545 of 598
Continued543
uuIf a Tire Goes Flat uChanging a Flat Tire
Handling the Unexpected
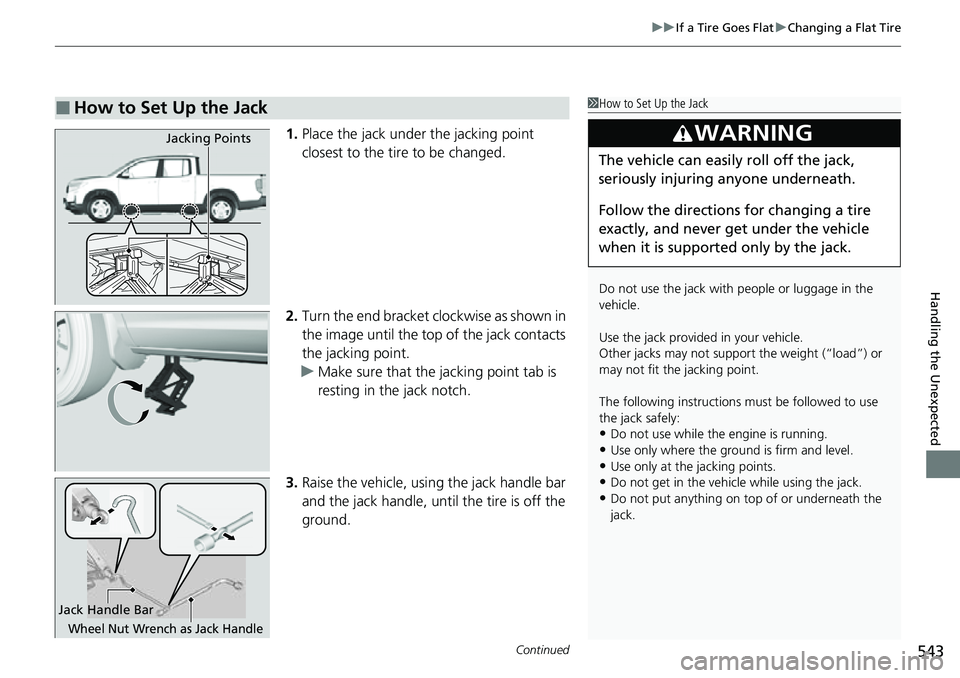
1. Place the jack under the jacking point
closest to the tire to be changed.
2. Turn the end bracket cl ockwise as shown in
the image until the top of the jack contacts
the jacking point.
u Make sure that the jacking point tab is
resting in the jack notch.
3. Raise the vehicle, using the jack handle bar
and the jack handle, until the tire is off the
ground.
■How to Set Up the Jack1How to Set Up the Jack
Do not use the jack with people or luggage in the
vehicle.
Use the jack provided in your vehicle.
Other jacks may not support the weight (“load”) or
may not fit the jacking point.
The following instructions must be followed to use
the jack safely:
•Do not use while the engine is running.
•Use only where the ground is firm and level.
•Use only at the jacking points.•Do not get in the vehicl e while using the jack.
•Do not put anything on top of or underneath the
jack.
3WARNING
The vehicle can easily roll off the jack,
seriously injuring anyone underneath.
Follow the directions for changing a tire
exactly, and never get under the vehicle
when it is supported only by the jack.
Jacking Points
Jack Handle Bar
Wheel Nut Wrench as Jack Handle
Page 553 of 598
551
uuEngine Does Not Start uEmergency Engine Stop
Handling the Unexpected
Emergency Engine Stop
The ENGINE START/STOP button may be used to stop the engine due to an
emergency situation even while driving. If you must stop the engine, do either of the
following operations:
• Press and hold the ENGINE START/STOP button for about two seconds.
• Firmly press the ENGINE START/STOP button three times.
The steering wheel will not lock. However, because turning off the engine disables
the power assist the engine provides to the steering and braking systems, it will
require significantly more physical effort an d time to steer and slow the vehicle. Use
both feet on the brake pedal to slow down the vehicle and stop immediately in a
safe place.
The transmission automa tically changes to
(P after the vehicle comes to a complete
stop.
Then, the power mode changes to VEHICLE OFF.
Then press the ENGINE START/STOP button twice without depressing the brake
pedal to change the mode to VEHICLE OFF.
1 Emergency Engine Stop
Do not press the ENGINE START/STOP button while
driving unless it is absolute ly necessary for the engine
to be turned off.
If you press the ENGINE START/STOP button while
driving, the beeper sounds.
U.S. models
Canadian models
Page 554 of 598
552
Handling the Unexpected
If the Battery Is Dead
Turn off the power to electric devices, such as audio and lights. Turn off the engine,
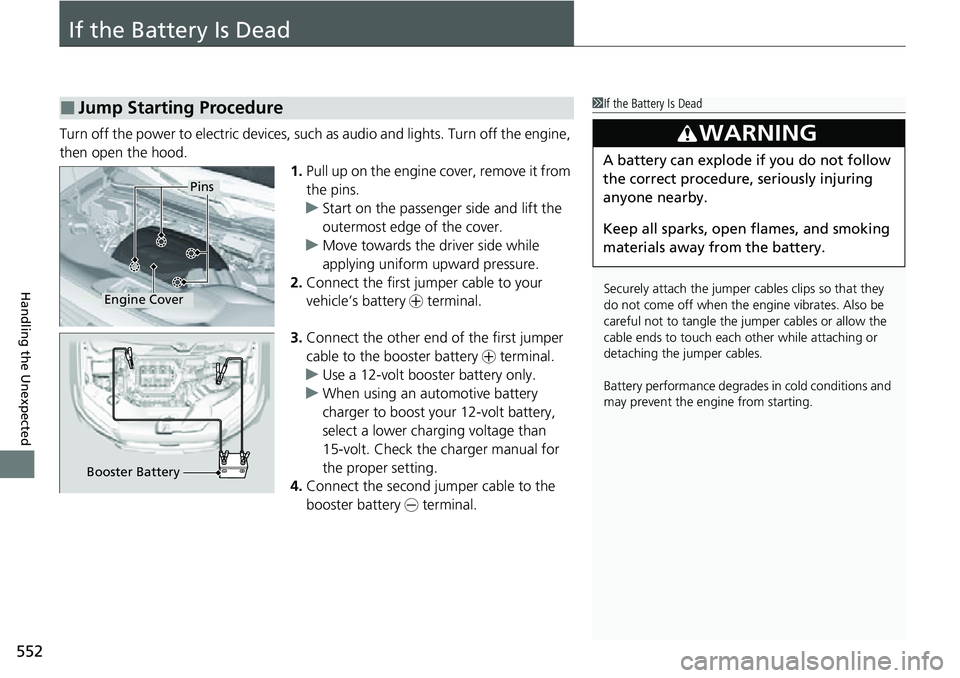
then open the hood. 1.Pull up on the engine cover, remove it from
the pins.
u Start on the passenger side and lift the
outermost edge of the cover.
u Move towards the driver side while
applying uniform upward pressure.
2. Connect the first jump er cable to your
vehicle’s battery + terminal.
3. Connect the other end of the first jumper
cable to the booster battery + terminal.
u Use a 12-volt booster battery only.
u When using an automotive battery
charger to boost your 12-volt battery,
select a lower charging voltage than
15-volt. Check the charger manual for
the proper setting.
4. Connect the second jumper cable to the
booster battery - terminal.
■Jump Starting Procedure1If the Battery Is Dead
Securely attach the jumper cables clips so that they
do not come off when the e ngine vibrates. Also be
careful not to tangle the ju mper cables or allow the
cable ends to touch each other while attaching or
detaching the jumper cables.
Battery performance degrades in cold conditions and
may prevent the engi ne from starting.
3WARNING
A battery can explode if you do not follow
the correct procedure, seriously injuring
anyone nearby.
Keep all sparks, open flames, and smoking
materials away from the battery.
Pins
Engine Cover
Booster Battery
Page 557 of 598
555Continued
Handling the Unexpected
Overheating
How to Handle Overheating
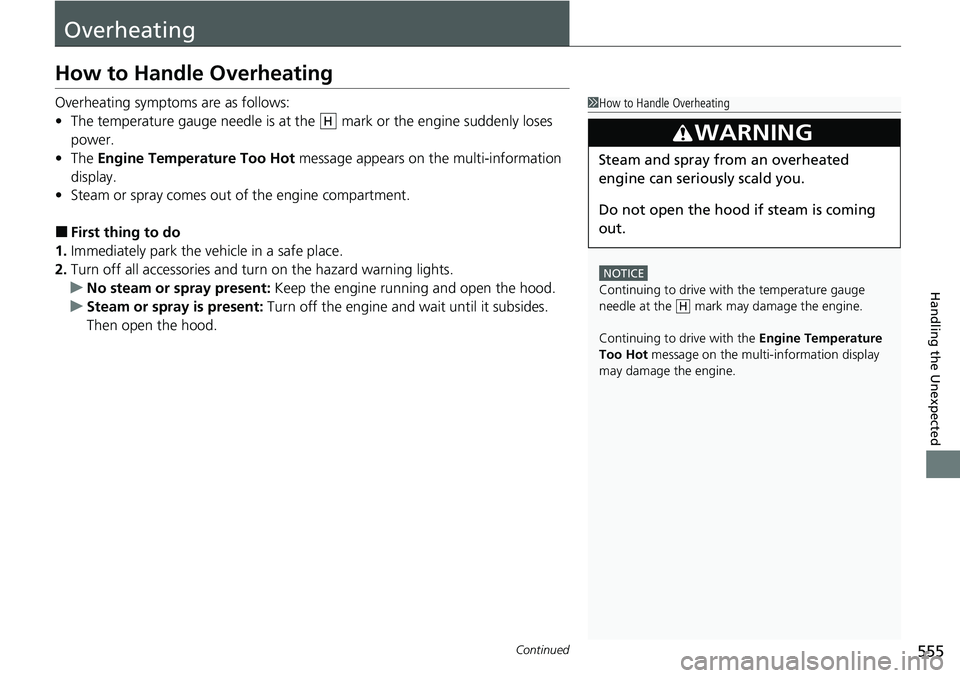
Overheating symptoms are as follows:
•The temperature gauge needle is at the mark or the engine suddenly loses
power.
• The Engine Temperature Too Hot message appears on the multi-information
display.
• Steam or spray comes out of the engine compartment.
■First thing to do
1. Immediately park the vehicle in a safe place.
2. Turn off all accessories and turn on the hazard warning lights.
u No steam or spray present: Keep the engine running and open the hood.
u Steam or spray is present: Turn off the engine and wait until it subsides.
Then open the hood.
1 How to Handle Overheating
NOTICE
Continuing to drive with the temperature gauge
needle at the mark may damage the engine.
Continuing to drive with the Engine Temperature
Too Hot message on the multi- information display
may damage the engine.
3WARNING
Steam and spray from an overheated
engine can seri ously scald you.
Do not open the hood if steam is coming
out.
H
H
Page 559 of 598
557
Handling the Unexpected
Indicator, Coming On/Blinking
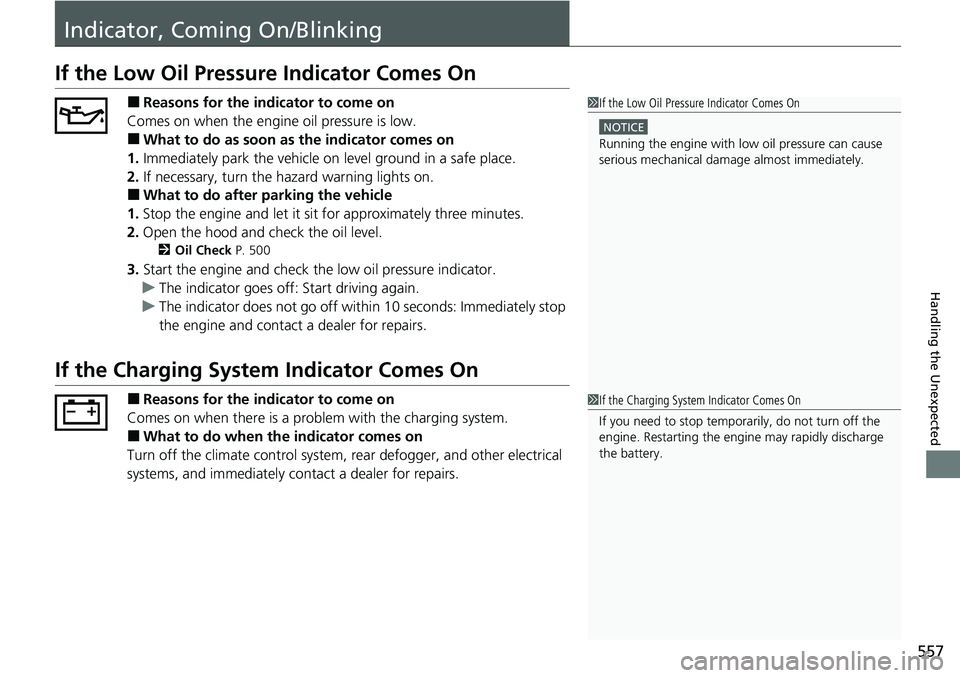
If the Low Oil Pressure Indicator Comes On
■Reasons for the indicator to come on
Comes on when the engine oil pressure is low.
■What to do as soon as the indicator comes on
1. Immediately park the vehicle on level ground in a safe place.
2. If necessary, turn the hazard warning lights on.
■What to do after parking the vehicle
1. Stop the engine and let it sit for approximately three minutes.
2. Open the hood and check the oil level.
2 Oil Check P. 500
3.Start the engine and check th e low oil pressure indicator.
u The indicator goes off: Start driving again.
u The indicator does not go off within 10 seconds: Immediately stop
the engine and contact a dealer for repairs.
If the Charging System Indicator Comes On
■Reasons for the indicator to come on
Comes on when there is a prob lem with the charging system.
■What to do when the indicator comes on
Turn off the climate control system, rear defogger, and other electrical
systems, and immediately co ntact a dealer for repairs.
1If the Low Oil Pressure Indicator Comes On
NOTICE
Running the engine with low oil pressure can cause
serious mechanical damage almost immediatelyM
1If the Charging System Indicator Comes On
If you need to stop temporarily, do not turn off the
engine. Restarting the engi ne may rapidly discharge
the battery.
Page 569 of 598
567
uuFuses uInspecting and Changing Fuses
Handling the Unexpected
Inspecting and Changing Fuses
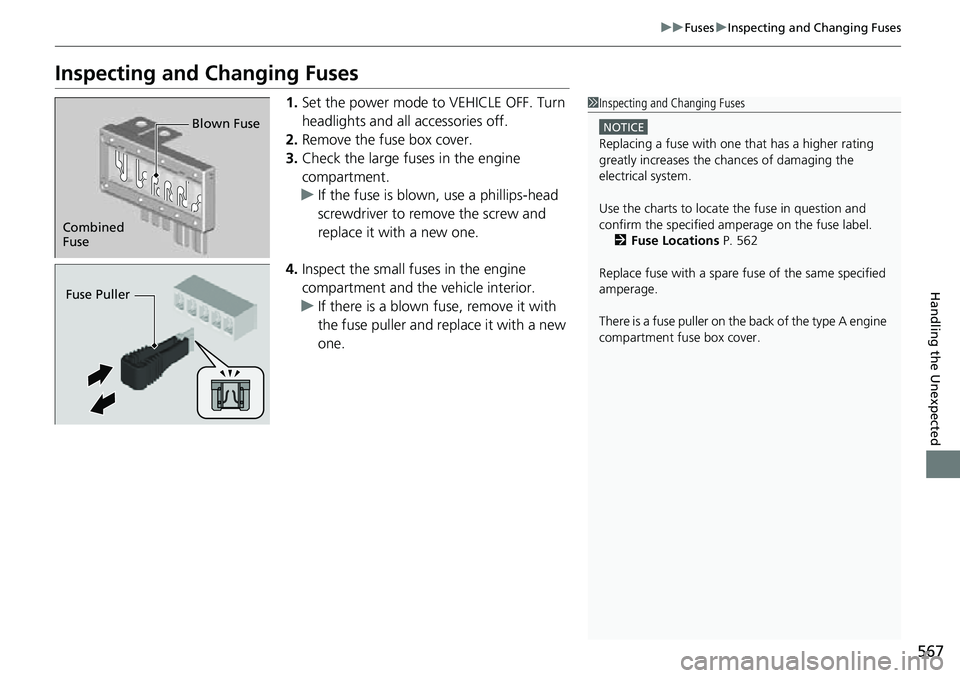
1. Set the power mode to VEHICLE OFF. Turn
headlights and all accessories off.
2. Remove the fuse box cover.
3. Check the large fuses in the engine
compartment.
u If the fuse is blown, use a phillips-head
screwdriver to remove the screw and
replace it with a new one.
4. Inspect the small fu ses in the engine
compartment and the vehicle interior.
u If there is a blown fuse, remove it with
the fuse puller and replace it with a new
one.1Inspecting and Changing Fuses
NOTICE
Replacing a fuse with on e that has a higher rating
greatly increases the chances of damaging the
electrical system.
Use the charts to locate the fuse in question and
confirm the specified amperage on the fuse labelM 2 Fuse Locations P. 562
Replace fuse with a spare fuse of the same specified
amperage.
There is a fuse puller on the back of the type A engine
compartment fuse box cover.
Combined
Fuse Blown Fuse
Fuse Puller
Page 573 of 598
571Continued
Handling the Unexpected
Refueling
Refueling From a Portable Fuel Container
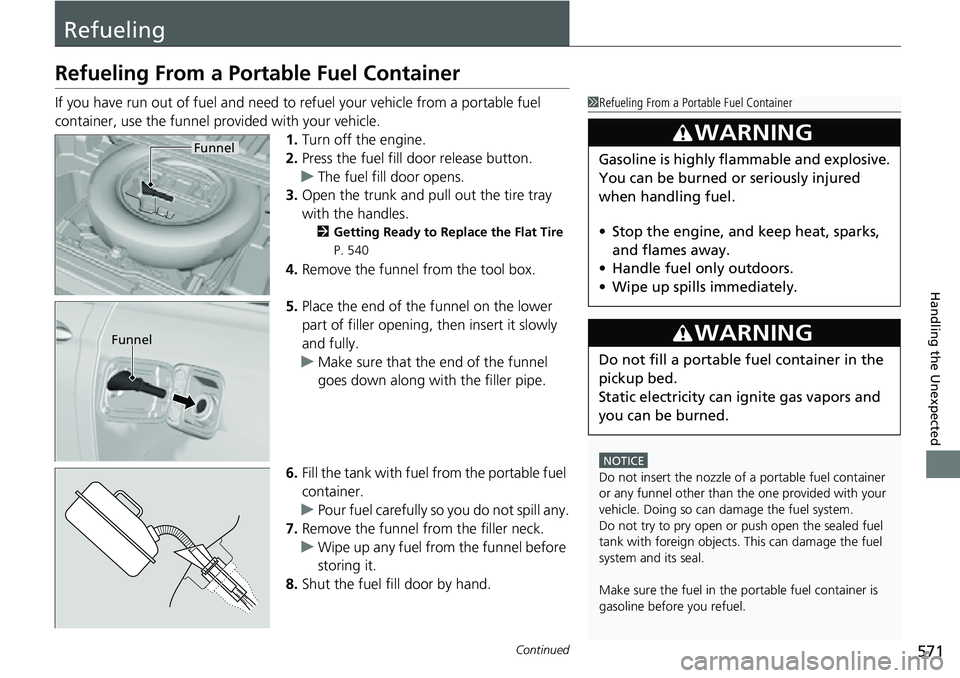
If you have run out of fuel and need to refuel your vehicle from a portable fuel
container, use the funnel provided with your vehicle.
1.Turn off the engine.
2. Press the fuel fill door release button.
u The fuel fill door opens.
3. Open the trunk and pull out the tire tray
with the handles.
2 Getting Ready to Replace the Flat Tire
P. 540
4. Remove the funnel from the tool box.
5. Place the end of the funnel on the lower
part of filler opening, then insert it slowly
and fully.
u Make sure that the end of the funnel
goes down along with the filler pipe.
6. Fill the tank with fuel from the portable fuel
container.
u Pour fuel carefully so you do not spill any.
7. Remove the funnel from the filler neck.
u Wipe up any fuel from the funnel before
storing it.
8. Shut the fuel fill door by hand.
1Refueling From a Portable Fuel Container
NOTICE
Do not insert the nozzle of a portable fuel container
or any funnel other than the one provided with your
vehicle. Doing so can damage the fuel systemM
Do not try to pry open or push open the sealed fuel
tank with foreign objects. This can damage the fuel
system and its seal.
Make sure the fuel in the portable fuel container is
gasoline before you refuelM
3WARNING
Gasoline is highly flammable and explosive.
You can be burned or seriously injured
when handling fuel.
• Stop the engine, and keep heat, sparks,
and flames away.
• Handle fuel only outdoors.
• Wipe up spills immediately.
3WARNING
Do not fill a portable fuel container in the
pickup bed.
Static electricity can ignite gas vapors and
you can be burned.
Funnel
Funnel
Page 581 of 598
579Continued
Information
Emissions Testing
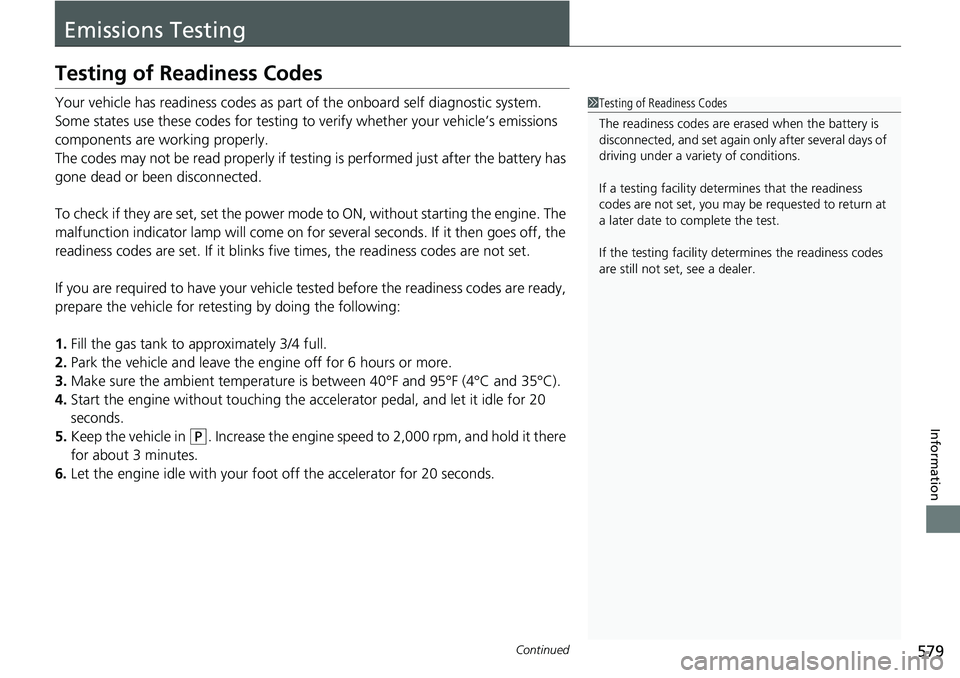
Testing of Readiness Codes
Your vehicle has readiness codes as part of the onboard self diagnostic system.
Some states use these codes for testing to verify whether your vehicle’s emissions
components are working properly.
The codes may not be read properly if testing is performed just after the battery has
gone dead or been disconnected.
To check if they are set, set the power mo de to ON, without starting the engine. The
malfunction indicator lamp will come on for several seconds. If it then goes off, the
readiness codes are set. If it blinks fi ve times, the readiness codes are not set.
If you are required to have your vehicle te sted before the readiness codes are ready,
prepare the vehicle for retest ing by doing the following:
1. Fill the gas tank to approximately 3/4 full.
2. Park the vehicle and leave the engine off for 6 hours or more.
3. Make sure the ambient temperature is between 40°F and 95°F (4°C and 35°C).
4. Start the engine without touching the ac celerator pedal, and let it idle for 20
seconds.
5. Keep the vehicle in
(P. Increase the engine speed to 2,000 rpm, and hold it there
for about 3 minutes.
6. Let the engine idle with your foot off the accelerator for 20 seconds.
1Testing of Readiness Codes
The readiness codes are erased when the battery is
disconnected, and set again onl y after several days of
driving under a variety of conditions.
If a testing facility determines that the readiness
codes are not set, you may be requested to return at
a later date to complete the test.
If the testing facility determines the readiness codes
are still not set, see a dealer.
Page 591 of 598
589
Index
Creeping (Automatic Transmission)........ 394
Cross Traffic Monitor ............................... 477
Cup Holders .............................................. 179
Customer Service Information ................ 585
Customized Features ............................... 298
D
Daytime Running Lights .......................... 153
Dead Battery ............................................ 552
Defaulting All the Settings ...................... 322
Defogger/Heated Door Mirror ................ 159
Defrosting the Windshield and
Windows ................................................. 196
Devices that Emit Radio Waves ............... 577
Dimming
Headlights .............................................. 149
Rearview Mirror ...................................... 164
Dipstick (Engine Oil) ................................ 500
Directional Signals (Turn Signal) ............. 148
Display Button .......................................... 212
Door Mirrors ............................................. 165
Doors ........................................................ 117
Auto Door Locking.................................. 130
Auto Door Unlocking .............................. 130
Door Open Message ........................... 36, 96
Key ......................................................... 117
Locking/Unlocking the Doors from the Inside................................ 16, 127
Locking/Unlocking the Doors
from the Outside................................... 120 Lockout Prevention System ...................... 126
DOT Tire Quality Grading ........................ 519
Driving ....................................................... 363
Adaptive Cruise Control (ACC) ................ 438
Automatic Transmission ........................... 394
Braking .................................................... 468
Off-Highway Driving Guidelines ............... 383
Shifting ................................................... 395
Starting the Engine .................................. 385
Driving Guidelines for Your Utility Vehicle ..................................................... 392
Driving Position Memory System ............. 161
Dust and Pollen Filter ............................... 528
E
Eco Assist® System ...................................... 12
ECON Button ............................................. 403
ECON Mode Indicator ................................ 92
Electric Power Steering (EPS) System Indicator ............................................ 85, 559
Electronic Stability Control (ESC) ............. 412
Emergency ................................................ 568
Emergency Trunk Opener ........................ 135
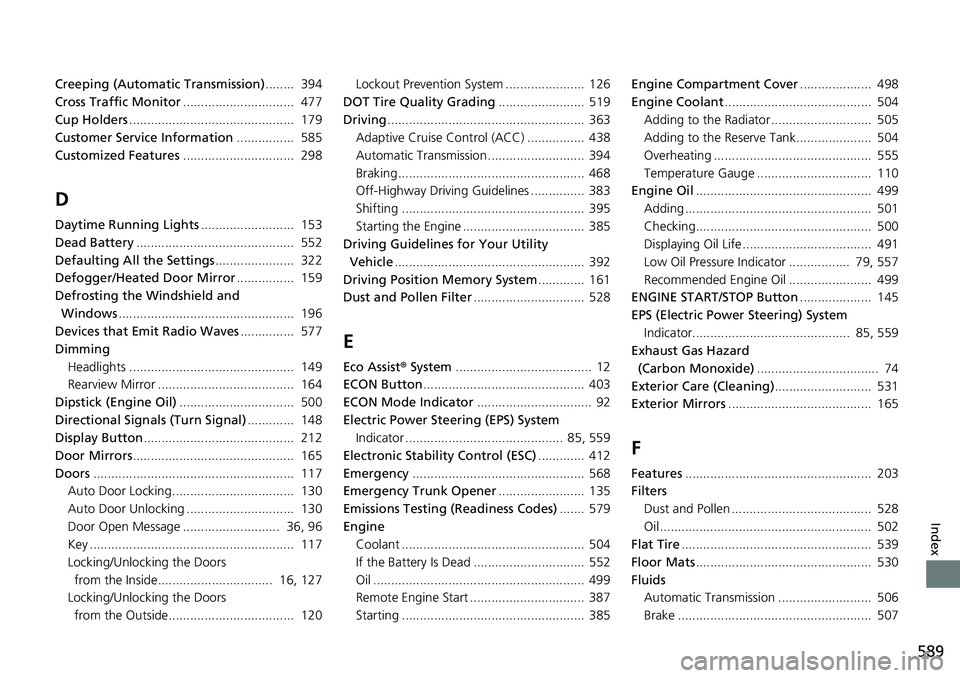
Emissions Testing (Readiness Codes) ....... 579
Engine Coolant ................................................... 504
If the Battery Is Dead ............................... 552
Oil ........................................................... 499
Remote Engine Start ................................ 387
Starting ................................................... 385 Engine Compartment Cover
.................... 498
Engine Coolant ......................................... 504
Adding to the Radiator ............................ 505
Adding to the Reserve Tank..................... 504
Overheating ............................................ 555
Temperature Gauge ................................ 110
Engine Oil ................................................. 499
Adding .................................................... 501
Checking................................................. 500
Displaying Oil Life .................................... 491
Low Oil Pressure Indicator ................. 79, 557
Recommended Engine Oil ....................... 499
ENGINE START/STOP Button .................... 145
EPS (Electric Power Steering) System
Indicator............................................ 85, 559
Exhaust Gas Hazard (Carbon Monoxide) .................................. 74
Exterior Care (Cleaning) ........................... 531
Exterior Mirrors ........................................ 165
F
Features.................................................... 203
Filters
Dust and Pollen ....................................... 528
Oil ........................................................... 502
Flat Tire ..................................................... 539
Floor Mats ................................................. 530
Fluids Automatic Transmission .......................... 506
Brake ...................................................... 507