HONDA S2000 2000 1.G Owners Manual
Manufacturer: HONDA, Model Year: 2000, Model line: S2000, Model: HONDA S2000 2000 1.GPages: 273, PDF Size: 21.58 MB
Page 231 of 273
Malfunction Indicator Lamp
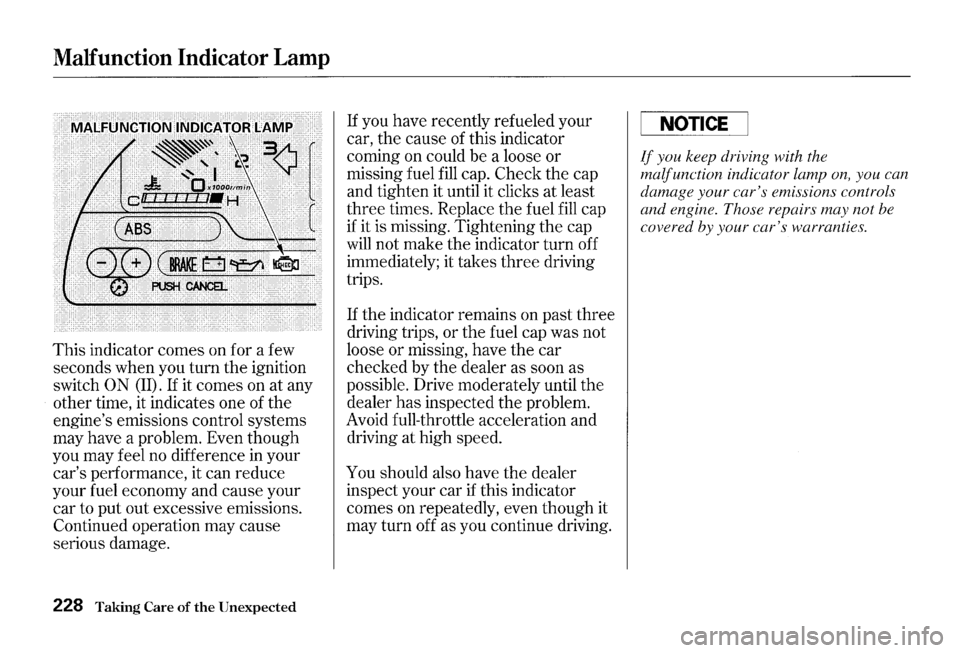
This indicator comes on for a few
seconds when you turn the ignition
switch
ON (II). If it comes on at any
other time, it indicates one of the
engine's emissions control systems
may have a problem. Even though
you may feel
no difference in your
car's performance, it can reduce
your fuel economy and cause your
car to put out excessive emissions.
Continued operation may cause
serious damage.
228 Taking Care of the Unexpected
If you have recently refueled your
car, the cause of this indicator
coming on could be a loose or
missing fuel
fill cap. Check the cap
and tighten it until it clicks at least
three times. Replace the fuel
fill cap
if it is missing. Tightening the cap
will not make the indicator turn off
immediately; it takes three driving
trips.
If the indicator remains on past three
driving trips, or the fuel cap was not
loose or missing, have the car
checked by the dealer as soon as
possible. Drive moderately until the
dealer has inspected the problem.
Avoid full-throttle acceleration and
driving at high speed.
You should also have the dealer
inspect your car
if this indicator
comes on repeatedly, even though it
may turn off as you continue driving.
NOTICE
If you keep driving with the
malfunction indicator lamp on, you can
damage your car's emissions controls
and engine. Those repairs may not be
covered by your car's warranties.
Page 232 of 273
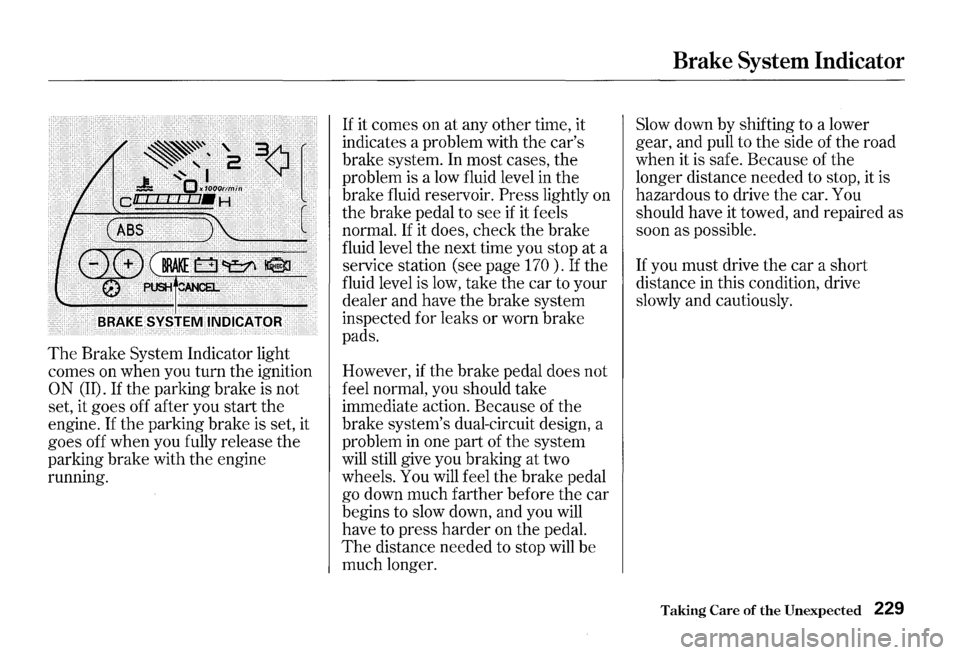
The Brake System Indicator light
comes on when you turn the ignition
ON (II). If the parking brake is not
set, it goes off after you start the
engine.
If the parking brake is set, it
goes off when you fully release the
parking brake with the engine
running. If
it comes on at any other time, it
indicates a problem with
the car's
brake system. In most cases, the
problem is a low fluid level in
the
brake fluid reservoir. Press lightly on
the brake pedal to see if it feels
normal.
If it does, check the brake
fluid level the next time you stop at a
service station (see page
170 ) . If the
fluid level is
low, take the car to your
dealer and have the brake system
inspected for leaks or worn brake
pads.
However,
if the brake pedal does not
feel normal, you should take
immediate action. Because
of the
brake system's dual-circuit design, a
problem
in one part of the system
will still give you braking at two
wheels.
You will feel the brake pedal
go down much farther before the car
begins to slow down, and you
will
have to press harder on the pedal.
The distance needed to stop will be
much longer.
Brake System Indicator
Slow down by shifting to a lower
gear, and pull to the side of the road
when it is safe. Because
of the
longer distance needed to stop, it is
hazardous to drive the car.
You
should have it towed, and repaired as
soon as possible.
If you must drive the car a short
distance in this condition, drive
slowly and cautiously.
Taking Care of the Unexpected 229
Page 233 of 273
Closing the Convertible Top
If the electric motor will not close
the convertible top, do the following.
1. Check the fuse for the convertible
top motor (see page
231 ) . If the
fuse is blown, replace it with one
of
the same or lower rating.
2. Try closing the convertible top. If
the new fuse blows immediately or
the convertible top still does not
operate, you can close
the
convertible top manually.
230 Taking Care of the Unexpected
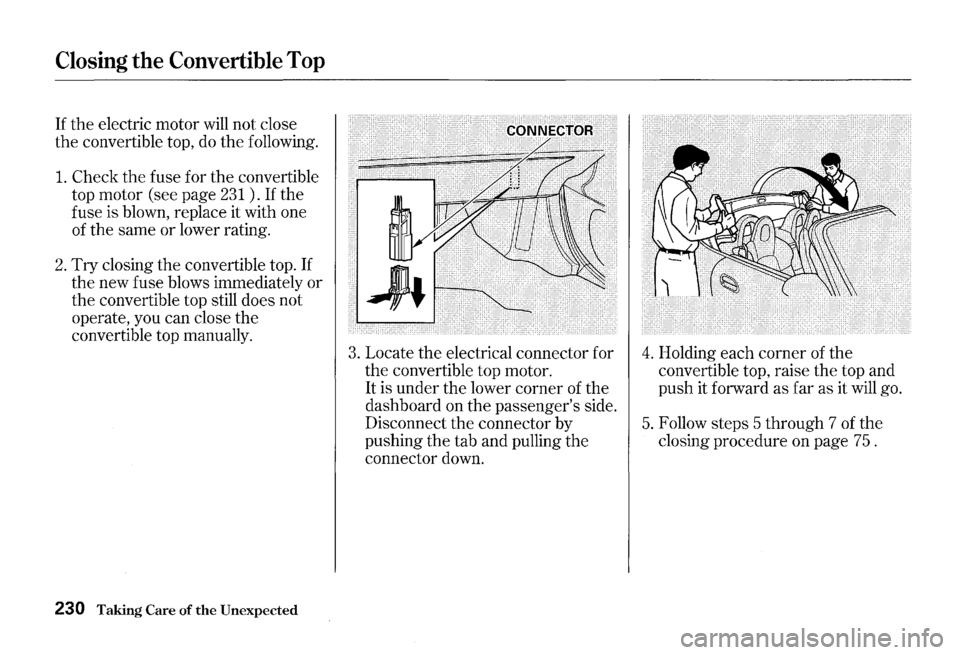
3. Locate the electrical connector for
the convertible top motor.
It is under the lower corner of the
dashboard on the passenger's side.
Disconnect
the connector by
pushing
the tab and pulling the
connector down.
4. Holding each corner of the
convertible top, raise the top and
push it forward as far as it will go.
5. Follow steps 5 through 7 of the
closing procedure on page 75 .
Page 234 of 273
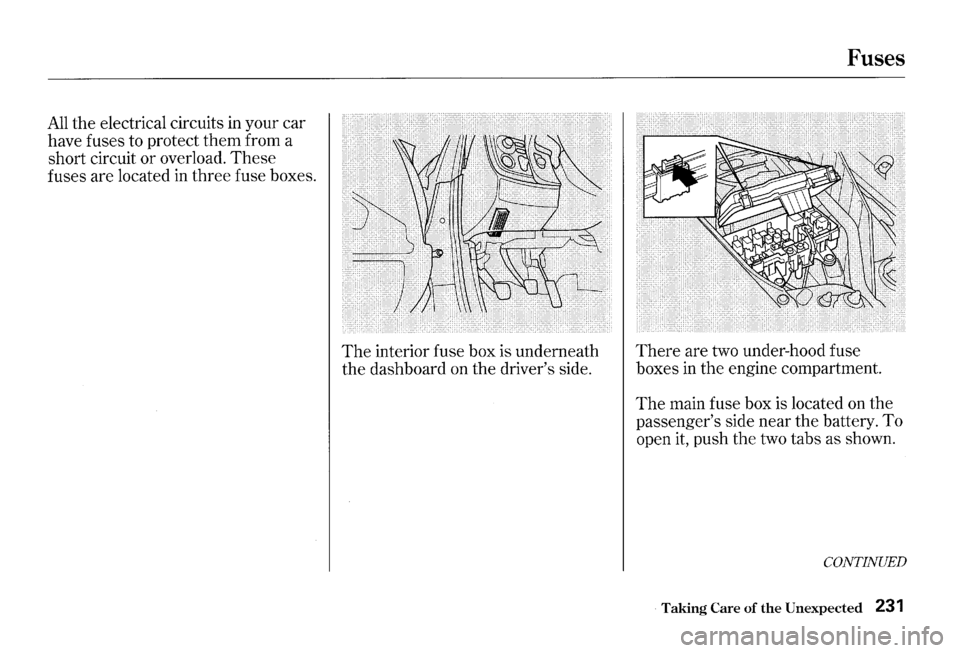
All the electrical circuits in your car
have fuses to protect them from a
short circuit or overload.
These
fuses are located in three fuse boxes.
The interior fuse box is underneath
the dashboard on the driver's side.
Fuses
There are two under-hood fuse
boxes
in the engine compartment.
The main fuse box is located on the
passenger's side near the battery. To
open it, push the two tabs as shown.
CONTINUED
Taking Care of the Unexpected 231
Page 235 of 273
Fuses
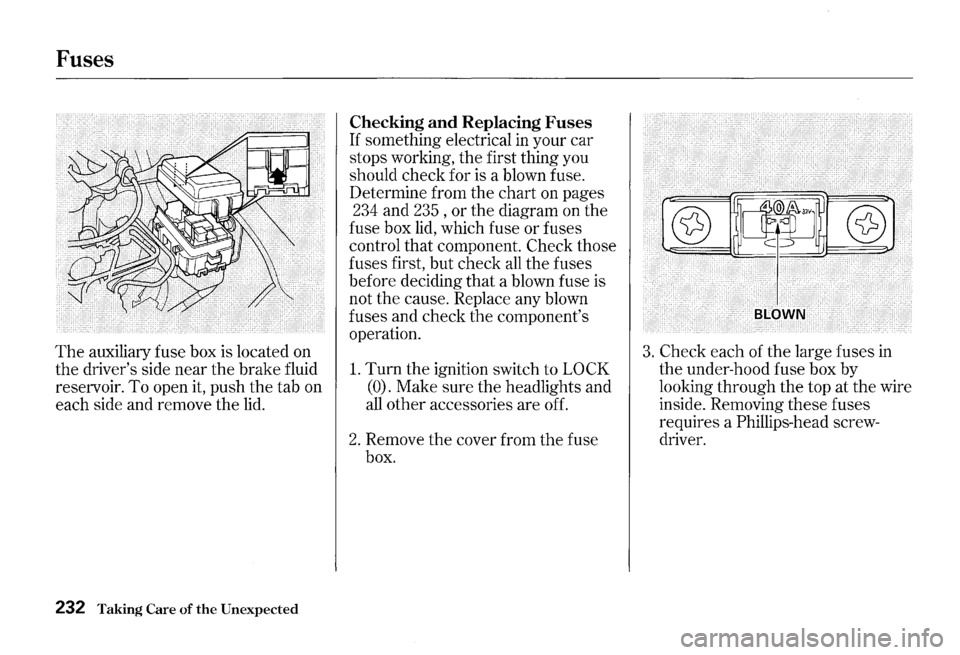
The auxiliary fuse box is located on
the driver's side near the brake fluid
reservoir. To open it, push the tab on
each side and remove the
lid.
232 Taking Care of the Unexpected
Checking and Replacing Fuses
If something electrical in your car
stops working, the first thing you
should check for is a blown fuse.
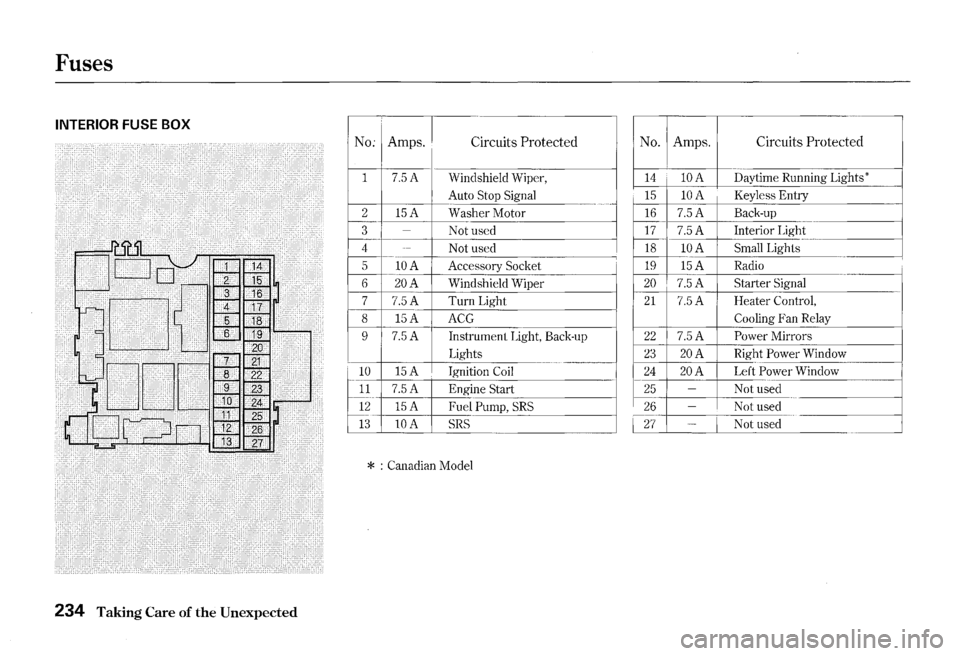
Determine from the chart on pages
234 and 235 , or the diagram on the
fuse box lid, which fuse or fuses
control that component. Check those
fuses first, but check
all the fuses
before deciding that a blown fuse is
not the cause. Replace any blown
fuses and check
the component's
operation.
1. Turn the ignition switch to LOCK
(0). Make sure the headlights and
all other accessories are off.
2. Remove the cover from the fuse
box.
3. Check each of the large fuses in
the under-hood fuse box by
looking through the top at the wire
inside. Removing these fuses
requires a Phillips-head screw
driver.
Page 236 of 273
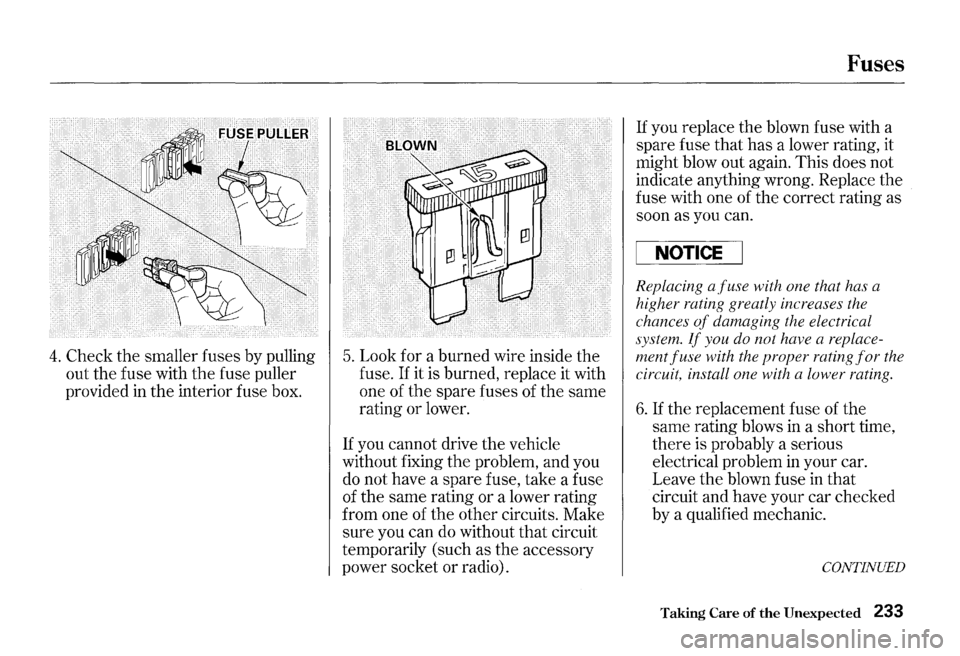
4. Check the smaller fuses by pulling
out
the fuse with the fuse puller
provided in
the interior fuse box.
5. Look for a burned wire inside the
fuse.
If it is burned, replace it with
one of
the spare fuses of the same
rating or lower.
If you cannot drive the vehicle
without fixing the problem, and you
do not have a spare fuse, take a fuse
of the same rating or a lower rating
from one of
the other circuits. Make
sure you can do without that circuit
temporarily (such as the accessory
power socket
or radio).
Fuses
If you replace the blown fuse with a
spare fuse that
has a lower rating, it
might blow out again. This does not
indicate anything wrong. Replace the
fuse with one of the correct rating as
soon as you can.
NOTICE
Replacing a fuse with one that has a
higher rating greatly increases the
chances
of damaging the electrical
system.
If you do not have a replace
ment
fuse with the proper rating for the
circuit, install one with a lower rating.
6. If the replacement fuse of the
same rating blows in a short time,
there is probably a serious
electrical problem in your car.
Leave
the blown fuse in that
circuit and have your car checked
by a qualified mechanic.
CONTINUED
Taking Care of the Unexpected 233
Page 237 of 273
Fuses
INTERIOR FUSE BOX
No: Amps. Circuits Protected No. Amps. Circuits Protected
1 7.5A Windshield Wiper, 14 lOA Daytime Running Lights*
Auto
Stop Signal 15 lOA Keyless Entry
2
15A Washer Motor 16 7.5A Back-up
3
-Not used 17 7.5A Interior Light
4
-Not used 18 lOA Small Lights
5
lOA Accessory Socket 19 15A Radio
6
20A Windshield Wiper 20 7.5A Starter Signal
7 7.5A Tum Light 21 7.5A Heater Control,
8 15A ACG Cooling Fan
Relay
9
7.5A Instrument Light, Back·up 22 7.5A Power Mirrors
Lights
23 20A Right Power Window
10 15A Ignition Coil 24 20A Left Power Window
11 7.5A Engine Start 25 -Not used
12 15A Fuel Pump, SRS 26 -Not used
13 lOA SRS 27 -Not used
* : Canadian Model
234 Taking Care of the Unexpected
Page 238 of 273
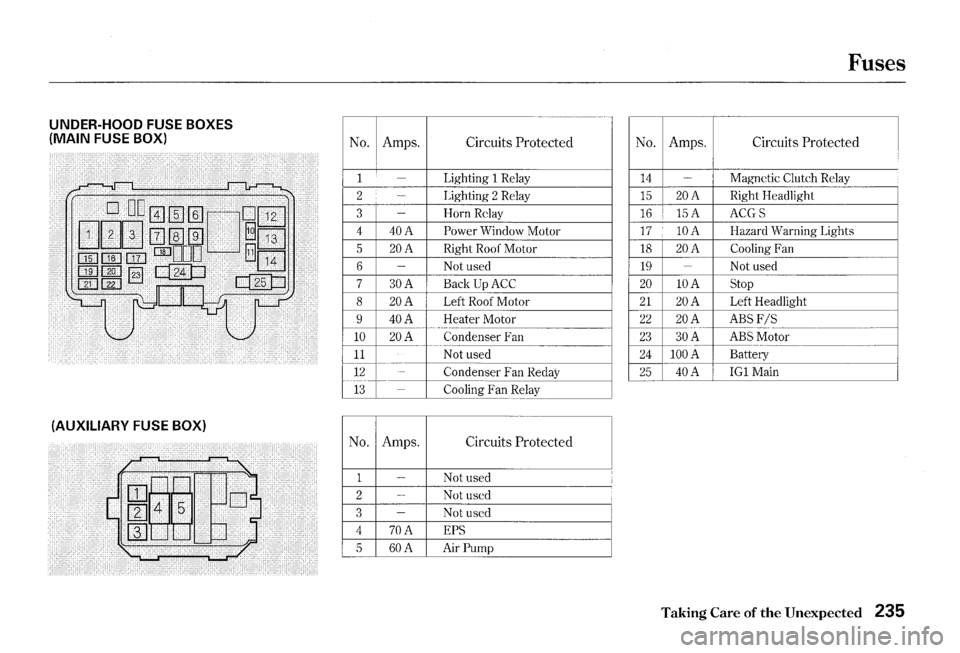
UNDER-HOOD FUSE BOXES
(MAIN FUSE BOX)
(AUXILIARY FUSE BOX)
No.
1 -~~ 2 ---------3
4
5 6
7
8 9
10
11
i 12
13
No.
1
2
~-3 4
5
Amps. Circuits Protected
Lighting 1 Relay ·--··---·-Lighting 2 Relay ~-r--c-~----Horn Relay
40A Power Window Motor
20A Right Roof Motor ~ Not used
30A ! BackUpACC
20A Left Roof Motor
40A ' Heater Motor
20A Condenser Fan ~ Not used ~ Condenser Fan Reday ~ Cooling Fan Relay
Amps. Circuits Protected
-Not used -··--·-··-· Not used ______ ,. ________ ~---~ Not used ---·· 70A EPS ___________ , __
60A Air Pump
Fuses
'
No. Amps. Circuits Protected
14 Magnetic Clutch Relay r--~~ ·--··-----------------....... -·---15 20A Right Headlight '1:6-·-· --15A ACGS
17 lOA Hazard
Warning Lights
18 20A Cooling Fan --19 ~ Not used ··-20 lOA Stop
21 20A Left Headlight
22 20A ABS F/S
23 30A ABS Motor
24 lOOA Battery
25 40A IGl Main
--------
Taking Care of the Unexpected 235
Page 239 of 273
If Your Car Gets Stuck
If your car gets stuck in sand, mud,
or snow, call a towing service to pull
it out (see page
238).
236 Taking Care of the Unexpected
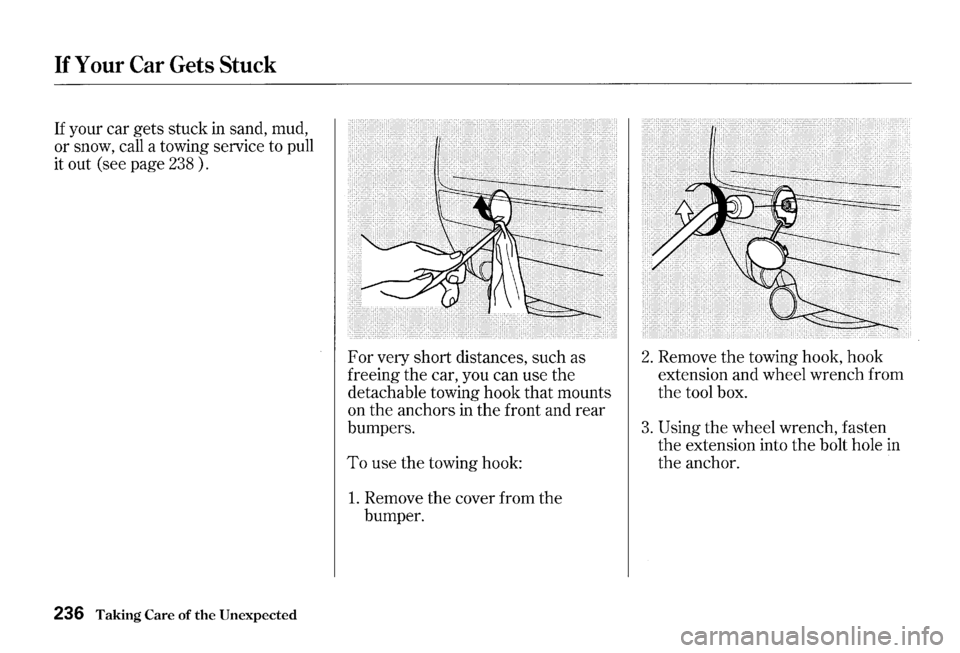
For very short distances, such as
freeing
the car, you can use the
detachable towing hook that mounts
on
the anchors in the front and rear
bumpers.
To use the towing hook:
1. Remove the cover from the
bumper.
2. Remove the towing hook, hook
extension and wheel wrench from
the tool box.
3. Using the wheel wrench, fasten
the extension into the bolt hole in
the anchor.
Page 240 of 273
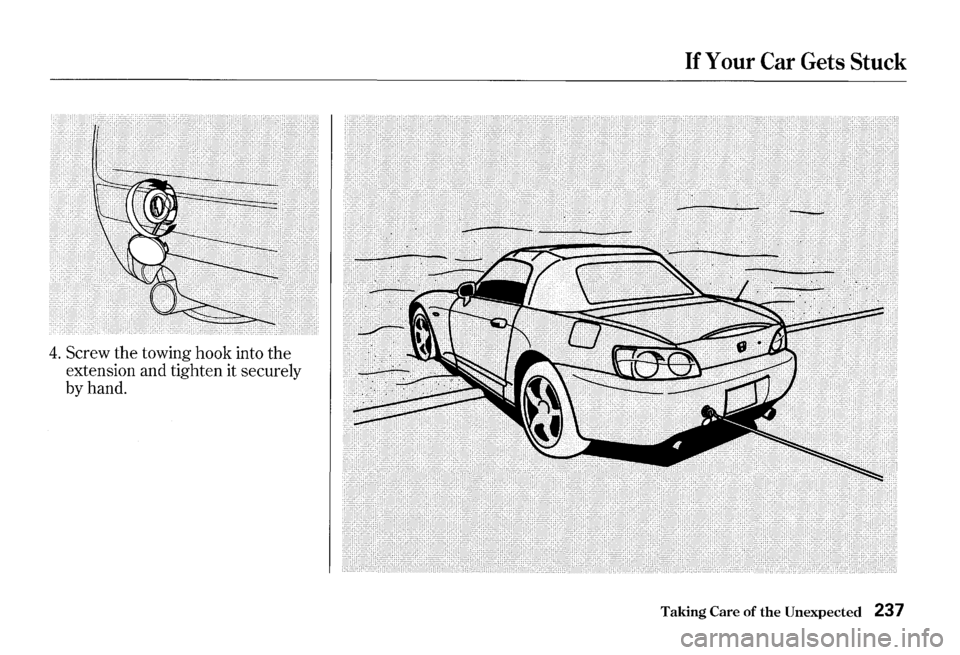
4. Screw the towing hook into the
extension and tighten it securely
by hand.
If Your Car Gets Stuck
Taking Care of the Unexpected 237