HUMMER H2 2004 Owners Manual
Manufacturer: HUMMER, Model Year: 2004, Model line: H2, Model: HUMMER H2 2004Pages: 472, PDF Size: 5.01 MB
Page 241 of 472

Do not get too close to the vehicle you want to
pass while you are awaiting an opportunity. For one
thing, following too closely reduces your area of
vision, especially if you are following a larger
vehicle. Also, you will not have adequate space if
the vehicle ahead suddenly slows or stops.
Keep back a reasonable distance.
When it looks like a chance to pass is coming up,
start to accelerate but stay in the right lane and
do not get too close. Time your move so you will be
increasing speed as the time comes to move into
the other lane. If the way is clear to pass, you
will have a “running start” that more than makes up
for the distance you would lose by dropping
back. And if something happens to cause you to
cancel your pass, you need only slow down
and drop back again and wait for another
opportunity.
If other vehicles are lined up to pass a slow vehicle,
wait your turn. But take care that someone is not
trying to pass you as you pull out to pass the slow
vehicle. Remember to glance over your shoulder
and check the blind spot.
Check your mirrors, glance over your shoulder and
start your left lane change signal before moving out
of the right lane to pass. When you are far
enough ahead of the passed vehicle to see its front
in your inside mirror, activate your right lane
change signal and move back into the right lane.
(Remember that if your right outside mirror is
convex, the vehicle you just passed may seem to
be farther away from you than it really is.)
Try not to pass more than one vehicle at a time on
two-lane roads. Reconsider before passing the
next vehicle.
Do not overtake a slowly moving vehicle too rapidly.
Even though the brake lamps are not �ashing, it
may be slowing down or starting to turn.
If you are being passed, make it easy for the
following driver to get ahead of you. Perhaps
you can ease a little to the right.
4-15
Page 242 of 472

Loss of Control
Let us review what driving experts say about what
happens when the three control systems (brakes,
steering and acceleration) do not have enough friction
where the tires meet the road to do what the driver
has asked.
In any emergency, do not give up. Keep trying to
steer and constantly seek an escape route or area of
less danger.
Skidding
In a skid, a driver can lose control of the vehicle.
Defensive drivers avoid most skids by taking reasonable
care suited to existing conditions, and by not
“overdriving” those conditions. But skids are always
possible.
The three types of skids correspond to your vehicle’s
three control systems. In the braking skid, your wheels
are not rolling. In the steering or cornering skid, too
much speed or steering in a curve causes tires to slip
and lose cornering force. And in the acceleration
skid, too much throttle causes the driving wheels
to spin.
A cornering skid is best handled by easing your foot off
the accelerator pedal.If your vehicle starts to slide, ease your foot off the
accelerator pedal and quickly steer the way you want
the vehicle to go. If you start steering quickly enough,
your vehicle may straighten out. Always be ready
for a second skid if it occurs.
Of course, traction is reduced when water, snow, ice,
gravel or other material is on the road. For safety,
you will want to slow down and adjust your driving to
these conditions. It is important to slow down on slippery
surfaces because stopping distance will be longer and
vehicle control more limited.
While driving on a surface with reduced traction, try
your best to avoid sudden steering, acceleration
or braking (including engine braking by shifting to a
lower gear). Any sudden changes could cause the tires
to slide. You may not realize the surface is slippery
until your vehicle is skidding. Learn to recognize warning
clues — such as enough water, ice or packed snow
on the road to make a “mirrored surface” — and slow
down when you have any doubt.
Remember: Any anti-lock brake system (ABS) helps
avoid only the braking skid.
4-16
Page 243 of 472

Off-Road Driving
This off-road guide is meant to provide advice for when
you drive your vehicle off paved roads. Also, see
Braking on page 4-6.
Off-road driving can be great fun. But it does have
some de�nite hazards. The greatest of these is
the terrain itself.
“Off-roading” means you have left the great North
American road system behind. Traffic lanes are not
marked. Curves are not banked. There are no
road signs. Surfaces can be slippery, rough, uphill or
downhill. In short, you have gone right back to nature.
Off-road driving involves some new skills. And that
is why it is very important that you read this guide. You
will �nd many driving tips and suggestions. These
will help make your off-road driving safer and more
enjoyable.
Before You Go Off-Roading
There are some things to do before you go out. For
example, be sure to have all necessary maintenance
and service work done. Check to make sure all
underbody shields are properly attached. Make sure any
equipment you may need (�rst aid kit, cell phone,
�ashlight, etc.) is securely stored in the vehicle. Be sure
you read all the information about your four-wheel-drive
vehicle in this manual. Is there enough fuel? Is the
spare tire fully in�ated? Are the �uid levels up where
they should be? What are the local laws that apply
to off-roading where you will be driving? If you do not
know, you should check with law enforcement people in
the area. Will you be on someone’s private land? If
so, be sure to get the necessary permission.
4-17
Page 244 of 472

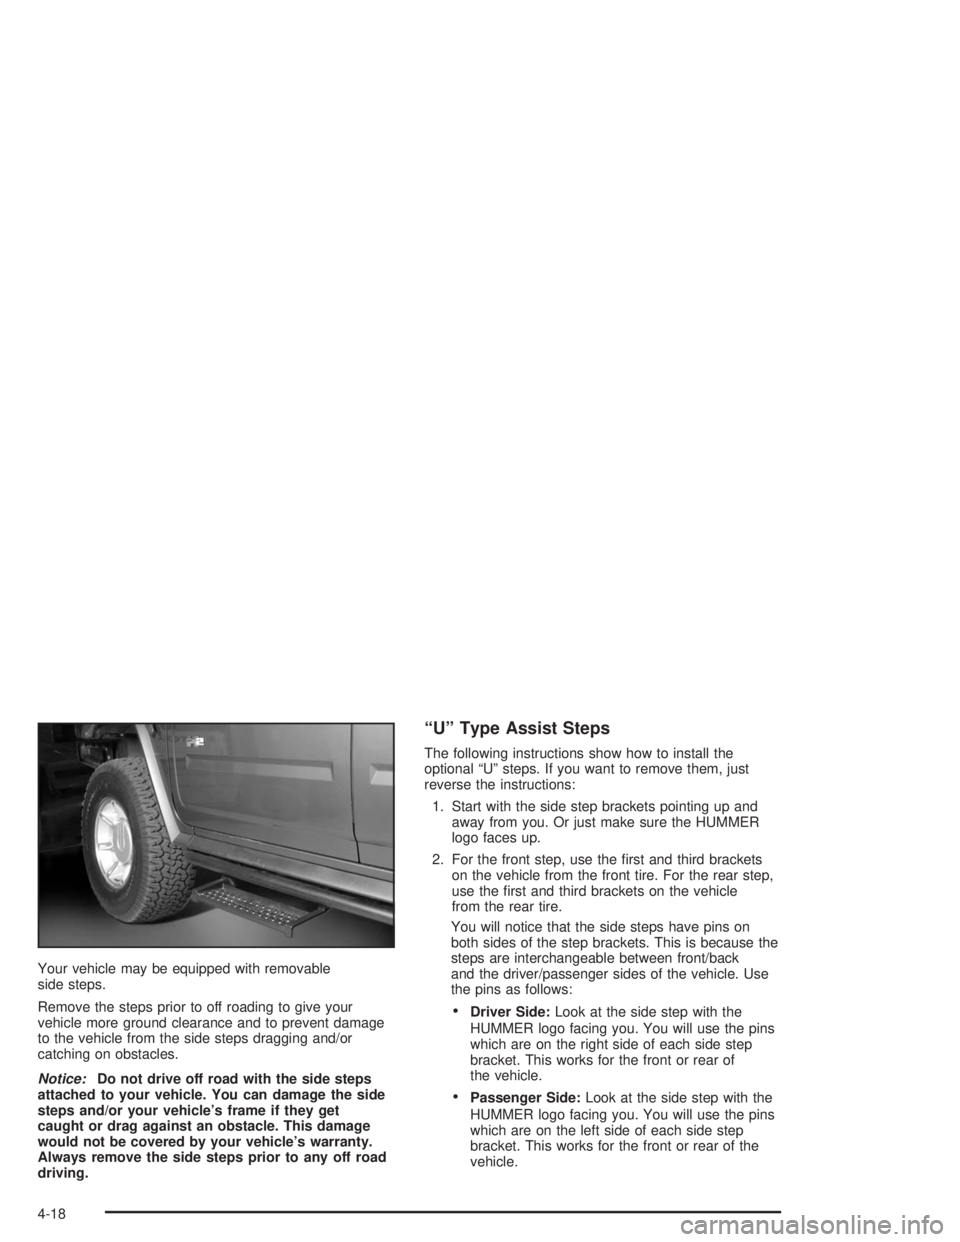
Your vehicle may be equipped with removable
side steps.
Remove the steps prior to off roading to give your
vehicle more ground clearance and to prevent damage
to the vehicle from the side steps dragging and/or
catching on obstacles.
Notice:Do not drive off road with the side steps
attached to your vehicle. You can damage the side
steps and/or your vehicle’s frame if they get
caught or drag against an obstacle. This damage
would not be covered by your vehicle’s warranty.
Always remove the side steps prior to any off road
driving.
“U” Type Assist Steps
The following instructions show how to install the
optional “U” steps. If you want to remove them, just
reverse the instructions:
1. Start with the side step brackets pointing up and
away from you. Or just make sure the HUMMER
logo faces up.
2. For the front step, use the �rst and third brackets
on the vehicle from the front tire. For the rear step,
use the �rst and third brackets on the vehicle
from the rear tire.
You will notice that the side steps have pins on
both sides of the step brackets. This is because the
steps are interchangeable between front/back
and the driver/passenger sides of the vehicle. Use
the pins as follows:
Driver Side:Look at the side step with the
HUMMER logo facing you. You will use the pins
which are on the right side of each side step
bracket. This works for the front or rear of
the vehicle.
Passenger Side:Look at the side step with the
HUMMER logo facing you. You will use the pins
which are on the left side of each side step
bracket. This works for the front or rear of the
vehicle.
4-18
Page 245 of 472

3. Guide the pins on the side step brackets into the
holes in the vehicle’s rocker panel protector
brackets. If you have difficulty doing this, it may
help to have someone hold up the step while you
guide the pins into the holes.
You will be guiding three pins into the holes with
the fourth hole in the vehicle’s rocker panel protector
brackets empty until the next step.4. Thread the knob through the remaining hole — �rst
into the rocker panel protector and then into the
threaded hole in the assist step bracket.
If you thread the knob into the step and then the
rocker panel protector, you may think the step
is secure. It will fall out this way. To be sure the step
is secure, try moving the step left and right after
installing the knob.
Notice:Threading the knob into the step and then
into the rocker panel will not secure the assist
step. The step could fall off the vehicle and be
damaged. Always thread the knob through the
rocker panel �rst.
4-19
Page 246 of 472

5. Hand-tighten the knob by turning it clockwise until it
is seated against the rocker panel protector bracket
and then tighten it to 10 lb ft (13.5Y) with a
wrench as shown.6. Once the knob is
torqued, install the
cotter pin through the
hole (see arrow) in
the end of the knob’s
threaded shaft.
This will help prevent the knob from coming completely
loose and falling out.
4-20
Page 247 of 472

Tubular Assist Steps
The driver’s side of the vehicle is shown with the body
removed for clarity. To remove a step:
1. Remove the nuts and bolts attaching the step to the
vehicle.
2. Remove the step from the vehicle.To install a step:
1. Before installing the bolts:
Remove all traces of the original adhesive patch.
Clean the threads of the bolts with denatured
alcohol or equivalent and allow threads to dry.
Apply Threadlocker (GM Part No. 12345382, in
Canada 10953489) or equivalent.
2. Install the assist step to the vehicle. You may need
someone to assist you in the installation.
3. Install the nuts and bolts for the two inner brackets
�rst, but do not tighten them.
4. Using a level, make sure the step is level in
relationship to the vehicle. Then, tighten the
inner bracket nuts and bolts.
5. Install the other nuts and bolts. Tighten all nuts and
bolts to 39 lb ft (50Y).
4-21
Page 248 of 472

Loading Your Vehicle for Off-Road
Driving
There are some important things to remember about
how to load your vehicle.
The heaviest things should be on the load �oor and
forward of your rear axle. Put heavier items in the
rear area, as far forward as you can.
Be sure the load is secured properly, so driving on
the off-road terrain does not toss things around.
{CAUTION:
Cargo on the load �oor piled higher than
the seatbacks can be thrown forward
during a sudden stop. You or your
passengers could be injured. Keep cargo
below the top of the seatbacks.
CAUTION: (Continued)
CAUTION: (Continued)
Unsecured cargo on the load �oor can be
tossed about when driving over rough
terrain. You or your passengers can be
struck by �ying objects. Secure the cargo
properly.
Heavy loads on the roof raise the vehicle’s
center of gravity, making it more likely to
roll over. You can be seriously or fatally
injured if the vehicle rolls over. Put heavy
loads inside the cargo area, not on the
roof. Keep cargo in the cargo area as far
forward and low as possible.
You will �nd other important information in this manual.
SeeLoading Your Vehicle on page 4-67andTires
on page 5-60.
4-22
Page 249 of 472

Environmental Concerns
Off-road driving can provide wholesome and satisfying
recreation. However, it also raises environmental
concerns. We recognize these concerns and urge every
off-roader to follow these basic rules for protecting
the environment:
Always use established trails, roads and areas that
have been specially set aside for public off-road
recreational driving; obey all posted regulations.
Avoid any driving practice that could damage the
environment — shrubs, �owers, trees, grasses — or
disturb wildlife (this includes wheel-spinning,
breaking down trees or unnecessary driving through
streams or over soft ground).
Always carry a litter bag — make sure all refuse is
removed from any campsite before leaving.
Take extreme care with open �res (where permitted),
camp stoves and lanterns.
Never park your vehicle over dry grass or other
combustible materials that could catch �re from the
heat of the vehicle’s exhaust system.
Traveling to Remote Areas
It makes sense to plan your trip, especially when going
to a remote area. Know the terrain and plan your
route. You are much less likely to get bad surprises.
Get accurate maps of trails and terrain. Try to learn of
any blocked or closed roads.
It is also a good idea to travel with at least one other
vehicle. If something happens to one of them, the other
can help quickly.
Does your vehicle have a winch? If so, be sure to read
the winch instructions. In a remote area, a winch
can be handy if you get stuck. But you will want to know
how to use it properly.
4-23
Page 250 of 472

High Mobility Characteristics
The HUMMER H2 has a 10 inch (25.4 cm) running
groung clearance (A) and a 9 inch (22.8 cm) axle
to ground clearance (B) while maintaining a low
silhouette and a low center of gravity.
4-24