buttons HUMMER H2 2005 Owners Manual
[x] Cancel search | Manufacturer: HUMMER, Model Year: 2005, Model line: H2, Model: HUMMER H2 2005Pages: 468, PDF Size: 3.21 MB
Page 10 of 468
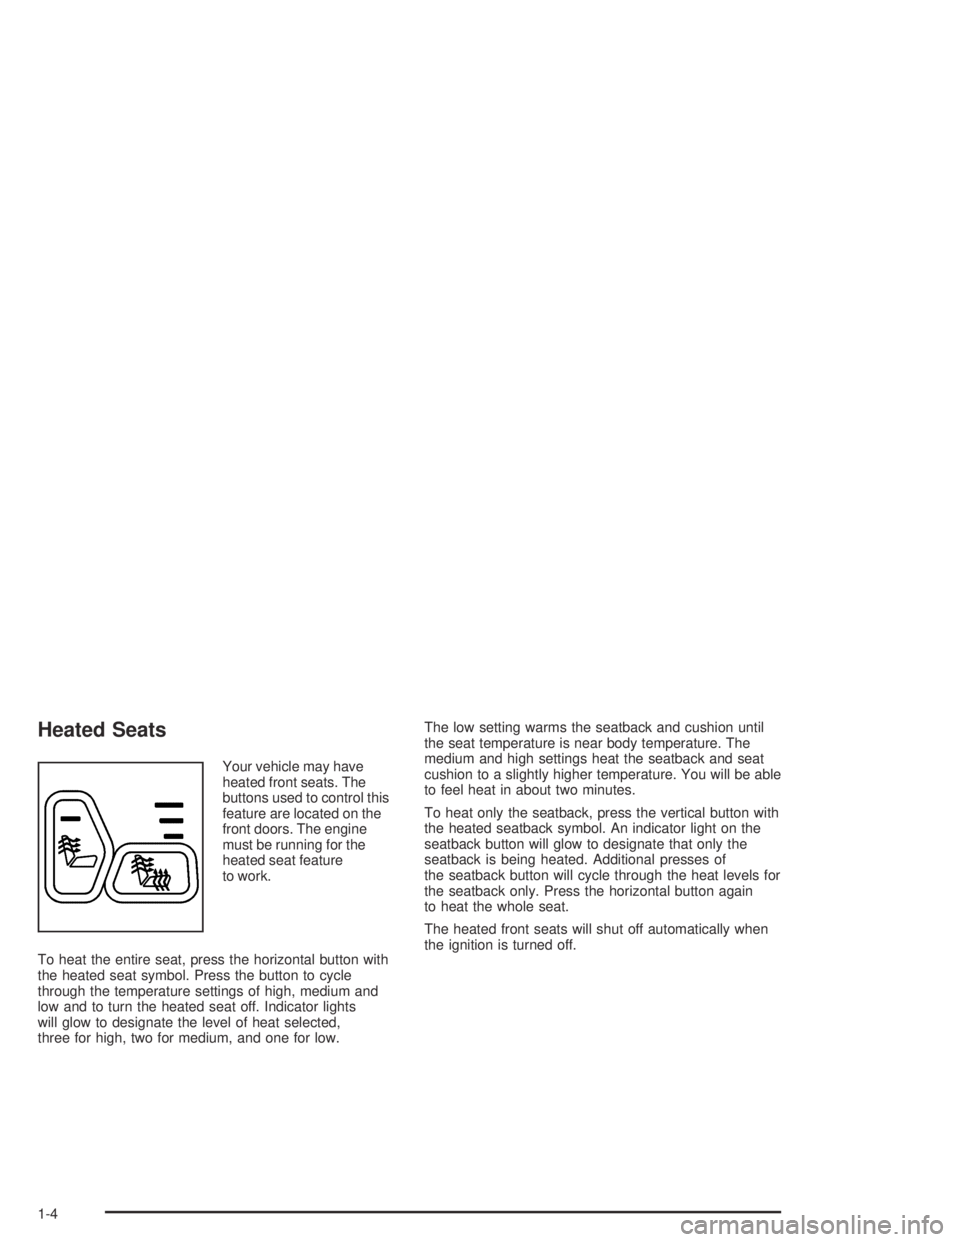
Heated Seats
Your vehicle may have
heated front seats. The
buttons used to control this
feature are located on the
front doors. The engine
must be running for the
heated seat feature
to work.
To heat the entire seat, press the horizontal button with
the heated seat symbol. Press the button to cycle
through the temperature settings of high, medium and
low and to turn the heated seat off. Indicator lights
will glow to designate the level of heat selected,
three for high, two for medium, and one for low.The low setting warms the seatback and cushion until
the seat temperature is near body temperature. The
medium and high settings heat the seatback and seat
cushion to a slightly higher temperature. You will be able
to feel heat in about two minutes.
To heat only the seatback, press the vertical button with
the heated seatback symbol. An indicator light on the
seatback button will glow to designate that only the
seatback is being heated. Additional presses of
the seatback button will cycle through the heat levels for
the seatback only. Press the horizontal button again
to heat the whole seat.
The heated front seats will shut off automatically when
the ignition is turned off.
1-4
Page 13 of 468
Rear Seats
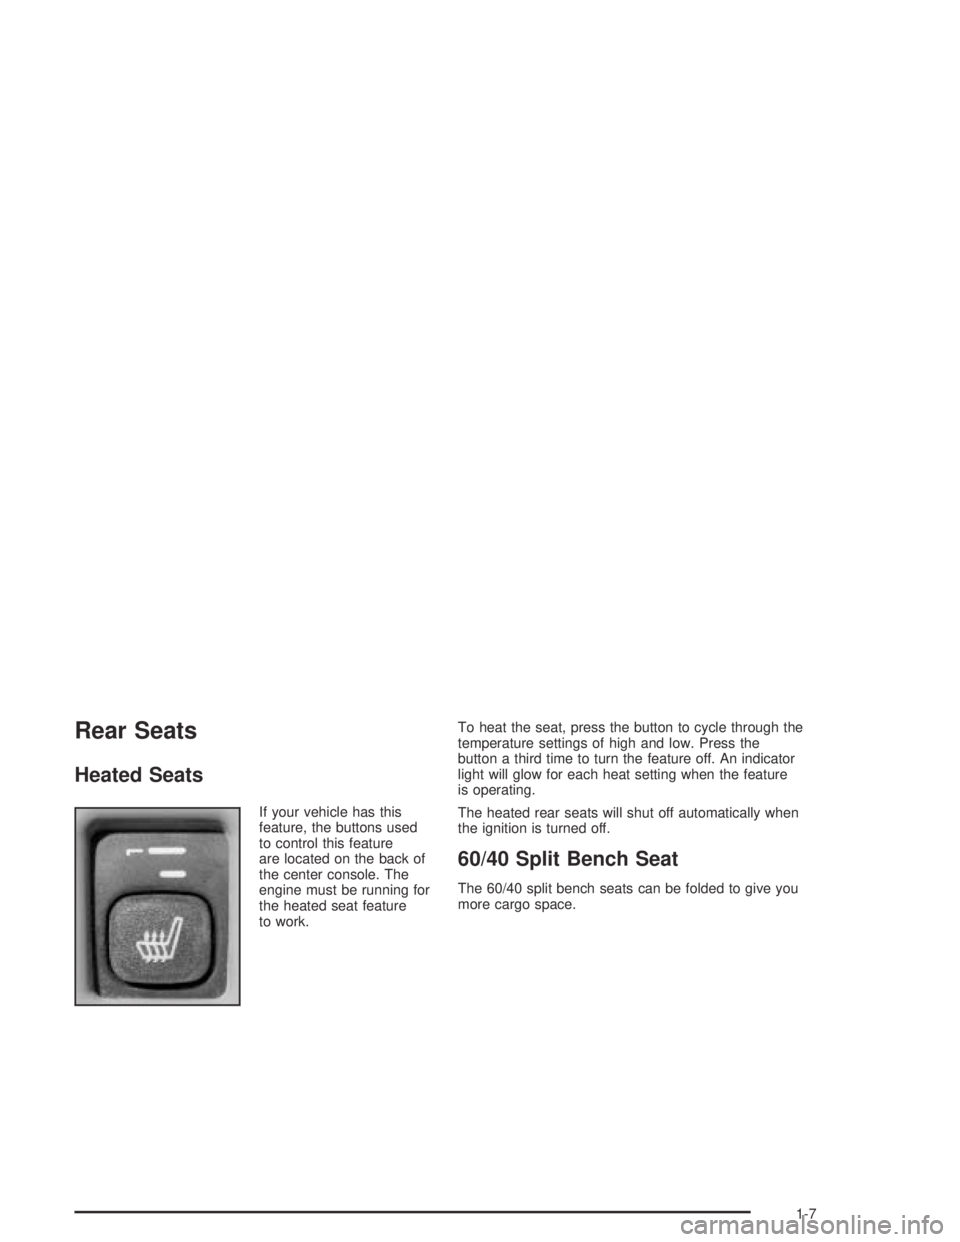
Heated Seats
If your vehicle has this
feature, the buttons used
to control this feature
are located on the back of
the center console. The
engine must be running for
the heated seat feature
to work.To heat the seat, press the button to cycle through the
temperature settings of high and low. Press the
button a third time to turn the feature off. An indicator
light will glow for each heat setting when the feature
is operating.
The heated rear seats will shut off automatically when
the ignition is turned off.
60/40 Split Bench Seat
The 60/40 split bench seats can be folded to give you
more cargo space.
1-7
Page 83 of 468
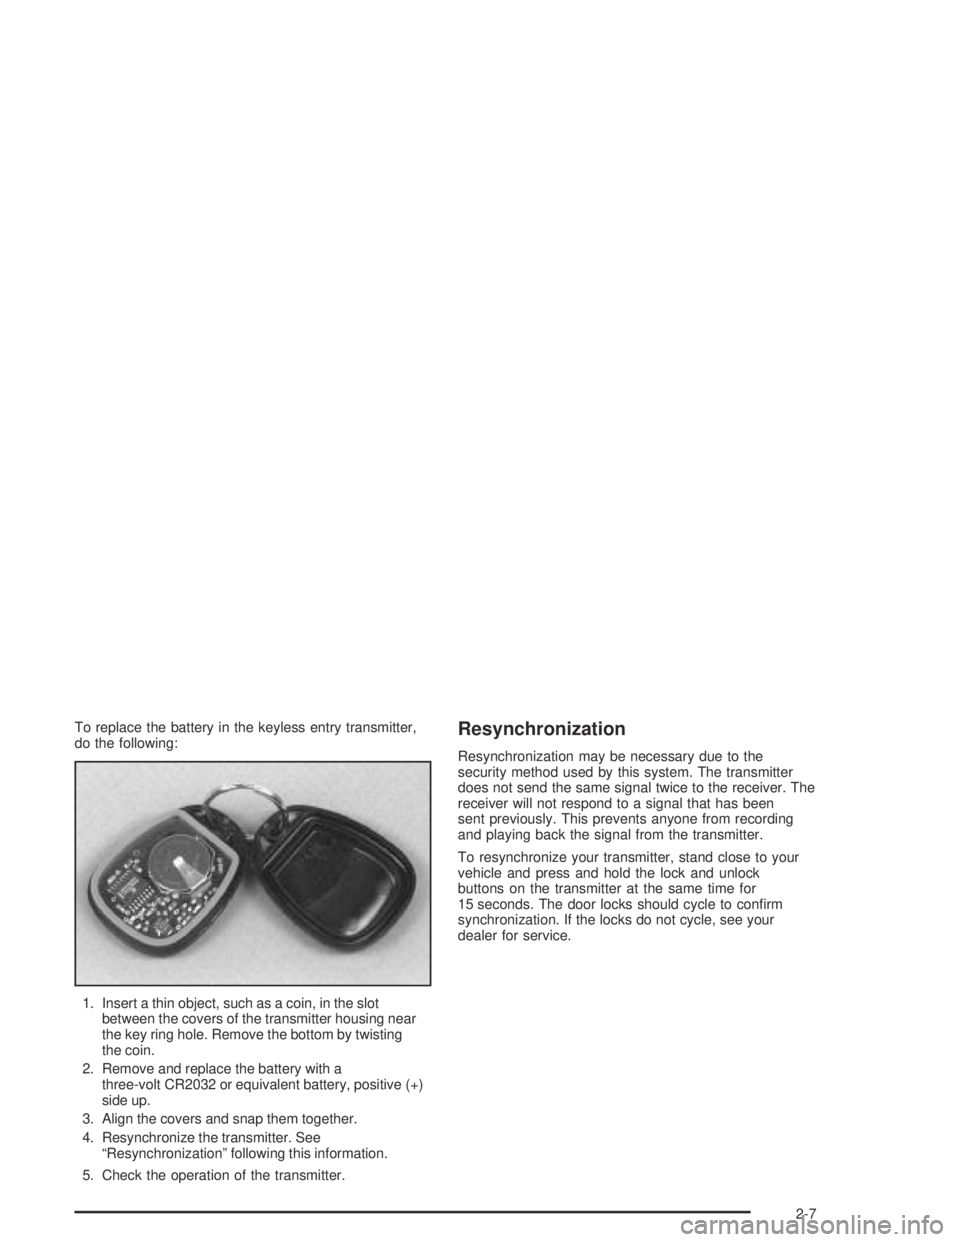
To replace the battery in the keyless entry transmitter,
do the following:
1. Insert a thin object, such as a coin, in the slot
between the covers of the transmitter housing near
the key ring hole. Remove the bottom by twisting
the coin.
2. Remove and replace the battery with a
three-volt CR2032 or equivalent battery, positive (+)
side up.
3. Align the covers and snap them together.
4. Resynchronize the transmitter. See
“Resynchronization” following this information.
5. Check the operation of the transmitter.Resynchronization
Resynchronization may be necessary due to the
security method used by this system. The transmitter
does not send the same signal twice to the receiver. The
receiver will not respond to a signal that has been
sent previously. This prevents anyone from recording
and playing back the signal from the transmitter.
To resynchronize your transmitter, stand close to your
vehicle and press and hold the lock and unlock
buttons on the transmitter at the same time for
15 seconds. The door locks should cycle to con�rm
synchronization. If the locks do not cycle, see your
dealer for service.
2-7
Page 91 of 468

3. Press either one of the two power midgate latch
release buttons. The midgate will move slightly
forward from its closed position. The latch release
buttons operate while the ignition is in RUN,
ACCESSORY, in RAP mode, or up to ten minutes
after removing the key. If necessary, press the
global express-down button to reactivate the release
buttons for an additional ten minutes.4. Pull the midgate inward and down to its fully
lowered position.
5. Flip the auxiliary panel on the top of the midgate
into position to bridge the gap created by the
hinges in the midgate. There are two �nger holds
on the panel.
Raising the Midgate
To raise the midgate, do the following:
1. Fold the auxiliary panel back into the exterior of the
midgate. The panel should snap loudly back into
position which means it is secure.
2. Reverse the steps for lowering the midgate listed
previously. The midgate must be fully latched on
both sides before the window can be raised.
3. Press the top part of the midgate window switch to
express-up the window. To stop the window, press
the switch a second time.
2-15
Page 96 of 468
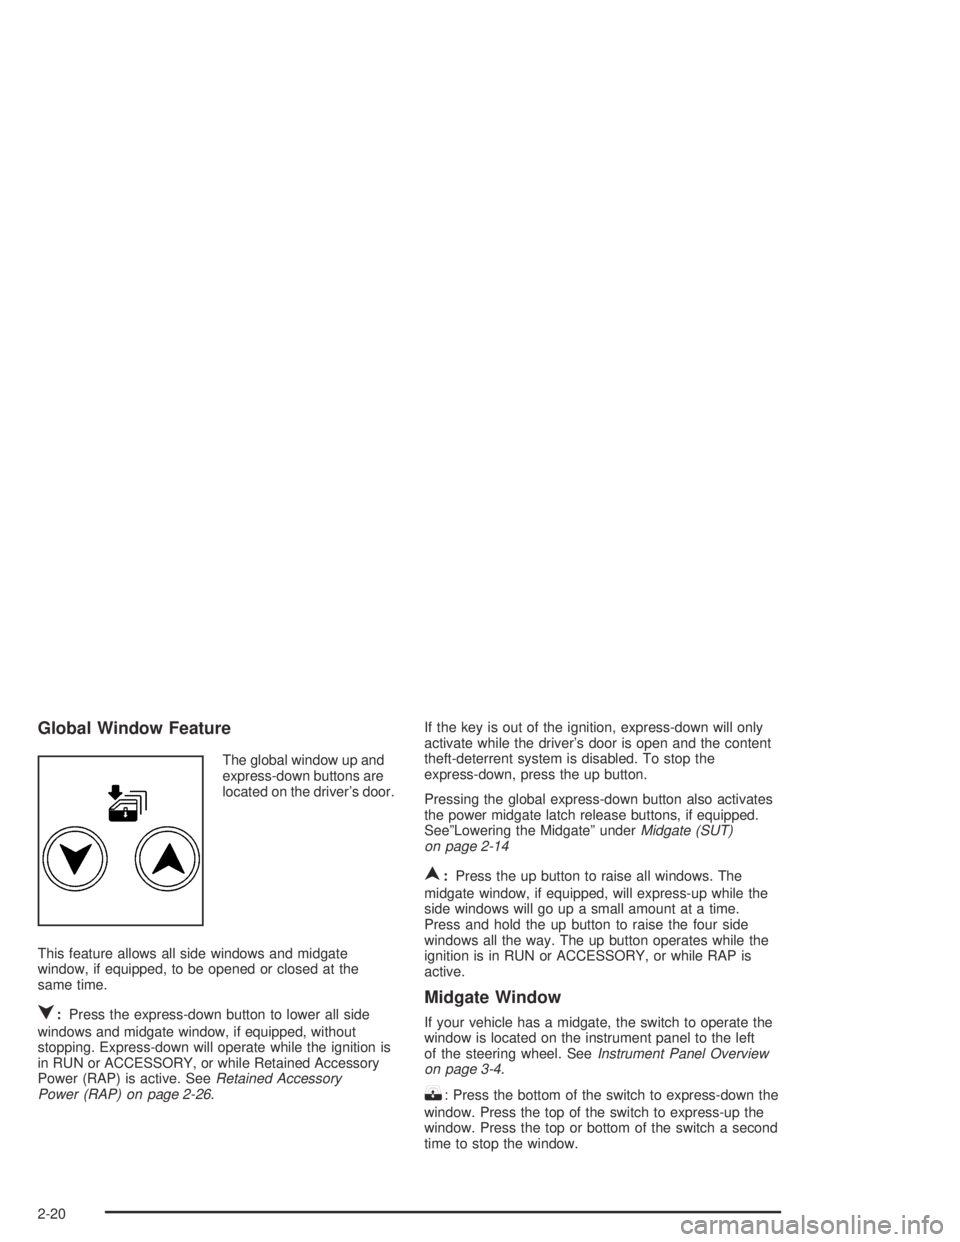
Global Window Feature
The global window up and
express-down buttons are
located on the driver’s door.
This feature allows all side windows and midgate
window, if equipped, to be opened or closed at the
same time.
q:Press the express-down button to lower all side
windows and midgate window, if equipped, without
stopping. Express-down will operate while the ignition is
in RUN or ACCESSORY, or while Retained Accessory
Power (RAP) is active. SeeRetained Accessory
Power (RAP) on page 2-26.If the key is out of the ignition, express-down will only
activate while the driver’s door is open and the content
theft-deterrent system is disabled. To stop the
express-down, press the up button.
Pressing the global express-down button also activates
the power midgate latch release buttons, if equipped.
See”Lowering the Midgate” underMidgate (SUT)
on page 2-14
n:Press the up button to raise all windows. The
midgate window, if equipped, will express-up while the
side windows will go up a small amount at a time.
Press and hold the up button to raise the four side
windows all the way. The up button operates while the
ignition is in RUN or ACCESSORY, or while RAP is
active.
Midgate Window
If your vehicle has a midgate, the switch to operate the
window is located on the instrument panel to the left
of the steering wheel. SeeInstrument Panel Overview
on page 3-4.
K: Press the bottom of the switch to express-down the
window. Press the top of the switch to express-up the
window. Press the top or bottom of the switch a second
time to stop the window.
2-20
Page 97 of 468
The window switch will operate while the ignition is in
RUN or ACCESSORY, or while Retained Accessory
Power (RAP) is active. SeeRetained Accessory
Power (RAP) on page 2-26.
The window can also be operated using the global
window buttons. See “Global Window Feature”
previously.
{CAUTION:
If express override is activated, the midgate
window will not reverse automatically. You or
others could be injured and the window could
be damaged. Before you use express override,
make sure that all people and obstructions are
clear of the midgate window path.
Midgate Window Express Override Mode
If window movement is stopped, either by an obstruction
or weather conditions such as severe icing, auto-reversal
to a partially open position will occur. The midgate
window function will return to normal operation once the
obstruction or condition is removed.
If you override this function and activate express
override mode, window express functions are disabled.
In this mode, the window can only be operated
manually by pressing and holding the midgate window
switch or the global window button within two seconds
after the midgate window has stopped at a partially open
position. The express override mode can only be
activated immediately following a window auto-reversal.
Midgate Window Error/Jog Mode
If the midgate window has detected abnormal operating
conditions which may lead to system damage or
malfunction, the midgate window will automatically go
into Error/Jog mode. In this mode, window express
functions are disabled and the window can only
be operated manually by pressing the midgate window
switch or the global window button. The window will
move slightly and stop. Press and hold the window
switch or global window button to continue to close the
window a small amount at a time.
2-21
Page 108 of 468

All-Wheel Drive
All-wheel drive sends your engine’s driving power to all
four wheels for extra traction. To get the most out of
all-wheel drive, you must be familiar with its operation.
Notice:Driving on pavement in 4HI Lock or
4LO Lock for extended periods may cause
premature wear on your vehicle’s powertrain and
tires. Do not drive in 4HI Lock or 4LO Lock on
pavement for extended periods.
Transfer Case Buttons
The transfer case buttons
are located to the right of
the instrument panel
cluster. Use these switches
to shift into and out of the
different all-wheel drive
modes.You can choose between four modes:
G(4HI):This setting is used for driving in most street
and highway situations. You can also use this setting for
light or variable off-road conditions.
H(4HI Lock):Use this mode when you need extra
traction in most off-road situations such as sand, mud,
snow or level, rocky trails.
I(4LO Lock):This mode delivers extra torque to all
four wheels and is used for extreme off-road conditions.
You might choose 4LO Lock if you are driving off-road,
deep sand, mud, or snow and climbing or descending
steep hills.
When in this mode you can also choose to lock the rear
axle for additional traction in extreme off-road situations.
SeeLocking Rear Axle on page 4-10.
Notice:Operating your vehicle in 4LO Lock above
50 mph (80 km/h) for any extended period of time
could cause damage to the transfer case. Do
not operate your vehicle in 4LO Lock above 50 mph
(80 km/h) for extended periods.
2-32
Page 109 of 468
{CAUTION:
Shifting the transfer case to NEUTRAL can
cause your vehicle to roll even if the
transmission is in PARK (P). You or someone
else could be seriously injured. Be sure to set
the parking brake before placing the transfer
case in NEUTRAL. SeeParking Brake on
page 2-36.
N (NEUTRAL):Shift the vehicle’s transfer case to
NEUTRAL only when towing your vehicle. See
Recreational Vehicle Towing on page 4-64orTowing
Your Vehicle on page 4-64for more information.
Indicator lights in the buttons show which mode you are
in. The indicator lights will come on brie�y when you
turn on the ignition and one will stay on. If the lights do
not come on, you should take your vehicle to your
dealer for service. An indicator light will �ash while
shifting the transfer case. It will remain illuminated when
the shift is complete. If for some reason the transfer
case cannot make a requested shift, it will return to the
last chosen setting.If the SERVICE 4WD message stays on, you should
take your vehicle to your dealer for service. See “Service
4WD message” underDriver Information Center (DIC)
on page 3-43.Shifting into 4HI or 4HI Lock
With the vehicle traveling less than 40 mph (64 km/h),
press and release the 4HI or 4HI Lock button. The
indicator light will �ash while shifting. It will remain lit
when the shift is complete.
It may be necessary to drive backwards for a short
distance of 25 feet (7.5 m) to get the lock feature
to disengage.
2-33
Page 111 of 468
Shifting into NEUTRAL
To shift the transfer case to NEUTRAL, do the following:
1. Make sure the vehicle is parked so that it will
not roll.
2. Set the parking brake.
3. Start the vehicle or turn the ignition to RUN.
4. Connect the vehicle to the towing vehicle.
5. Put the transmission in NEUTRAL (N).
6. Shift the transfer case to 4HI.
7. Simultaneously press and hold the 4HI and
4LO Lock buttons for 10 seconds. The red
NEUTRAL light will come on when the transfer case
shift to NEUTRAL is complete.
8. Turn the ignition to LOCK.
9. Place the transmission shift lever in PARK (P).
10. Release the parking brake prior to towing.
Shifting Out of NEUTRAL
To shift the transfer case out of NEUTRAL, do the
following:
1. Set the parking brake and apply the regular brake
pedal.
2. Shift the transmission to NEUTRAL (N) and turn the
ignition to RUN with the engine off.
3. Press the button for the desired transfer case shift
position (4HI, 4HI Lock or 4LO Lock).
4. After the transfer case has shifted out of NEUTRAL
the red light will go out.
5. You may start the engine and shift the transmission
to the desired position.
Notice:Shifting the transmission into gear before
the indicator light stops �ashing could cause
damage to the transfer case. Always wait until the
indicator light stops �ashing before putting the
transmission back in gear.
2-35
Page 127 of 468
This device complies with RSS-210 of Industry Canada.
Operation is subject to the following two conditions: (1)
this device may not cause interference, and (2) this
device must accept any interference, including
interference that may cause undesired operation of
the device.
Changes and modi�cations to this system by other than
an authorized service facility could void authorization
to use this equipment.
Programming the HomeLink®
Transmitter
Do not use the HomeLink®Transmitter with any garage
door opener that does not have the “stop and reverse”
feature. This includes any garage door opener model
manufactured before April 1, 1982. If you have a newer
garage door opener with rolling codes, please be
sure to follow steps 6 through 8 to complete the
programming of your HomeLink
®Transmitter.
Read the instructions completely before attempting to
program the HomeLink
®Transmitter. Because of
the steps involved, it may be helpful to have another
person available to assist you in programming the
transmitter.
Keep the original transmitter for use in other vehicles as
well as for future HomeLink
®programming. It is also
recommended that upon the sale of the vehicle,the programmed HomeLink
®buttons should be erased
for security purposes. Refer to “Erasing HomeLink®
Buttons” or, for assistance, contact HomeLink®on the
internet at: www.homelink.com or by calling
1-800-355-3515.
Be sure that people and objects are clear of the garage
door or gate operator you are programming. When
programming a garage door, it is advised to park outside
of the garage.
It is recommended that a new battery be installed in
your hand-held transmitter for quicker and more
accurate transmission of the radio frequency.
Programming HomeLink®
Your vehicle’s engine should be turned off while
programming the transmitter. Follow these steps to
program up to three channels:
1. Press and hold down the two outside buttons,
releasing only when the indicator light begins to
�ash, after 20 seconds. Do not hold down the
buttons for longer than 30 seconds and do not
repeat this step to program a second and/or third
transmitter to the remaining two HomeLink
®buttons.
2. Position the end of your hand-held transmitter about
1 to 3 inches (3 to 8 cm) away from the HomeLink
®
buttons while keeping the indicator light in view.
2-51