ECO mode HUMMER H2 2006 Owner's Guide
[x] Cancel search | Manufacturer: HUMMER, Model Year: 2006, Model line: H2, Model: HUMMER H2 2006Pages: 502, PDF Size: 3.35 MB
Page 224 of 502
To insert multiple CDs, do the following:
1. Turn the ignition on.
2. Press and hold the LOAD button for two seconds.
You will hear a beep and the indicator light, located
to the right of the slot, will begin to �ash and
MULTI LOAD # will appear on the display.
3. Once the light stops �ashing and turns green,
INSERT CD # will appear on the display, load
a CD. Insert the CD partway into the slot, label side
up. The player will pull the CD in.
Once the CD is loaded, the indicator light will begin
�ashing again. Once the light stops �ashing and
turns green, you can load another CD. The
CD player takes up to six CDs. Do not try to load
more than six.
To load more than one CD but less than six, complete
Steps 1 through 3. When �nished loading CDs,
press the LOAD button to cancel the loading function.
The radio will begin to play the last CD loaded.
If more than one CD has been loaded, a number for
each CD will appear on the display.Playing a Speci�c Loaded CD
For every CD loaded, a number will appear on the
display. To play a speci�c CD, �rst (if not in CD mode)
press the CD AUX button, then press the numbered
pushbutton that corresponds to the CD. A small bar will
appear under the CD number that is playing and the
track number will appear on the display.
If an error appears on the display, see “CD Messages”
later in this section.
CD
Z(Eject):Press this button to eject CD(s).
To eject the CD that is currently playing, press and
release this button.
To eject multiple CDs, do the following:
1. Press and hold the CD eject button for �ve seconds.
You will hear a beep and the indicator light, located
to the right of the slot, will begin to �ash and
EJECT ALL will appear on the display.
2. Once the light stops �ashing REMOVE CD # will
appear on the display. The CD will eject and can
be removed.
Once the CD is removed, the indicator light will
begin �ashing again and another CD will eject.
To stop ejecting the CDs, press the LOAD or the
eject button.
3-84
Page 226 of 502
AUTO EQ (Automatic Equalization):Press AUTO EQ
to select the equalization setting while playing a CD.
The equalization will be stored whenever a CD is played.
For more information on AUTO EQ, see “AUTO EQ”
listed previously in this section.
©SEEK¨:Press the left arrow to go to the start of
the current track (if more than 10 seconds have played),
or go to the beginning of the previous track (if less
than 10 seconds has played). Press the right arrow to
go to the next track. If either arrow is held or pressed
more than once, the player will continue moving
backward or forward through the CD.
©SCAN¨:To scan one CD, press and hold either
SCAN arrow for more than two seconds until TRACK
SCAN appears on the display and you hear a beep. The
radio will go to the next track, play for 10 seconds,
then go on to the next track. Press either SCAN arrow
again, to stop scanning.
To scan all loaded CDs, press and hold either SCAN
arrow for more than four seconds until ALL CD
SCAN appears on the display and you hear a beep.
Use this feature to listen to 10 seconds of the �rst track
of each loaded CD. Press either SCAN arrow again,
to stop scanning.INFO (Information):Press this knob to see how long
the current track has been playing. To change the
default on the display, track or elapsed time, press the
knob until you see the display you want, then hold
the knob until the radio beeps. The selected display will
now be the default.
BAND:Press this button to listen to the radio when a
CD is playing. The inactive CD(s) will remain safely
inside the radio for future listening.
Using Song List Mode
The six-disc CD changer has a feature called song list.
This feature is capable of saving 20 track selections.
To save tracks into the song list feature, perform
the following steps:
1. Turn the CD player on and load it with at least
one CD. See “LOAD CD” listed previously in this
section for more information.
2. Check to see that the CD changer is not in song list
mode. S-LIST should not appear on the display. If
S-LIST is present, press the SONG LIST button
to turn it off.
3. Select the desired CD by pressing the numbered
pushbutton and then use the SEEK or TYPE right
arrow to locate the track to be saved. The track will
begin to play.
3-86
Page 227 of 502
4. Press and hold the SONG LIST button to save
the track into memory. When SONG LIST is
pressed, one beep will be heard immediately. After
two seconds of continuously pressing the SONG
LIST button, two beeps will sound to con�rm
the track has been saved.
5. Repeat Steps 3 and 4 for saving other selections.
S-LIST FULL will appear on the display if you try to save
more than 20 selections.
To play the song list, press the SONG LIST button.
One beep will be heard and S-LIST will appear on the
display. The recorded tracks will begin to play in
the order they were saved.
Seek through the song list by using the SEEK or TYPE
arrows. Seeking past the last saved track will return
to the �rst saved track.
To delete tracks from the song list, perform the
following steps:
1. Turn the CD player on.
2. Press the SONG LIST button to turn song list on.
S-LIST will appear on the display.
3. Press either SEEK or TYPE arrow to select the
desired track to be deleted.
4. Press and hold the SONG LIST button for
two seconds. When SONG LIST is pressed,
one beep will be heard immediately. After
two seconds of continuously pressing the SONG
LIST button, two beeps will be heard to con�rm that
the track has been deleted.After a track has been deleted, the remaining tracks are
moved up the list. When another track is added to the
song list, the track will be added to the end of the list.
To delete the entire song list, perform the
following steps:
1. Turn the CD player on.
2. Press the SONG LIST button to turn song list on.
S-LIST will appear on the display.
3. Press and hold the SONG LIST button for more
than four seconds. One beep will be heard,
followed by two beeps after two seconds, and a
�nal beep will be heard after four seconds. S-LIST
EMPTY will appear on the display indicating the
song list has been deleted.
If a CD is ejected, and the song list contains saved
tracks from that CD, those tracks are automatically
deleted from the song list. Any tracks saved to the song
list again are added to the bottom of the list.
To end song list mode, press the SONG LIST button.
One beep will be heard and S-LIST will be removed from
the display.
3-87
Page 232 of 502
To use a video screen, do the following:
POWER:Press this button, located on the lower right
side of the screen to turn the power on or off. Each
video screen can be powered on or off independently. A
screen auto power mode feature allows the screen to
default to the last power on or off condition that the
monitors were in, when the vehicle was last shut off.
Make sure the screens are off when not in use.
SOURCE:Press this button to switch between the
different sources listed below:
AV (Audio/Video) 1 — Allows the vehicle-mounted
DVD player to become a source.
AV (Audio/Video) 2 — Allows the monitor-mounted
auxiliary input jack to become a source. This input
can be viewed on the monitor that the connection
is made to.
AV (Audio/Video) 3 — Allows the DVD-mounted
auxiliary input jack to become a source. This
input can be viewed on one or both monitors.
Each video screen can be adjusted independently to
switch between all available audio/video sources.MENU:Press this button to adjust the video screen
control functions such as:
CONTRAST — Adjusts picture contrast.
BRIGHTNESS — Adjusts picture brightness.
COLOR — Adjusts picture color balance.
TINT — Adjusts picture tint.
SHARPNESS — Adjusts picture sharpness.
MODE — Adjusts screen preference from Normal
to Wide, or to Zoom.
RESET DEFAULT — Resets all monitor control
functions to default (center point) settings.
Q(Up):Press this button to increase a basic monitor
control function once the MENU button has been
pressed and a control function has been selected.
R(Down):Press this button to decrease a basic
monitor control function once the MENU button has been
pressed and a control function has been selected.
Infrared LED Window:The infrared LED window sends
audio signals to the wireless headphones. In order for
the infrared LED window to work properly, it must remain
unobstructed at all times.
3-92
Page 237 of 502
Remote Control Buttons
(DVD Control Functions)
DVD POWER:Press this button to turn the DVD player
on and off.
ENTER:Press this button to enter a selected function.
Q,R,q,r(Directional Arrows):Press these
buttons to move through the DVD menus.
The up and down arrows will move through
MP3 folders.
RETURN
%:Press this button to go back one step in
the RSE On-Screen Display (OSD) menu and some
DVD menus. Press this button to exit the current menu
and to move to the previous menu.
SETUP:Press this button to modify default settings to
suit your personal preferences. For further information
on modifying the default settings, see “RSE On-Screen
Display (OSD) Menu” later in this section.
TITLE:Press this button to enter the disc title mode
with a disc loaded. The title feature is disc-speci�c, and
may not be available with the disc that is currently
loaded in the DVD player.
MENU:Press this button to enter the DVD disc menu
while the disc is playing. The type of menu displayed
depends on the disc.−VOLUME +
RQ:Press the minus sign to decrease
the audio volume. Press and hold this button, or
press and release multiple times to change the volume
level from a range of 20 to 0.
Press the plus sign to increase the audio volume. Press
and hold this button, or press and release multiple times
to change the volume level from a range of 0 to 20.
If distortion occurs, decrease the volume. The DVD
player will retain the last selected volume position
in memory.
S-TITLE (Subtitle):Press this button to switch between
the default language set on the DVD player and up to
any alternate language that may be recorded on
the DVD disc itself. Press this button again to turn the
subtitle function off.
AUDIO:Press this button to switch between the default
language set on the DVD player or to any alternate
language that may be recorded on the DVD disc itself.
REPEAT
$:Press this button to switch between
repeat functions of title, chapter, track, entire disc, or off.
A-B:This button is used to repeat prede�ned sections.
Press this button once while the disc is playing to
select the starting position. Press a second time to
select the end position. Press a third time to turn
the function off.
3-97
Page 263 of 502
Traction Control System (TCS)
Your vehicle has a Traction Control System (TCS) that
limits wheel spin. This is especially useful in slippery
road conditions. The system operates only if it senses
that any of the wheels are spinning or beginning to lose
traction. When this happens, the system applies the
brakes to limit wheel spin.
The Traction Control System may operate on dry roads
under some conditions. When this happens, you may
notice a reduction in acceleration or a pumping sound.
This is normal and doesn’t mean there’s a problem with
your vehicle. Examples of these conditions include hard
acceleration in a turn, an abrupt upshift or downshift of
the transmission or driving on rough roads.
If your vehicle is in cruise control when the TCS begins
to limit wheel spin, the cruise control will automatically
disengage. When road conditions allow you to safely
use it again, you may re-engage the cruise control. See
Cruise Control on page 3-11.
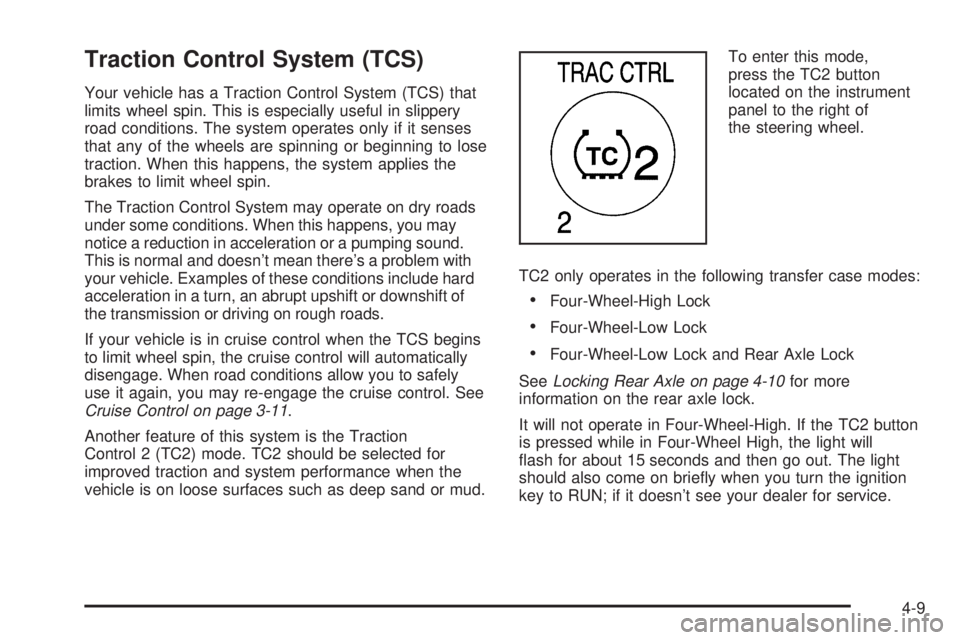
Another feature of this system is the Traction
Control 2 (TC2) mode. TC2 should be selected for
improved traction and system performance when the
vehicle is on loose surfaces such as deep sand or mud.To enter this mode,
press the TC2 button
located on the instrument
panel to the right of
the steering wheel.
TC2 only operates in the following transfer case modes:
Four-Wheel-High Lock
Four-Wheel-Low Lock
Four-Wheel-Low Lock and Rear Axle Lock
SeeLocking Rear Axle on page 4-10for more
information on the rear axle lock.
It will not operate in Four-Wheel-High. If the TC2 button
is pressed while in Four-Wheel High, the light will
�ash for about 15 seconds and then go out. The light
should also come on brie�y when you turn the ignition
key to RUN; if it doesn’t see your dealer for service.
4-9
Page 265 of 502
You must wait for the light in the button to stop �ashing
and remain illuminated before the rear axle is locked.
Notice:If you try to lock the rear axle while
your vehicle is stuck and the tires are spinning, you
could damage your vehicle’s drivetrain. The
repairs would not be covered by your warranty.
Always lock the rear axle before attempting
situations and/or navigating terrain which could
possibly cause the vehicle to become stuck.
The locking rear axle will be disengaged when the
vehicle’s speed is greater than 20 mph (32 km/h), if the
vehicle’s battery is low and/or the transfer case is
shifted out of Four-Wheel-Low-Lock mode.
Notice:If you lock the rear axle while driving on
pavement, you could damage your vehicle’s
drivetrain. The repairs would not be covered by
your warranty. Do not use the locking rear axle on
pavement. If you need four-wheel drive when
traveling on pavement, use only 4HI.
Steering
Power Steering
If you lose power steering assist because the engine
stops or the system is not functioning, you can steer but
it will take much more effort.
Steering Tips
It is important to take curves at a reasonable speed.
A lot of the “driver lost control” accidents mentioned on
the news happen on curves. Here is why:
Experienced driver or beginner, each of us is subject to
the same laws of physics when driving on curves.
The traction of the tires against the road surface makes
it possible for the vehicle to change its path when
you turn the front wheels. If there is no traction, inertia
will keep the vehicle going in the same direction. If
you have ever tried to steer a vehicle on wet ice, you
will understand this.
The traction you can get in a curve depends on the
condition of your tires and the road surface, the angle at
which the curve is banked, and your speed. While
you are in a curve, speed is the one factor you
can control.
Suppose you are steering through a sharp curve.
Then you suddenly accelerate. Both control
systems — steering and acceleration — have to do
their work where the tires meet the road. Adding
the sudden acceleration can demand too much of
those places. You can lose control. SeeTraction
Control System (TCS) on page 4-9.
What should you do if this ever happens? Ease up on
the accelerator pedal, steer the vehicle the way you
want it to go, and slow down.
4-11
Page 306 of 502
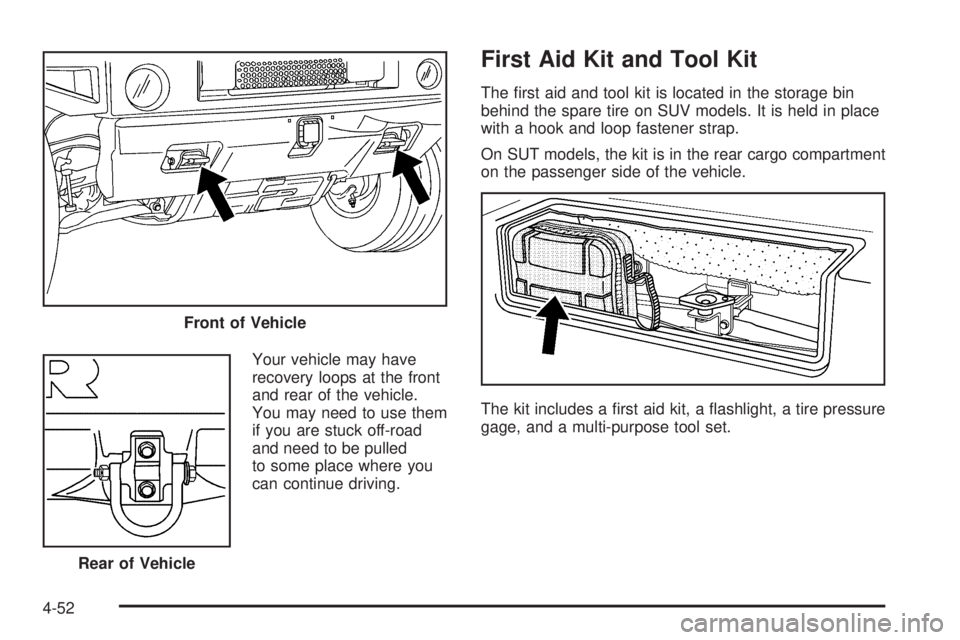
Your vehicle may have
recovery loops at the front
and rear of the vehicle.
You may need to use them
if you are stuck off-road
and need to be pulled
to some place where you
can continue driving.
First Aid Kit and Tool Kit
The �rst aid and tool kit is located in the storage bin
behind the spare tire on SUV models. It is held in place
with a hook and loop fastener strap.
On SUT models, the kit is in the rear cargo compartment
on the passenger side of the vehicle.
The kit includes a �rst aid kit, a �ashlight, a tire pressure
gage, and a multi-purpose tool set. Front of Vehicle
Rear of Vehicle
4-52
Page 317 of 502
Overload and Overheat Protection
Overload protection is designed to protect the air
suspension system and is an indication to the driver that
the vehicle is overloaded.
If the rear suspension remains at a low height, the rear
axle load has exceeded GAWR (Gross Axle Weight
Rating). When the overload protection mode is activated,
the compressor operates for about 30 seconds to one
minute without raising the vehicle depending on the
amount of overload. This will continue each time
the ignition is turned on until the rear axle load is
reduced below GAWR.
If the total rear GAWR (Gross Axle Weight Rating) is
reached, the suspension may be slightly less than level.
This is normal and does not mean there is a problem
with the air suspension.
If the system overheats, it will shut down and stop all
leveling functions until the system cools down.
During this time the SERVICE AIR SUSPENSION
message will appear in the DIC. SeeDIC Warnings and
Messages on page 3-48for more information.
Towing a Trailer
{CAUTION:
If you do not use the correct equipment and
drive properly, you can lose control when you
pull a trailer. For example, if the trailer is too
heavy, the brakes may not work well — or even
at all. You and your passengers could be
seriously injured. Pull a trailer only if you have
followed all the steps in this section. Ask your
dealer for advice and information about towing
a trailer with your vehicle.
Notice:Pulling a trailer improperly can damage
your vehicle and result in costly repairs not covered
by your warranty. To pull a trailer correctly, follow
the advice in this part, and see your dealer for
important information about towing a trailer with
your vehicle.
To identify the trailering capacity of your vehicle, you
should read the information in “Weight of the Trailer” that
appears later in this section.
4-63
Page 318 of 502

Trailering is different than just driving your vehicle by
itself. Trailering means changes in handling,
acceleration, braking, durability and fuel economy.
Successful, safe trailering takes correct equipment, and
it has to be used properly.
That’s the reason for this part. In it are many time-tested,
important trailering tips and safety rules. Many of
these are important for your safety and that of your
passengers. So please read this section carefully before
you pull a trailer.
If You Do Decide To Pull A Trailer
If you do, here are some important points:
There are many different laws, including speed limit
restrictions, having to do with trailering. Make sure
your rig will be legal, not only where you live
but also where you’ll be driving. A good source for
this information can be state or provincial police.
Consider using a sway control. See “Hitches” later
in this section.
Don’t tow a trailer at all during the �rst 500 miles
(800 km) your new vehicle is driven. Your engine,
axle or other parts could be damaged.
Then, during the �rst 500 miles (800 km) that you
tow a trailer, don’t drive over 50 mph (80 km/h)
and don’t make starts at full throttle. This helps your
engine and other parts of your vehicle wear in at
the heavier loads.
You can tow in DRIVE (D). You may want to shift
the transmission to THIRD (3) or, if necessary, a
lower gear selection if the transmission shifts
too often (e.g., under heavy loads and/or hilly
conditions). See “Tow/Haul Mode” following.
Three important considerations have to do with weight:
the weight of the trailer
the weight of the trailer tongue
and the weight on your vehicle’s tires
4-64