remote control HUMMER H2 2006 Owners Manual
[x] Cancel search | Manufacturer: HUMMER, Model Year: 2006, Model line: H2, Model: HUMMER H2 2006Pages: 502, PDF Size: 3.35 MB
Page 1 of 502
Seats and Restraint Systems........................... 1-1
Front Seats
............................................... 1-2
Rear Seats
............................................... 1-6
Safety Belts
.............................................1-14
Child Restraints
.......................................1-32
Airbag System
.........................................1-58
Restraint System Check
............................1-69
Features and Controls..................................... 2-1
Keys
........................................................ 2-3
Doors and Locks
....................................... 2-8
Windows
.................................................2-17
Theft-Deterrent Systems
............................2-21
Starting and Operating Your Vehicle
...........2-24
Mirrors
....................................................2-39
OnStar
®System
......................................2-48
Universal Home Remote System
................2-50
Storage Areas
.........................................2-54
Sunroof
..................................................2-61
Vehicle Personalization
.............................2-63
Instrument Panel............................................. 3-1
Instrument Panel Overview
.......................... 3-4
Climate Controls
......................................3-22
Warning Lights, Gages, and Indicators
........3-29
Driver Information Center (DIC)
..................3-45
Audio System(s)
.......................................3-61Driving Your Vehicle....................................... 4-1
Your Driving, the Road, and Your Vehicle
..... 4-2
Towing
...................................................4-59
Service and Appearance Care.......................... 5-1
Service
..................................................... 5-3
Fuel
......................................................... 5-5
Checking Things Under the Hood
...............5-10
Rear Axle
...............................................5-43
Four-Wheel Drive
.....................................5-44
Front Axle
...............................................5-45
Bulb Replacement
....................................5-46
Windshield Wiper Blade Replacement
.........5-52
Tires
......................................................5-53
Appearance Care
...................................5-105
Vehicle Identi�cation
...............................5-114
Electrical System
....................................5-114
Capacities and Speci�cations
...................5-124
Maintenance Schedule..................................... 6-1
Maintenance Schedule
................................ 6-2
Customer Assistance and Information.............. 7-1
Customer Assistance and Information
........... 7-2
Reporting Safety Defects
...........................7-14
Index................................................................ 1
2006 HUMMER H2 Owner ManualM
Page 77 of 502
Keys...............................................................2-3
Remote Keyless Entry System.........................2-4
Remote Keyless Entry System Operation...........2-5
Doors and Locks.............................................2-8
Door Locks....................................................2-8
Power Door Locks..........................................2-9
Delayed Locking.............................................2-9
Programmable Automatic Door Locks..............2-10
Rear Door Security Locks..............................2-10
Lockout Protection........................................2-10
Liftgate (SUV)..............................................2-11
Midgate
®(SUT)............................................2-12
Tailgate/Spare Tire Carrier.............................2-14
Windows........................................................2-17
Power Windows............................................2-18
Sun Visors...................................................2-21
Theft-Deterrent Systems..................................2-21
Content Theft-Deterrent.................................2-21
Passlock
®....................................................2-23
Starting and Operating Your Vehicle................2-24
New Vehicle Break-In....................................2-24
Ignition Positions..........................................2-24
Retained Accessory Power (RAP)...................2-25Starting the Engine.......................................2-25
Engine Coolant Heater..................................2-26
Automatic Transmission Operation...................2-27
Tow/Haul Mode............................................2-30
Full-Time Four-Wheel Drive............................2-30
Parking Brake..............................................2-34
Shifting Into Park (P).....................................2-35
Shifting Out of Park (P).................................2-36
Parking Over Things That Burn.......................2-37
Engine Exhaust............................................2-37
Running the Engine While Parked...................2-38
Mirrors...........................................................2-39
Automatic Dimming Rearview Mirror with
OnStar
®and Compass...............................2-39
Automatic Dimming Rearview Mirror with
OnStar
®, Compass and Temperature
Display....................................................2-41
Automatic Dimming Rearview Mirror
with Compass...........................................2-43
Outside Power Mirrors...................................2-45
Outside Convex Mirror...................................2-46
Outside Heated Mirrors..................................2-47
Outside Automatic Dimming Mirror with
Curb View Assist.......................................2-47
Section 2 Features and Controls
2-1
Page 78 of 502
OnStar®System.............................................2-48
Universal Home Remote System......................2-50
Universal Home Remote System Operation......2-50
Storage Areas................................................2-54
Glove Box...................................................2-54
Center Overhead Console..............................2-54
Center Console Storage Area.........................2-54
Luggage Carrier...........................................2-54Rear Seat Armrest........................................2-58
Cargo Tie Downs (SUT)................................2-58
All-Weather Cargo Area.................................2-58
Tonneau Cover (SUT)...................................2-60
Sunroof.........................................................2-61
Vehicle Personalization...................................2-63
Memory Seat...............................................2-63
Section 2 Features and Controls
2-2
Page 87 of 502
Liftgate (SUV)
{CAUTION:
It can be dangerous to drive with the liftgate
open because carbon monoxide (CO) gas can
come into your vehicle. You can not see or
smell CO. It can cause unconsciousness and
even death. If you must drive with the liftgate
open or if electrical wiring or other cable
connections must pass through the seal
between the body and the liftgate:
Make sure all other windows are shut.
Turn the fan on your heating or cooling
system to its highest speed and select the
control setting that will force outside air
into your vehicle. SeeDual Automatic
Climate Control System on page 3-22.
If you have air outlets on or under the
instrument panel, open them all the way.
SeeEngine Exhaust on page 2-37.
To lock and unlock the liftgate, use any of the power
door lock switches or the remote keyless entry (RKE)
transmitter.To open the liftgate, do the following:
1. Move the spare tire carrier out of the way. See
“Opening the Spare Tire Carrier” under
Tailgate/Spare Tire Carrier on page 2-14.
2. Pull the handle located in the center of the door.
To close the liftgate, do the following:
1. Pull the liftgate down until it latches.
2. Move the spare tire carrier back into place. See
“Closing the Spare Tire Carrier” under
Tailgate/Spare Tire Carrier on page 2-14.
2-11
Page 228 of 502
CD Messages
CHECK CD:If this message appears on the display
and/or the CD comes out, it could be for one of the
following reasons:
It is very hot. When the temperature returns to
normal, the CD should play.
You are driving on a very rough road. When the
road becomes smoother, the CD should play.
The CD is dirty, scratched, wet, or upside down.
The air is very humid. If so, wait about an hour and
try again.
There may have been a problem while burning
the CD.
The label may be caught in the CD player.
If the CD is not playing correctly, for any other reason,
try a known good CD.
If any error occurs repeatedly or if an error cannot be
corrected, contact your GM dealer. If the radio displays
an error message, write it down and provide it to
your GM dealer when reporting the problem.
Navigation/Radio System
Your vehicle may have a navigation radio system.
The navigation system has built-in features intended to
minimize driver distraction. Technology alone, no
matter how advanced, can never replace your own
judgment. See the navigation system manual for some
tips to help you reduce distractions while driving.
Rear Seat Entertainment System
Your vehicle may have a DVD Rear Seat
Entertainment (RSE) system. The RSE system
includes a DVD player, two head restraint video
display screens, auxiliary inputs, two sets of wireless
headphones, and a remote control.
Parental Control
Parental control can be maintained through the DVD
rating settings. This function restricts movie viewing for
children of appropriate age levels. See “Rating”
under Displaying DVD Player Default Settings, later in
this section.
3-88
Page 233 of 502
AUX (Auxiliary):The monitor-mounted auxiliary input
jack is an AV 2 input jack. This auxiliary input jack allows
viewing of auxiliary sources such as portable DVD
units, game stations, video cameras, etc., on each
individual monitor. The sources connected to these
inputs cannot be shared between the monitors.
Press the SOURCE button on either monitor, or the
SEL button on the system remote control to select the
desired auxiliary source. See “SOURCE” under
Video Screens earlier in this section.
X(Wired Headphone Jack):This type of headphone
jack is used with universal wired headphones. The
wired headphone volume is adjusted using the up and
down arrow buttons. See “Wired Headphones” earlier in
this section.
Infrared Remote Sensor:The infrared remote sensor
receives light signals from the system’s remote
control. This type of sensor works as a line-of-sight
signal as the transmitted signals are received. In order
for the sensor to work properly, it must remain
unobstructed at all times.
DVD Player
The DVD player is located in the center console.
The DVD player can be controlled by the buttons on the
DVD player or by the buttons on the remote control.
See “Remote Control” later in this section for more
information.
The RSE system DVD player is only compatible with
DVDs of the appropriate region code for the country
where the vehicle was sold. The DVD region code is
printed on the jacket of most DVDs.
DVDs, Standard audio CDs, CD-R, CD-RW, enhanced
CDs, video CDs, and CD-ROM with MP3 media are
supported by this DVD player. DVD+R, DVD+RW, and
copy protected CDs may or may not be supported by the
DVD player. The DVD player does not support
DVD-RAM, DVD-ROM, DVD-R, DVD-R/W, and DVD
audio media. An error message will appear on the display
if this type of media is inserted into the DVD player.
If an error message appears on the video screen, see
“DVD Messages” later in this section.
3-93
Page 235 of 502
If a disc is already in the player, make sure that the
DVD player is on, then press the PLAY button on the
player faceplate or on the remote control to start playing
a disc.
Some DVDs will not allow fast forwarding or skipping of
the copyright information or previews. Some DVDs
will begin playing after the previews have �nished. If the
DVD does not begin playing at the main title, refer to
the on-screen instructions.
Ejecting a Disc
Press the eject button on the DVD player faceplate, to
eject the disc. As the disc is ejected, the display on
the video screen will indicate Open.
If a disc is ejected from the player, but not removed, the
disc will not reload until it is pushed back into the
player. Another way to reload a disc that has been
ejected, but not removed from the DVD player, is
to either press the eject button or the PLAY button. The
DVD player will automatically reload the disc and
display Close on the video screen.
Remote Control
The system’s remote control combines the control of all
monitor and DVD player functions. To use the remote
control, aim at the remote sensor located on the
upper right side of the monitor and press the desired
button on the remote control. The remote works
best when held at a comfortable distance from the
monitors.
Direct sunlight or very bright light may affect the ability
of the transmitter to receive signals from the remote
control. If the remote control does not seem to be
working, the batteries may need to be replaced. See
“Battery Replacement” later in this section. Objects
blocking the line-of-sight will affect the function of the
remote control.
Notice:Storing the remote control in a hot area or
in direct sunlight may damage it, and the repairs
will not be covered by your warranty. Keep the
remote control stored in a cool, dry place.
3-95
Page 236 of 502
Remote Control Buttons
(Monitor Control Functions)
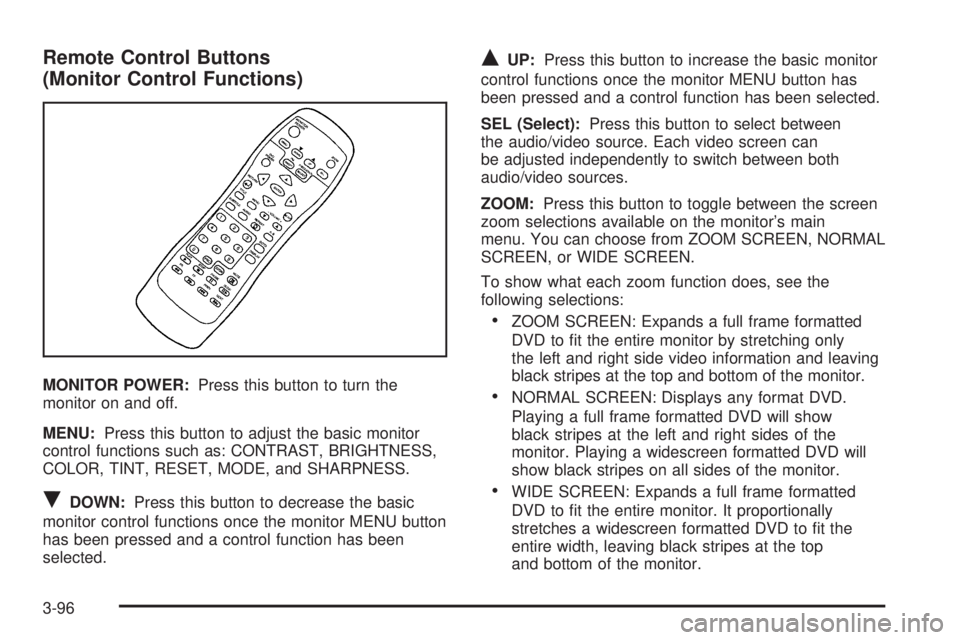
MONITOR POWER:Press this button to turn the
monitor on and off.
MENU:Press this button to adjust the basic monitor
control functions such as: CONTRAST, BRIGHTNESS,
COLOR, TINT, RESET, MODE, and SHARPNESS.
RDOWN:Press this button to decrease the basic
monitor control functions once the monitor MENU button
has been pressed and a control function has been
selected.
QUP:Press this button to increase the basic monitor
control functions once the monitor MENU button has
been pressed and a control function has been selected.
SEL (Select):Press this button to select between
the audio/video source. Each video screen can
be adjusted independently to switch between both
audio/video sources.
ZOOM:Press this button to toggle between the screen
zoom selections available on the monitor’s main
menu. You can choose from ZOOM SCREEN, NORMAL
SCREEN, or WIDE SCREEN.
To show what each zoom function does, see the
following selections:
ZOOM SCREEN: Expands a full frame formatted
DVD to �t the entire monitor by stretching only
the left and right side video information and leaving
black stripes at the top and bottom of the monitor.
NORMAL SCREEN: Displays any format DVD.
Playing a full frame formatted DVD will show
black stripes at the left and right sides of the
monitor. Playing a widescreen formatted DVD will
show black stripes on all sides of the monitor.
WIDE SCREEN: Expands a full frame formatted
DVD to �t the entire monitor. It proportionally
stretches a widescreen formatted DVD to �t the
entire width, leaving black stripes at the top
and bottom of the monitor.
3-96
Page 237 of 502
Remote Control Buttons
(DVD Control Functions)
DVD POWER:Press this button to turn the DVD player
on and off.
ENTER:Press this button to enter a selected function.
Q,R,q,r(Directional Arrows):Press these
buttons to move through the DVD menus.
The up and down arrows will move through
MP3 folders.
RETURN
%:Press this button to go back one step in
the RSE On-Screen Display (OSD) menu and some
DVD menus. Press this button to exit the current menu
and to move to the previous menu.
SETUP:Press this button to modify default settings to
suit your personal preferences. For further information
on modifying the default settings, see “RSE On-Screen
Display (OSD) Menu” later in this section.
TITLE:Press this button to enter the disc title mode
with a disc loaded. The title feature is disc-speci�c, and
may not be available with the disc that is currently
loaded in the DVD player.
MENU:Press this button to enter the DVD disc menu
while the disc is playing. The type of menu displayed
depends on the disc.−VOLUME +
RQ:Press the minus sign to decrease
the audio volume. Press and hold this button, or
press and release multiple times to change the volume
level from a range of 20 to 0.
Press the plus sign to increase the audio volume. Press
and hold this button, or press and release multiple times
to change the volume level from a range of 0 to 20.
If distortion occurs, decrease the volume. The DVD
player will retain the last selected volume position
in memory.
S-TITLE (Subtitle):Press this button to switch between
the default language set on the DVD player and up to
any alternate language that may be recorded on
the DVD disc itself. Press this button again to turn the
subtitle function off.
AUDIO:Press this button to switch between the default
language set on the DVD player or to any alternate
language that may be recorded on the DVD disc itself.
REPEAT
$:Press this button to switch between
repeat functions of title, chapter, track, entire disc, or off.
A-B:This button is used to repeat prede�ned sections.
Press this button once while the disc is playing to
select the starting position. Press a second time to
select the end position. Press a third time to turn
the function off.
3-97
Page 239 of 502
Numeric Keys:The numbered buttons located on the
lower left side of the remote control are numeric
digits assigned to menu options. To use the numeric
buttons, follow the menu instructions by pressing
the number that has been assigned to the option that
you prefer.
PBC (Playback Control):Press this button to turn
video CD playback control on or off.
Battery Replacement
To change the remote control batteries, do the following:
1. Slide the battery door, located on the back of the
remote control, down.
2. Replace the two AAA batteries in the compartment.
Make sure that they are installed correctly, using
the diagram on the inside of the battery
compartment.
3. Close the battery door.
If the remote control is to be stored for a long period of
time, remove the batteries and keep them in a cool,
dry place.
Using the RSE On-Screen Display
(OSD) Menu
To use the RSE OSD menu when using the DVD player
or an auxiliary device, do the following:
1. Press the SETUP button on the remote control to
access the general setup menu, see “Remote
Control” earlier in this section.
2. Once this menu is on the screen, press the
directional arrows and then the ENTER button
to navigate the screen.
This menu will let you select default preferences for
language, video, audio, and ratings.
Not all DVDs support all of the feature defaults in
the setup menus. If a feature is not supported,
the defaults will be provided by the DVD media.
The default language selection will apply to all
future DVDs.
3. Press the RETURN button on the remote control to
exit this menu, or wait for the menu to time out.
3-99