center console HUMMER H2 2009 Owners Manual
[x] Cancel search | Manufacturer: HUMMER, Model Year: 2009, Model line: H2, Model: HUMMER H2 2009Pages: 524, PDF Size: 3.1 MB
Page 88 of 524

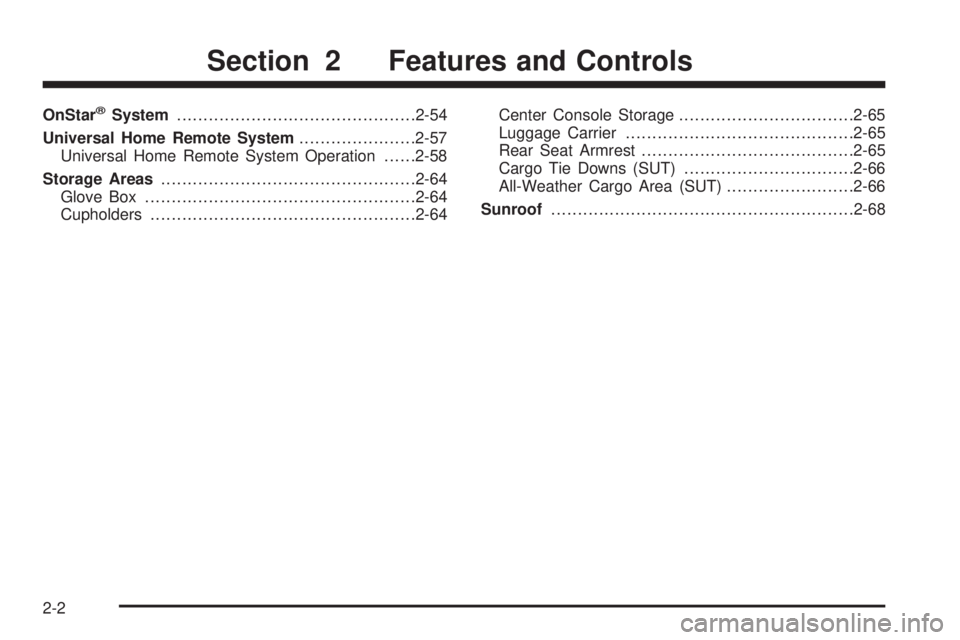
OnStar®System.............................................2-54
Universal Home Remote System......................2-57
Universal Home Remote System Operation......2-58
Storage Areas................................................2-64
Glove Box...................................................2-64
Cupholders..................................................2-64Center Console Storage.................................2-65
Luggage Carrier...........................................2-65
Rear Seat Armrest........................................2-65
Cargo Tie Downs (SUT)................................2-66
All-Weather Cargo Area (SUT)........................2-66
Sunroof.........................................................2-68
Section 2 Features and Controls
2-2
Page 150 of 524

Reprogramming Universal Home
Remote Buttons
You can reprogram any of the three buttons by repeating
the instructions.
Erasing Universal Home Remote
Buttons
You should erase the programmed buttons when you
sell or terminate your lease.
To erase either Rolling Code or Fixed Code on the
Universal Home Remote device:
1. Press and hold the two outside buttons at the same
time for approximately 20 seconds, until the indicator
lights, located directly above the buttons, begin to
blink rapidly.
2. Once the indicator lights begin to blink, release both
buttons. The codes from all buttons will be erased.
For help or information on the Universal Home Remote
System, call the customer assistance phone number
underCustomer Assistance Offices on page 7-6.
Storage Areas
Glove Box
Lift up on the glove box lever to open it.
Cupholders
Cupholders are located in front of the center console.
They are also located in the rear center armrest, and on
the left rear of the vehicle.
2-64
Page 151 of 524

Center Console Storage
To open the front center console, press the button and
lift up.
Luggage Carrier
For vehicles with this feature, cargo can be loaded on
the vehicle.
The luggage carrier consists of siderails attached to the
roof. The crossrails attach into the siderails and can
be moved back and forth to accommodate securing
various cargo sizes.
See your dealer/retailer for more information.
Notice:Loading cargo on the luggage carrier
that weighs more than 300 lbs. (136 kg) or hangs
over the rear or sides of the vehicle can damage
the vehicle. Load cargo only on top of the crossrails
and tie the cargo down to the crossrail support
cargo tie-down loops, making sure to fasten
it securely.
Do not exceed the maximum vehicle capacity when
loading the vehicle. For more information on vehicle
capacity and loading, seeLoading the Vehicle on
page 4-44.
Rear Seat Armrest
This vehicle has a rear seat armrest with cupholders.
Pull the tab on the armrest forward, to access it.
2-65
Page 176 of 524

Accessory Power Outlet(s)
Accessory power outlets can be used to connect
auxiliary electrical equipment, such as a cellular
telephone.
The vehicle may have one outlet located inside the
storage bin below the climate control system, one outlet
inside the center �oor console and two outlets on the
rear of the center �oor console.
The outlet located inside the storage bin below the
climate control system can only use equipment that
does not exceed 15 amperes.
Notice:Leaving electrical equipment on for
extended periods will drain the battery. Always
turn off electrical equipment when not in use and
do not plug in equipment that exceeds the maximum
15 ampere rating.
There may also be an accessory power outlet located
in the rear of the vehicle near the liftgate. To use
an accessory power outlet, remove the protective cap.
When not in use, always cover the accessory power
outlet with the protective cap.If the vehicle is the SUT model, there is an accessory
power outlet in the rear cargo area on the passenger
side of the vehicle.
Notice:Adding any electrical equipment to the
vehicle can damage it or keep other components
from working as they should. The repairs would
not be covered by the vehicle warranty. Do not use
equipment exceeding maximum amperage rating
of 20 amperes. Check with your dealer/retailer before
adding electrical equipment.
Certain power accessory plugs may not be compatible
to the accessory power outlets and could result in blown
vehicle or adapter fuses. If you experience a problem,
see your dealer/retailer for additional information on the
accessory power plugs.
The accessory power outlets are powered, even when
the ignition is in LOCK/OFF. Continuing to use power
outlets while the ignition is in LOCK/OFF may cause the
vehicle’s battery to run down.
Notice:Improper use of the power outlet can cause
damage not covered by the warranty. Do not hang
any type of accessory or accessory bracket from the
plug because the power outlets are designed for
accessory power plugs only.
3-20
Page 184 of 524

Operation Tips
Keep the hood and front air inlets free of ice,
snow, or any other obstruction, such as leaves.
The heater and defroster will work better, reducing
the chance of fogging the inside of the windows.
Keep the air path under the front seats clear of
objects. This helps air to circulate throughout
the vehicle.
Adding outside equipment to the front of the
vehicle, such as hood-air de�ectors, etc., may affect
the performance of the heating and air conditioning
system. Check with your dealer/retailer before
adding equipment to the outside of the vehicle.
Rear Air Conditioning and Heating
System and Electronic Climate
Controls
For vehicles with the rear heat and air conditioning
controls, they are integrated with the rear seat audio
controls located in the center console. The system can
be controlled from the front controls as well as the
rear controls.A. Fan Control
B. Air Delivery Mode Control
C. Temperature Control
REAR:Press the REAR button on the front climate
control system to turn the rear climate control system on
or off. An indicator comes on when the rear system is on.
The air�ow direction, temperature, and speed for the rear
of the vehicle will be the same as those set for the front of
the vehicle.
The rear controls can be used to control the air �ow for
the rear of the vehicle separately from that of the front of
the vehicle. To turn the system on from the rear seats,
press any rear climate control button, except the
C
button. The rear climate control system can also be
turned off by pressing and holding the
Cbutton. Rear Climate Control with Rear Seat Audio Controls
3-28
Page 188 of 524

Safety Belt Reminders
Safety Belt Reminder Light
When the engine is started, a chime comes on for
several seconds to remind people to fasten their safety
belts, unless the driver safety belt is already buckled.
The safety belt light also
comes on and stay on for
several seconds, then
it �ashes for several more.
This chime and light is repeated if the driver remains
unbuckled and the vehicle is in motion. If the driver
safety belt is already buckled, neither the chime nor
the light comes on.
Airbag Readiness Light
There is an airbag readiness light on the center
overhead console, which shows the airbag symbol.
The system checks the airbag’s electrical system for
malfunctions. The light indicates if there is an electrical
problem. The system check includes the airbag sensors,
the airbag modules, the wiring and the crash sensing and
diagnostic module. For more information on the airbag
system, seeAirbag System on page 1-67.
This light comes on when
the vehicle is started,
and �ashes for a few
seconds. Then the light
should go out. This means
the system is ready.
3-32
Page 512 of 524

Audio System (cont.)
Rear Seat Audio (RSA)...............................3-127
Setting the Clock.........................................3-73
Theft-Deterrent Feature...............................3-128
XM™ Satellite Radio Antenna System...........3-130
Audio System(s).............................................3-75
Automatic Headlamp System............................3-17
Automatic Transmission
Fluid..........................................................5-23
Operation...................................................2-32
B
Battery..........................................................5-41
Electric Power Management..........................3-19
Run-Down Protection...................................3-19
Bluetooth
®....................................................3-107
Brake
Emergencies................................................ 4-6
Brake Fluid....................................................5-38
Brakes..........................................................5-38
System Warning Light..................................3-37
Braking........................................................... 4-4
Braking in Emergencies..................................... 4-6
Break-In, New Vehicle.....................................2-27
Bucket Seats, Rear.........................................1-13Bulb Replacement...........................................5-50
Daytime Running Lamp................................5-52
Front Turn Signal and Parking Lamps.............5-52
Halogen Bulbs............................................5-50
Headlamps.................................................5-51
Replacement Bulbs......................................5-55
Roof Marker Lamps.....................................5-53
Taillamps, Turn Signal, Stoplamps and
Back-up Lamps........................................5-54
Buying New Tires...........................................5-72
C
Calibration.....................................................3-54
California Fuel.................................................. 5-6
California Perchlorate Materials Requirements....... 5-4
California Proposition 65 Warning....................... 5-4
Canadian Owners................................................ ii
Capacities and Speci�cations..........................5-117
Carbon Monoxide...................2-14, 2-16, 2-45, 4-37
Care of
Safety Belts..............................................5-105
Cargo Area, All-Weather..................................2-66
Cargo Tie Downs............................................2-66
CD, MP3 ...............................................3-94, 3-99
Center Console Storage Area...........................2-65
2
Page 522 of 524

Start Vehicle, Remote....................................... 2-7
Starting the Engine.........................................2-29
Steering........................................................4-11
Steering Wheel Controls, Audio.......................3-129
Steering Wheel, Heated..................................... 3-7
Steering Wheel, Tilt Wheel................................. 3-6
Storage Areas
All-Weather Cargo Area................................2-66
Center Console Storage Area........................2-65
Cupholders.................................................2-64
Glove Box..................................................2-64
Luggage Carrier..........................................2-65
Rear Seat Armrest.......................................2-65
Stuck in Sand, Mud, Ice, or Snow.....................4-39
Sun Visors.....................................................2-23
Sunroof.........................................................2-68
T
Tachometer....................................................3-31
Tailgate/Spare Tire Carrier................................2-16
Taillamps
Turn Signal, Stoplamps and Back-up Lamps....5-54
Theft-Deterrent, Radio....................................3-128
Theft-Deterrent Systems...................................2-23
Content Theft-Deterrent................................2-24
PASS-Key
®III+ Electronic Immobilizer............2-25
PASS-Key®III+ Electronic Immobilizer
Operation................................................2-26Third Row Seat..............................................1-14
Tilt Wheel........................................................ 3-6
Time, Setting..................................................3-73
Tire
Pressure Light.............................................3-39
Tires.............................................................5-57
Aluminum Wheels, Cleaning........................5-107
Buying New Tires........................................5-72
Chains.......................................................5-77
Changing a Flat Tire....................................5-80
Cleaning...................................................5-108
Different Size..............................................5-74
If a Tire Goes Flat.......................................5-79
In�ation - Tire Pressure................................5-63
In�ator,- Accessory.......................................5-78
Inspection and Rotation................................5-69
Installing the Spare Tire................................5-90
Pressure Monitor Operation...........................5-66
Pressure Monitor System..............................5-64
Removing the Flat Tire.................................5-90
Removing the Spare Tire and Tools.......5-82, 5-86
Spare Tire................................................5-101
Storing a Flat or Spare Tire and Tools....5-95, 5-98
Tire Sidewall Labeling..................................5-58
Tire Terminology and De�nitions....................5-60
Uniform Tire Quality Grading.........................5-74
Wheel Alignment and Tire Balance.................5-76
Wheel Replacement.....................................5-76
When It Is Time for New Tires......................5-71
12