tow HUMMER H2 2009 Owners Manual
[x] Cancel search | Manufacturer: HUMMER, Model Year: 2009, Model line: H2, Model: HUMMER H2 2009Pages: 524, PDF Size: 3.1 MB
Page 1 of 524
Seats and Restraint System............................. 1-1
Head Restraints
......................................... 1-2
Front Seats
............................................... 1-4
Rear Seats
..............................................1-10
Safety Belts
.............................................1-20
Child Restraints
.......................................1-40
Airbag System
.........................................1-67
Restraint System Check
............................1-80
Features and Controls..................................... 2-1
Keys
........................................................ 2-3
Doors and Locks
......................................2-10
Windows
.................................................2-19
Theft-Deterrent Systems
............................2-23
Starting and Operating Your Vehicle
...........2-27
Mirrors
....................................................2-47
Object Detection Systems
..........................2-50
OnStar
®System
......................................2-54
Universal Home Remote System
................2-57
Storage Areas
.........................................2-64
Sunroof
..................................................2-68
Instrument Panel............................................. 3-1
Instrument Panel Overview
.......................... 3-4
Climate Controls
......................................3-22
Warning Lights, Gages, and Indicators
........3-29
Driver Information Center (DIC)
..................3-46
Audio System(s)
.......................................3-72Driving Your Vehicle....................................... 4-1
Your Driving, the Road, and the Vehicle
....... 4-2
Towing
...................................................4-50
Service and Appearance Care.......................... 5-1
Service
..................................................... 5-3
Fuel
......................................................... 5-5
Checking Things Under the Hood
...............5-11
Rear Axle
...............................................5-47
Four-Wheel Drive
.....................................5-48
Front Axle
...............................................5-49
Bulb Replacement
....................................5-50
Windshield Wiper Blade Replacement
.........5-56
Tires
......................................................5-57
Appearance Care
...................................5-102
Vehicle Identi�cation
...............................5-109
Electrical System
....................................5-109
Capacities and Speci�cations
...................5-117
Maintenance Schedule..................................... 6-1
Maintenance Schedule
................................ 6-2
Customer Assistance Information.................... 7-1
Customer Assistance and Information
........... 7-2
Reporting Safety Defects
...........................7-14
Vehicle Data Recording and Privacy
...........7-16
Index................................................................ 1
2009 HUMMER H2 Owner ManualM
Page 4 of 524
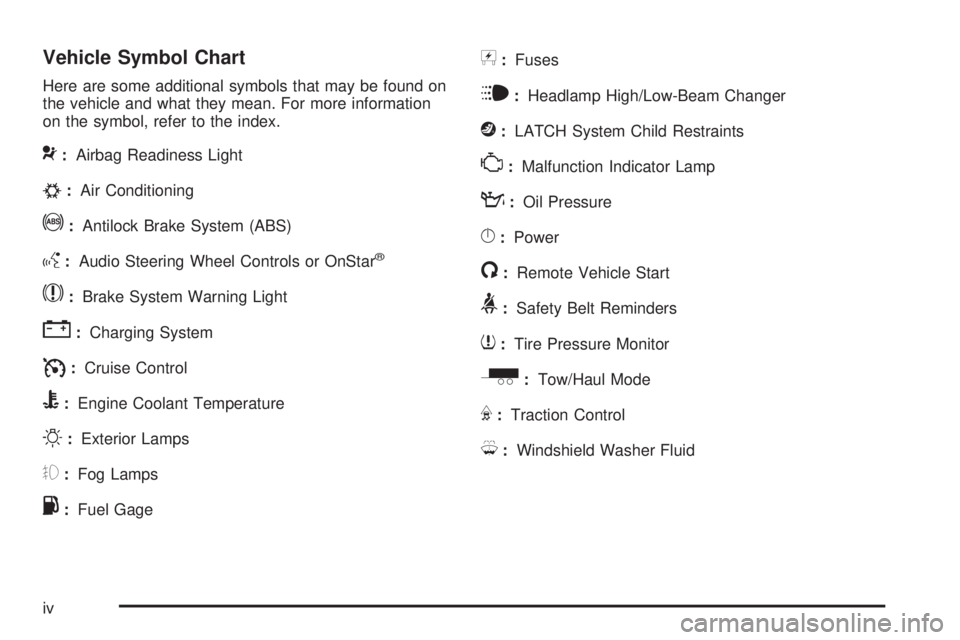
Vehicle Symbol Chart
Here are some additional symbols that may be found on
the vehicle and what they mean. For more information
on the symbol, refer to the index.
9:Airbag Readiness Light
#:Air Conditioning
!:Antilock Brake System (ABS)
g:Audio Steering Wheel Controls or OnStar®
$:Brake System Warning Light
":Charging System
I:Cruise Control
B:Engine Coolant Temperature
O:Exterior Lamps
#:Fog Lamps
.:Fuel Gage
+:Fuses
i:Headlamp High/Low-Beam Changer
j:LATCH System Child Restraints
*:Malfunction Indicator Lamp
::Oil Pressure
}:Power
/:Remote Vehicle Start
>:Safety Belt Reminders
7:Tire Pressure Monitor
_:Tow/Haul Mode
F:Traction Control
M:Windshield Washer Fluid
iv
Page 12 of 524
Power Reclining Seatbacks
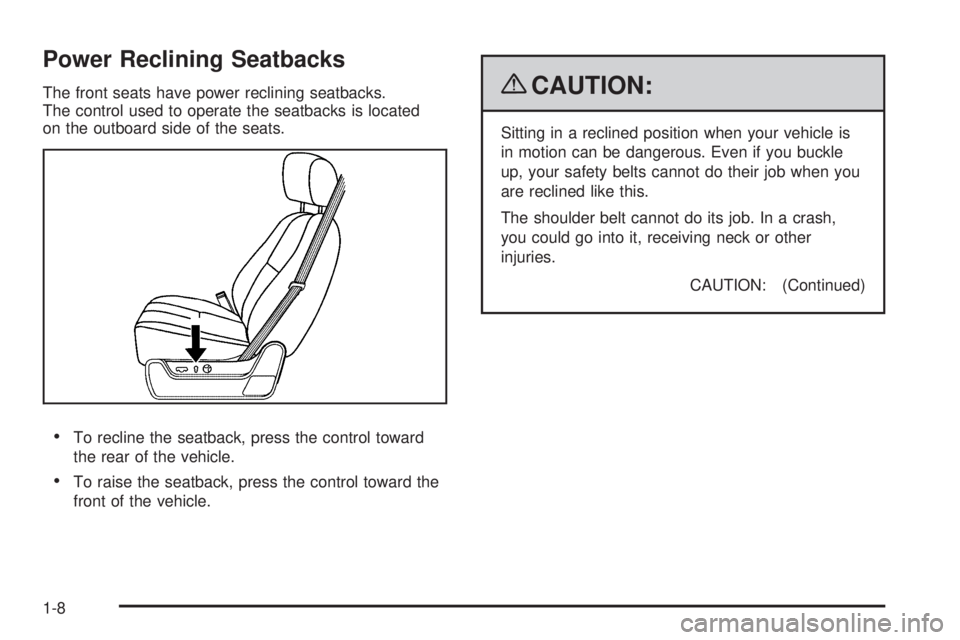
The front seats have power reclining seatbacks.
The control used to operate the seatbacks is located
on the outboard side of the seats.
To recline the seatback, press the control toward
the rear of the vehicle.
To raise the seatback, press the control toward the
front of the vehicle.
{CAUTION:
Sitting in a reclined position when your vehicle is
in motion can be dangerous. Even if you buckle
up, your safety belts cannot do their job when you
are reclined like this.
The shoulder belt cannot do its job. In a crash,
you could go into it, receiving neck or other
injuries.
CAUTION: (Continued)
1-8
Page 15 of 524
Split Folding Rear Seat
The split bench and bucket seats can be folded to
provide more cargo space.
Folding the Seatbacks
The seatbacks are equipped with rearward folding head
rests (SUV only). When the seatback is being folded
down, the head rest will automatically fold rearward.
To fold the rear seat:
1. Make sure that nothing is under or in front of
the seat.
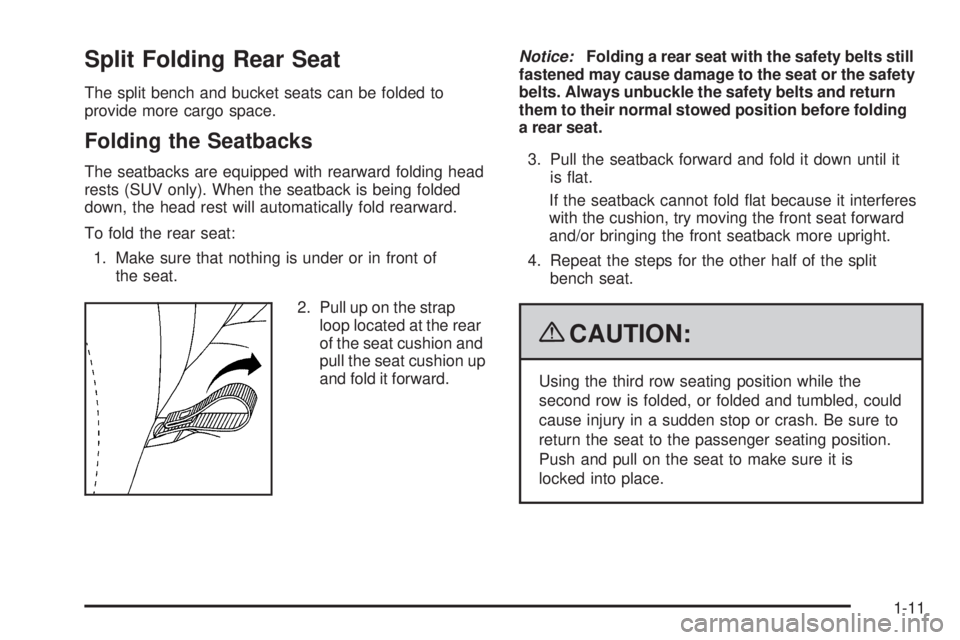
2. Pull up on the strap
loop located at the rear
of the seat cushion and
pull the seat cushion up
and fold it forward.Notice:Folding a rear seat with the safety belts still
fastened may cause damage to the seat or the safety
belts. Always unbuckle the safety belts and return
them to their normal stowed position before folding
a rear seat.
3. Pull the seatback forward and fold it down until it
is �at.
If the seatback cannot fold �at because it interferes
with the cushion, try moving the front seat forward
and/or bringing the front seatback more upright.
4. Repeat the steps for the other half of the split
bench seat.
{CAUTION:
Using the third row seating position while the
second row is folded, or folded and tumbled, could
cause injury in a sudden stop or crash. Be sure to
return the seat to the passenger seating position.
Push and pull on the seat to make sure it is
locked into place.
1-11
Page 18 of 524
Third Row Seat
Entering or Exiting the Third Row Seat
If the vehicle has a third row seat, it is intended for
two passengers and has only two designated seating
positions.
A second row split folding rear seat must be folded
down before entering or exiting the third row. See
“Folding the Seatbacks” underSplit Folding Rear Seat
on page 1-11earlier in this section for instructions.
The third row seatback can be folded and the entire seat
can be tilted or removed from the vehicle.
Folding the Seatback
To fold the seatback:
Notice:Folding a rear seat with the safety belts
still fastened may cause damage to the seat or the
safety belts. Always unbuckle the safety belts
and return them to their normal stowed position
before folding a rear seat.
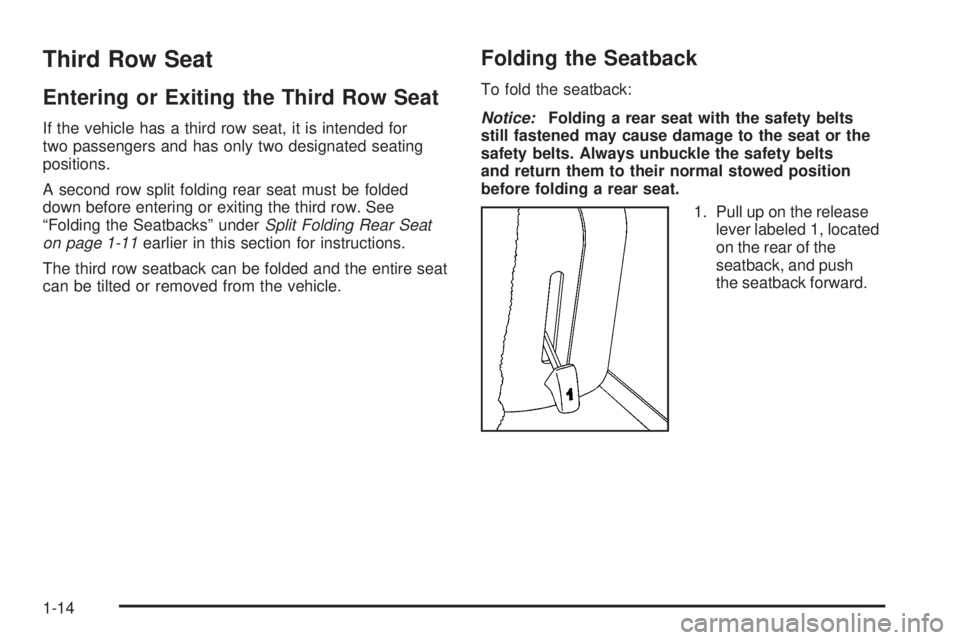
1. Pull up on the release
lever labeled 1, located
on the rear of the
seatback, and push
the seatback forward.
1-14
Page 20 of 524
Returning the Seat from a Tilted to an
Upright Position
{CAUTION:
If either seatback is not locked, it could move
forward in a sudden stop or crash. That could
cause injury to the person sitting there. Always
push and pull on the seatbacks to be sure they
are locked.To return the seatback to an upright position:
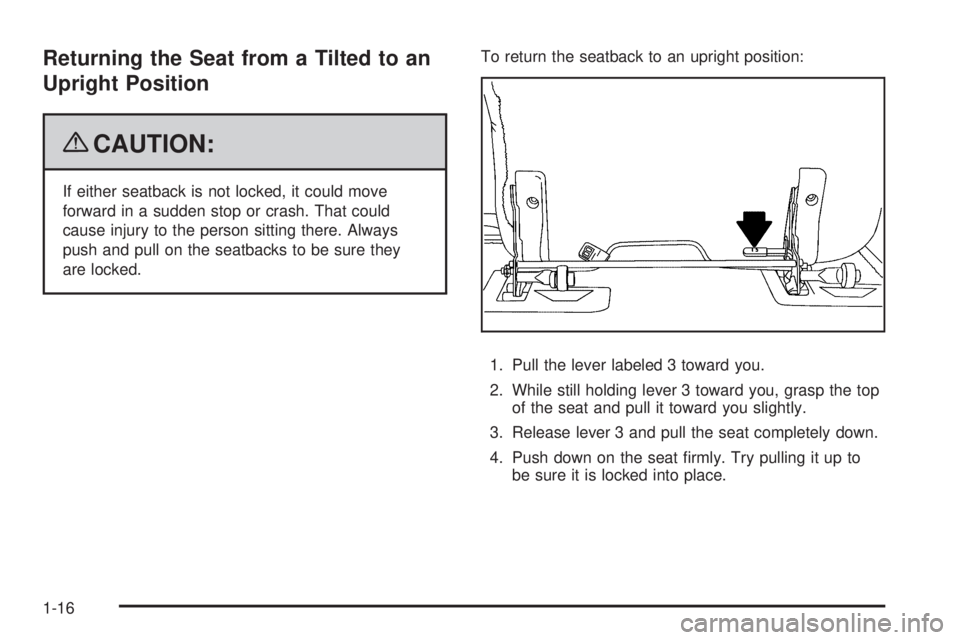
1. Pull the lever labeled 3 toward you.
2. While still holding lever 3 toward you, grasp the top
of the seat and pull it toward you slightly.
3. Release lever 3 and pull the seat completely down.
4. Push down on the seat �rmly. Try pulling it up to
be sure it is locked into place.
1-16
Page 21 of 524
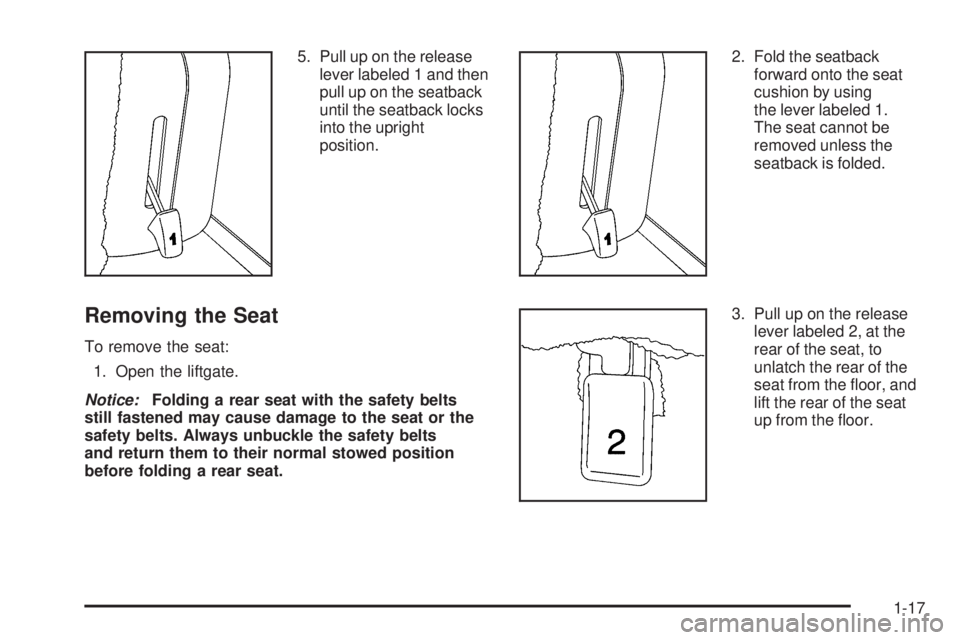
5. Pull up on the release
lever labeled 1 and then
pull up on the seatback
until the seatback locks
into the upright
position.
Removing the Seat
To remove the seat:
1. Open the liftgate.
Notice:Folding a rear seat with the safety belts
still fastened may cause damage to the seat or the
safety belts. Always unbuckle the safety belts
and return them to their normal stowed position
before folding a rear seat.2. Fold the seatback
forward onto the seat
cushion by using
the lever labeled 1.
The seat cannot be
removed unless the
seatback is folded.
3. Pull up on the release
lever labeled 2, at the
rear of the seat, to
unlatch the rear of the
seat from the �oor, and
lift the rear of the seat
up from the �oor.
1-17
Page 39 of 524
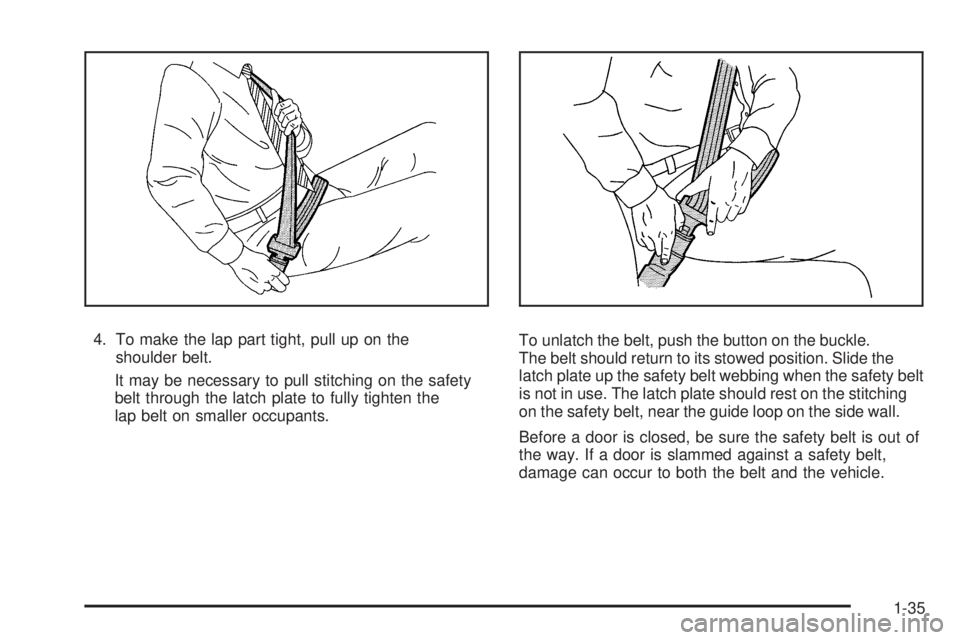
4. To make the lap part tight, pull up on the
shoulder belt.
It may be necessary to pull stitching on the safety
belt through the latch plate to fully tighten the
lap belt on smaller occupants.To unlatch the belt, push the button on the buckle.
The belt should return to its stowed position. Slide the
latch plate up the safety belt webbing when the safety belt
is not in use. The latch plate should rest on the stitching
on the safety belt, near the guide loop on the side wall.
Before a door is closed, be sure the safety belt is out of
the way. If a door is slammed against a safety belt,
damage can occur to both the belt and the vehicle.
1-35
Page 61 of 524
{CAUTION:
Do not attach more than one child restraint to a
single anchor. Attaching more than one child
restraint to a single anchor could cause the anchor
or attachment to come loose or even break during
a crash. A child or others could be injured. To
reduce the risk of serious or fatal injuries during a
crash, attach only one child restraint per anchor.
{CAUTION:
Children can be seriously injured or strangled if a
shoulder belt is wrapped around their neck and
the safety belt continues to tighten. Buckle any
unused safety belts behind the child restraint so
CAUTION: (Continued)
CAUTION: (Continued)
children cannot reach them. Pull the shoulder belt
all the way out of the retractor to set the lock, if
your vehicle has one, after the child restraint has
been installed.
Notice:Do not let the LATCH attachments rub
against the vehicle’s safety belts. This may damage
these parts. If necessary, move buckled safety
belts to avoid rubbing the LATCH attachments.
Do not fold the empty rear seat with a safety belt
buckled. This could damage the safety belt or
the seat. Unbuckle and return the safety belt to its
stowed position, before folding the seat.
1-57
Page 68 of 524
6. If the child restraint has a top tether, follow the child
restraint manufacturer’s instructions regarding the
use of the top tether. SeeLower Anchors and
Tethers for Children (LATCH) on page 1-51for
more information.
7. Push and pull the child restraint in different
directions to be sure it is secure.
To remove the child restraint, unbuckle the vehicle safety
belt and let it return to the stowed position. If the top
tether is attached to a top tether anchor, disconnect it.
Securing a Child Restraint in the
Right Front Seat Position
This vehicle has airbags. A rear seat is a safer place to
secure a forward-facing child restraint. SeeWhere to
Put the Restraint on page 1-50.
There is a switch in the glove box that you can use to
turn off the right front passenger frontal airbag. See
Airbag Off Switch on page 1-76for more information,
including important safety information.
A label on the sun visor says, “Never put a rear-facing
child seat in the front.” This is because the risk to
the rear-facing child is so great, if the airbag deploys.
{CAUTION:
A child in a rear-facing child restraint can be
seriously injured or killed if the right front
passenger airbag in�ates. This is because the
back of the rear-facing child restraint would be
very close to the in�ating airbag. A child in a
forward-facing child restraint can be seriously
injured or killed if the right front passenger airbag
in�ates and the passenger seat is in a forward
position.
Even if the airbag switch has turned off the right
front passenger frontal airbag, no system is
fail-safe. No one can guarantee that an airbag will
not deploy under some unusual circumstance,
even though it is turned off.
Secure rear-facing child restraints in a rear seat,
even if the airbag is off. If you secure a
forward-facing child restraint in the right front seat,
always move the front passenger seat as far back
as it will go. It is better to secure the child restraint
in a rear seat.
1-64