radio HUMMER H3 2009 Owners Manual
[x] Cancel search | Manufacturer: HUMMER, Model Year: 2009, Model line: H3, Model: HUMMER H3 2009Pages: 382, PDF Size: 1.99 MB
Page 69 of 382

Remote Keyless Entry
(RKE) System
The Remote Keyless Entry (RKE)
system operates on a radio
frequency subject to Federal
Communications Commission (FCC)
Rules and with Industry Canada.
This device complies with Part 15
of the FCC Rules. Operation
is subject to the following
two conditions:
1. This device may not cause
interference.
2. This device must accept any
interference received, including
interference that may cause
undesired operation of the
device.This device complies with RSS-210
of Industry Canada. Operation
is subject to the following
two conditions:
1. This device may not cause
interference.
2. This device must accept any
interference received, including
interference that may cause
undesired operation of the
device.
Changes or modi�cations to this
system by other than an authorized
service facility could void
authorization to use this equipment.If there is a decrease in the RKE
operating range, try this:Check the distance. The
transmitter may be too far from
the vehicle. Stand closer
during rainy or snowy weather.
Check the location. Other
vehicles or objects may be
blocking the signal. Take a
few steps to the left or right,
hold the transmitter higher, and
try again.
Check the transmitter’s battery.
See “Battery Replacement”
later in this section.
If the transmitter is still not
working correctly, see your
dealer/retailer or a quali�ed
technician for service.
Features and Controls 2-3
Page 79 of 382
If the engine is running and the
security light comes on, the engine
restarts if you turn the engine
off. However, the Passlock
®system
is not working properly and must
be serviced by your dealer/retailer.
The vehicle is not protected by
Passlock
®at this time. See
your dealer/retailer for service.
In an emergency, call the Roadside
Assistance Center. SeeRoadside
Service on page 7-6.
Do not leave the key or device that
disarms or deactivates the theft
deterrent system in the vehicle.
PASS-Key®III+ Electronic
Immobilizer
The PASS-Key III+ system
operates on a radio frequency
subject to Federal Communications
Commission (FCC) Rules and
with Industry Canada.
This device complies with Part 15
of the FCC Rules. Operation
is subject to the following
two conditions:
1. This device may not cause
harmful interference.
2. This device must accept any
interference received, including
interference that may cause
undesired operation.This device complies with RSS-210
of Industry Canada. Operation
is subject to the following
two conditions:
1. This device may not cause
interference.
2. This device must accept any
interference received, including
interference that may cause
undesired operation of the
device.
Changes or modi�cations to
this system by other than an
authorized service facility could void
authorization to use this equipment.
PASS-Key III+ uses a radio
frequency transponder in the key that
matches a decoder in the vehicle.
Features and Controls 2-13
Page 108 of 382
OnStar service cannot work unless
the vehicle is in a place where
OnStar has an agreement with a
wireless service provider for service
in that area. OnStar service also
cannot work unless the vehicle is in
a place where the wireless service
provider OnStar has hired for
that area has coverage, network
capacity and reception when
the service is needed, and
technology that is compatible
with the OnStar service. Not all
services are available everywhere,
particularly in remote or enclosed
areas, or at all times.
Location information about the
vehicle is only available if the GPS
satellite signals are unobstructed
and available.
The vehicle must have a working
electrical system, including adequate
battery power, for the OnStar
equipment to operate. There are
other problems OnStar cannotcontrol that may prevent OnStar
from providing OnStar service at
any particular time or place.
Some examples are damage to
important parts of the vehicle in a
crash, hills, tall buildings, tunnels,
weather or wireless phone network
congestion.
Your Responsibility
Increase the volume of the radio
if the OnStar advisor cannot
be heard. If the light next to the
OnStar buttons is red, the system
may not be functioning properly.
Press the OnStar button and request
a vehicle diagnostic. If the light
appears clear (no light is appearing),
your OnStar subscription has
expired and all services have been
deactivated. Press the OnStar
button to con�rm that the OnStar
equipment is active.Universal Home
Remote System
The Universal Home Remote
System provides a way to
replace up to three hand-held
radio-frequency (RF) transmitters
used to activate devices such
as garage door openers, security
systems, and home lighting.
This device complies with Part 15
of the FCC Rules. Operation is
subject to the following two
conditions:
1. This device may not cause
harmful interference.
2. This device must accept any
interference received, including
interference that may cause
undesired operation.
The FCC Grant of Equipment
Authorization Certi�cate number
is CB2SAHL3.
2-42 Features and Controls
Page 110 of 382
When programming a garage door,
park outside of the garage. Park
directly in line with and facing
the garage door opener motor-head
or gate motor-head. Be sure that
people and objects are clear of
the garage door or gate you are
programming.
It is recommended that a new
battery be installed in the hand-held
transmitter for quicker and more
accurate transmission of the
radio-frequency signal.
Programming the Universal
Home Remote System
If you have questions or need help
programming the Universal
Home Remote System, call
1-800-355-3515 or go to
www.homelink.com.
Programming a garage door opener
involves time-sensitive actions, so
read the entire procedure before you
begin. If you do not follow these
actions, the device times out and you
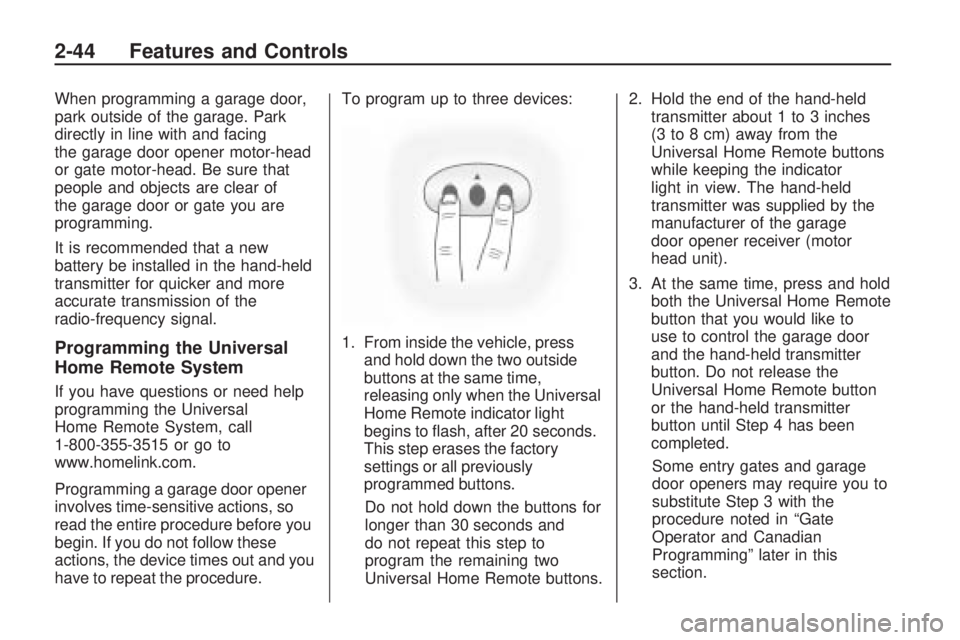
have to repeat the procedure.To program up to three devices:
1. From inside the vehicle, press
and hold down the two outside
buttons at the same time,
releasing only when the Universal
Home Remote indicator light
begins to �ash, after 20 seconds.
This step erases the factory
settings or all previously
programmed buttons.
Do not hold down the buttons for
longer than 30 seconds and
do not repeat this step to
program the remaining two
Universal Home Remote buttons.2. Hold the end of the hand-held
transmitter about 1 to 3 inches
(3 to 8 cm) away from the
Universal Home Remote buttons
while keeping the indicator
light in view. The hand-held
transmitter was supplied by the
manufacturer of the garage
door opener receiver (motor
head unit).
3. At the same time, press and hold
both the Universal Home Remote
button that you would like to
use to control the garage door
and the hand-held transmitter
button. Do not release the
Universal Home Remote button
or the hand-held transmitter
button until Step 4 has been
completed.
Some entry gates and garage
door openers may require you to
substitute Step 3 with the
procedure noted in “Gate
Operator and Canadian
Programming” later in this
section.
2-44 Features and Controls
Page 112 of 382
Gate Operator and Canadian
Programming
If you have questions or need help
programming the Universal
Home Remote System, call
1-800-355-3515 or go to
www.homelink.com.
Canadian radio-frequency laws
require transmitter signals to time
out or quit after several seconds of
transmission. This may not be
long enough for Universal Home
Remote to pick up the signal
during programming. Similarly,
some U.S. gate operators are
manufactured to time out in the
same manner.
If you live in Canada, or you are
having difficulty programming a gate
operator or garage door opener
by using the “Programming
Universal Home Remote”procedures, regardless of where
you live, replace Step 3 under
“Programming Universal Home
Remote” with the following:
Continue to press and hold the
Universal Home Remote button
while you press and release every
two seconds (cycle) the hand-held
transmitter button until the frequency
signal has been successfully
accepted by the Universal Home
Remote. The Universal Home
Remote indicator light �ashes slowly
at �rst and then rapidly. Proceed
with Step 4 under “Programming
Universal Home Remote” to
complete.
Using Universal Home Remote
Press and hold the appropriate
Universal Home Remote button
for at least half of a second.
The indicator light comes on while
the signal is being transmitted.
Erasing Universal Home
Remote Buttons
Erase the programmed buttons when
you sell or terminate your lease.
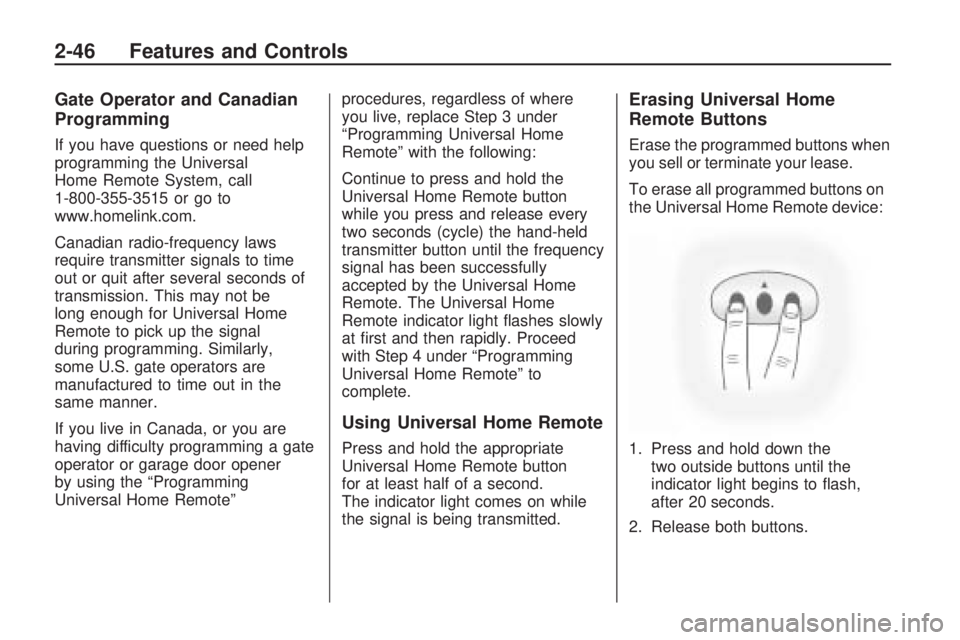
To erase all programmed buttons on
the Universal Home Remote device:
1. Press and hold down the
two outside buttons until the
indicator light begins to �ash,
after 20 seconds.
2. Release both buttons.
2-46 Features and Controls
Page 120 of 382
Oil Pressure Light.............3-32
Security Light....................3-33
Cruise Control Light..........3-33
Highbeam On Light...........3-33
Fuel Gage........................3-33
Driver Information
Center (DIC)
Driver Information Center
(DIC)...............................3-34
DIC Operation and
Displays..........................3-34
DIC Warnings and
Messages........................3-37
Audio System(s)
Audio System(s)................3-41
Setting the Clock..............3-41
Radio(s)............................3-42
XM Radio Messages.........3-51
Navigation/Radio System. . .3-52
Bluetooth®........................3-52
Theft-Deterrent Feature.....3-62
Radio Reception...............3-62
Fixed Mast Antenna..........3-63
XM™ Satellite Radio
Antenna System..............3-63
3-2 Instrument Panel
Page 132 of 382
Automatic Headlamp
System
When it is dark enough outside,
the automatic headlamp system
will turn on after the transmission
has been shifted from P (Park) to
D (Drive). The headlamps, taillamps,
sidemarker, parking lamps, roof
marker lamps, and the instrument
panel lights turn on at normal
brightness. The radio lights will
become dimmer when the
headlights are off compared to
when the headlights are on.
The vehicle has a light sensor
located on the top of the instrument
panel. Do not cover the sensor,
or the system will be on whenever
the ignition is on.
The system can turn on the
headlamps when driving in a parking
garage, through a tunnel or when
there is overcast weather. This
is normal.There is a delay in the transition
between the daytime and nighttime
operation of the Daytime Running
Lamps (DRL) and the automatic
headlamp system so that driving
under bridges or bright overhead
street lights does not affect the
system. The DRL and automatic
headlamp system will only be
affected when the light sensor
detects a change in lighting lasting
longer than the delay.
If the vehicle is started in a dark
garage, the automatic headlamp
system will come on immediately.
Once the vehicle leaves the garage,
it will take about one minute for
the automatic headlamp system to
change to DRL if it is light
outside. During that delay, the
instrument panel cluster may not be
as bright as usual. Make sure the
instrument panel brightness
control is in the full bright position.
SeeInstrument Panel Brightness on
page 3-15.
Off-Road Lamps
The off-road lamps, if the vehicle
has them, provide auxiliary lighting
when the vehicle is used off
road. These lamps are not intended
to be used in place of existing
vehicle lighting. The lamps are not
to be used on any public street
or highway and are to be covered
when not in use. Check your
state and local laws before installing
or using any auxiliary lighting. In
some states it may be necessary to
remove the roof lamps when
operating the vehicle on the
highway.
3-14 Instrument Panel
Page 133 of 382
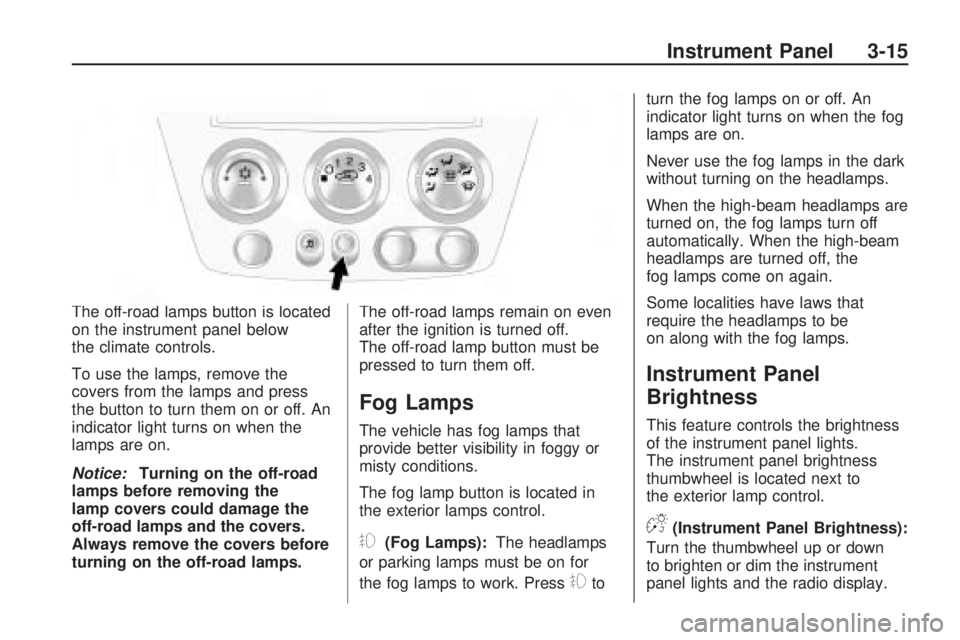
The off-road lamps button is located
on the instrument panel below
the climate controls.
To use the lamps, remove the
covers from the lamps and press
the button to turn them on or off. An
indicator light turns on when the
lamps are on.
Notice:Turning on the off-road
lamps before removing the
lamp covers could damage the
off-road lamps and the covers.
Always remove the covers before
turning on the off-road lamps. The off-road lamps remain on even
after the ignition is turned off.
The off-road lamp button must be
pressed to turn them off.
Fog Lamps
The vehicle has fog lamps that
provide better visibility in foggy or
misty conditions.
The fog lamp button is located in
the exterior lamps control.
#(Fog Lamps):
The headlamps
or parking lamps must be on for
the fog lamps to work. Press
#to turn the fog lamps on or off. An
indicator light turns on when the fog
lamps are on.
Never use the fog lamps in the dark
without turning on the headlamps.
When the high-beam headlamps are
turned on, the fog lamps turn off
automatically. When the high-beam
headlamps are turned off, the
fog lamps come on again.
Some localities have laws that
require the headlamps to be
on along with the fog lamps.
Instrument Panel
Brightness
This feature controls the brightness
of the instrument panel lights.
The instrument panel brightness
thumbwheel is located next to
the exterior lamp control.
D(Instrument Panel Brightness):
Turn the thumbwheel up or down
to brighten or dim the instrument
panel lights and the radio display.
Instrument Panel 3-15
Page 134 of 382
The instrument panel lights, cluster,
and radio display do not dim to
complete darkness. Turn the
thumbwheel all the way up to turn
the dome lamps on.
Dome Lamp
The dome lamps are located in the
front area of the vehicle. There
is also a dome lamp in the cargo
area of the H3 model only.
Turn the thumbwheel, located next
to the exterior lamps control, all
the way up to turn the dome
and footwell lamps on. In this
position, the lamps remain on
whether a door is opened or closed.
The dome lamp in the cargo area
automatically turns off when:
The shift lever is shifted out of
P (Park) (automatic
transmissions).
The parking brake is released
(manual transmissions).
Dome Lamp Override
E
(Dome Lamp Override):You
can use the dome override
button, located below the exterior
lamps control, to set the dome
and footwell lamps to come
on automatically when a door is
opened, or to remain off. To turn the
lamps off, press the
Ebutton in.
With the button in this position,
the dome lamps will remain off when
the doors are open. To return the
lamps to automatic operation, press
Eagain and return it to the out
position. With the button in this
position, the dome lamps will come
on when a door is opened.
Exit Lighting
The interior lamps will come on
when the key is removed from the
ignition. The lamps will not come on
if the dome override button is
pressed in.
Reading Lamps
The reading lamps are located in
the overhead console.
Press the button located next to
each lamp to turn them on or off.
These lamps will not come on
with the dome lamps.
3-16 Instrument Panel
Page 145 of 382
If, after several seconds, both status
indicator lights remain on, or if
there are no lights at all, there may
be a problem with the lights or
the passenger sensing system. See
your dealer/retailer for service.
{CAUTION
If the airbag readiness light ever
comes on and stays on, it means
that something may be wrong with
the airbag system. To help avoid
injury to yourself or others, have
the vehicle serviced right away.
SeeAirbag Readiness Light on
page 3-25for more information,
including important safety
information.
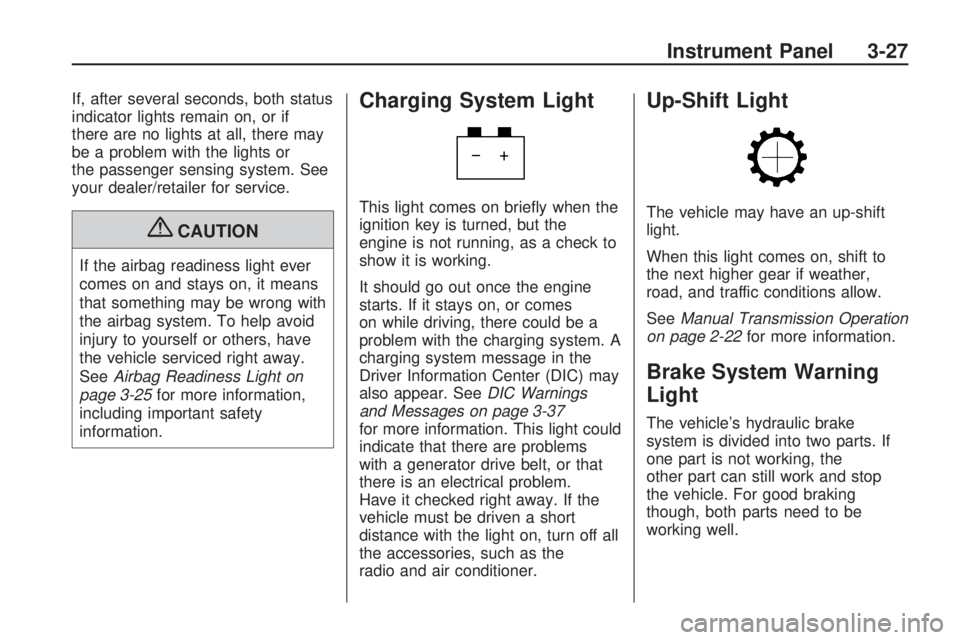
Charging System Light
This light comes on brie�y when the
ignition key is turned, but the
engine is not running, as a check to
show it is working.
It should go out once the engine
starts. If it stays on, or comes
on while driving, there could be a
problem with the charging system. A
charging system message in the
Driver Information Center (DIC) may
also appear. SeeDIC Warnings
and Messages on page 3-37
for more information. This light could
indicate that there are problems
with a generator drive belt, or that
there is an electrical problem.
Have it checked right away. If the
vehicle must be driven a short
distance with the light on, turn off all
the accessories, such as the
radio and air conditioner.
Up-Shift Light
The vehicle may have an up-shift
light.
When this light comes on, shift to
the next higher gear if weather,
road, and traffic conditions allow.
SeeManual Transmission Operation
on page 2-22for more information.
Brake System Warning
Light
The vehicle’s hydraulic brake
system is divided into two parts. If
one part is not working, the
other part can still work and stop
the vehicle. For good braking
though, both parts need to be
working well.
Instrument Panel 3-27