HUMMER H3 2010 User Guide
Manufacturer: HUMMER, Model Year: 2010, Model line: H3, Model: HUMMER H3 2010Pages: 410, PDF Size: 2.24 MB
Page 11 of 410
In Brief 1-7
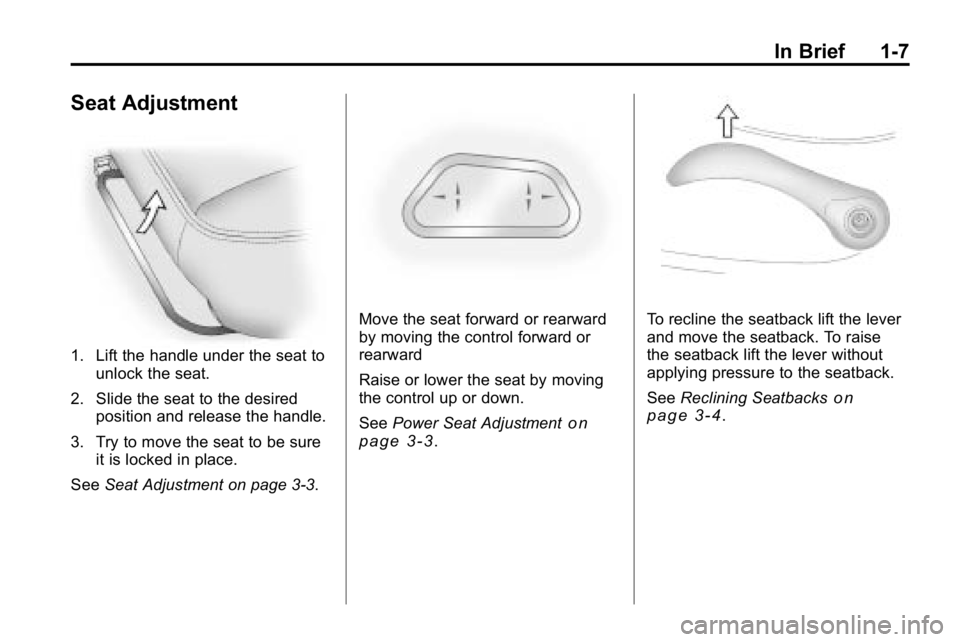
Seat Adjustment
1. Lift the handle under the seat tounlock the seat.
2. Slide the seat to the desired position and release the handle.
3. Try to move the seat to be sure it is locked in place.
See Seat Adjustment on page 3‑3.
Move the seat forward or rearward
by moving the control forward or
rearward
Raise or lower the seat by moving
the control up or down.
SeePower Seat Adjustment
on
page 3‑3.
To recline the seatback lift the lever
and move the seatback. To raise
the seatback lift the lever without
applying pressure to the seatback.
See Reclining Seatbacks
on
page 3‑4.
Page 12 of 410
1-8 In Brief
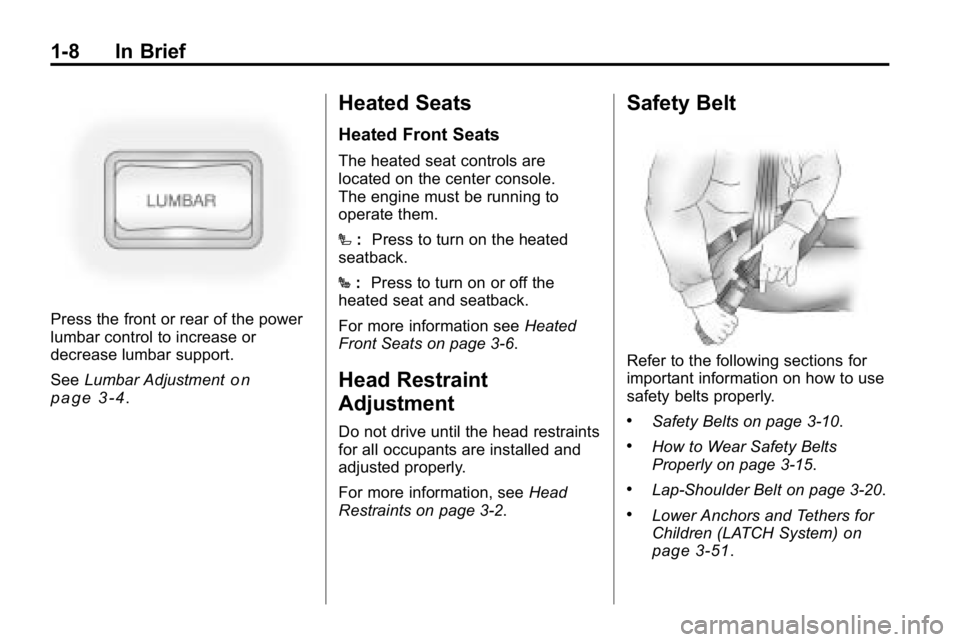
Press the front or rear of the power
lumbar control to increase or
decrease lumbar support.
SeeLumbar Adjustment
on
page 3‑4.
Heated Seats
Heated Front Seats
The heated seat controls are
located on the center console.
The engine must be running to
operate them.
I :Press to turn on the heated
seatback.
J :Press to turn on or off the
heated seat and seatback.
For more information see Heated
Front Seats on page 3‑6.
Head Restraint
Adjustment
Do not drive until the head restraints
for all occupants are installed and
adjusted properly.
For more information, see Head
Restraints on page 3‑2.
Safety Belt
Refer to the following sections for
important information on how to use
safety belts properly.
.Safety Belts on page 3‑10.
.How to Wear Safety Belts
Properly on page 3‑15.
.Lap-Shoulder Belt on page 3‑20.
.Lower Anchors and Tethers for
Children (LATCH System)on
page 3‑51.
Page 13 of 410

In Brief 1-9
Sensing System for
Passenger Airbag
United States
Canada
The passenger sensing system will
turn off the right front passenger
frontal airbag under certain
conditions. The driver airbag and
roof‐rail airbags (if equipped) are not
affected by the passenger sensing
system. See Passenger Airbag
Status Indicator
on page 5‑11for
more information. The passenger airbag status
indicator will be visible on the
instrument panel when the vehicle
is started.
Mirror Adjustment
Exterior Mirrors
H3 shown, H3T similar
Controls for the outside power
mirrors are located on the
driver door. To adjust the power mirrors:
1. Press the left or right side of the
selector switch to choose the
driver or passenger side mirror.
2. Press the round, four-way control pad to adjust the mirror.
Interior Mirror
The vehicle has an automatic
dimming rearview mirror with a
compass and temperature display.
Automatic dimming reduces the
glare from the headlamps of the
vehicle behind you. The dimming
feature comes on and the indicator
light illuminates each time the
ignition is turned to start.
z:Press to turn the dimming
feature and/or compass display on
or off.
For more information, see
.Automatic Dimming Rearview
Mirror on page 2‑14.
.Driver Information Center (DIC)on page 5‑18.
Page 14 of 410
1-10 In Brief
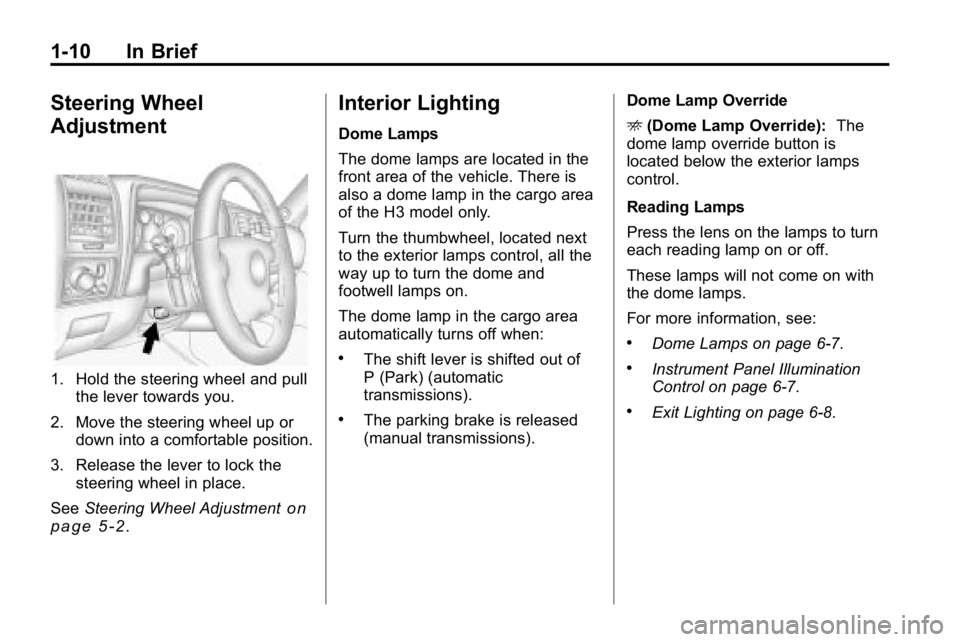
Steering Wheel
Adjustment
1. Hold the steering wheel and pullthe lever towards you.
2. Move the steering wheel up or down into a comfortable position.
3. Release the lever to lock the steering wheel in place.
See Steering Wheel Adjustment
on
page 5‑2.
Interior Lighting
Dome Lamps
The dome lamps are located in the
front area of the vehicle. There is
also a dome lamp in the cargo area
of the H3 model only.
Turn the thumbwheel, located next
to the exterior lamps control, all the
way up to turn the dome and
footwell lamps on.
The dome lamp in the cargo area
automatically turns off when:
.The shift lever is shifted out of
P (Park) (automatic
transmissions).
.The parking brake is released
(manual transmissions). Dome Lamp Override
E
(Dome Lamp Override): The
dome lamp override button is
located below the exterior lamps
control.
Reading Lamps
Press the lens on the lamps to turn
each reading lamp on or off.
These lamps will not come on with
the dome lamps.
For more information, see:
.Dome Lamps on page 6‑7.
.Instrument Panel Illumination
Control on page 6‑7.
.Exit Lighting on page 6‑8.
Page 15 of 410

In Brief 1-11
Exterior Lighting
9:Turns off all exterior lamps
including the Daytime Running
Lamps (DRL).
AUTO: Automatic operation of
the headlamps and other exterior
lamps.
;: Manual operation of the parking
lamps and other exterior lamps,
except headlamps.
2: Manual operation of the
headlamps and other exterior
lamps. For more information, see:
.Exterior Lamp Controlson
page 6‑1.
.Daytime Running Lamps (DRL)on page 6‑3.
.Fog Lamps on page 6‑6.
.Automatic Headlamp Systemon
page 6‑4.
.Off-Road Lamps on page 6‑6.
Washer and Wiper
Systems
8: Use for a single wiping cycle.
6:Delays wiping cycle. Move the
band to adjust the frequency of
wipes.
6 :Slow wipes.
1 :Fast wipes.
9: Turns the wipers off.
Windshield Washer: Push the
paddle on top of the turn signal/lane
change lever to spray washer fluid
on the windshield.
See Windshield Wiper/Washer
on
page 5‑2and Rear Window
Wiper/Washer on page 5‑3.
Page 16 of 410
1-12 In Brief
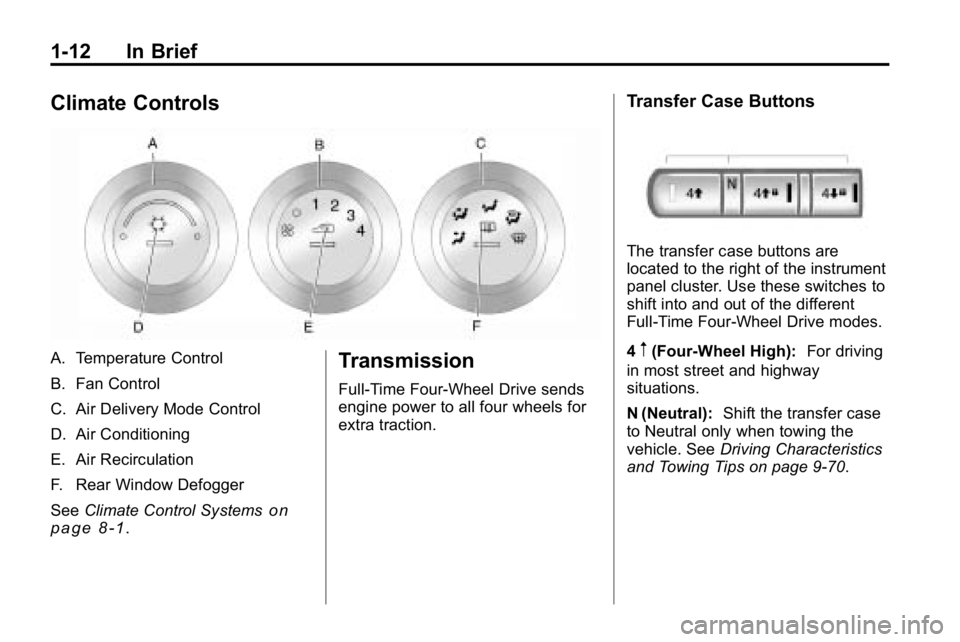
Climate Controls
A. Temperature Control
B. Fan Control
C. Air Delivery Mode Control
D. Air Conditioning
E. Air Recirculation
F. Rear Window Defogger
SeeClimate Control Systems
on
page 8‑1.
Transmission
Full-Time Four-Wheel Drive sends
engine power to all four wheels for
extra traction.
Transfer Case Buttons
The transfer case buttons are
located to the right of the instrument
panel cluster. Use these switches to
shift into and out of the different
Full-Time Four-Wheel Drive modes.
4
m(Four-Wheel High): For driving
in most street and highway
situations.
N (Neutral): Shift the transfer case
to Neutral only when towing the
vehicle. See Driving Characteristics
and Towing Tips on page 9‑70.
Page 17 of 410
In Brief 1-13
4m Q(Four-Wheel-High Lock):
When extra traction is needed in
most off-road situations.
4
n Q(Four-Wheel-Low Lock):
Delivers extra torque to all
four wheels. Used for extreme
off-road conditions. See Four-Wheel
Drive on page 9‑46.
Vehicle Features
Radio(s)
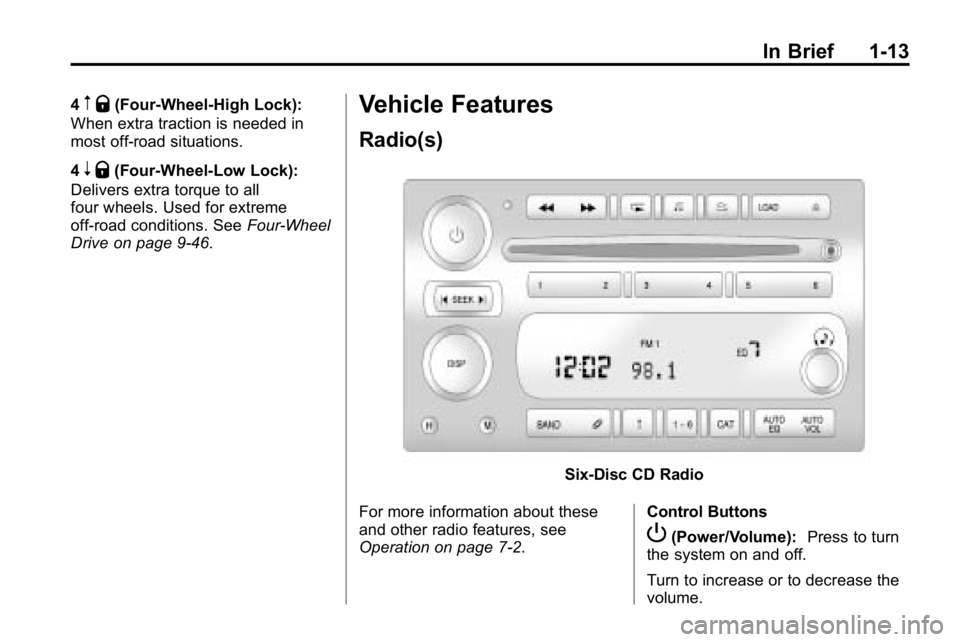
Six-Disc CD Radio
For more information about these
and other radio features, see
Operation on page 7‑2. Control Buttons
P(Power/Volume):
Press to turn
the system on and off.
Turn to increase or to decrease the
volume.
Page 18 of 410
1-14 In Brief
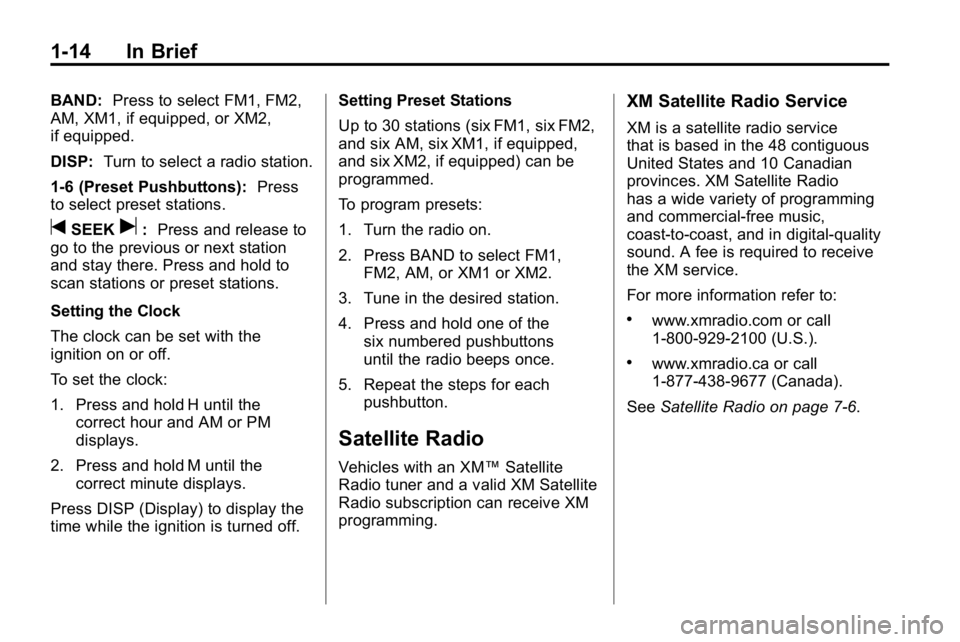
BAND:Press to select FM1, FM2,
AM, XM1, if equipped, or XM2,
if equipped.
DISP: Turn to select a radio station.
1-6 (Preset Pushbuttons): Press
to select preset stations.
tSEEKu: Press and release to
go to the previous or next station
and stay there. Press and hold to
scan stations or preset stations.
Setting the Clock
The clock can be set with the
ignition on or off.
To set the clock:
1. Press and hold H until the correct hour and AM or PM
displays.
2. Press and hold M until the correct minute displays.
Press DISP (Display) to display the
time while the ignition is turned off. Setting Preset Stations
Up to 30 stations (six FM1, six FM2,
and six AM, six XM1, if equipped,
and six XM2, if equipped) can be
programmed.
To program presets:
1. Turn the radio on.
2. Press BAND to select FM1,
FM2, AM, or XM1 or XM2.
3. Tune in the desired station.
4. Press and hold one of the six numbered pushbuttons
until the radio beeps once.
5. Repeat the steps for each pushbutton.
Satellite Radio
Vehicles with an XM™ Satellite
Radio tuner and a valid XM Satellite
Radio subscription can receive XM
programming.
XM Satellite Radio Service
XM is a satellite radio service
that is based in the 48 contiguous
United States and 10 Canadian
provinces. XM Satellite Radio
has a wide variety of programming
and commercial-free music,
coast-to-coast, and in digital-quality
sound. A fee is required to receive
the XM service.
For more information refer to:
.www.xmradio.com or call
1-800-929-2100 (U.S.).
.www.xmradio.ca or call
1-877-438-9677 (Canada).
See Satellite Radio on page 7‑6.
Page 19 of 410

In Brief 1-15
Bluetooth®
The in-vehicle Bluetooth
system allows users with a
Bluetooth-enabled cell phone to
make and receive hands-free calls
using the vehicle’s audio system,
microphone and controls.
The Bluetooth-enabled cell phone
must be paired with the in-vehicle
Bluetooth system before it can be
used in the vehicle. Not all phones
will support all functions.
See Bluetooth on page 7‑15.
Navigation System
The vehicle's navigation system
provides detailed maps of most
major freeways and roads
throughout the United States and
Canada. After a destination has
been set, the system provides
turn-by-turn instructions for reaching
the destination. In addition, the
system can help locate a variety of points of interest (POI), such as
banks, airports, restaurants,
and more.
See the vehicle's Navigation System
manual for more information.
Cruise Control
The cruise controls are located at
the end of the multifunction lever.
9:
Turns the system off.
R: Turns the system on.
+ (Resume/Accelerate): Use to
accelerate or resume speed.
rT(Set): Press the button at the
end of the lever to set the speed.
For more information, see Cruise
Control on page 9‑57.
Storage Compartments
The vehicle comes with a cargo
management system located in the
rear of the vehicle. The system has
three rails located on the front and
sides of the bed.
There are four adjustable cargo
tie-downs, that can be placed on the
upper and lower slides of the rail.
The cargo management system can
be removed and re-installed into the
vehicle.
For more information, see Cargo
Management System on page 4‑2.
Page 20 of 410
1-16 In Brief
Power Outlets
The accessory power outlets can be
used to connect auxiliary electrical
equipment, such as a cellular
phone.
There are two accessory power
outlets located under the climate
control system. There is also
one accessory power outlet
located in the rear cargo area
(H3 model only).
To use the outlet, open the cover.
SeePower Outlets
on page 5‑5andCigarette Lighter on page 5‑5.
Sunroof
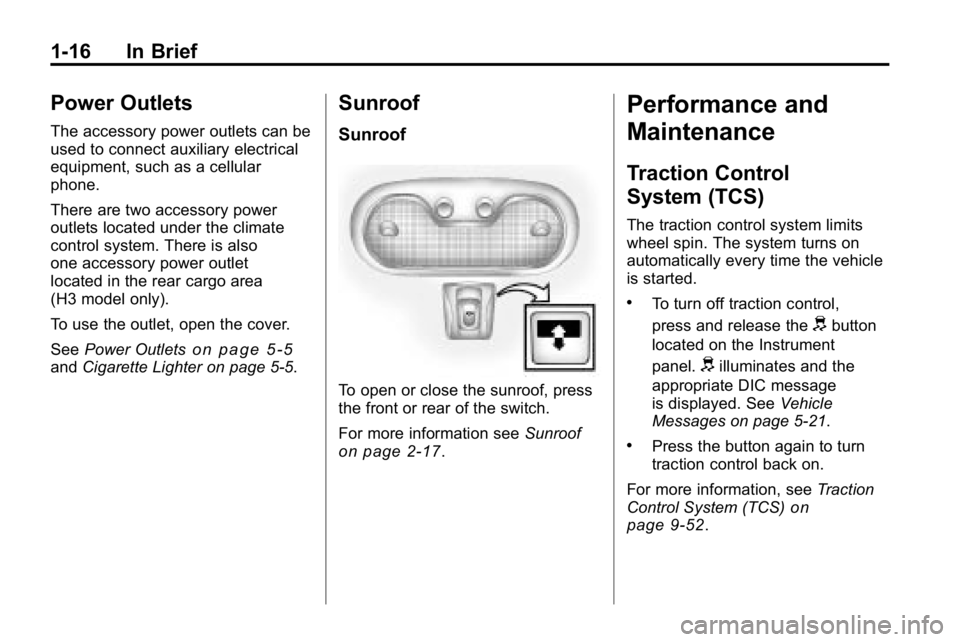
Sunroof
To open or close the sunroof, press
the front or rear of the switch.
For more information see Sunroof
on page 2‑17.
Performance and
Maintenance
Traction Control
System (TCS)
The traction control system limits
wheel spin. The system turns on
automatically every time the vehicle
is started.
.To turn off traction control,
press and release the
dbutton
located on the Instrument
panel.
dilluminates and the
appropriate DIC message
is displayed. See Vehicle
Messages on page 5‑21.
.Press the button again to turn
traction control back on.
For more information, see Traction
Control System (TCS)
on
page 9‑52.