seat adjustment HUMMER H3 2010 Owners Manual
[x] Cancel search | Manufacturer: HUMMER, Model Year: 2010, Model line: H3, Model: HUMMER H3 2010Pages: 410, PDF Size: 2.24 MB
Page 5 of 410
In Brief 1-1
In Brief
Instrument Panel
Instrument Panel . . . . . . . . . . . . . . 1-2
Initial Drive Information
Initial Drive Information . . . . . . . . 1-3
Remote Keyless Entry (RKE)System . . . . . . . . . . . . . . . . . . . . . . 1-4
Door Locks . . . . . . . . . . . . . . . . . . . 1-4
Tailgate . . . . . . . . . . . . . . . . . . . . . . . 1-5
Windows . . . . . . . . . . . . . . . . . . . . . . 1-6
Seat Adjustment . . . . . . . . . . . . . . 1-7
Heated Seats . . . . . . . . . . . . . . . . . 1-8
Head Restraint Adjustment . . . . 1-8
Safety Belt . . . . . . . . . . . . . . . . . . . . 1-8
Sensing System for Passenger Airbag . . . . . . . . . . . . . . . . . . . . . . . 1-9 Mirror Adjustment . . . . . . . . . . . . . 1-9
Steering Wheel
Adjustment . . . . . . . . . . . . . . . . . 1-10
Interior Lighting . . . . . . . . . . . . . . 1-10
Exterior Lighting . . . . . . . . . . . . . 1-11
Washer and Wiper Systems . . . . . . . . . . . . . . . . . . . . 1-11
Climate Controls . . . . . . . . . . . . . 1-12
Transmission . . . . . . . . . . . . . . . . 1-12
Vehicle Features
Radio(s) . . . . . . . . . . . . . . . . . . . . . 1-13
Satellite Radio . . . . . . . . . . . . . . . 1-14
Bluetooth
®. . . . . . . . . . . . . . . . . . . 1-15
Navigation System . . . . . . . . . . . 1-15
Cruise Control . . . . . . . . . . . . . . . 1-15
Storage Compartments . . . . . . 1-15
Power Outlets . . . . . . . . . . . . . . . 1-16
Sunroof . . . . . . . . . . . . . . . . . . . . . . 1-16
Performance and Maintenance
Traction Control System (TCS) . . . . . . . . . . . . . . 1-16
StabiliTrak
®. . . . . . . . . . . . . . . . . . 1-17
Tire Pressure Monitor . . . . . . . . 1-17
Engine Oil Life System . . . . . . 1-18
Fuel E85 (85% Ethanol) . . . . . 1-18
Driving for Better Fuel Economy . . . . . . . . . . . . . . . . . . . 1-18
Roadside Service . . . . . . . . . . . . 1-19
OnStar
®. . . . . . . . . . . . . . . . . . . . . 1-19
Page 11 of 410
In Brief 1-7
Seat Adjustment
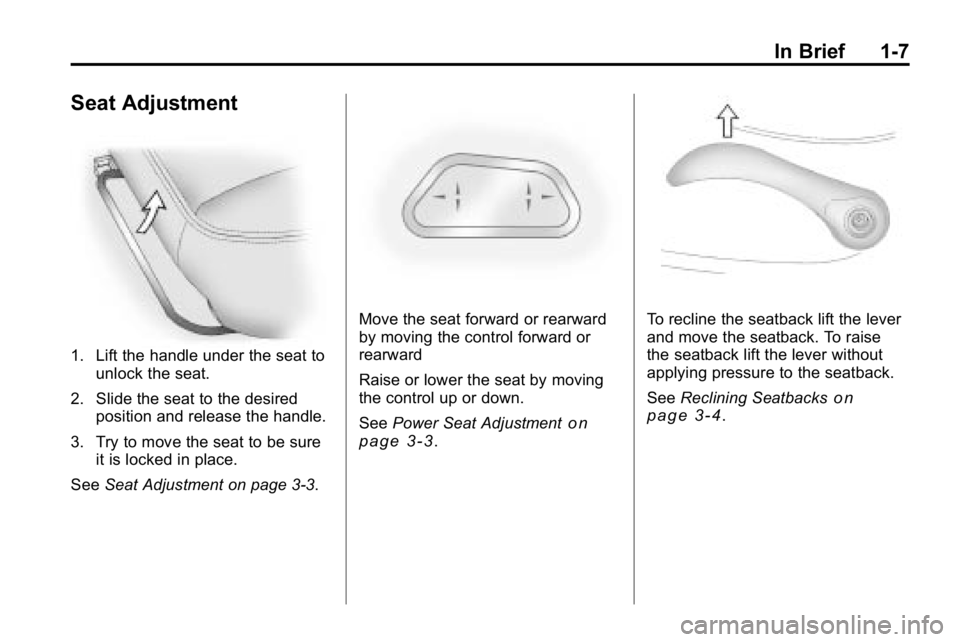
1. Lift the handle under the seat tounlock the seat.
2. Slide the seat to the desired position and release the handle.
3. Try to move the seat to be sure it is locked in place.
See Seat Adjustment on page 3‑3.
Move the seat forward or rearward
by moving the control forward or
rearward
Raise or lower the seat by moving
the control up or down.
SeePower Seat Adjustment
on
page 3‑3.
To recline the seatback lift the lever
and move the seatback. To raise
the seatback lift the lever without
applying pressure to the seatback.
See Reclining Seatbacks
on
page 3‑4.
Page 12 of 410
1-8 In Brief
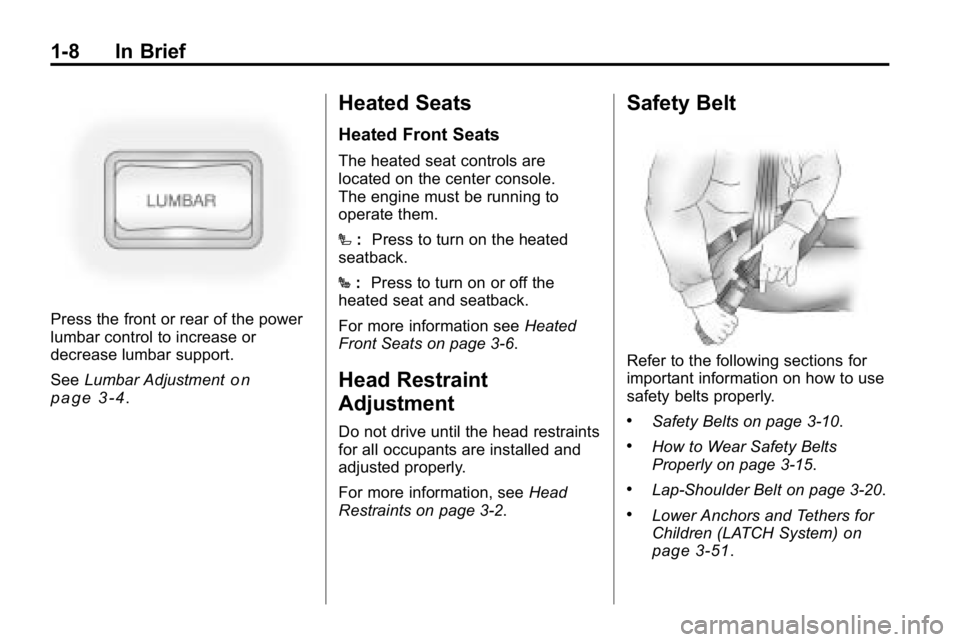
Press the front or rear of the power
lumbar control to increase or
decrease lumbar support.
SeeLumbar Adjustment
on
page 3‑4.
Heated Seats
Heated Front Seats
The heated seat controls are
located on the center console.
The engine must be running to
operate them.
I :Press to turn on the heated
seatback.
J :Press to turn on or off the
heated seat and seatback.
For more information see Heated
Front Seats on page 3‑6.
Head Restraint
Adjustment
Do not drive until the head restraints
for all occupants are installed and
adjusted properly.
For more information, see Head
Restraints on page 3‑2.
Safety Belt
Refer to the following sections for
important information on how to use
safety belts properly.
.Safety Belts on page 3‑10.
.How to Wear Safety Belts
Properly on page 3‑15.
.Lap-Shoulder Belt on page 3‑20.
.Lower Anchors and Tethers for
Children (LATCH System)on
page 3‑51.
Page 45 of 410
Seats and Restraints 3-1
Seats and
Restraints
Head Restraints
Head Restraints . . . . . . . . . . . . . . . 3-2
Front Seats
Seat Adjustment . . . . . . . . . . . . . . 3-3
Power Seat Adjustment . . . . . . . 3-3
Lumbar Adjustment . . . . . . . . . . . 3-4
Reclining Seatbacks . . . . . . . . . . 3-4
Heated Front Seats . . . . . . . . . . . 3-6
Rear Seats
Rear Seats (H3) . . . . . . . . . . . . . . 3-7
Rear Seats (H3T) . . . . . . . . . . . . . 3-9
Safety Belts
Safety Belts . . . . . . . . . . . . . . . . . . 3-10
How to Wear Safety BeltsProperly . . . . . . . . . . . . . . . . . . . . 3-15
Lap-Shoulder Belt . . . . . . . . . . . 3-20
Safety Belt Use During Pregnancy . . . . . . . . . . . . . . . . . . 3-25
Safety Belt Extender . . . . . . . . . 3-26 Safety System Check . . . . . . . . 3-26
Safety Belt Care . . . . . . . . . . . . . 3-26
Replacing Safety Belt System
Parts After a Crash . . . . . . . . . 3-27
Airbag System
Airbag System . . . . . . . . . . . . . . . 3-27
Where Are the Airbags? . . . . . 3-29
When Should an AirbagInflate? . . . . . . . . . . . . . . . . . . . . . 3-31
What Makes an Airbag Inflate? . . . . . . . . . . . . . . . . . . . . . 3-32
How Does an Airbag Restrain? . . . . . . . . . . . . . . . . . . . 3-32
What Will You See After an Airbag Inflates? . . . . . . . . . . . . 3-33
Passenger Sensing
System . . . . . . . . . . . . . . . . . . . . . 3-35
Servicing the Airbag-Equipped Vehicle . . . . . . . . . . . . . . . . . . . . . 3-40
Adding Equipment to the Airbag-Equipped Vehicle . . . 3-40
Airbag System Check . . . . . . . . 3-41
Replacing Airbag System Parts After a Crash . . . . . . . . . 3-42
Child Restraints
Older Children . . . . . . . . . . . . . . . 3-42
Infants and YoungChildren . . . . . . . . . . . . . . . . . . . . 3-44
Child Restraint Systems . . . . . 3-47
Where to Put the Restraint . . . 3-49
Lower Anchors and Tethers for Children (LATCH
System) . . . . . . . . . . . . . . . . . . . . 3-51
Replacing LATCH System Parts After a Crash . . . . . . . . . 3-59
Securing Child Restraints (Rear Outboard Seating
Position) . . . . . . . . . . . . . . . . . . . 3-59
Securing Child Restraints (Rear Center Seating
Position) . . . . . . . . . . . . . . . . . . . 3-61
Securing Child Restraints (Right Front Seat
Position) . . . . . . . . . . . . . . . . . . . 3-62
Page 47 of 410
Seats and Restraints 3-3
Front Seats
Seat Adjustment
{WARNING
You can lose control of the
vehicle if you try to adjust a
manual driver's seat while the
vehicle is moving. The sudden
movement could startle and
confuse you, or make you push a
pedal when you do not want to.
Adjust the driver's seat only when
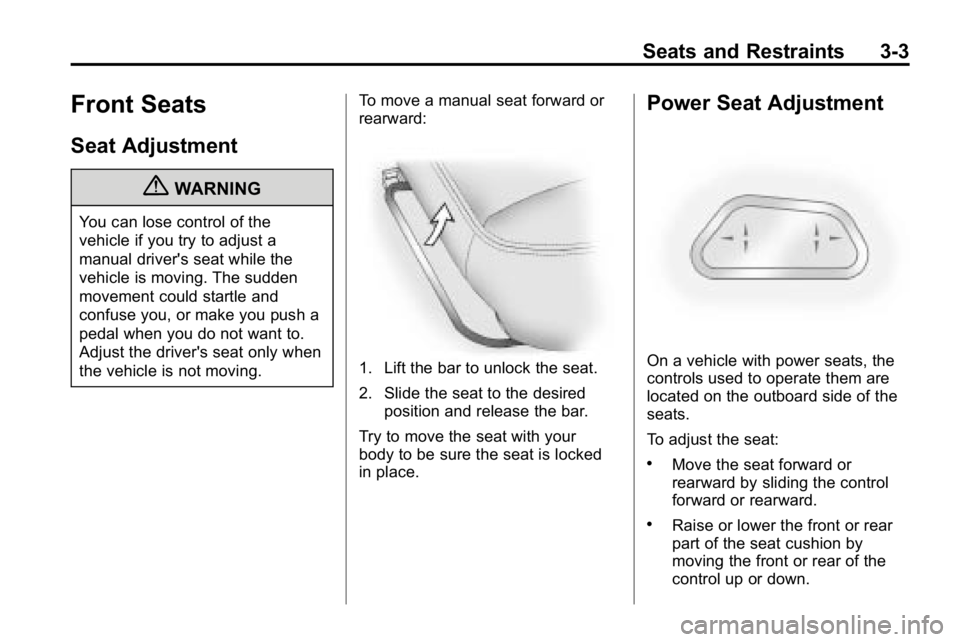
the vehicle is not moving.To move a manual seat forward or
rearward:
1. Lift the bar to unlock the seat.
2. Slide the seat to the desired
position and release the bar.
Try to move the seat with your
body to be sure the seat is locked
in place.
Power Seat Adjustment
On a vehicle with power seats, the
controls used to operate them are
located on the outboard side of the
seats.
To adjust the seat:
.Move the seat forward or
rearward by sliding the control
forward or rearward.
.Raise or lower the front or rear
part of the seat cushion by
moving the front or rear of the
control up or down.
Page 48 of 410
3-4 Seats and Restraints
.Raise or lower the entire seat
cushion by moving the control
up or down.
Lumbar Adjustment
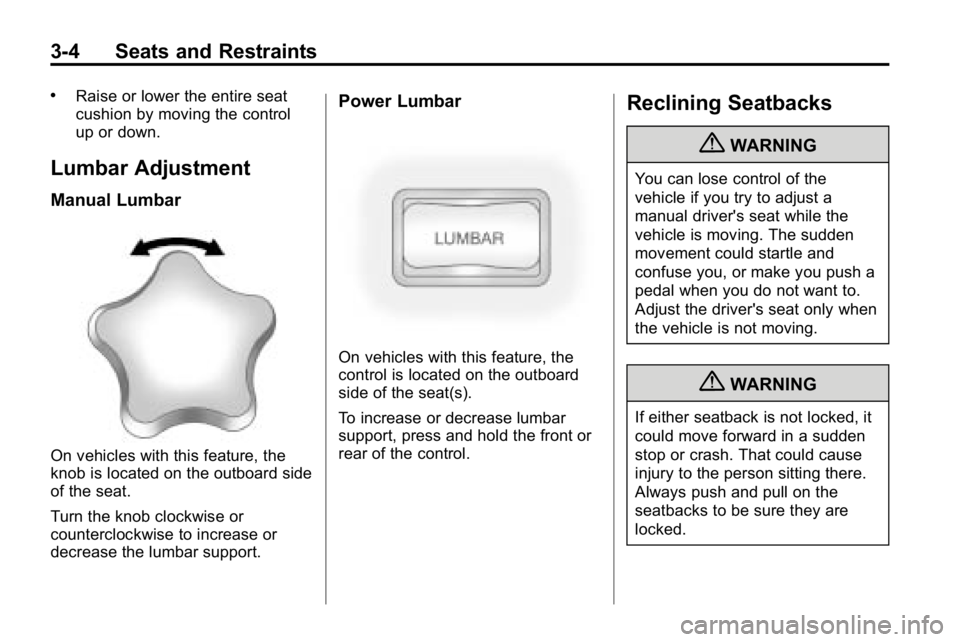
Manual Lumbar
On vehicles with this feature, the
knob is located on the outboard side
of the seat.
Turn the knob clockwise or
counterclockwise to increase or
decrease the lumbar support.
Power Lumbar
On vehicles with this feature, the
control is located on the outboard
side of the seat(s).
To increase or decrease lumbar
support, press and hold the front or
rear of the control.
Reclining Seatbacks
{WARNING
You can lose control of the
vehicle if you try to adjust a
manual driver's seat while the
vehicle is moving. The sudden
movement could startle and
confuse you, or make you push a
pedal when you do not want to.
Adjust the driver's seat only when
the vehicle is not moving.
{WARNING
If either seatback is not locked, it
could move forward in a sudden
stop or crash. That could cause
injury to the person sitting there.
Always push and pull on the
seatbacks to be sure they are
locked.
Page 66 of 410

3-22 Seats and Restraints
4. If equipped with a shoulder beltheight adjuster, move it to the
height that is right for you.
See “Shoulder Belt Height
Adjustment” later in this section
for instructions on use and
important safety information.
5. To make the lap part tight, pull
up on the shoulder belt.
It may be necessary to pull
stitching on the safety belt
through the latch plate to fully
tighten the lap belt on smaller
occupants.
To unlatch the belt, push the button
on the buckle. The belt should
return to its stowed position. Slide
the latch plate up the safety belt
webbing when the safety belt is not
in use. The latch plate should rest
on the stitching on the safety belt,
near the guide loop on the side wall.
Before a door is closed, be sure the
safety belt is out of the way. If a
door is slammed against a safety
belt, damage can occur to both the
safety belt and the vehicle.
Shoulder Belt Height Adjuster
The vehicle has a shoulder belt
height adjuster for the driver and
right front passenger seating
positions.
Adjust the height so that the
shoulder portion of the belt is
centered on the shoulder. The
belt should be away from the face
and neck, but not falling off of the
shoulder. Improper shoulder belt
height adjustment could reduce the
effectiveness of the safety belt in a
crash.
Page 299 of 410
Vehicle Care 10-33
Headlamp Aiming
The vehicle may have a visual
optical headlamp aiming system.
The aim has been preset at the
factory and should need no further
adjustment.
However, if the vehicle is damaged
in a crash, the headlamp aim may
be affected and adjustment may be
necessary.
If oncoming vehicles flash their high
beams at you, this may also mean
the vertical aim needs to be
adjusted.
It is recommended that the vehicle
is taken to your dealer for service if
the headlamps need to be re-aimed.
It is possible however, to re-aim the
headlamps as described.The vehicle should be:.Placed so the headlamps are
7.6 m (25 ft) from a light colored
wall or other flat surface.
.On a level surface which is level
all the way to a wall.
.Placed so it is at a right angle to
the wall or other flat surface.
.Clear of any snow, ice, or mud
on it.
.Fully assembled, the tires
properly inflated, and all other
work stopped while headlamp
aiming is being performed.
.Normally loaded with the spare
tire in its original location and a
full tank of fuel and one person
or 75 kg (160 lbs) sitting on the
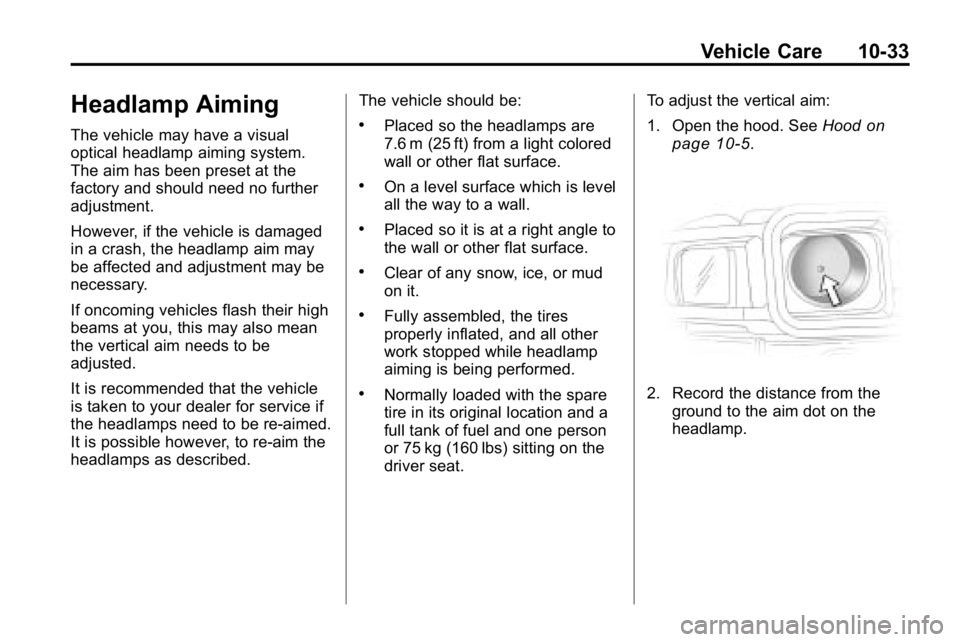
driver seat.To adjust the vertical aim:
1. Open the hood. See
Hood
on
page 10‑5.
2. Record the distance from the ground to the aim dot on the
headlamp.
Page 399 of 410

INDEX i-1
A
Accessories andModifications . . . . . . . . . . . . . . . . . 10-3
Accessory Power . . . . . . . . . . . . . . 9-35
Add-On Electrical Equipment . . . . . . . . . . . . . . . . . . . 9-81
Adding Equipment to the
Airbag-Equipped Vehicle . . . . . 3-40
Adjustments Lumbar, Front Seats . . . . . . . . . . . 3-4
Air Cleaner/Filter, Engine . . . . . 10-17
Air Vents . . . . . . . . . . . . . . . . . . . . . . . 8-4
Airbag System
Check . . . . . . . . . . . . . . . . . . . . . . . . 3-41
How Does an AirbagRestrain? . . . . . . . . . . . . . . . . . . . 3-32
Passenger Sensing System . . . . . . . . . . . . . . . . . . . . . . 3-35
What Makes an Airbag Inflate? . . . . . . . . . . . . . . . . . . . . . . 3-32 Airbag System (cont.)
What Will You See After
an Airbag Inflates? . . . . . . . . . . 3-33
When Should an Airbag
Inflate? . . . . . . . . . . . . . . . . . . . . . . 3-31
Where Are the Airbags? . . . . . . 3-29
Airbags Adding Equipment to theVehicle . . . . . . . . . . . . . . . . . . . . . . 3-40
Passenger Status Indicator . . . 5-11
Readiness Light . . . . . . . . . . . . . . 5-10
Servicing Airbag-Equipped Vehicles . . . . . . . . . . . . . . . . . . . . . 3-40
System Check . . . . . . . . . . . . . . . . 3-27
Alarm System Anti-Theft . . . . . . . . . . . . . . . . . . . . . . 2-9
AM-FM Radio . . . . . . . . . . . . . . . . . . . 7-5
Antenna Satellite Radio . . . . . . . . . . . . . . . . 7-10
Anti-Theft Alarm System . . . . . . . . . . . . . . . . . 2-9 Antilock Brake
System (ABS) . . . . . . . . . . . . . . . . 9-50
Warning Light . . . . . . . . . . . . . . . . . 5-15
Appearance Care Exterior . . . . . . . . . . . . . . . . . . . . . 10-92
Interior . . . . . . . . . . . . . . . . . . . . . . 10-96
Ashtrays . . . . . . . . . . . . . . . . . . . . . . . . 5-6
Audio Players . . . . . . . . . . . . . . . . . 7-10
CD . . . . . . . . . . . . . . . . . . . . . . . . . . . 7-10
Audio System Fixed Mast Antenna . . . . . . . . . . 7-10
Radio Reception . . . . . . . . . . . . . . . 7-9
Theft-Deterrent Feature . . . . . . . . 7-2
Automatic Door Locks . . . . . . . . . . . . . . . . . . . . 2-6
Headlamp System . . . . . . . . . . . . . 6-4
Automatic Transmission . . . . . . . 9-41 Fluid . . . . . . . . . . . . . . . . . . . . . . . . 10-12
Shiftlock Control SystemCheck . . . . . . . . . . . . . . . . . . . . . 10-30
Axle
Locking Front . . . . . . . . . . . . . . . . . 9-55
Axle, Front . . . . . . . . . . . . . . . . . . . . 10-29
Axle, Rear . . . . . . . . . . . . . . . . . . . . 10-29
Page 402 of 410

i-4 INDEX
E
E85 Fuel . . . . . . . . . . . . . . . . . . . . . . . 9-66
Electrical Equipment,Add-On . . . . . . . . . . . . . . . . . . . . . . 9-81
Electrical System Engine CompartmentFuse Block . . . . . . . . . . . . . . . . 10-39
Fuses and Circuit Breakers . . . . . . . . . . . . . . . . . . 10-39
Overload . . . . . . . . . . . . . . . . . . . 10-38
Engine
Air Cleaner/Filter . . . . . . . . . . . 10-17
Check and Service EngineSoon Lamp . . . . . . . . . . . . . . . . . . 5-12
Compartment Overview . . . . . . . 10-6
Coolant . . . . . . . . . . . . . . . . . . . . . 10-19
Coolant Heater . . . . . . . . . . . . . . . 9-36
Coolant Temperature Gauge . . . 5-9
Cooling System . . . . . . . . . . . . . 10-18
Cooling System Messages . . . 5-23
Drive Belt Routing . . . . . . . . . . . . 12-4
Exhaust . . . . . . . . . . . . . . . . . . . . . . 9-40
Fan . . . . . . . . . . . . . . . . . . . . . . . . . 10-24 Engine (cont.)
Overheating . . . . . . . . . . . . . . . . 10-22
Power Messages . . . . . . . . . . . . . 5-23
Pressure Light . . . . . . . . . . . . . . . . 5-17
Running While Parked . . . . . . . . 9-41
Starting . . . . . . . . . . . . . . . . . . . . . . . 9-35
Engine Oil Life System . . . . . . . . . . . . . . . . . .10-11
Messages . . . . . . . . . . . . . . . . . . . . 5-23
Equipment, Towing . . . . . . . . . . . . 9-78
Event Data Recorders . . . . . . . . 13-15
Exit Lighting . . . . . . . . . . . . . . . . . . . . 6-8
Extender, Safety Belt . . . . . . . . . . 3-26
Exterior Lamp Controls . . . . . . . . . 6-1
Exterior Lamps Off Reminder . . . 6-3
F
Fan Engine . . . . . . . . . . . . . . . . . . . . . . 10-24
Filter
Engine Air Cleaner . . . . . . . . . 10-17
Flash-to-Pass . . . . . . . . . . . . . . . . . . . 6-3
Flashers, Hazard Warning . . . . . . 6-5
Flat Tire . . . . . . . . . . . . . . . . . . . . . . 10-64
Flat Tire, Changing . . . .10-66, 10-75 Fluid
Automatic Transmission . . . . 10-12
Brakes . . . . . . . . . . . . . . . . . . . . . . 10-27
Four-Wheel Drive
Transfer Case . . . . . . . . . . . . . . . 9-46
Power Steering . . . . . . . . . . . . . 10-24
Washer . . . . . . . . . . . . . . . . . . . . . 10-25
Fog Lamps Bulb Replacement . . . . . . . . . . . . . 6-6
Folding Mirrors . . . . . . . . . . . . . . . . 2-13
Four-Wheel Drive . . . . . . . 10-29, 9-46
Front Axle . . . . . . . . . . . . . . . . . . . . 10-29 Locking . . . . . . . . . . . . . . . . . . . . . . . 9-55
Front Seats Adjustment . . . . . . . . . . . . . . . . . . . . 3-3
Heated . . . . . . . . . . . . . . . . . . . . . . . . 3-6
Front Storage . . . . . . . . . . . . . . . . . . . 4-1
Fuel . . . . . . . . . . . . . . . . . . . . . . . . . . . 9-64 Additives . . . . . . . . . . . . . . . . . . . . . 9-65
E85 (85% Ethanol) . . . . . . . . . . . 9-66
Filling a Portable FuelContainer . . . . . . . . . . . . . . . . . . . 9-69
Filling the Tank . . . . . . . . . . . . . . . 9-68