turn signal HUMMER H3 2010 Owners Manual
[x] Cancel search | Manufacturer: HUMMER, Model Year: 2010, Model line: H3, Model: HUMMER H3 2010Pages: 410, PDF Size: 2.24 MB
Page 7 of 410

In Brief 1-3
A.Air Vents on page 8‑4.
B. Turn and Lane-Change Signals
on page 6‑5.Windshield
Wiper/Washeron page 5‑2.
Cruise Control on page 9‑57.
C. Horn on page 5‑2.
D. Instrument Cluster
on
page 5‑7.
E. Four-Wheel Drive on page 9‑46.
F. Hazard Warning Flashers
on
page 6‑5.
G. Passenger Airbag Status
Indicator on page 5‑11.
H. Locking Rear Axle
on
page 9‑54. Locking Front Axle
(If Equipped) or Traction Control
System (TCS) on page 9‑52.
I. Exterior Lamp Controls
on
page 6‑1. Dome Lamp
Override. See Dome Lampson
page 6‑7. Instrument Panel
Illumination Controlon
page 6‑7. Fog Lampson
page 6‑6. J.
Parking Brake on page 9‑51.
K. AM-FM Radio on page 7‑5.
L. Climate Control Systems
on
page 8‑1.
M. Rear Window Wiper/Washer
on
page 5‑3(If Equipped).
N. Traction Control System (TCS)
on page 9‑52(For vehicles with
Locking Front Axle).
O. Off-Road Lamps on page 6‑6.
P. Shift Lever. See Automatic
Transmission
on page 9‑41or Manual Transmissionon
page 9‑44.
Q. Power Outlets on page 5‑5.
R. Glove Box on page 4‑1.
Initial Drive
Information
This section provides a brief
overview about some of the
important features that may or may
not be on your specific vehicle.
For more detailed information, refer
to each of the features which can be
found later in this owner manual.
Page 15 of 410

In Brief 1-11
Exterior Lighting
9:Turns off all exterior lamps
including the Daytime Running
Lamps (DRL).
AUTO: Automatic operation of
the headlamps and other exterior
lamps.
;: Manual operation of the parking
lamps and other exterior lamps,
except headlamps.
2: Manual operation of the
headlamps and other exterior
lamps. For more information, see:
.Exterior Lamp Controlson
page 6‑1.
.Daytime Running Lamps (DRL)on page 6‑3.
.Fog Lamps on page 6‑6.
.Automatic Headlamp Systemon
page 6‑4.
.Off-Road Lamps on page 6‑6.
Washer and Wiper
Systems
8: Use for a single wiping cycle.
6:Delays wiping cycle. Move the
band to adjust the frequency of
wipes.
6 :Slow wipes.
1 :Fast wipes.
9: Turns the wipers off.
Windshield Washer: Push the
paddle on top of the turn signal/lane
change lever to spray washer fluid
on the windshield.
See Windshield Wiper/Washer
on
page 5‑2and Rear Window
Wiper/Washer on page 5‑3.
Page 24 of 410

1-20 In Brief
Crisis Assist, Stolen Vehicle
Assistance, Vehicle Diagnostics,
Remote Door Unlock, Roadside
Assistance, Turn‐by‐Turn
Navigation and Hands‐Free
Calling are available on most
vehicles. Not all OnStar services
are available on all vehicles.
For more information see the
OnStar Owner's Guide or visit
www.onstar.com (U.S.) or
www.onstar.ca (Canada), contact
OnStar at 1-888-4-ONSTAR
(1‐888‐466‐7827) or
TTY 1‐877‐248‐2080, or
press
Qto speak with an
OnStar advisor 24 hours a day,
7 days a week.
For a full description of OnStar
services and system limitations,
see the OnStar Owner's Guide in
the glove box. OnStar service is subject to the
OnStar terms and conditions
included in the OnStar Subscriber
Information.
OnStar service cannot work unless
the vehicle is in a place where
OnStar has an agreement with a
wireless service provider for service
in that area. OnStar service also
cannot work unless the vehicle is
in a place where the wireless
service provider OnStar has hired
for that area has coverage, network
capacity and reception when the
service is needed, and technology
that is compatible with the OnStar
service. Not all services are
available everywhere, particularly
in remote or enclosed areas, or at
all times.
The OnStar system can record and
transmit vehicle information. This
information is automatically sent to
an OnStar call center when
Qis
pressed,
]is pressed, or if the
airbags or ACR system deploy.
This information usually includes
the vehicle's GPS location and, in
the event of a crash, additional
information regarding the crash that
the vehicle was involved in (e.g. the
direction from which the vehicle was
hit). When the virtual advisor feature
of OnStar hands-free calling is
used, the vehicle also sends OnStar
the vehicle's GPS location so they
can provide services where it is
located.
Location information about the
vehicle is only available if the GPS
satellite signals are unobstructed
and available.
Page 29 of 410
Keys, Doors and Windows 2-3
If there is a decrease in the RKE
operating range:
.Check the distance.
The transmitter may be
too far from the vehicle.
.Check the location. Other
vehicles or objects may be
blocking the signal.
.Check the transmitter's battery.
See“Battery Replacement” later
in this section.
.If the transmitter is still not
working correctly, see your
dealer or a qualified technician
for service.
Remote Keyless Entry
(RKE) System Operation
The Remote Keyless Entry (RKE)
transmitter functions work up to 9 m
(30 feet) away from the vehicle.
There are other conditions which
can affect the performance of the
transmitter. See Remote Keyless
Entry (RKE) System on page 2‑2.
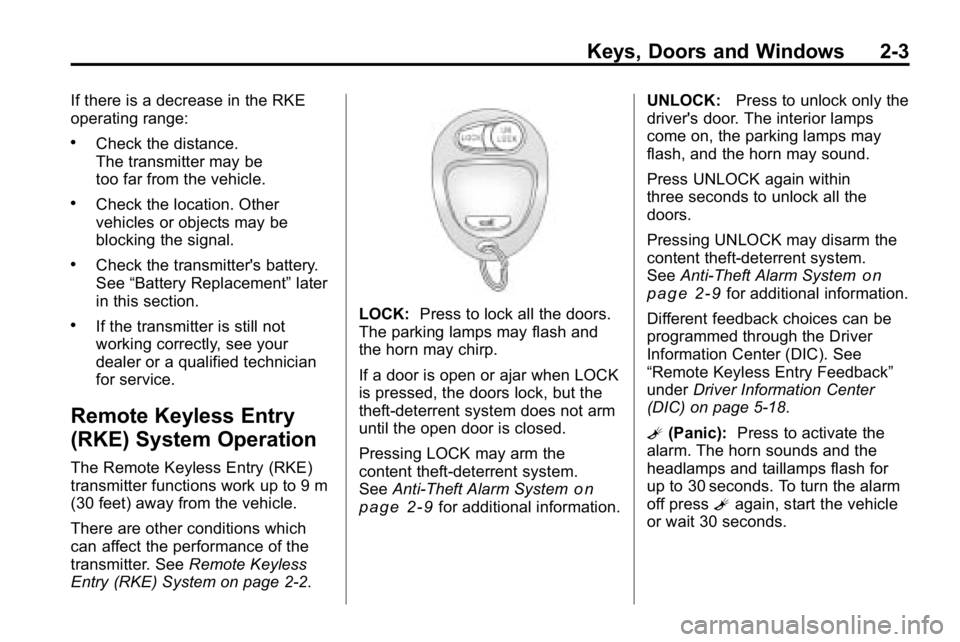
LOCK: Press to lock all the doors.
The parking lamps may flash and
the horn may chirp.
If a door is open or ajar when LOCK
is pressed, the doors lock, but the
theft-deterrent system does not arm
until the open door is closed.
Pressing LOCK may arm the
content theft-deterrent system.
See Anti-Theft Alarm System
on
page 2‑9for additional information. UNLOCK:
Press to unlock only the
driver's door. The interior lamps
come on, the parking lamps may
flash, and the horn may sound.
Press UNLOCK again within
three seconds to unlock all the
doors.
Pressing UNLOCK may disarm the
content theft-deterrent system.
See Anti-Theft Alarm System
on
page 2‑9for additional information.
Different feedback choices can be
programmed through the Driver
Information Center (DIC). See
“Remote Keyless Entry Feedback”
under Driver Information Center
(DIC) on page 5‑18.
L (Panic): Press to activate the
alarm. The horn sounds and the
headlamps and taillamps flash for
up to 30 seconds. To turn the alarm
off press Lagain, start the vehicle
or wait 30 seconds.
Page 35 of 410
Keys, Doors and Windows 2-9
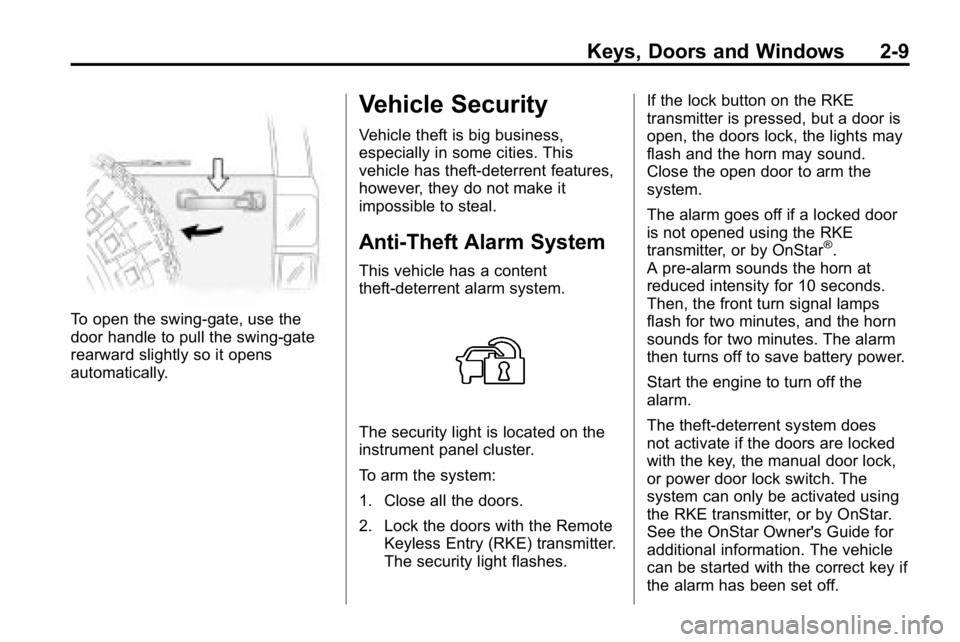
To open the swing‐gate, use the
door handle to pull the swing-gate
rearward slightly so it opens
automatically.
Vehicle Security
Vehicle theft is big business,
especially in some cities. This
vehicle has theft-deterrent features,
however, they do not make it
impossible to steal.
Anti-Theft Alarm System
This vehicle has a content
theft-deterrent alarm system.
The security light is located on the
instrument panel cluster.
To arm the system:
1. Close all the doors.
2. Lock the doors with the RemoteKeyless Entry (RKE) transmitter.
The security light flashes. If the lock button on the RKE
transmitter is pressed, but a door is
open, the doors lock, the lights may
flash and the horn may sound.
Close the open door to arm the
system.
The alarm goes off if a locked door
is not opened using the RKE
transmitter, or by OnStar
®.
A pre-alarm sounds the horn at
reduced intensity for 10 seconds.
Then, the front turn signal lamps
flash for two minutes, and the horn
sounds for two minutes. The alarm
then turns off to save battery power.
Start the engine to turn off the
alarm.
The theft-deterrent system does
not activate if the doors are locked
with the key, the manual door lock,
or power door lock switch. The
system can only be activated using
the RKE transmitter, or by OnStar.
See the OnStar Owner's Guide for
additional information. The vehicle
can be started with the correct key if
the alarm has been set off.
Page 36 of 410
2-10 Keys, Doors and Windows
To avoid setting off the alarm by
accident:
.Lock the vehicle with the manual
door lock lever, the power door
lock switch, or the key, after the
doors are closed.
.Unlock the doors by pressing
the unlock button on the RKE
transmitter or by contacting
OnStar. Unlocking a door any
other way activates the alarm.
Press unlock on the RKE
transmitter, start the vehicle with
the correct key, or have OnStar
unlock the doors to turn the alarm
off. The alarm does not stop if a
door is unlocked any other way.
Testing the Alarm
To test the alarm:
1. From inside the vehicle, lock the doors with the RKE transmitter.
2. Unlock the door with the manual door lock and open the door.
The pre-alarm should sound
followed by the full alarm about
10 seconds later.
3. Press the unlock button on the RKE transmitter or start the
engine to turn the alarm off.
If the alarm does not sound but the
lights flash, check to see if the horn
works. The horn fuse could be
blown. To replace the fuse, see
Fuses and Circuit Breakers
on
page 10‑39.
If the alarm does not sound or the
front turn signal lamps do not flash,
see your dealer for service.
Immobilizer
See Radio Frequency Statementon
page 13‑16for information
regarding Part 15 of the Federal
Communications Commission (FCC)
Rules and RSS-210/211 of Industry
Canada.
Immobilizer
Operation (U.S.)
Passlock®is a passive
theft-deterrent system that enables
fuel if the vehicle is started with a
valid key. If an incorrect key is used
or the ignition lock cylinder is
tampered with, the fuel system is
disabled and the vehicle does not
start.
The security light turns off
approximately five seconds after
the engine is started. See Security
Light on page 5‑17.
Page 117 of 410
Instruments and Controls 5-3
Windshield Washer
L(Washer Fluid): To spray
washer fluid on the windshield, push
the paddle marked with
Lat the
top of the turn signal/lane change
lever. The wipers will clear the
window and then either stop or
return to the preset speed.
{WARNING
In freezing weather, do not use
your washer until the windshield
is warmed. Otherwise the
washer fluid can form ice on the
windshield, blocking your vision.
Rear Window
Wiper/Washer
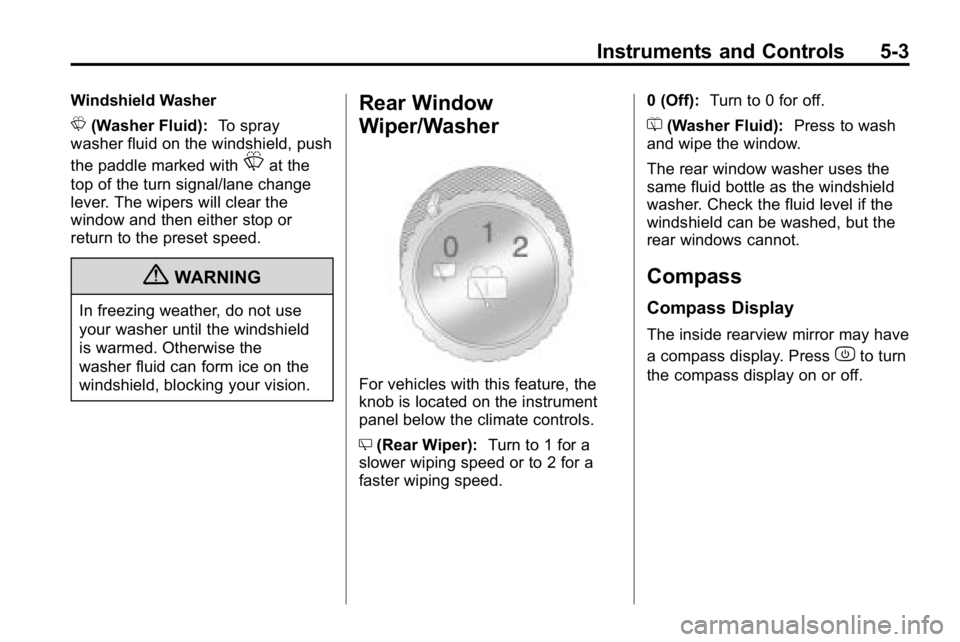
For vehicles with this feature, the
knob is located on the instrument
panel below the climate controls.
Z (Rear Wiper): Turn to 1 for a
slower wiping speed or to 2 for a
faster wiping speed. 0 (Off):
Turn to 0 for off.
= (Washer Fluid): Press to wash
and wipe the window.
The rear window washer uses the
same fluid bottle as the windshield
washer. Check the fluid level if the
windshield can be washed, but the
rear windows cannot.
Compass
Compass Display
The inside rearview mirror may have
a compass display. Press
zto turn
the compass display on or off.
Page 138 of 410
5-24 Instruments and Controls
Fuel System Messages
FUEL CAP
This message displays if the
vehicle's fuel cap is either off or
loose. Pull over as soon as possible
and check to see if the fuel cap is
secure. You may also see the check
engine light on the instrument panel
cluster. If the check engine light
does come on when the fuel cap
was loose, it may take a few driving
trips before the light turns off.
SeeMalfunction Indicator Lamp
on
page 5‑12for more information if
the light still remains on. Press
and release the reset stem to
acknowledge the message and
clear it from the display.
LOW FUEL
This message displays if the level of
fuel in the vehicle is low. Also check
the fuel gauge. See Fuel Gauge
on
page 5‑8for more information.
Refill the fuel tank as soon as
possible.
Lamp Messages
TURN SIGNAL
This message displays when the
turn signal is on for about 1.2 km
(0.75 miles) of travel. Press
and release the reset stem to
acknowledge the message and
clear it from the display.
Ride Control System
Messages
SERVICE STAB (Stability)
SYS (System)
This message displays if there is
a problem with the StabiliTrak®
system. Have the vehicle serviced
by your dealer. See StabiliTrak
System
on page 9‑53for more
information.
STAB (Stability)
SYS (System) OFF
This message displays when the
StabiliTrak®system is turned off.
See StabiliTrak Systemon
page 9‑53for more information.
TRAC (Traction) OFF
This message along with the
traction off light displays when the
Traction Control System (TCS) is
turned off by pressing the TCS
button. See Traction Control System
(TCS)
on page 9‑52and Traction
Control System (TCS)/StabiliTrak®
Lighton page 5‑16for more
information.
Page 142 of 410

5-28 Instruments and Controls
4. The indicator light on theUniversal Home Remote will
flash slowly at first and then
rapidly after Universal Home
Remote successfully receives
the frequency signal from the
hand-held transmitter. Release
both buttons.
5. Press and hold the newly-trained Universal Home Remote button
and observe the indicator light.
.If the indicator light stays
on continuously, the
programming is complete
and the garage door should
move when the Universal
Home Remote button is
pressed and released.
There is no need to
continue programming
Steps 6 through 8.
.If the Universal Home
Remote indicator light
blinks rapidly for
two seconds and then
turns to a constant
light, continue with the
programming Steps 6
through 8.
It may be helpful to have
another person assist with
the remaining steps.
6. After Steps 1 through 5 havebeen completed, locate inside
the garage the garage door
opener receiver (motor-head
unit). Locate the “Learn”or
“Smart” button. The name and
color of the button may vary by
manufacturer.
7. Firmly press and release the “Learn” or“Smart” button. After
you press this button, you will
have 30 seconds to complete
Step 8.
Page 143 of 410
Instruments and Controls 5-29
8. Immediately return to thevehicle. Firmly press and hold
the Universal Home Remote
button, selected in Step 3 to
control the garage door, for
two seconds, and then release
it. If the garage door does not
move, press and hold the
same button a second time for
two seconds, and then release
it. Again, if the door does not
move, press and hold the
same button a third time for
two seconds, and then release.
The Universal Home Remote
should now activate the
garage door.
To program the remaining
two Universal Home Remote
buttons, begin with Step 2 of
“Programming the Universal Home
Remote System.” Do not repeat
Step 1, as this will erase all
previous programming from the
Universal Home Remote buttons.Gate Operator and Canadian
Programming
If you have questions or need
help programming the Universal
Home Remote System, call
1-800-355-3515 or go to
www.homelink.com.
Canadian radio-frequency laws
require transmitter signals to time
out or quit after several seconds
of transmission. This may not be
long enough for Universal Home
Remote to pick up the signal during
programming. Similarly, some U.S.
gate operators are manufactured to
time out in the same manner. If you live in Canada, or you are
having difficulty programming a gate
operator or garage door opener by
using the
“Programming Universal
Home Remote” procedures,
regardless of where you live,
replace Step 3 under “Programming
Universal Home Remote” with the
following:
Continue to press and hold the
Universal Home Remote button
while you press and release
every two seconds (cycle) the
hand-held transmitter button until
the frequency signal has been
successfully accepted by the
Universal Home Remote. The
Universal Home Remote indicator
light will flash slowly at first and then
rapidly. Proceed with Step 4 under
“Programming Universal Home
Remote” to complete the training
procedure.