torque Hyundai Accent 2003 Owner's Manual
[x] Cancel search | Manufacturer: HYUNDAI, Model Year: 2003, Model line: Accent, Model: Hyundai Accent 2003Pages: 186, PDF Size: 11.36 MB
Page 120 of 186

3- 10 WHAT TO DO IN AN EMERGENCY
D060I01E-GAT8. Lower Vehicle and Tighten Nuts
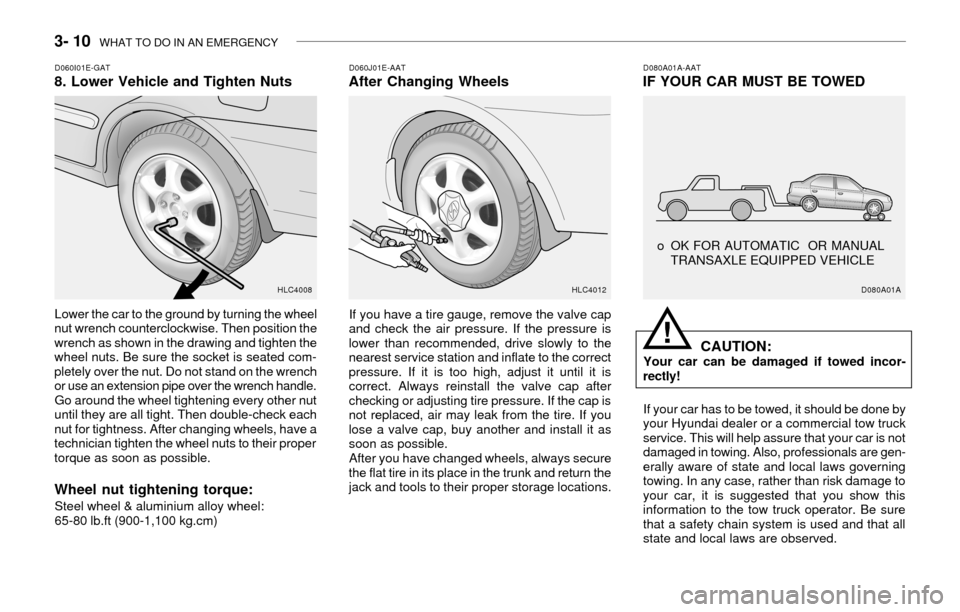
Lower the car to the ground by turning the wheel
nut wrench counterclockwise. Then position the
wrench as shown in the drawing and tighten the
wheel nuts. Be sure the socket is seated com-
pletely over the nut. Do not stand on the wrench
or use an extension pipe over the wrench handle.
Go around the wheel tightening every other nut
until they are all tight. Then double-check each
nut for tightness. After changing wheels, have a
technician tighten the wheel nuts to their proper
torque as soon as possible.
Wheel nut tightening torque:
Steel wheel & aluminium alloy wheel:
65-80 lb.ft (900-1,100 kg.cm)
D060J01E-AATAfter Changing Wheels
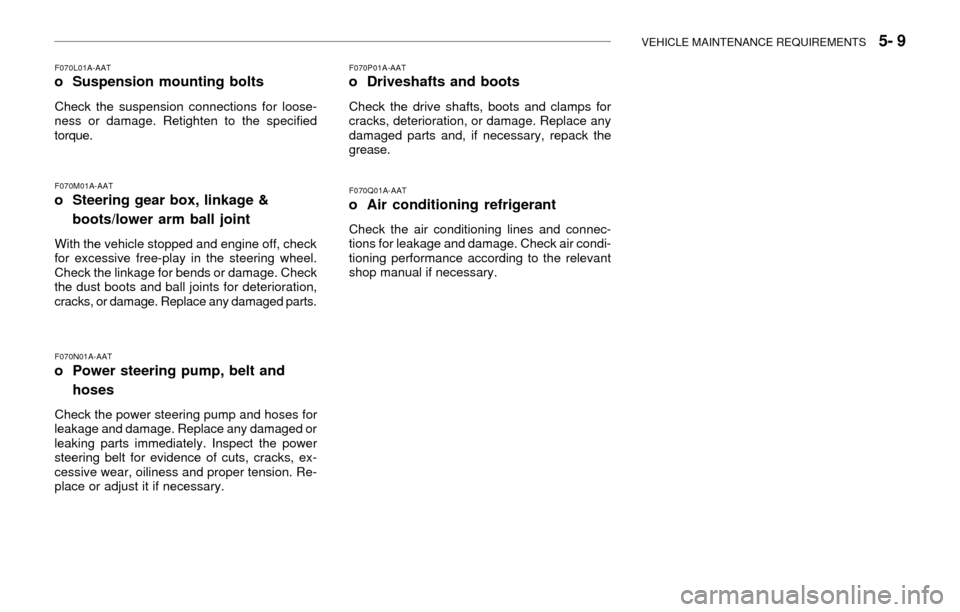
If you have a tire gauge, remove the valve cap
and check the air pressure. If the pressure is
lower than recommended, drive slowly to the
nearest service station and inflate to the correct
pressure. If it is too high, adjust it until it is
correct. Always reinstall the valve cap after
checking or adjusting tire pressure. If the cap is
not replaced, air may leak from the tire. If you
lose a valve cap, buy another and install it as
soon as possible.
After you have changed wheels, always secure
the flat tire in its place in the trunk and return the
jack and tools to their proper storage locations.
D080A01A-AATIF YOUR CAR MUST BE TOWED
CAUTION:
Your car can be damaged if towed incor-
rectly!
HLC4008HLC4012
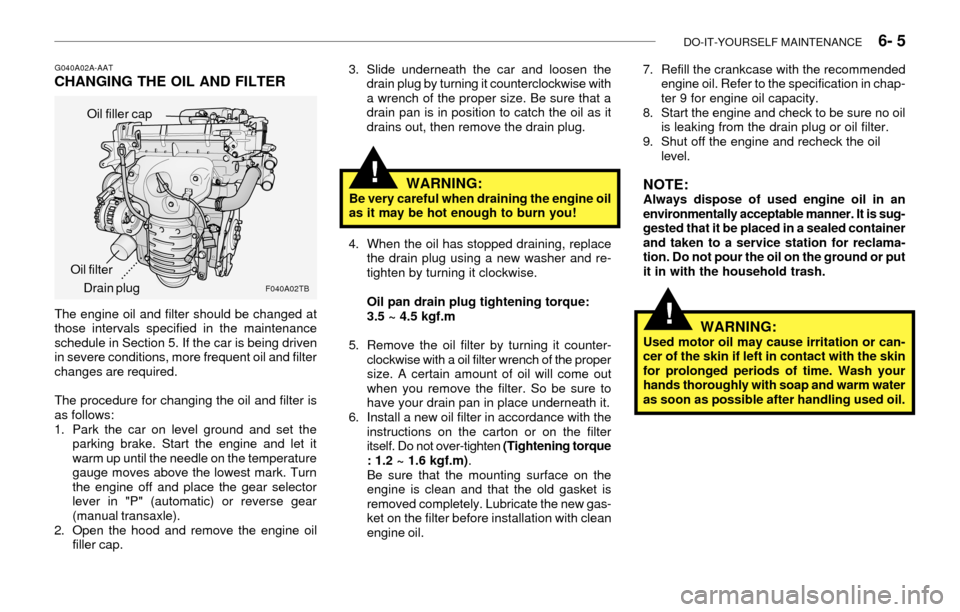
If your car has to be towed, it should be done by
your Hyundai dealer or a commercial tow truck
service. This will help assure that your car is not
damaged in towing. Also, professionals are gen-
erally aware of state and local laws governing
towing. In any case, rather than risk damage to
your car, it is suggested that you show this
information to the tow truck operator. Be sure
that a safety chain system is used and that all
state and local laws are observed.
D080A01A
o OK FOR AUTOMATIC OR MANUAL
TRANSAXLE EQUIPPED VEHICLE
!
Page 136 of 186

VEHICLE MAINTENANCE REQUIREMENTS 5- 9
F070M01A-AAT
o Steering gear box, linkage &
boots/lower arm ball joint
With the vehicle stopped and engine off, check
for excessive free-play in the steering wheel.
Check the linkage for bends or damage. Check
the dust boots and ball joints for deterioration,
cracks, or damage. Replace any damaged parts.
F070L01A-AATo Suspension mounting bolts
Check the suspension connections for loose-
ness or damage. Retighten to the specified
torque.
F070Q01A-AAT
o Air conditioning refrigerant
Check the air conditioning lines and connec-
tions for leakage and damage. Check air condi-
tioning performance according to the relevant
shop manual if necessary.
F070P01A-AATo Driveshafts and boots
Check the drive shafts, boots and clamps for
cracks, deterioration, or damage. Replace any
damaged parts and, if necessary, repack the
grease.
F070N01A-AAT
o Power steering pump, belt and
hoses
Check the power steering pump and hoses for
leakage and damage. Replace any damaged or
leaking parts immediately. Inspect the power
steering belt for evidence of cuts, cracks, ex-
cessive wear, oiliness and proper tension. Re-
place or adjust it if necessary.
Page 141 of 186

DO-IT-YOURSELF MAINTENANCE 6- 5
!
G040A02A-AATCHANGING THE OIL AND FILTER3. Slide underneath the car and loosen the
drain plug by turning it counterclockwise with
a wrench of the proper size. Be sure that a
drain pan is in position to catch the oil as it
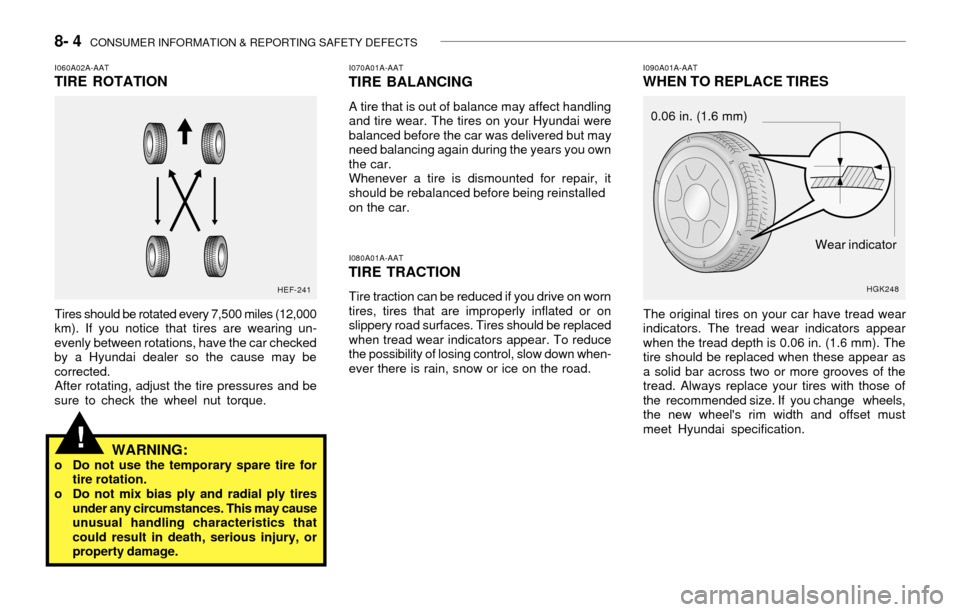
drains out, then remove the drain plug.
F040A02TB
Oil filler cap
Drain plug Oil filter
.........
WARNING:Be very careful when draining the engine oil
as it may be hot enough to burn you!
4. When the oil has stopped draining, replace
the drain plug using a new washer and re-
tighten by turning it clockwise.
Oil pan drain plug tightening torque:
3.5 ~ 4.5 kgf.m
5. Remove the oil filter by turning it counter-
clockwise with a oil filter wrench of the proper
size. A certain amount of oil will come out
when you remove the filter. So be sure to
have your drain pan in place underneath it.
6. Install a new oil filter in accordance with the
instructions on the carton or on the filter
itself. Do not over-tighten (Tightening torque
: 1.2 ~ 1.6 kgf.m).
Be sure that the mounting surface on the
engine is clean and that the old gasket is
removed completely. Lubricate the new gas-
ket on the filter before installation with clean
engine oil.
!
7. Refill the crankcase with the recommended
engine oil. Refer to the specification in chap-
ter 9 for engine oil capacity.
8. Start the engine and check to be sure no oil
is leaking from the drain plug or oil filter.
9. Shut off the engine and recheck the oil
level.
NOTE:Always dispose of used engine oil in an
environmentally acceptable manner. It is sug-
gested that it be placed in a sealed container
and taken to a service station for reclama-
tion. Do not pour the oil on the ground or put
it in with the household trash.
The engine oil and filter should be changed at
those intervals specified in the maintenance
schedule in Section 5. If the car is being driven
in severe conditions, more frequent oil and filter
changes are required.
The procedure for changing the oil and filter is
as follows:
1. Park the car on level ground and set the
parking brake. Start the engine and let it
warm up until the needle on the temperature
gauge moves above the lowest mark. Turn
the engine off and place the gear selector
lever in "P" (automatic) or reverse gear
(manual transaxle).
2. Open the hood and remove the engine oil
filler cap.
WARNING:Used motor oil may cause irritation or can-
cer of the skin if left in contact with the skin
for prolonged periods of time. Wash your
hands thoroughly with soap and warm water
as soon as possible after handling used oil.
Page 172 of 186

8- 4 CONSUMER INFORMATION & REPORTING SAFETY DEFECTS
I070A01A-AAT
TIRE BALANCING
A tire that is out of balance may affect handling
and tire wear. The tires on your Hyundai were
balanced before the car was delivered but may
need balancing again during the years you own
the car.
Whenever a tire is dismounted for repair, it
should be rebalanced before being reinstalled
on the car.
I080A01A-AAT
TIRE TRACTION
Tire traction can be reduced if you drive on worn
tires, tires that are improperly inflated or on
slippery road surfaces. Tires should be replaced
when tread wear indicators appear. To reduce
the possibility of losing control, slow down when-
ever there is rain, snow or ice on the road.
I090A01A-AATWHEN TO REPLACE TIRESI060A02A-AATTIRE ROTATION
Tires should be rotated every 7,500 miles (12,000
km). If you notice that tires are wearing un-
evenly between rotations, have the car checked
by a Hyundai dealer so the cause may be
corrected.
After rotating, adjust the tire pressures and be
sure to check the wheel nut torque.
HEF-241
WARNING:o Do not use the temporary spare tire for
tire rotation.
o Do not mix bias ply and radial ply tires
under any circumstances. This may cause
unusual handling characteristics that
could result in death, serious injury, or
property damage.
!
Wear indicator 0.06 in. (1.6 mm)
HGK248
The original tires on your car have tread wear
indicators. The tread wear indicators appear
when the tread depth is 0.06 in. (1.6 mm). The
tire should be replaced when these appear as
a solid bar across two or more grooves of the
tread. Always replace your tires with those of
the recommended size. If you change wheels,
the new wheel's rim width and offset must
meet Hyundai specification.