lever Hyundai Accent 2007 Owner's Manual
[x] Cancel search | Manufacturer: HYUNDAI, Model Year: 2007, Model line: Accent, Model: Hyundai Accent 2007Pages: 282, PDF Size: 10.55 MB
Page 9 of 282
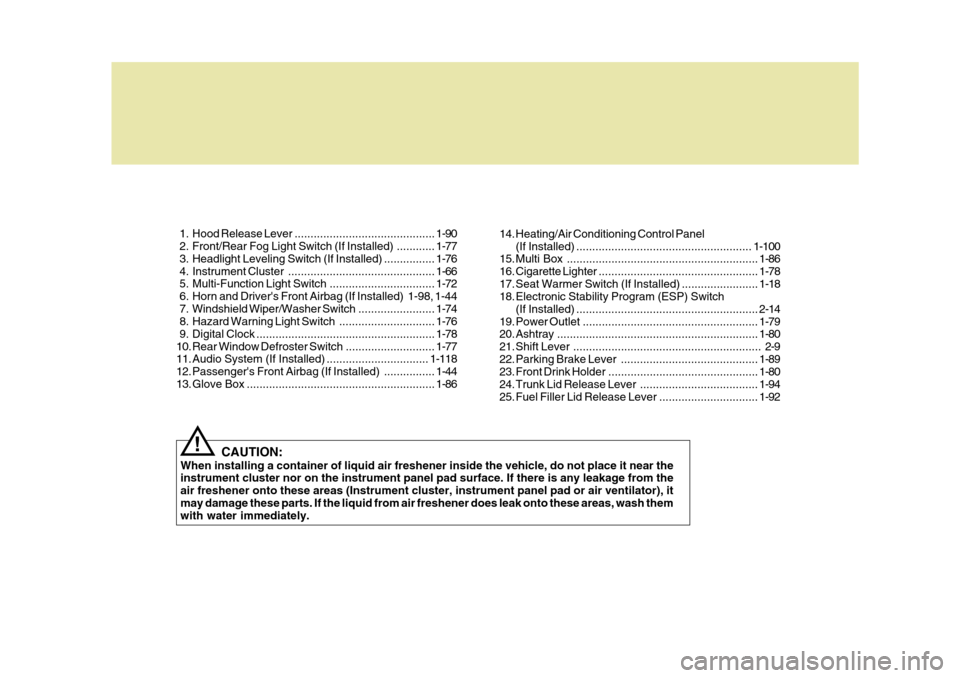
1. Hood Release Lever ............................................ 1-90
2. Front/Rear Fog Light Switch (If Installed) ............ 1-77
3. Headlight Leveling Switch (If Installed) ................ 1-76
4. Instrument Cluster.............................................. 1-66
5. Multi-Function Light Switch................................. 1-72
6. Horn and Driver's Front Airbag (If Installed) 1-98, 1-44
7. Windshield W iper/Washer Switch ........................1-74
8. Hazard Warning Light Switch.............................. 1-76
9. Digital Clock ........................................................ 1-78
10. Rear Window De froster Switch ............................ 1-77
11. Audio System (If Installed) ................................ 1-118
12. Passenger's Front Airbag (If Installed) ................1-44
13. Glov e Box ........................................................... 1-86
CAUTION:
When installing a container of liquid air freshener inside the vehicle, do not place it near the instrument cluster nor on the instrument panel pad surface. If there is any leakage from the air freshener onto these areas (Instrument cluster, instrument panel pad or air ventilator), itmay damage these parts. If the liquid from air freshener does leak onto these areas, wash them with water immediately.
! 14. Heating/Air Conditioning Control Panel
(If Installed) ....................................................... 1-100
15. Multi Box ............................................................ 1-86
16. Cigarette Lighter .................................................. 1-78
17. Seat Warmer Switch (If Installed) ........................ 1-18
18. Electronic Stability Program (ESP) Switch
(If Installed) ......................................................... 2-14
19. Power Outlet ....................................................... 1-79
20. Ashtray ............................................................... 1-80
21. Shift Lever ........................................................... 2-9
22. Parking Brake Lever ........................................... 1-89
23. Front Drink Holder ............................................... 1-80
24. Trunk Lid Release Lever .....................................1-94
25. Fuel Filler Lid Release Lever ...............................1-92
Page 11 of 282
CAUTION:
When installing a container of liquid air freshener inside the vehicle, do not place it near the instrument cluster nor on the instrument panel pad surface. If there is any leakage from the air freshener onto these areas (Instrument cluster, instrument panel pad or air ventilator), it may damage these parts. If the liquid from air freshener does leak onto these areas, wash themwith water immediately.!
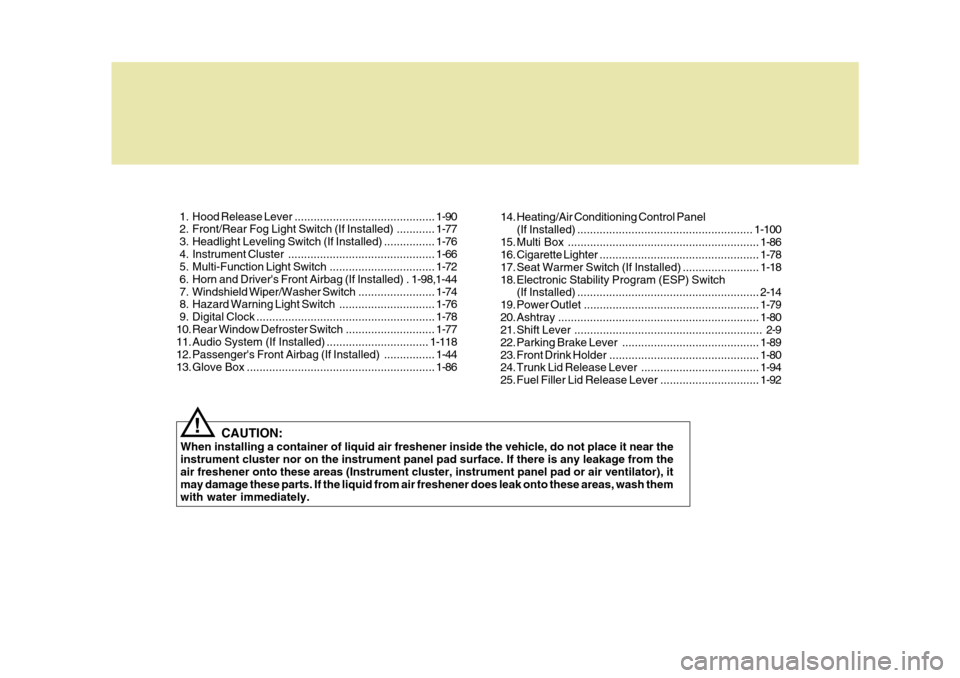
1. Hood
Release Lever ............................................ 1-90
2. Front/Rear Fog Light Switch (If Installed) ............ 1-77
3. Headlight Leveling Switch (If Installed) ................ 1-76
4. Instrument Cluster.............................................. 1-66
5. Multi-Function Light Switch................................. 1-72
6. Horn and Driver's Front Airbag (If Installed) . 1-98,1-44
7. Windshield W iper/Washer Switch ........................1-74
8. Hazard Warning Light Switch.............................. 1-76
9. Digital Clock ........................................................ 1-78
10. Rear Window De froster Switch ............................ 1-77
11. Audio System (If Installed) ................................ 1-118
12. Passenger's Front Airbag (If Installed) ................1-44
13. Glov e Box ........................................................... 1-8614. Heating/Air Conditioning Control Panel
(If Installed) ....................................................... 1-100
15. Multi Box ............................................................ 1-86
16. Cigarette Lighter .................................................. 1-78
17. Seat Warmer Switch (If Installed) ........................ 1-18
18. Electronic Stability Program (ESP) Switch (If Installed) ......................................................... 2-14
19. Power Outlet ....................................................... 1-79
20. Ashtray ............................................................... 1-80
21. Shift Lever ........................................................... 2-9
22. Parking Brake Lever ........................................... 1-89
23. Front Drink Holder ............................................... 1-80
24. Trunk Lid Release Lever .....................................1-94
25. Fuel Filler Lid Release Lever ...............................1-92
Page 21 of 282
1
FEATURES OF YOUR HYUNDAI
9THEFT-ALARM SYSTEM
To engage the child-protector feature so the door cannot be opened from theinside, move the child-protector lever to the " " position and close the door. Move the lever to the " " positionwhen normal door operation is desired. If you wish to be able to open the door from the outside, the outside door handle will function normally.
B070A01A-AAT (If Installed) This system is designed to provide protection from unauthorized entry intothe car. This system is operated in three stages: the first is the "Armed" stage, the second is the "Alarm" stage,and the third is the "Disarmed" stage. If triggered, the system provides an au- dible alarm with blinking of the turnsignal lights.NOTE:
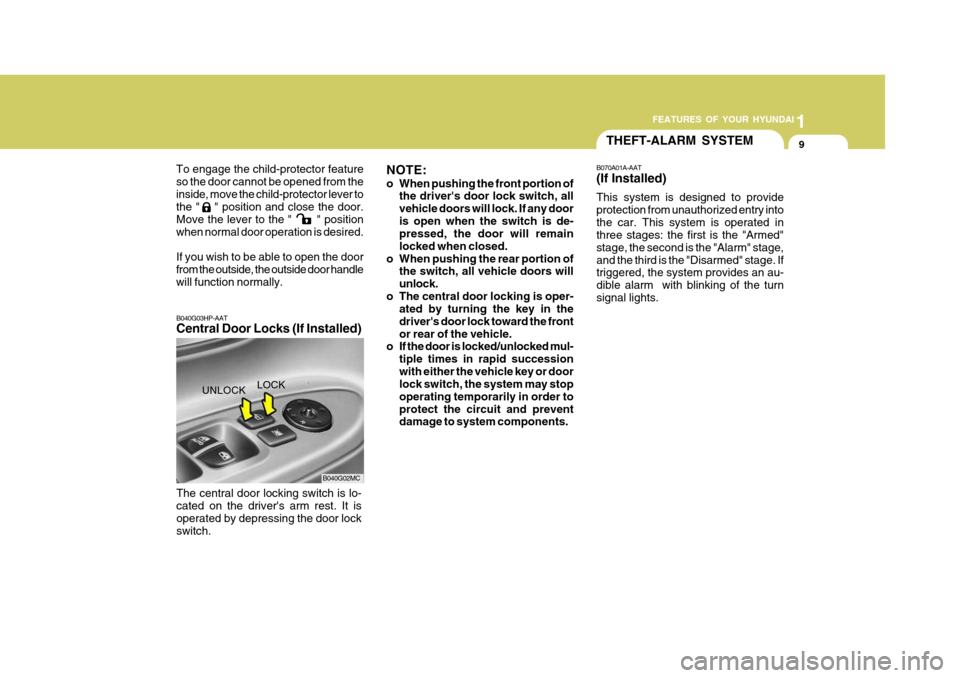
o When pushing the front portion of the driver's door lock switch, all vehicle doors will lock. If any dooris open when the switch is de- pressed, the door will remain locked when closed.
o When pushing the rear portion of the switch, all vehicle doors willunlock.
o The central door locking is oper- ated by turning the key in thedriver's door lock toward the frontor rear of the vehicle.
o If the door is locked/unlocked mul-
tiple times in rapid successionwith either the vehicle key or door lock switch, the system may stop operating temporarily in order toprotect the circuit and prevent damage to system components.
B040G03HP-AAT Central Door Locks (If Installed) The central door locking switch is lo- cated on the driver's arm rest. It is operated by depressing the door lock switch.
B040G02MC
UNLOCK
LOCK
Page 26 of 282
1FEATURES OF YOUR HYUNDAI
14SEATS
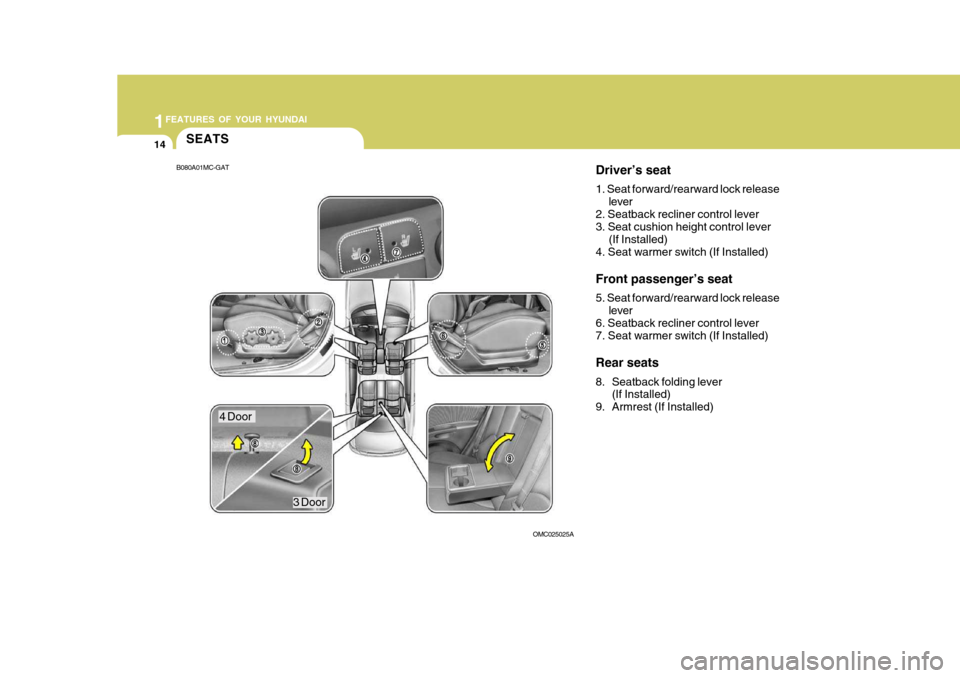
Driver’s seat 1. Seat forward/rearward lock releaselever
2. Seatback recliner control lever 3. Seat cushion height control lever
(If Installed)
4. Seat warmer switch (If Installed) Front passenger’s seat 5. Seat forward/rearward lock release
lever
6. Seatback recliner control lever 7. Seat warmer switch (If Installed) Rear seats
8. Seatback folding lever (If Installed)
9. Armrest (If Installed)
B080A01MC-GAT
OMC025025A
4 Door3 Door
Page 27 of 282
1
FEATURES OF YOUR HYUNDAI
15
!
!
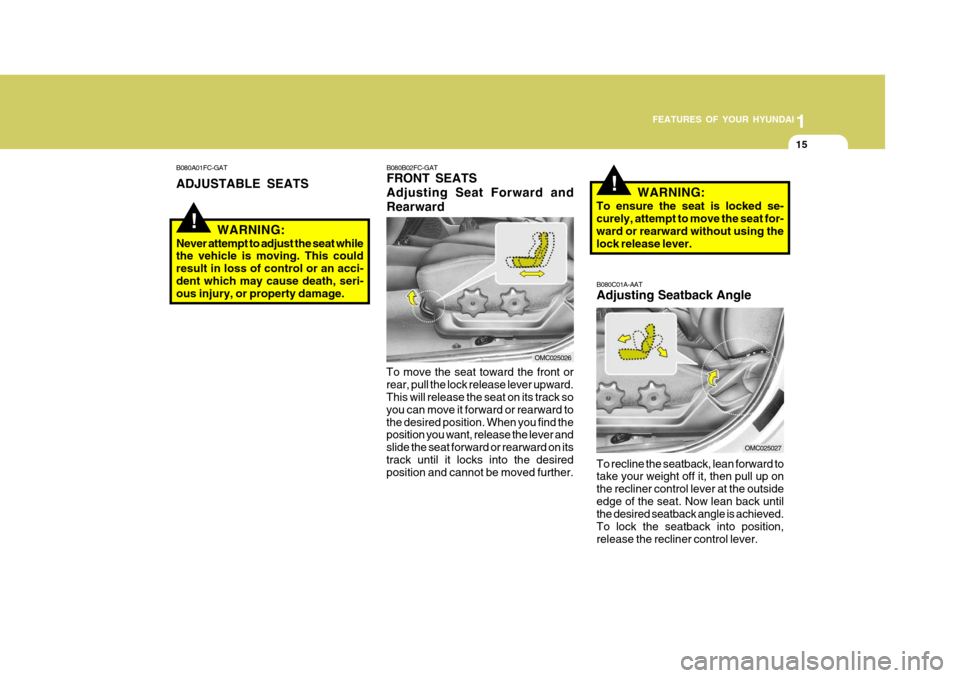
To recline the seatback, lean forward to take your weight off it, then pull up on the recliner control lever at the outsideedge of the seat. Now lean back until the desired seatback angle is achieved. To lock the seatback into position,release the recliner control lever.
B080C01A-AAT Adjusting Seatback Angle
To move the seat toward the front or rear, pull the lock release lever upward. This will release the seat on its track so you can move it forward or rearward tothe desired position. When you find the position you want, release the lever and slide the seat forward or rearward on itstrack until it locks into the desired position and cannot be moved further. WARNING:
To ensure the seat is locked se-curely, attempt to move the seat for- ward or rearward without using thelock release lever.
B080A01FC-GAT ADJUSTABLE SEATS
B080B02FC-GAT FRONT SEATS Adjusting Seat Forward andRearward
WARNING:
Never attempt to adjust the seat while the vehicle is moving. This could result in loss of control or an acci-dent which may cause death, seri- ous injury, or property damage.
OMC025026
OMC025027
Page 30 of 282
1FEATURES OF YOUR HYUNDAI
18
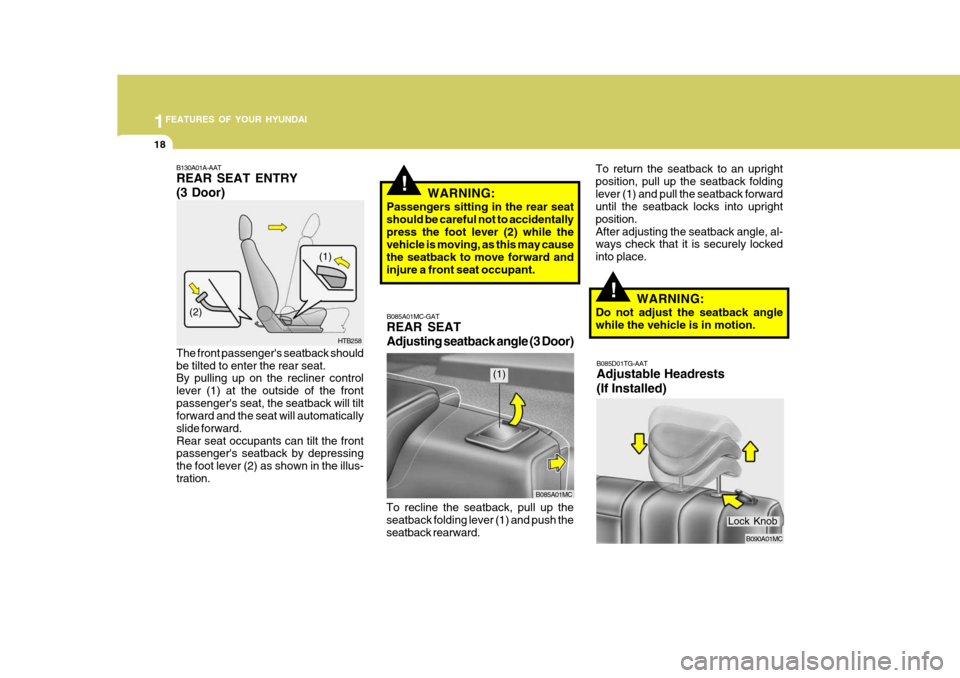
B085D01TG-AAT Adjustable Headrests (If Installed)
B130A01A-AAT REAR SEAT ENTRY (3 Door) The front passenger's seatback should be tilted to enter the rear seat. By pulling up on the recliner control lever (1) at the outside of the frontpassenger's seat, the seatback will tilt forward and the seat will automatically slide forward.Rear seat occupants can tilt the front passenger's seatback by depressing the foot lever (2) as shown in the illus-tration. HTB258
(1)
(2)
!WARNING:
Passengers sitting in the rear seat should be careful not to accidentallypress the foot lever (2) while the vehicle is moving, as this may cause the seatback to move forward andinjure a front seat occupant.
B090A01MC
Lock Knob
B085A01MC-GAT REAR SEAT Adjusting seatback angle (3 Door)
To recline the seatback, pull up the seatback folding lever (1) and push the seatback rearward. B085A01MC
(1)
To return the seatback to an upright position, pull up the seatback foldinglever (1) and pull the seatback forward until the seatback locks into upright position.After adjusting the seatback angle, al- ways check that it is securely locked into place.
!WARNING:
Do not adjust the seatback angle while the vehicle is in motion.
Page 84 of 282
1FEATURES OF YOUR HYUNDAI
72
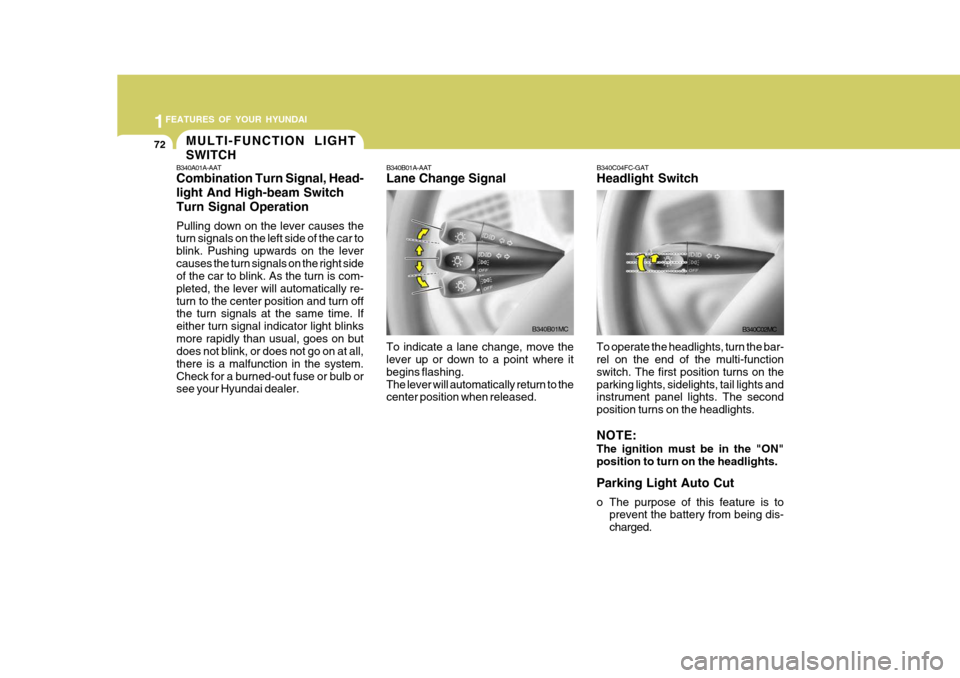
B340A01A-AAT Combination Turn Signal, Head- light And High-beam SwitchTurn Signal Operation Pulling down on the lever causes the turn signals on the left side of the car to blink. Pushing upwards on the levercauses the turn signals on the right side of the car to blink. As the turn is com- pleted, the lever will automatically re-turn to the center position and turn off the turn signals at the same time. If either turn signal indicator light blinksmore rapidly than usual, goes on but does not blink, or does not go on at all, there is a malfunction in the system.Check for a burned-out fuse or bulb or see your Hyundai dealer. B340B01A-AAT Lane Change Signal To indicate a lane change, move the lever up or down to a point where it begins flashing.The lever will automatically return to the center position when released.
B340B01MC
B340C04FC-GAT Headlight Switch
To operate the headlights, turn the bar- rel on the end of the multi-function switch. The first position turns on theparking lights, sidelights, tail lights and instrument panel lights. The second position turns on the headlights. NOTE: The ignition must be in the "ON" position to turn on the headlights. Parking Light Auto Cut
o The purpose of this feature is to prevent the battery from being dis- charged.B340C02MC
MULTI-FUNCTION LIGHT SWITCH
Page 85 of 282
1
FEATURES OF YOUR HYUNDAI
73
B340E01A-AAT Headlight Flasher
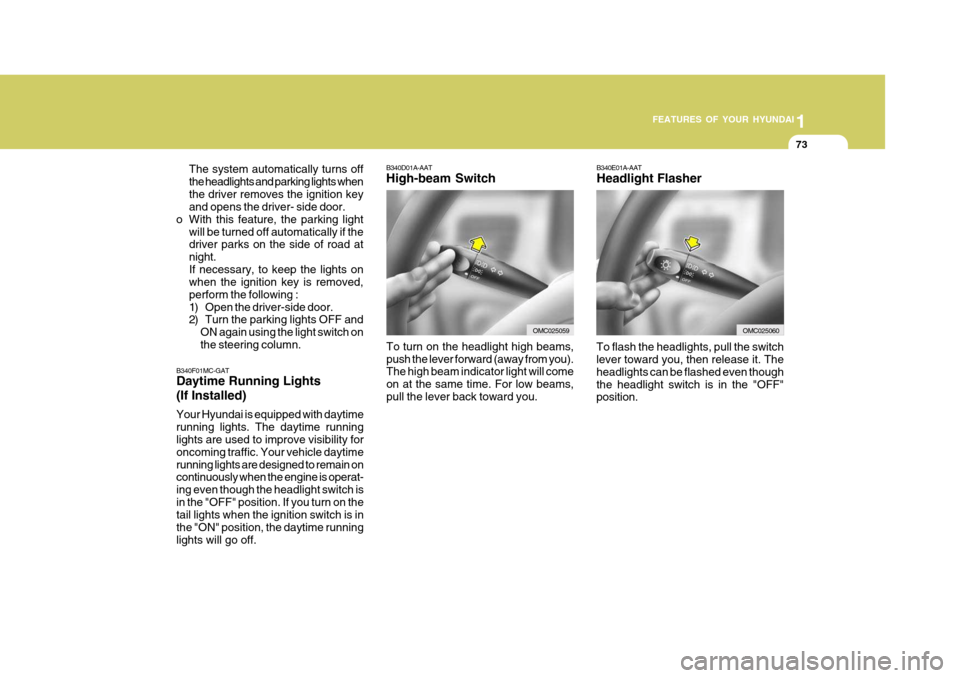
To flash the headlights, pull the switch lever toward you, then release it. The headlights can be flashed even thoughthe headlight switch is in the "OFF" position.
B340D01A-AAT High-beam Switch
B340F01MC-GAT Daytime Running Lights (If Installed) Your Hyundai is equipped with daytime running lights. The daytime running lights are used to improve visibility for oncoming traffic. Your vehicle daytimerunning lights are designed to remain on continuously when the engine is operat- ing even though the headlight switch isin the "OFF" position. If you turn on the tail lights when the ignition switch is in the "ON" position, the daytime runninglights will go off. The system automatically turns offthe headlights and parking lights whenthe driver removes the ignition key and opens the driver- side door.
o With this feature, the parking light
will be turned off automatically if thedriver parks on the side of road at night.If necessary, to keep the lights on when the ignition key is removed, perform the following :
1) Open the driver-side door.
2) Turn the parking lights OFF andON again using the light switch on the steering column.
OMC025060
To turn on the headlight high beams, push the lever forward (away from you). The high beam indicator light will come on at the same time. For low beams,pull the lever back toward you.OMC025059
Page 86 of 282
1FEATURES OF YOUR HYUNDAI
74WINDSHIELD WIPER AND WASHER SWITCH
To use the windshield washer, pull the wiper/washer lever toward the steeringwheel. When the washer lever is oper- ated, the wipers automatically make two passes across the windshield. Thewasher continues to operate until the lever is released.
B350B01O-GAT Windshield Washer Operation
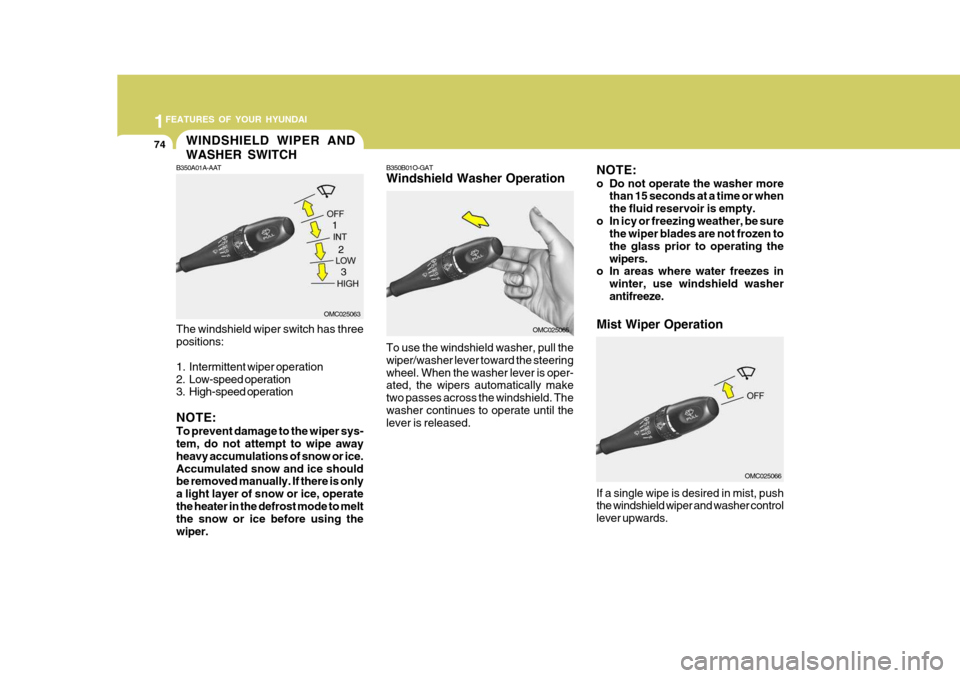
B350A01A-AAT The windshield wiper switch has three positions:
1. Intermittent wiper operation
2. Low-speed operation
3. High-speed operation NOTE: To prevent damage to the wiper sys- tem, do not attempt to wipe away heavy accumulations of snow or ice.Accumulated snow and ice should be removed manually. If there is only a light layer of snow or ice, operatethe heater in the defrost mode to melt the snow or ice before using the wiper.
OMC025063
OMC025065
Mist Wiper Operation
NOTE:
o Do not operate the washer more
than 15 seconds at a time or when the fluid reservoir is empty.
o In icy or freezing weather, be sure the wiper blades are not frozen tothe glass prior to operating thewipers.
o In areas where water freezes in
winter, use windshield washerantifreeze.
If a single wipe is desired in mist, push the windshield wiper and washer control lever upwards.
OMC025066
1
23
Page 98 of 282
1FEATURES OF YOUR HYUNDAI
86
!
GLOVE BOX
WARNING:
To avoid the possibility of injury in case of an accident or a sudden stop, the glove box door should bekept closed when the car is in mo- tion.
B500A01A-AAT
B500A01MC
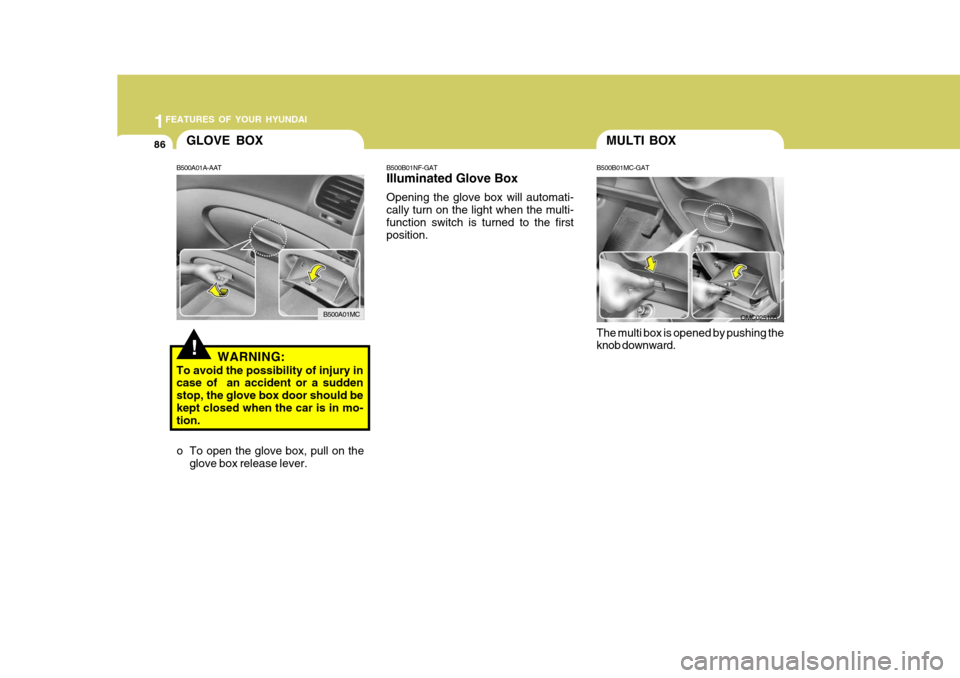
o To open the glove box, pull on the glove box release lever. B500B01NF-GAT Illuminated Glove Box Opening the glove box will automati- cally turn on the light when the multi-function switch is turned to the first position.
MULTI BOX
B500B01MC-GAT The multi box is opened by pushing the knob downward.
OMC025105